Table of Contents
Advertisement
NODE 1.1 & NODE 2.1
Complete Instructions.
ENGLISH
About This Manual
This is the complete manual for your NODE computer. It explains how
to install your NODE computer and complete the setup (programming).
It includes riding safety. It also shows how to access the features of your
NODE computer and to view and record your ride data. If you need
additional information, visit your Bontrager dealer or visit us online
at www.bontrager.com.
Advertisement
Chapters
Table of Contents

Related Manuals for Bontrager NODE 1.1


Summary of Contents for Bontrager NODE 1.1
-
Page 1: About This Manual
It includes riding safety. It also shows how to access the features of your NODE computer and to view and record your ride data. If you need additional information, visit your Bontrager dealer or visit us online at www.bontrager.com. ENGLISH... -
Page 2: Table Of Contents
Contents SAFETY............... 1 Screen Terms BASIC INFORMATION The following abbreviations appear on the screen of the Display (screen) ................ 2 Node computer. Function list................3 Buttons ..................4 Memory ..................4 Abbreviation Meaning Modes..................5 Altitude INSTALLATION Average Process Overview ..............6 BIKE Bicycles, including bike1 and bike 2 Attaching the Computer ............ -
Page 3: Safety
SAFETY When riding your bicycle, do not stare at the computer for a long time (Figure 1). If you do not watch the road, you could hit an obstacle, which might cause you to lose control and fall. Figure 1. Do Not Stare at Computer for Long Periods of Time. -
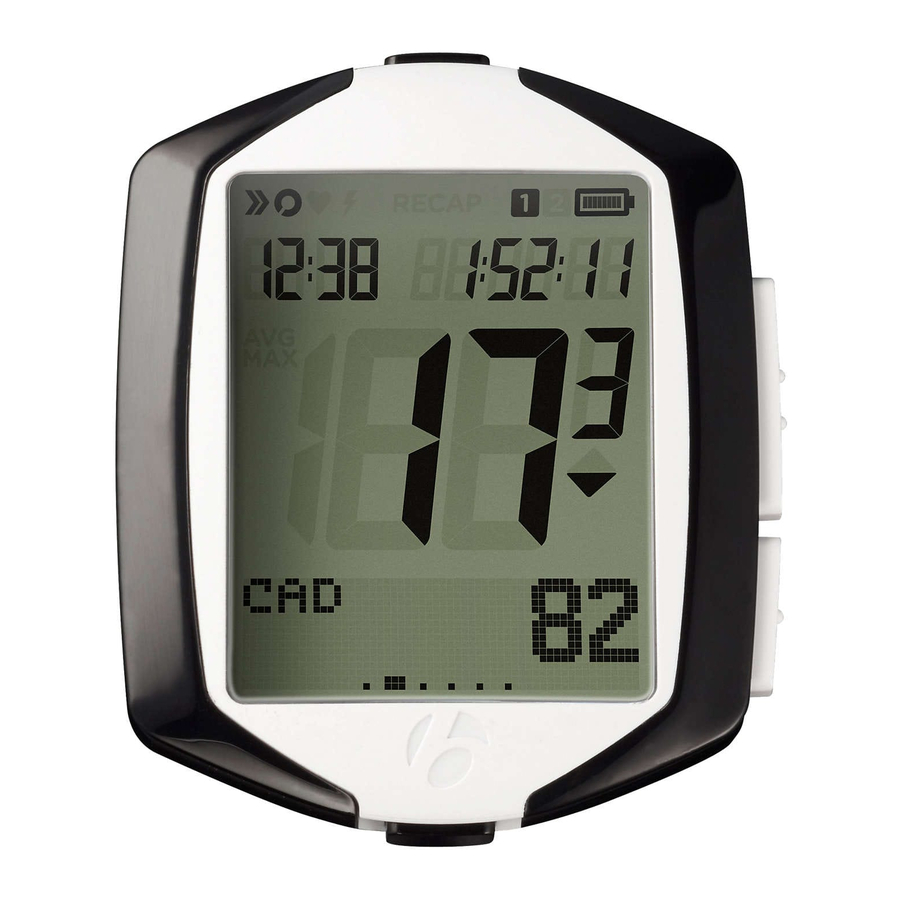
Page 4: Basic Information
BASIC INFORMATION This section describes the NODE display, the terms used in this manual, and the working modes. This is background information to help you understand the other sections of the manual. However, you will not see any of the screen elements until you have installed the computer. -
Page 5: Function List
–Cadence Recap Mode –Bike 1 –Power –Bike 2 –Heart Rate Battery Function list Ride Clock The NODE 1.1 and NODE 2.1 have different function menus. Speed Clock (Primary Display) NODE 1.1 NODE 2.1 Distance Dual View Mode (Secondary Display) Cadence... -
Page 6: Buttons
Buttons The NODE has four buttons (Figure 7). The actions for buttons are described in the table below. For simplicity, these are the abbreviations of button names: is Top is Bottom is Side 1 is Side 2 Press and repeat to switch through a list of Browse values or screen elements. -
Page 7: Modes
Modes The NODE computer has five modes: Setup This mode allows you to ‘program’ the computer, setting your preferences for language, distance units, time, and odometer. Ride Use the Ride mode (Figure 9) when riding. It shows displays of the information gathered by the computer. -
Page 8: Installation
Sensors Your NODE is not packaged with sensors. You can purchase sensors for the NODE from your Bontrager dealer. For installation instructions for a sensor, see those packaged with the sensor. Figure 11. Parts Included with Your Node Computer. -
Page 9: Attaching The Computer
Attaching the Computer You can choose to attach the computer to the handlebar or the stem. On the handlebar, consider your preference for left and right, and your access to the buttons on the computer. On the stem, the computer is in the center. Handlebars are generally round with only one or two sizes, while stems come in many shapes and sizes. -
Page 10: Setup (Initial Programming)
Setup (Initial Programming) The NODE is shipped with the battery outside the computer so that the battery is fresh. When you install the battery, your NODE will automatically proceed through this Setup, including the Pairing process and Connecting procedures. The automatic Setup also happens when you replace the battery or perform the Reset procedure. -
Page 11: Basic Setup
Basic Setup In this procedure, you will set your preference for a function, then save those preferences. When you save one function, the setup program proceeds to the next function. 1. Wake the computer: install the battery, push any button, or make the speed sensor send a signal. - Page 12 5. To the change the minutes, press If desired, you can go back to the hours in the previous step by pressing To save the Set Clock (time) and proceed to the Wheel (wheel size) function, press 6. To change the wheel size (choose from the Wheel size menu on the right), press To set a custom wheel size, see page 27.
- Page 13 8. The odometer shows your accumulated distance. You can skip this step and leave the value at 00000 by pressing and then go to step 10. To change the highlighted number, press To select a value and proceed to the next digit, press 9.
-
Page 14: The Display During Pairing
The display during Pairing During the Pairing process, the display shows PAIRING SENSORS and the receiving icon flashes in the lower right corner (Figure 20). When the computer finds the signal and pairs to it, the icon for the sensor flashes three times and it is then added to the display. -
Page 15: Starting A Ride Clock
STARTING A RIDE Sensor icons This section explains how to start a new ride. To start a ride, you must connect the sensor and then either continue your previous ride or start a new ride. Connecting the Sensor Each time you wake the NODE or switch it to On, it automatically tries to communicate with the sensor. -
Page 16: Main Ride Functions
Instead you will see the screen for the function of the next connected sensor. Note: The NODE 2.1 has additional functions not available on the NODE 1.1. When viewing the NODE 1.1 secondary display, the browse sequence goes from its last connected sensor function (Speed, Cadence, Heart Rate, or Power) to Distance. -
Page 17: Secondary Display
The lower part of the display (Figure 28) shows the secondary functions. If a sensor is switched to Off, the computer will not show the display for the matching function. Some secondary functions are only available on the NODE 2.1. NODE 1.1 NODE 2.1 Function Figure 28. -
Page 18: Dual View
Dual View Your computer can show two secondary functions at the same time (Figure 29). This is called Dual View. To make your computer do this, see the section Setup Dual View on pages 42-43. 1. To switch the secondary display from Distance to Dual View, press Figure 29. -
Page 19: Heart Rate
Table 1. Heart Rate Zones. Zone % of maximum heart rate setting 50-60 60-70 70-80 Heart Rate 80-90 Heart rate is a measurement of the number of times your heart beats 90-100 in a minute (BPM). Figure 30. Location for Chest Strap. Sensor The sensor for heart rate is the chest strap. The chest strap must be ANT+ compatible and correctly located on your chest (Figure 30) and against your... -
Page 20: Power
(PWR MAX), browse To calibrate the power, see the Manage mode, page 31. NODE 1.1: continue browsing 1. For the NODE 1.1, you can now return to Distance in the secondary display. Press NODE 2.1: additional features The NODE 2.1 has additional features. Go to the next pages to read about these features: • Grade... - Page 21 GRADE Grade Grade is a measurement of the steepness of a climb expressed in percent. This represents the number of feet (or meters) you climb for each 100 feet you travel in a horizontal direction. 1. To switch the secondary display from Power to Grade, press 2.
- Page 22 Altitude Altitude is the height in feet (or meters) above sea level. The NODE calculates altitude based on air pressure. Because air pressure at a given location varies with the weather, you may want to reset the altitude for the most accuracy.
- Page 23 TEMP Temperature 1. To switch the secondary display from Altitude to Temperature, press Continue browsing 1. You can now return to Distance in the secondary display. Press RIDE Mode...
- Page 24 Backlight The NODE 2.1 has a screen backlight. The backlight provides a light source behind the screen so that the numbers are more visible. (3 seconds) To Switch the Backlight to ON 1. In Ride mode, press To save battery life, the backlight automatically switches to Off after five seconds. RIDE Mode...
-
Page 25: Recap (Review Trip Data) F
RECAP (Review Trip Data) (3 seconds) You can review all current data in the memory of the computer, including average and maximum values. Switch to RECAP mode 1. Hold for three seconds. The computer shows the END RIDE? display. 2. To switch the value (choose YES or NO), press Stops recording trip data Switches to RIDE mode Switches to RECAP mode... -
Page 26: Grade
See Recap (Trip data) 1. To see the functions in the secondary display, browse 2. To see the data for a function, browse Functions Data Press Press Cadence Heart Rate Zone 1 Zone 2 Zone 3 Zone 4 Zone 5 Power Grade Altitude... -
Page 27: Switch To Manage Mode
MANAGE (Optional Programming) In this mode, you can change the setup (programming) of your computer: either to change existing settings, or to add advanced features. Switch to Manage mode (3 seconds) 1. Hold for three seconds. The computer shows the BIKE display 2. -
Page 28: Bike Selection
Bike Selection Setup second bike 1. Enter MANAGE mode. Hold for three seconds. The Manage mode starts with the Bike Selection display. 2. To change the selection (choose bike1 or bike2), press To save the Bike and proceed to the Wheel Size function, press (3 seconds) 3. -
Page 29: Wheel Size
Wheel Size Setup If the NODE is currently showing WHEEL, start with Step 3. 1. Enter MANAGE mode. Hold for three seconds. The Manage mode starts with the Bike Selection display. (3 seconds) 2. Browse to wheel size. Make sure you are setting the wheel size for the correct Bike Wheel Selection: bike1 or bike2. - Page 30 To setup the computer with a custom wheel size If the NODE is currently showing WHEEL, start with Step 3. 1. Enter MANAGE mode. Hold for three seconds. The Manage mode starts with the Bike Selection display. 2. Browse to wheel size. (3 seconds) 3.
- Page 31 6. To save your custom wheel size settings, press The display switches to Altitude in Manage mode. 7. Choose one of the following: • Follow the instructions to manage Altitude on the next page. • To see other functions, browse • To return to RIDE mode, hold for three seconds. MANAGE Mode...
-
Page 32: Altitude
Altitude Setup If the NODE is currently showing ALTITUDE, start with Step 3. 1. Enter MANAGE mode. Hold for three seconds. The Manage mode starts with the Bike Selection display. 2. Browse to altitude. (3 seconds) 3. To change the first digit, browse To select a number, press After you select a number, the next digit is highlighted. -
Page 33: Cadence
Cadence Switch sensor to Off or On If the NODE is currently showing CADENCE, start with Step 3. 1. Enter MANAGE mode. Hold for three seconds. The Manage mode starts with the Bike Selection display. 2. Browse to cadence. (3 seconds) 3. -
Page 34: Power
Power Switch sensor to Off or On If the NODE is currently showing POWER, start with Step 3. 1. Enter MANAGE mode. Hold for three seconds. The Manage mode starts with the Bike Selection display. 2. Browse to power. (3 seconds) 3. - Page 35 Calibrate To calibrate, the Power sensor must be turned on, then connected and paired. If the NODE is currently showing CALIBRATE?, start with Step 4. 1. Enter MANAGE mode. Hold for three seconds. The Manage mode starts with the Bike Selection display. 2.
-
Page 36: Heart Rate And Calories
Heart Rate and Calories Switch sensor to Off or On If the NODE is currently showing HEART RATE, start with Step 3. 1. Enter MANAGE mode. Hold for three seconds. The Manage mode starts with the Bike Selection display. 2. Browse to heart rate. - Page 37 Setup minimum and maximum If the NODE is currently showing HR MIN, start with Step 4. 1. Enter MANAGE mode. Hold for three seconds. The Manage mode starts with the Bike Selection display. 2. Browse to heart rate. (3 seconds) 3.
- Page 38 6. To save the minimum heart rate setting, press .The display switches to HR MAX in Manage mode. 7. To change the highlighted HR MAX number, press To select a number, press After you select a number, the next digit is highlighted. 8.
- Page 39 Setup gender Gender is used in calculations of calorie output. If the NODE display is currently showing Gender, start with Step 5. 1. Enter MANAGE mode. Hold for three seconds. The Manage mode starts with the Bike Selection display. 2. Browse to heart rate. (3 seconds) 3. If needed, change Heart Rate to On. Press to change.
- Page 40 Setup body weight If the NODE display is currently showing Weight, start with Step 5. 1. Enter MANAGE mode. Hold for three seconds. The Manage mode starts with the Bike Selection display. 2. Browse to heart rate. (3 seconds) 3. If needed, change Heart Rate to On. Press to change.
- Page 41 7. To change to your choice of units (choose LB or KG), browse 8. To save your weight settings, press The display switches to Temperature in Manage mode. 9. Choose one of the following: • Follow the instructions to manage Temperature on page 40. • To see other functions, browse • To return to RIDE mode, hold for three seconds. MANAGE Mode...
-
Page 42: Temperature
Temperature Switch to Off or On If the NODE display is currently showing Temperature, start with Step 3. 1. Enter MANAGE mode. Hold for three seconds. The Manage mode starts with the Bike Selection display. 2. Browse to temperature. (3 seconds) 3. - Page 43 Setup units If the NODE display is currently showing Temperature Units, start with Step 4. 1. Enter MANAGE mode. Hold for three seconds. The Manage mode starts with the Bike Selection display. 2. Browse to temperature. (3 seconds) 3. If needed, change temperature to On. Press to change.
-
Page 44: Dual View
Dual View Switch to Off or On If the NODE display is currently showing Dual View, start with Step 3. 1. Enter MANAGE mode. Hold for three seconds. The Manage mode starts with the Bike Selection display. 2. Browse to Dual View. (3 seconds) 3. - Page 45 3. If needed, change Dual View to On. Press to change. To save your choice and proceed to the Set Dual View function, press 4. To change the left view, browse Left Dual Node 1.1 Node 2.1 View Function DIST TEMP...
- Page 46 Right Dual Node 1.1 Node 2.1 View Function DIST TEMP GRADE To return to set the left Dual View, press To save your choice of Dual View functions and proceed to the Clock Type function, press 6. Choose one of the following: • Follow the instructions to set Clock Type on page 45. • To see other functions, browse • To return to RIDE mode, hold for three seconds.
-
Page 47: Clock
Clock Setup Clock Type If the NODE display is currently showing Clock Type, start with Step 3. 1. Enter MANAGE mode. Hold for three seconds. The Manage mode starts with the Bike Selection display. 2. Browse to Clock Type. (3 seconds) 3. - Page 48 Setup Time If the NODE display is currently showing Clock Type, start with Step 3. 1. Enter MANAGE mode. Hold for three seconds. The Manage mode starts with the Bike Selection display. 2. Browse to Set Clock. The hours are highlighted. (3 seconds) 3.
-
Page 49: Distance
Distance Setup Units If the NODE display is currently showing Distance Units, start with Step 3. 1. Enter MANAGE mode. Hold for three seconds. The Manage mode starts with the Bike Selection display. 2. Browse to Distance Units. (3 seconds) 3. - Page 50 Setup Odometer If the NODE display is currently showing Odometer, start with Step 3. 1. Enter MANAGE mode. Hold for three seconds. The Manage mode starts with the Bike Selection display. 2. Browse to Odometer. The first digit is highlighted. (3 seconds) 3.
-
Page 51: Language
Language Setup If the NODE display is currently showing Language, start with Step 3. 1. Enter MANAGE mode. Hold for three seconds. The Manage mode starts with the Bike Selection display. 2. Browse to Language. (3 seconds) 3. To change the Language (Choose English, Francais, Espanol, or Deutsch), browse To save the language and proceed to Bike function, press 4. -
Page 52: Battery Information
BATTERY INFORMATION There is a battery in the computer, and also one in each sensor. If you use the NODE for one hour every day, the batteries should last about ten months. To extend battery life during long periods of non-use, remove the computer from its computer base. -
Page 53: Reset
RESET You can erase all settings and programming. Push the Reset button (Figure 32). The NODE goes to the process for Automatic Setup. Figure 32. Reset Button. -
Page 54: Troubleshooting
TROUBLESHOOTING If your NODE computer has problems, use this guide to fix it. If you cannot fix it, take your computer—with the bicycle—to your dealer. Symptom Possible Causes Solution Page Magnet misaligned or too far away Readjust magnet and sensor placement Erratic data Sensor battery power is low Replace battery... - Page 55 Bontrager & Bontrager B-Dot are registered trademarks of Trek Bicycle Corporation. ©2011 Trek Bicycle Corporation, Waterloo, Wisconsin 53594 USA. All rights reserved.
Need help?
Do you have a question about the NODE 1.1 and is the answer not in the manual?
Questions and answers
Is there a battery replacement in the spoke attached wheel sensor? My unit operates fine, but it cannot detect the sensor which is has been working fine.