Table of Contents

Related Manuals for Roban AS350 b3


Summary of Contents for Roban AS350 b3
-
Page 1: Instruction Manual
INSTRUCTION MANUAL True Scale 1/12 CCPM OUTDOOR RC HELICOPTER... -
Page 2: Specifications
Roban AS 350 is intended for intermediate helicopter pilots. And although the Roban AS 350 is easy to control right out of the box, please take the time to read through this manual completely in order to assure you are getting the maximum out of this stunning and technically top edge product. - Page 3 -Moisture causes damage to electronics. Avoid water exposure to all equipment not specifically designed and protected for this purpose. -Never lick or place any portion of your Roban AS 350 in your mouth as it could cause serious injury or even death.
- Page 4 True Scale AS 350 Instruction Manual Scale accessories and installation accessories Decals Instruction Manual Required Consumables: Blue thread lock Red thread lock 30 minute epoxy CA or Super Glue Foam backed tape Zip ties Tape Tools: Hobby knife Hex screw driver set Phillips screw driver set Needle nose pliers Diagonal cutting pliers...
-
Page 5: Section A - Mechanic Assembly
True Scale AS 350 Instruction Manual SECTION A – MECHANIC ASSEMBLY NOTE: As with any RC model helicopter, all fasteners installed into metal parts must use blue thread lock and all bearings installed into metal bearing blocks must use red bearing lock, wipe off excess. -
Page 6: Section B - Installation Of Electronic Components
True Scale AS 350 Instruction Manual SECTION B – INSTALLATION OF ELECTRONIC COMPONENTS 1) Install Motor a) Install Pinion gear on motor. Eventually add a flat with a file to the motor shaft for security where the grub screw engages the shaft. Make sure the pinion gear is installed at the appropriate height to fully engage the main gear. -
Page 7: Section C - Adjustments And Electronic Setup
Please be advised that the swash plate is a 140deg and not a 120deg CCPM. b) If using the Roban 3 axis gyro, please use the following parameters (online) 4) Test TX a) In order to test your TX and the proper setup, please follow your radio controls user manual. -
Page 8: Section E - Final Adjustments
True Scale AS 350 Instruction Manual again following the steps of Section A backwards. Make sure that you insert the neoprene rubber dampener into the tail as shown before mounting the tail frame on the tail boom. c) Check by turning the main with your hand if the mechanics operate smoothly. Make sure the tail rotor spins in the correct direction. - Page 9 True Scale AS 350 Instruction Manual b) You have to make sure that the timing of the rotor head is adjusted properly. The L shaped lever that keeps the upper part of the swash plate in track with the main shaft and can be adjusted by loosening the set screw and turning it into the desired position.
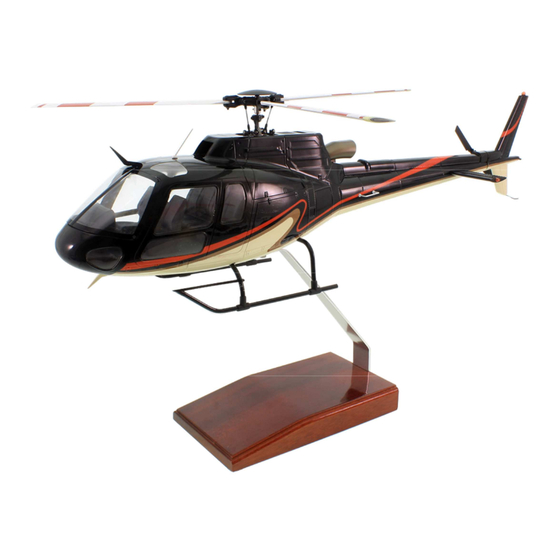
- Page 10 True Scale AS 350 Instruction Manual c) If your helicopter includes a wooden desktop stand, please assemble the stand as shown. Make sure that you use the supplied triangular washer so the model will sit in a proper angle on the holder!
- Page 11 True Scale AS 350 Instruction Manual EXHIBIT A – MECHANICAL ASSEMBLY NOTE: As the helicopter is readily assembled the following explosion drawings are a guide to the according spare part numbers, but also a guide on how to setup the mechanics. 1) Swash plate hub 1-JX-47-00021 1-JX-47-00009...
- Page 12 True Scale AS 350 Instruction Manual 3) Rotor head 1-JX-47-00104 1-JX-47-00130 1-JX-47-00109 1-JX-47-00122 1-JX-47-00102 1-JX-47-00106 1-JX-47-00112 1-JX-47-00106 1-JX-47-00108 1-JX-47-00107 1-JX-47-00109 1-JX-47-00110 1-JX-47-00105 1-JX-47-00113 4) Main Shaft 1-JX-47-00006 1-JX-47-00007 1-JX-47-00005...
- Page 13 True Scale AS 350 Instruction Manual 5) Complete CCPM assy 1-JX-47-00001 1-JX-47-00000 1-JX-47-00000 1-JX-47-00114 1-JX-47-00000 1-JX-47-00051 6) Main Frame 1-JX-47-00002 1-JX-47-00000 1-JX-47-00001 1-JX-47-00003...
- Page 14 True Scale AS 350 Instruction Manual 7) Front servo holder 1-JX-47-00058 1-JX-47-00057 1-JX-47-00059 1-JX-47-00054 8) Servo levers 1-JX-47-00013 1-JX-47-00027 1-JX-47-00057 1-JX-47-00014 1-JX-47-00028 1-JX-47-00055...
- Page 15 True Scale AS 350 Instruction Manual 9) Front Servo Assy 1-JX-47-00000 1-JX-47-00025 1-JX-47-00024 1-JX-47-00060 1-JX-47-00062 1-JX-47-00014 1-JX-47-00063 1-JX-47-00015 1-JX-47-00014 1-JX-47-00049 10) Tail gearbox frame 1-JX-47-00046 1-JX-47-00045...
- Page 16 True Scale AS 350 Instruction Manual 11) Aft servo holder 1-JX-47-00053 1-JX-47-00054 12) Aft servo assy 1-JX-47-00000 1-JX-47-00052 1-JX-47-00054 1-JX-47-00015 1-JX-47-00007...
- Page 17 True Scale AS 350 Instruction Manual 13) Tail boom holder assy 1-JX-47-00010 1-JX-47-00032 1-JX-47-00065 1-JX-47-00038 1-JX-47-00075 - 1-JX-47-00040 1-JX-47-00007 1-JX-47-00069 1-JX-47-00064 1-JX-47-00072 1-JX-47-00007 1-JX-47-00066 14) Tail servo and main gear assy 1-JX-47-00032 1-JX-47-00033 1-JX-47-00054 1-JX-47-00037 1-JX-47-00030 1-JX-47-00034 1-JX-47-00050 1-JX-47-00036 1-JX-47-00037 1-JX-47-00074 1-JX-47-00031 1-JX-47-00061...
- Page 18 True Scale AS 350 Instruction Manual 15) Main gear assy 1-JX-47-00004 1-JX-47-00010 1-JX-47-00009 16) Mounting the main frame 1-JX-47-00048...
- Page 19 True Scale AS 350 Instruction Manual 17) Tail frame assy 1-JX-47-00030 1-JX-47-00080 1-JX-47-00082 1-JX-47-00032 1-JX-47-00026 1-JX-47-00077 1-JX-47-00030 1-JX-47-00076 1-JX-47-00078 1-JX-47-00083 1-JX-47-00032 18) Tail rotor assy 1-JX-47-00089 1-JX-47-00088 1-JX-47-00087 1-JX-47-00054 1-JX-47-00100 1-JX-47-00027 1-JX-47-00090 1-JX-47-00099 1-JX-47-00085 1-JX-47-00096 1-JX-47-00086 1-JX-47-00095 1-JX-47-00091 1-JX-47-00097 1-JX-47-00084 1-JX-47-00096 1-JX-47-00098 1-JX-47-00007...
- Page 20 True Scale AS 350 Instruction Manual EXHIBIT B SPAREPART LIST SPAREPART SPAREPART SPAREPART NO NAME PART NO DESCRIPTION NAME GERMAN RCH-AS350-001 SWASH TAUMELSCHEIBEN- 1-JX-47-00019 Swash drive MITNEHMER 1-JX-47-00020 Threaded sleeve M3 f. -016 1-JX-47-00022 Drive Arm 1-JX-47-00023 Drive Link 1-JX-47-00024 Sleeve 2x2.78x5 1-JX-47-00026 Ball link frame...
- Page 21 True Scale AS 350 Instruction Manual 1-JX-47-00044 Screw M3x6 PH RCH-AS350-005 PINION Motorritzel 1-JX-47-00043 Pinion gear 12T GEAR SET 47C-042 Set Screw M3x3 Cyclic Metal Taumescheiben- RCH-AS350-007 1-JX-47-00049 Cyclic Servo 9g Gear Servo# Metallgetriebeservos RCH-AS350-008 Tail Servo Heck Servo 1-JX-47-00050 Tail Servo 9g RCH-AS350-009 Main Frame...
- Page 22 True Scale AS 350 Instruction Manual 1-JX-47-00064 Lower tail boom holder 1-JX-47-00065 Upper tail boom holder 1-JX-47-00066 Screw M2x16 SH 1-JX-47-00010 Self locking Nut M2 RCH-AS350-017 Tail boom Heckrohr Satz 1-JX-47-00014 Ball link 1-JX-47-00015 Screw M2x7 CS 1-JX-47-00061 Push rod sleeve 1-JX-47-00074 Tail push rod 1-JX-47-00026...
- Page 23 True Scale AS 350 Instruction Manual 1-JX-47-00087 Screw M2x6 1-JX-47-00115 Screw M2x9 1-JX-47-00092 Tail pitch lever 1-JX-47-00093 Sleeve 2x3.8x2.8 1-JX-47-00094 Sleeve 2x3x0.5 1-JX-47-00014 Ball link 1-JX-47-00015 Screw M2x7 CS 1-JX-47-00095 Tail pitch drive 1-JX-47-00096 Bearing 4x7x2.5 1-JX-47-00097 Control washer 4x6x0.55 1-JX-47-00098 Bushing 3x5x10 1-JX-47-00099...
- Page 24 True Scale AS 350 Instruction Manual 3Axis HH RCH-AS350-028 3 Achs Gyro 1-JX-47-00068 3 axis gyro Gyro RCH-AS350-029 6S ESC 6S ESC 1-JX-47-00126 ESC 6S 40A RCH-AS350-030 Position light Positionslichter-satz 1-JK-47-00082 Red Light Cap 1-JK-47-00083 Red Light Socket 1-JK-47-00084 Round Light Cap 1-JK-47-00085 Oval Light Socket 1-JK-47-00086...
- Page 25 True Scale AS 350 Instruction Manual 1-JK-47-00032 Left upper support 1-JK-47-00033 Right upper support 1-JK-47-00034 Lower wire cutter 1-JK-47-00035 Upper wire cutter 1-JK-47-00036 Handle 1-JK-47-00037 Antenna 1-JK-47-00038 Engine exhaust 1-JK-47-00039 Front gear cap 1-JK-47-00040 Aft gear cap 1-JK-47-00041 Scale Detail 1-JK-47-00042 Scale Detail 1-JK-47-00043...
-
Page 26: Wiring Diagram
Brand tag 1-JK-47-00132 Felt footprints LIPO 6S 1200mAh RCH-AS350-040 LIPO 6S 1200mAh 25C LIPO 6S 1200mAh 25C FULLYMAX RCH-AS350-041 12. WIRING DIAGRAM Note: This is how to wire the Roban 3 Axis Gyro. Other systems may require different wiring setup. - Page 27 True Scale AS 350 Instruction Manual 13. SPAREPART PICTURES...
- Page 28 True Scale AS 350 Instruction Manual Copyright 2012 Roban Model – www.robanmodel.com...
Need help?
Do you have a question about the AS350 b3 and is the answer not in the manual?
Questions and answers