Table of Contents
Advertisement
Quick Links
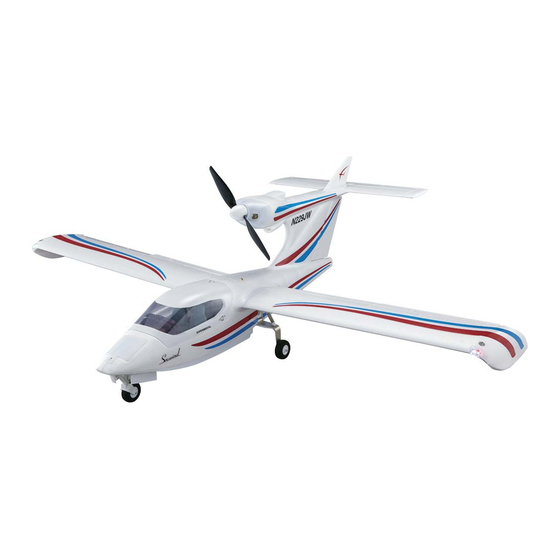
SPECIFICATIONS
Wingspan:
56.5 in [1435 mm]
2
Wing Area:
421 in
Weight:
61 oz [1729 g]
WARRANTY
Flyzone
®
guarantees this kit to be free from defects in both
material and workmanship at the date of purchase. This
warranty does not cover any component parts damaged by use
or modification. In no case shall Flyzone's liability exceed the
original cost of the purchased kit. Further, Flyzone reserves
the right to change or modify this warranty without notice.
In that Flyzone has no control over the final assembly or
material used for final assembly, no liability shall be assumed
nor accepted for any damage resulting from the use by the user
of the final user-assembled product. By the act of using the
user-assembled product, the user accepts all resulting liability.
READ THROUGH THIS MANUAL BEFORE STARTING CONSTRUCTION. IT CONTAINS IMPORTANT
READ THROUGH THIS MANUAL BEFORE STARTING CONSTRUCTION. IT CONTAINS IMPORTANT
INSTRUCTIONS AND WARNINGS CONCERNING THE ASSEMBLY AND USE OF THIS MODEL.
INSTRUCTIONS AND WARNINGS CONCERNING THE ASSEMBLY AND USE OF THIS MODEL.
© 2015 Flyzone, a Hobbico company.
Wing Loading:
2
[27.2 dm
]
I N S T R U C T I O N M A N U A L
2
20.9 oz/ft
2
[63.7 g/dm
Length:
44.5 in [1130 mm]
Radio:
6 channel
If the buyer is not prepared to accept the liability associated
with the use of this product, the buyer is advised to return this
kit immediately in new and unused condition to the place of
purchase.
For warranty claims contact Hobbico Product Support:
Hobbico Product Support
3002 N. Apollo Drive Suite 1
Champaign IL 61822 USA
Telephone: (217) 398-8970 ext. 6
Fax: (217) 398-7721
E-mail: airsupport@hobbico.com
Champaign, Illinois
®
(217) 398-8970
E-mail: airsupport@hobbico.com
]
900kV Outrunner,
Power
System:
40A ESC,
2200 mAh 11.1 V
LiPo battery
FLZA4054
Advertisement
Table of Contents

Related Manuals for Flyzone Seawind


Summary of Contents for Flyzone Seawind
- Page 1 Hobbico Product Support 3002 N. Apollo Drive Suite 1 In that Flyzone has no control over the final assembly or Champaign IL 61822 USA material used for final assembly, no liability shall be assumed nor accepted for any damage resulting from the use by the user Telephone: (217) 398-8970 ext.
-
Page 2: Table Of Contents
The plane is quick to build so 1. Your Seawind should not be considered a toy, but rather a you can spend more time fl ying. -
Page 3: Assemble The Model
Academy of Model Aeronautics If you are not already a member of the AMA, please join! The AMA is the governing body of model aviation and membership provides liability insurance coverage, protects modelers’ rights and interests and is required to fl y at most R/C sites. -
Page 4: Install The Wing Halves
Install the Wing Halves ❑ 2. Install the M3 x 16mm machine screw. ❑ 1. Insert the carbon fi ber wing tube. ❑ 3. Insert the elevator pushrod but do not tighten at this time. ❑ 2. Slide one wing panel onto the wing tube. Route the fl ap pushrod and servo leads through the appropriate holes. -
Page 5: Install The Receiver
❑ 4. Rotate the retainer to lock the wing. ❑ 3. Set the servo reversing switches on the TTX610, under the battery cover, as shown. All the switches are to the right except channels 3 and 6 which are to the left. ❑... -
Page 6: Set The Failsafe
❑ 7. Move the fl ap switch on the transmitter to the "0" !!! WARNING !!! position. Set the Failsafe With electric planes, once the motor battery is connected to the ESC the motor can come on at anytime causing damage or serious injury. If the failsafe is not set and the transmitter is switched off before the motor battery is disconnected, the motor could come on. -
Page 7: Check/Set The Control Throws
Check/Set the Control Throws Mount the Propeller The propeller should still not be installed. ❑ 1. Install the prop/collet adapter onto the motor shaft. Then, tighten the nut with a crescent wrench or 10mm wrench (not included). Measure and if necessary, use the programming in your transmitter or adjust the throws mechanically to achieve the throws specifi ed. -
Page 8: Check The C.g. (Center Of Gravity)
C.G. location. Do not at any time balance the model outside this C.G. range. ❑ 3. If the Seawind does not balance within the recommended range, reposition the battery to get the model to balance. Once the correct battery location has... -
Page 9: Flight Tips
Seawind will make it back to the runway or pond. With ● ALWAYS move the battery to a safe location, preferably a dead stick it is common to not land with fl aps at all. -
Page 10: Replacement Parts
FRONT RETRACTS FLZA6652 WHEELS ONLY FLZA6653 COWL FLZA6654 SPINNER FLZA6655 WATER RUDDER FLZA6656 WING JOINER FLZA6657 PROP 11.5X6 Fill out this tag and tape it inside your Seawind: This model belongs to: Name Address City, State, Zip Phone Number AMA Number... - Page 12 ®...
Need help?
Do you have a question about the Seawind and is the answer not in the manual?
Questions and answers