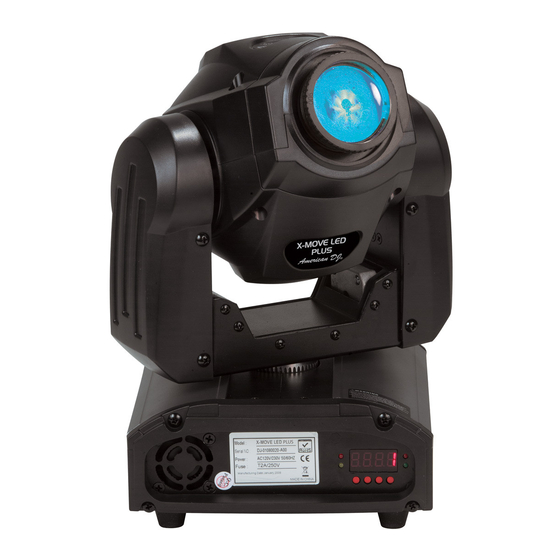
Table of Contents
Advertisement
Quick Links
X
-MOVE LED
User Instructions
6/08
PLUS
American DJ
®
6122 S. Eastern Ave.
Los Angeles CA. 90040
www.americandj.com
X-Move LED™
Unpacking:
Thank you for purchasing the X-Move LED™ by Ameri
can DJ
. Every X-Move LED™ has been thoroughly tested and has
®
been shipped in perfect operating condition. Carefully check the ship
ping carton for damage that may have occurred during shipping. If the
carton appears to be damaged, carefully inspect your xture for any
damage and be sure all equipment necessary to operate the unit has
arrived intact. In the event damage has been found or parts are miss
ing, please contact our toll free customer support number for further
instructions. Please do not return this unit to your dealer without con
tacting customer support rst.
Introduction:
T
h
e
- X
M
o
e v
moving head, mini LED fixture. The X-Move LED™ can operate as a
stand alone fixture or in a Master/Slave configuration.
LED™ has three operating modes; a sound active, show mode, DMX
controlled . For best results use fog or special effects smoke to enhance
the beams projections.
Customer Support:
American DJ
support line, to provide help and to answer any question should you
encounter problems during your set up or initial operation. You may
also visit us on the web at www.americandj.com for any comments or
suggestions. Service Hours are Monday through Friday 9:00 a.m. to
5:00 p.m. Paci c Standard Time.
Voice:
(800) 322-6337
Fax:
(323) 582-2941
E-mail:
support@americandj.com
To purchase parts online visit http://parts.americandj.com
Warning!
To prevent or reduce the risk of electrical shock or re, do
not expose this unit to rain or moisture.
Warning!
This may cause severe eye damage. Avoid looking directly
into the light source at all times!
American DJ
- www.americandj.com - X-Move LED™ Instruction Manual Page 2
®
General Information
E L
D
™
s i
a
e
g i
t h
c
a h
n
n
l e
D
M
provides a toll free customer
®
-
-
-
-
X
i
t n
l e
g i l
e
n
, t
The X-Move
Advertisement
Table of Contents

Summary of Contents for ADJ X-MOVE LED PLUS
- Page 1 -MOVE LED PLUS X-Move LED™ General Information Unpacking: Thank you for purchasing the X-Move LED™ by Ameri can DJ . Every X-Move LED™ has been thoroughly tested and has ® been shipped in perfect operating condition. Carefully check the ship ping carton for damage that may have occurred during shipping.
-
Page 2: General Instructions
X-Move LED™ Safety Precautions X-Move LED™ General Instructions To optimize the performance of this product, please read these For Your Own Personal Safety, Please Read and Understand This operating instructions carefully to familiarize yourself with the basic Manual Completely Before You Attempt To Install Or Operate operations of this unit. - Page 3 Data Cable (DMX Cable) Requirements (For DMX unit in your daisy chain to terminate the line. Using a cable terminator and Master/Slave Operation): The X-Move LED™ (ADJ part number Z-DMX/T) will decrease the possibilities of erratic can be controlled via DMX-512 protocol. The X- behavior.
- Page 4 X-Move LED™ Set Up X-Move LED™ System Menu Chart 5-Pin XLR DMX Connectors. Some manufactures use 5-pin DMX- 512 data cables for DATA transmission in place of 3-pin. 5-pin DMX fixtures may be implemented in a 3-pin DMX line. When inserting stan- dard 5-pin data cables in to a 3-pin line a cable adaptor must be used, these adaptors are readily available at most electric stores.
- Page 5 X-Move LED™ System Menu X-Move LED™ System Menu System Menu: When making adjustments you can press SLND - ENTER to confirm your setup or you can wait 8 seconds for This will let you set unit as a master or slave in a automatic setup.
- Page 6 X-Move LED™ System Menu X-Move LED™ System Menu 2. To activate the Pan inversion tap the UP or DOWN buttons MENU to exit. until I is displayed, press ENTER to confim. To deactivate Pan TEST - This function will run a self test program. The test inversion, select No and press Enter.
-
Page 7: Operation
X-Move LED™ System Menu X-Move LED™ Operation Operating Modes: The X-Move LED™ can operate in three dif- tures home position. ferent modes. In each mode you can run the fixture as a stand 1. Press the ENTER button for at least 5 seconds to enter into alone fixute or in a master/slave confiugration. - Page 8 X-Move LED™ Operation X-Move LED™ DMX Traits Channel Value Function 2. To control your fixture in DMX mode, follow the set-up procedures on pages 5-7 as well as the set-up specifications that are includ- 0 - 255 ed with your DMX controller. 0 - 255 TILT 3.
-
Page 9: Fixture Cleaning
X-Move LED™ DMX Traits X-Move LED™ Fuse Replacement Channel Value Function Locate and remove the unit’s power cord. Once the cord has been removed located the fuse holder located inside the power socket. SHUTTER/STROBE Insert a flat-head screw driver into the power socket and gently pry 0 - 7 BLACKOUT out the fuse holder. -
Page 10: Warranty
X-Move LED™ Warranty X-Move LED™ Specifications MANUFACTURER’S LIMITED WARRANTY Model: X-Move LED™ American DJ, Inc. hereby warrants, to the original purchaser, American DJ and American Audio products to be free of manufacturing defects in material and workmanship for a prescribed Voltage*: 120v/60Hz or 230v/50Hz period from the date of purchase (see specific warranty period on reverse).


Need help?
Do you have a question about the X-MOVE LED PLUS and is the answer not in the manual?
Questions and answers