Table of Contents
Advertisement
Quick Links
Advertisement
Table of Contents

Related Manuals for BETCO Big Bertha


Summary of Contents for BETCO Big Bertha
- Page 2 - 2 -...
- Page 3 TABLE OF CONTENTS PAGE DESCRIPTION Table of Contents 4, 5 Safety Instructions – Very Important – Must Read Both Pages Specifications of the Extreme Vac Features of the Extreme Vac Battery Installation and Charging Battery Maintenance Vacuum Controls Operating Procedures Preventative Maintenance and Operating Tips Squeegee Information and Adjustments View - Rear View of Parts...
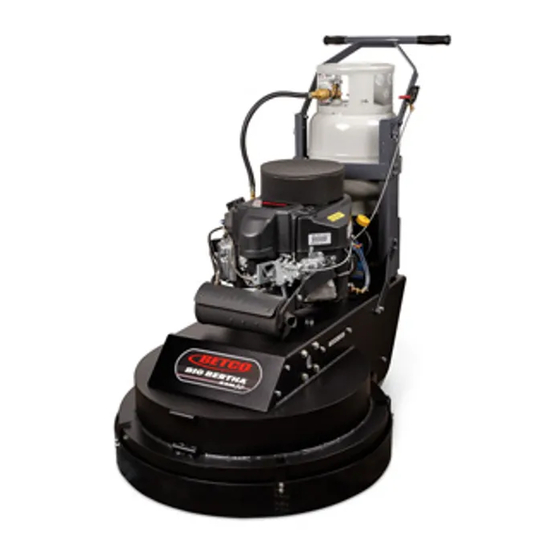
- Page 4 INTRODUCTION Thank you for taking the time to select the best propane powered floor equipment being manufactured today. With the Extreme Strip, we offer the “Best Built – Best Backed” propane powered floor stripping machine available. - 4 -...
- Page 5 WARNING LETHAL EXHAUST GAS NEVER RUN THE ENGINE IN A CLOSED BUILDING OR CONFINED AREA Exhaust gases contain poisonous carbon monoxide. Carbon monoxide is odorless, colorless, and can cause death if inhaled. - 5 -...
- Page 6 SAFETY General Safety Information Keep hands, feet, strings and ties away from all moving parts while the machine is in operation. The exhaust system gets very hot so keep hands, clothing and any items that can burn away from the engine, engine manifold, and muffler while hot.
-
Page 7: Carbon Monoxide Detector
CARBON MONOXIDE DETECTOR The “CO” carbon monoxide detector detects carbon monoxide before it reaches dangerous levels. This detector is a must for those who run propane powered equipment in or around enclosed areas. • The CO Detector is for everyone’s protection against Carbon Monoxide Poisoning. - Page 8 Tank Storage and Maintenance We at PowerBuff Inc., use the Worthington gas cylinders designed for vapor withdraw. The fuel lockoffs, regulators, and engines are also designed for vapor withdrawal. “Fuel freeze-ups” or “frozen regulators” are a result of liquid propane being introduced into the system. To prevent these “freeze-ups”...
-
Page 9: Before Starting The Machine
INSTRUCTIONS BEFORE STARTING THE MACHINE Before any operation should begin, you first should read your Engine Operation Manual and your Owner’s Manual. Your machine is shipped ready for your operation, however there is no fuel in the tank. When having the tank filled, you must make sure the tank is never over filled. -
Page 10: Starting The Engine
INSTRUCTIONS STARTING THE ENGINE The PB 17-V-Twin is equipped with a 12 volt starter and a key switch start. Start the Extreme Strip machine with the brushes in the running position, flat on the floor. Open propane tank valve (turn counterclockwise). Put throttle cable into the “slow”... - Page 11 INSTRUCTIONS MACHINE OPERATION AND OTHER INSTRUCTIONS Machine Operation: • Prepare the floor as needed for the procedure that you are performing. Be sure the Extreme Strip is suitable for the task you are planning to use it for. • Start the engine as instructed under “Starting the Engine” in the “Instructions”.
-
Page 12: Engine Maintenance
ENGINE MAINTENANCE DAILY EVERY EVERY EVERY EVERY PERIODIC MAINTENANCE PLEASE REFER TO ENGINE OWNERS MANUAL HOURS HOURS HOURS HOURS FOR MORE INFORMATION • Check engine oil level and add if needed • Check and clean engine bonnet filter (replacement is P2304) •... -
Page 13: Maintenance Notes
MAINTENANCE NOTES LEVELING BRUSH DRIVE SYMPTOM: MACHINE PULLS OR PUSHES IN AN UNUSUAL WAY. NOTE THAT IT IS NATURAL FOR MACHINE TO PULL TO THE LEFT TO SOME EXTENT. MUCH LIKE A REGULAR BUFFER. POSSIBLE CAUSE: BRUSH PIVOT YOKE IS NOT LEVEL. THIS CAN BE CHECKED BY MEASURING THE DISTANCE ON EACH SIDE OF THE YOKE, SUCH AS AT POSITIONS A and B. -
Page 14: Removal And Installation
BRUSH DRIVE REMOVAL AND INSTALLATION TENSIONER MUST BE TOWARD BACK ALSO, SEE PAGES OF MACHINE, SO THAT 19 AND 30 FOR LARGE PULLEY DOES TENSIONER NOT HIT IT, WHEN MACHINE IS POSITION LOWERERED ON BRUSH DRIVE TO REMOVE BRUSH DRIVE - REMOVE 4 BOLTS (ITEM 1) AND REMOVE FRONT ACCESS COVER (ITEM 2). -
Page 15: Brush Replacement
BRUSH REPLACEMENT DETAIL A DETAIL B USE 1-1/4" SOCKET TO HELP REMOVE IMPORTANT: BRUSHES USE 3/4" THREADS ARE LEFT HAND THREADS. WRENCH ON SHAFT TO KEEP FROM TURNING TURN CLOCKWISE TO LOOSEN AND COUNTERCLOCKWISE TO TIGHTEN (OPPOSITE FROM REGULAR THREADS). BRUSH REPLACEMENT - LAY MACHINE ON IT'S SIDE (MACHINE WILL NOT STAY IN THE UPRIGHT POSITION WITH THE BRUSH DRIVE IN PLACE). - Page 16 ENGINE CLUTCH BELT REPLACEMENT AND TENSIONING CLUTCH CLUTCH BELT (MOUNTED TO ENGINE) LARGE TENSIONER PULLEY (MOUNTED TO FRAME) REAR ACCESS FIGURE 1 HIDDEN PARTS FIGURE 2 BELT ACCESS FRONT SIDE ACCESS ACCESS 3/4" WRENCH ON TENSIONER BOLT REACH INSIDE TO HEX ON TENSIONER BODY WITH 1"...
-
Page 17: Belt Removal
ENGINE CLUTCH BELT REPLACEMENT AND TENSIONING BELT REMOVAL • REMOVE TENSIONER ACCESS PLATE (SHOWN REMOVED AT SIDE ACCESS IN FIGURE 2). • REMOVE FRONT ACCESS PANEL. • LOOSEN TENSIONER BOLT, USING A ¾” WRENCH, WHICH REMOVES TENSION FROM BELT. • FROM THE FRONT ACCESS, CLUTCH BELT CAN BE REMOVED FROM LARGE PULLEY. - Page 18 BRUSH DRIVE BELT REPLACEMENT AND TENSIONING BRUSH DRIVE ASSEMBLY BRUSH DRIVE ASSEMBLY WITH PIVOT ASSEMBLY REMOVED AS REMOVED FROM MACHINE TO SHOW BELT PATH MORE CLEARLY PULLEY 4 PULLEY 1 1" WRENCH PULLEY 3 FOR HEX ON TENSIONER BODY PULLEY 2 NOTE THAT THE BELT PATH IS 3/4 WRENCH ALSO SHOWN ON THE INSIDE...
- Page 19 EXTRA VIEWS BOTTOM VIEW WITH BRUSH DRIVE AND PIVOT YOKE REMOVED. SHOWS BELT PATH AND TENSIONER POSITION WIREFRAME VIEW. SHOWS ALL PARTS - 19 -...
- Page 20 EXTREME STRIP - OVERVIEW PARTS NOT LISTED ELSEWHERE PAGE 21 ELECTRICAL AND FUEL SYSTEM SCHEMATIC PAGES 32 & 33 TANK MOUNT AND HANDLE PAGES 26 & 27 REGULATOR AND FUEL SYSTEM PAGE 25 ENGINE AND RELATED PARTS BATTERY TRAY AND BATTERY COVER PAGE 24 PAGE 28 WHEELS AND AXLE...
- Page 21 PARTS NOT LISTED ELSEWHERE IN THIS MANUAL ITEM QTY. PART NO. DESCRIPTION ES2004 Front access cover ES0002 Belt path label P2098 W asher P2021 Bolt F0003 Solenoid BOLT ES5003 Bolt WASHER -ENGINE- P2006 -DECK - WASHER ES2008 Machine frame/deck ES2003 Handle support - right side ES2002 Handle support - left side...
- Page 22 BRUSH DRIVE AND PIVOT YOKE WASHER AND BOLT FOR TENSIONER ON BOTTOM...
- Page 23 BRUSH DRIVE AND PIVOT YOKE ITEM QTY. Part # Alternate Name ES2204 Brush drive shaft and bearing assembly ES2203 Main shaft and bearing assembly ES2007 Mounting plate for brushes ES2303 Pulley P1017 Pulley shaft bushing P2022 Lock washer P2040 Bolt P1136 ES2301 Pulley...
-
Page 24: Engine And Related Parts
ENGINE AND RELATED PARTS CARBURETOR ADAPTER IS BEHIND FILTER HOUSING ITEM QTY. PART NO. DESCRIPTION FH500V Kawasaki motor P2300-1 Catalytic muffler P2302 Cooling air intake guard P2305 Edge trim P2304 Bonnet air filter Engine part Acorn nut (6mm nut) F11013-7001 Foam pre-filter F11013-7006 Paper element air filter... - Page 25 REGULATOR AND FUEL SYSTEM ITEM QTY. PART NO. DESCRIPTION P1083 Regulator P2308 Fuel lock-off solenoid P1009 Hose barb ES2001 Regulator mounting bracket P2021 Bolt P2098 W asher ES5003 Bolt ES5008 P1011 Union coupling P1086 Tank coupling P1006-2 Standard fuel hose P2137 Fuel hose - 6LOLA P1090...
- Page 26 TANK MOUNT AND HANDLE THROTTLE DETAIL IGNITION SWITCH DETAIL - 26 -...
- Page 27 TANK MOUNT AND HANDLE ITEM QTY. PART NO. DESCRIPTION ES2009 Lower tank and handle mount P1090 Propane tank (not shown) ES5000 P2033 Washer P2031 Bolt see description Assembly includes items 6a, 6b, 6c, and 6d P2209 Clevis pin P2115 Hair pin cotter P2211 Retaining cable P2212...
- Page 28 BATTERY TRAY AND BATTERY COVER NARROW FELT UNDER TOP LONG FELT ON THE INSIDE ITEM QTY. PART NO. DESCRIPTION P1053 Battery cover P1053-2 Tank pad P1053-1 Battery cover back P1054 Battery tray P1133-2 Battery P1054-1 Battery tray retainer P2038 P2039 Screw ES5003 Bolt...
- Page 29 SPLASH GUARD PARTS AND HEIGHT ADJUSTMENT DETAIL A SPLASH GUARD HEIGHT ADJUSTMENT TO ADJUST THE HEIGHT OF THE SPLASH SKIRT TO WHAT IS NEEDED: CHANGE THE LOCATION OF THE SCREWS (ITEM 3) IN THE SPLASH GUARD BRACKET (ITEM 2 - WHICH IS A MAJOR ADJUSTMENT), AND/OR THE SPLASH GUARD PLASTIC (ITEM 1 - WHICH IS A MINOR ADJUSTMENT).
-
Page 30: Clutch Assembly
CLUTCH AND CLUTCH BELT DRIVE PARTS CLUTCH ASSEMBLY TOP VIEW WITH DECK REMOVED ITEM QTY. PART NO. DESCRIPTION P1067 Centrifugal clutch P2050 Spacer washer P2033 W asher P2032 Lock washer P2051 Bolt P1135 P2033 W asher ES2300 V-belt ES2600 Tensioner - 30 -... -
Page 31: Wheels And Axle
WHEELS AND AXLE ON INSIDE OF FRAME ON OUTSIDE OF FRAME ON OUTSIDE OF FRAME ITEM QTY. PART NO. DESCRIPTION ES2200 Wheel axle AS261382 Wheel ES5006 Bolt ES5007 Washer ES2306 Shaft collar P2148 Washer - 31 -... - Page 32 ELECTRICAL AND FUEL SYSTEM SCHEMATIC THIS MALE CONNECTOR CONNECTS TO FEMALE CONNECTOR ON FUEL LOCK-OFF SOLENOID ON THE PREVIOUS PAGE BLUE ORANGE YELLOW WHITE GREEN BLACK GREY GREY BROWN WHITE OIL PRESSURE SWITCH MOUNTED ON ENGINE O2 SENSOR MOUNTED IN MUFFLER MANIFOLD VOLTAGE REGULATOR GROUND...
- Page 33 ELECTRICAL AND FUEL SYSTEM SCHEMATIC CONNECT COUPLING TO TANK BOTH WIRES ARE BLACK THIS FEMALE CONNECTOR CONNECTS TO MALE CONNECTOR ON EMISSION WARNING MODULE ON THE NEXT PAGE ITEM QTY. PART NO. DESCRIPTION P1090 Propane tank P1086 Tank coupling P1011 Union coupling P1006-2 Standard fuel hose...
-
Page 34: Trouble-Shooting The Machine
TROUBLE-SHOOTING THE MACHINE PROBLEM CAUSE POSSIBLE SOLUTION Cannot remove brushes (a) Turning brushes the wrong (a) Turn clockwise to remove. way. They have left-hand See page 15 for details. threads. (b) Use a socket on the brush (b) Threads too tight. and a wrench on the shaft. -
Page 35: Trouble-Shooting The Engine
TROUBLE-SHOOTING THE ENGINE PROBLEM CAUSE POSSIBLE SOLUTION Engine will not turn over. (a) Battery is dead. (a) Recharge battery or replace (b) Loose wire or bad if necessary. connection. (b) Check wires and (c) Bad electrical component. connections. (c) Replace bad component. (d) Refer to engine owner’s manual and read IMPORTANT below. - Page 36 PROPANE POWERED FLOOR EQUIPMENT LIMITED WARRANTY PowerBuff, Inc. warrants new machines to be free from defects in material and workmanship under normal use and service to the original purchaser. The warranty period commences on the date of sale and is subject to the conditions stated below.
Need help?
Do you have a question about the Big Bertha and is the answer not in the manual?
Questions and answers