Table of Contents
Advertisement
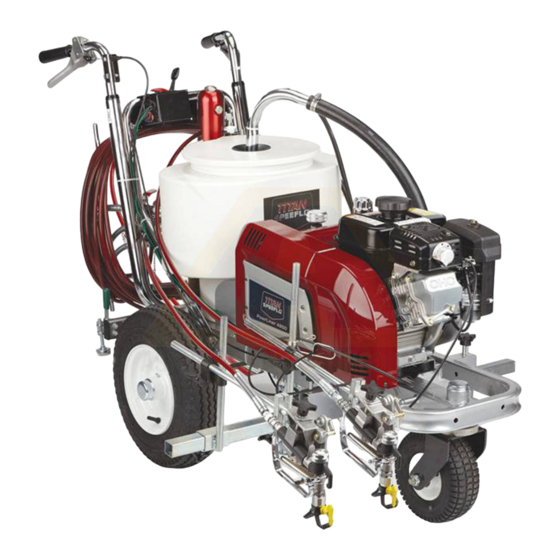
PowrLiner 4950
Model 0290019
Register your product online at:
www.titantool.com
Proper registration will serve as proof of purchase in the event your
original receipt becomes misplaced or lost.
_ _ _ _ _ _ _ _ _ _
Serial Number
Printed in the U.S.A.
SPEEFLO
Owner's Manual
For professional use only
Do not use this equipment
before reading this manual!
NOTE: This manual contains important
warnings and instructions. Please
read and retain for reference.
© Titan Tool Inc. All Rights Reserved. Form No. 0290921C
•
0312
Advertisement
Table of Contents

Related Manuals for Titan SPEEFLO PowrLiner 4950


Summary of Contents for Titan SPEEFLO PowrLiner 4950
- Page 1 Proper registration will serve as proof of purchase in the event your original receipt becomes misplaced or lost. _ _ _ _ _ _ _ _ _ _ Serial Number © Titan Tool Inc. All Rights Reserved. Form No. 0290921C • 0312 Printed in the U.S.A.
-
Page 2: Safety Precautions
(add more hose if necessary). Flammable vapors are often heavier than the system. air. Floor area must be extremely well ventilated. The pump contains arcing parts that emit sparks and can ignite vapors. © Titan Tool Inc. All rights reserved. -
Page 3: Grounding Instructions
DO NOT use this equipment to spray water or acid. proper outlet installed by a qualified electrician. Grounded Outlet IMPORTaNT: Do not lift by cart handle when loading or unloading. Grounding Pin Cover for grounded outlet box © Titan Tool Inc. All rights reserved. -
Page 4: Table Of Contents
SAE O-Ring Fitting Installation .......... 32 accessories and Service Kits ..........33 Second Gun Assembly ............34 Electrical Schematic............... 36 Sc-6 Striping Tip chart ............37 Spray Gun Positions .............. 38 Warranty .................. 40 © Titan Tool Inc. All rights reserved. -
Page 5: Introduction
Operation Congratulations on having selected the finest airless sprayer Fueling (gas engine) available in the world. Titan piston pumps are tireless workhorses — so tough they are virtually indestructible, even Gasoline is extremely flammable and is explosive under the most severe service. Titan designs and builds under certain conditions. -
Page 6: Setup
2. Install the gun support bar. 6. Fill the oil cup 1/2 full with Titan Piston Lube (P/N 314- NOTE: The spray gun, hose, and cables are mounted to 480) supplied by the factory. This extends packing life. -
Page 7: Preparing To Paint
Failure to control knob fully counterclockwise, do so may lead to a static electric discharge, which may cause a fire. • move the ON/OFF switch to the OFF position. © Titan Tool Inc. All rights reserved. -
Page 8: Painting
8. Turn off the sprayer. To turn off the gas engine, • set the pressure to minimum by turning the pressure control knob fully counterclockwise, © Titan Tool Inc. All rights reserved. -
Page 9: Pressure Relief Procedure
Do not point the using the appropriate solvent. gun at any person. Never operate the spray gun without the proper tip guard. 3. Place the siphon tube into a container of the appropriate solvent. © Titan Tool Inc. All rights reserved. -
Page 10: Maintenance
5. Place the thin Teflon gasket onto the step at the top of the filter body. 6. Place the thick Teflon gasket onto the top of the thin gasket. 7. Tighten the filter cap assembly onto the filter body. © Titan Tool Inc. All rights reserved. -
Page 11: Maintaining The Hydraulic System
1. Change engine oil. 2. Change the hydraulic fluid every twelve months. Drain Every 100 hours the old fluid from the tank and fill with 5 quarts of Titan Coolflo™ Hydraulic Fluid. Start the sprayer at just enough 1. Change engine oil. -
Page 12: Replacing The Motor Brushes (Electric Motor)
Brush Holder Spring Spring Clip 6. Place the spring on the brush as shown above. Push in and hook the spring clip. Repeat this procedure for the other side. 7. Reinstall both inspection covers. © Titan Tool Inc. All rights reserved. -
Page 13: Troubleshooting
Hose size or length is too small or too long Increase hose size to minimize pressure drop through hose and/or reduce hose length. Pump chatters on up or down Solvent has caused upper packing to swell Replace packing. stroke © Titan Tool Inc. All rights reserved. -
Page 14: Hydraulic Motor
NOTE: Engine labors at stall on if the head becomes hotter. This will help determine if center o-ring is blown on spool valve. If hot, remove both strokes. and replace o-ring. Bad hydraulic pump Replace hydraulic pump. © Titan Tool Inc. All rights reserved. -
Page 15: Spray Patterns
Remove restrictions in system; clean tip screen if filter is used. Round pattern Worn tip Replace tip. Fluid too heavy for tip Increase pressure. Thin material. Change nozzle tip. © Titan Tool Inc. All rights reserved. -
Page 16: Français
11. Maintenez la propreté de la zone et veillez à ce qu’elle ne tous les tuyaux ou pièces endommagés. contienne pas de conteneurs de peinture ou de solvant, de chiffons et autres matières inflammables. Français © Titan Tool Inc. Tous droits réservés. - Page 17 13. Ne pulvérisez pas à l’extérieur par temps venteux. 14. Débranchez toujours le cordon électrique de la prise avant de travailler sur l’équipement. IMPORTaNT: Ne pas soulever par la poignée du chariot lors du chargement ou du déchargement. © Titan Tool Inc. Tous droits réservés. Français...
-
Page 18: Español
Lea las hojas de datos sobre seguridad 10. Ponga siempre el seguro del gatillo cuando no esté pulverizando. Verifique que el seguro del gatillo funciona de los materiales (MSDS) y las etiquetas en los botes de correctamente. Español © Titan Tool Inc. Todos los derechos reservados. - Page 19 13. No pulverice al aire libre si hace viento. 14. Desenchufe siempre el cable antes de trabajar en el equipo. IMPORTaNTE: No cargue el equipo por el asa del carrito durante la carga y descarga. © Titan Tool Inc. Todos los derechos reservados. Español...
-
Page 20: Parts Lists And Service Instructions
103-841 Siphon hose assembly Bleed line assembly w/ valve 840-218 Convertokit, 169cc, 5.7 HP, Gasoline 0290438 779-564 Cart assembly 665-xxxx SC-6 striping tips (optional, see tip chart near the end of this section) © Titan Tool Inc. All rights reserved. -
Page 21: Hydraulic System Assembly
Use blue Loctite on threads, Torque to 8 FT/LBS (11 N/m) 449-135 Spacer Torque to 8 FT/LBS (11 N/m) Elbow (not shown) 451-121 Torque to 15 FT/LBS (20,5 N/m) Ball valve (not shown) 28, 33-34 941-555 © Titan Tool Inc. All rights reserved. -
Page 22: Gas Convertokit
Screw Bracket 449-144 980-307 449-165 Vibration pad 448-337 Mounting Plate 0290484 Mounting plate 424-255 Spring Belt, “V” (not shown, not part of assembly) 424-285 Belt, “V” (not shown, not part of assembly) 0290408 © Titan Tool Inc. All rights reserved. -
Page 23: Siphon Hose Assembly
Description Qty. Bleed valve assembly 944-030 500-516 Hose assembly Item Part No. Description Qty. Bleed tube (includes item 4) 103-300 Axle 779-018 103-118 Diffuser 779-011 Frame 779-017 Spacer 779-016 Wheel 779-019 Lock nut © Titan Tool Inc. All rights reserved. -
Page 24: Cart Assembly
Rear wheel Hex screw 757-014 Gun support bar 761-178 176-919 Washer 862-002 Lock washer 779-118 Guide block 756-080 Spring washer 862-436 Screw 730-148 Socket screw 756-078 Castle nut 703-079 Screw 756-087 Lock spring © Titan Tool Inc. All rights reserved. - Page 25 Handle bar, left 779-055 Handle assembly 0528245 424-247 Cable clip 779-090 Kill switch 862-468 Screw 700-139 Screw Lock nut, 3/8” 862-410 779-193 Screw 856-744 Screw 779-057 Control plate 759-033 Clamp knob 770-712 Carriage screw © Titan Tool Inc. All rights reserved.
-
Page 26: Hydraulic Motor
235-028 Rod seal critical parts and affect its service life and 235-123 Motor/pump block warranty. all parts should be inspected for absolute cleanliness. 235-029 Motor tube 235-125 © Titan Tool Inc. All rights reserved. - Page 27 Install the spool through the top of the cylinder head, down into the sleeve. IMPORTaNT: Do not use Piston Lube pump packing lubricant. It is a solvent and will severely damage seals and O-Rings of the hydraulic motor. © Titan Tool Inc. All rights reserved.
-
Page 28: Fluid Section
Fluid section service kit, minor (includes items 1, 107-051 3, 4, 10, 12, 15, 17, 19, and Loctite P/N 426-051) Foot valve assembly (includes items 16–20) 107-015 Outlet valve assembly (includes items 10–13) 107-016 © Titan Tool Inc. All rights reserved. -
Page 29: Servicing The Fluid Section
(13) followed by the sleeve (8) and spring retainer (7). IMPORTaNT: use of non-Titan service parts may void warranty. ask for original parts made by Titan for best 9. Screw the displacement rod (6) and the outlet valve services. This pump should receive a routine servicing housing (13) together. -
Page 30: Belt Guard Assembly
Close the belt guard and tighten the belt guard knob. 0290540 Knob 0290794 Hinge 0524318 Knob Guard, front 0290522 859-001 Washer Belt guard (front end) Belt guard Belt (fixed section) Front Rear pulley pulley © Titan Tool Inc. All rights reserved. -
Page 31: Filter Assembly
Ball valve 940-553 0290424 Filter body 227-027 Pipe plug 703-136 O-ring Swivel fitting assembly (includes item 15) 703-137 227-033 Pipe plug Hex nipple 812-003 Filter service kit (includes items 2 and 4–6) 930-050 © Titan Tool Inc. All rights reserved. -
Page 32: Trigger Assembly
Avoid screwing fitting in too far. the hydraulic pump, No gap assemble the same but may not have the indicator.) Bent washer allows for o-ring extrusion Avoid leaving fitting too far out. O-ring cut on thread © Titan Tool Inc. All rights reserved. -
Page 33: Accessories And Service Kits
Service Kits These items may be purchased separately from your local Titan distributor. Part No. Description 103-627 Rock Catcher S-5 G, T, and 1/4” x 50’ Hose Kit 550-110 S-5 G, T, and 3/8” x 50’ Hose Kit 550-111 LX-80 G, T, and 1/4”... -
Page 34: Second Gun Assembly
858-002 Lock washer Screw, hex head 424-224 Support arm 858-636 Airless gun, S-3 779-152 Gun control cable assembly 550-290 Grease fitting Reversible tip, SC6 424-229 661-517 Striping tip, SC6 424-248 Flanged bearing 665-1908 © Titan Tool Inc. All rights reserved. - Page 35 NOTE: Once the second gun is in position, the trigger cables can be installed on both guns. Make sure the trigger cable from the second gun is disconnected before performing the next step. © Titan Tool Inc. All rights reserved.
-
Page 36: Electrical Schematic
Electrical Schematic Engine Stop Switch Wire Assembly 779-147 Wire Assembly 779-148 YELLOW BLACK Engine Wire Assembly YELLOW 779-242 Ground GREEN PINK Wire Assembly 779-149 12V Adapter © Titan Tool Inc. All rights reserved. -
Page 37: Sc-6 Striping Tip Chart
All traffic paints — High speed, heavy film 665-4308 4”-6” (102-152 mm) .043” (1.09 mm) All traffic paints — High speed, heavy film 665-4312 6”-8” (152-203 mm) .043” (1.09 mm) All traffic paints — High speed, heavy film © Titan Tool Inc. All rights reserved. -
Page 38: Spray Gun Positions
Spray Gun Positions Single Line One Gun Curb Two Lines Two Gun Curb Spraying Around Obstacles Two Lines or One Wide Line © Titan Tool Inc. All rights reserved. - Page 39 Notes © Titan Tool Inc. All rights reserved.
-
Page 40: Warranty
Warranty Titan Tool, Inc., (“Titan”) warrants that at the time of delivery to the original purchaser for use (“End User”), the equipment covered by this warranty is free from defects in material and workmanship. With the exception of any special, limited, or extended warranty published by Titan, Titan’s obligation under this warranty is limited to replacing or repairing without charge those parts which, to Titan’s...
Need help?
Do you have a question about the SPEEFLO PowrLiner 4950 and is the answer not in the manual?
Questions and answers