
Related Manuals for Rumble Tuff Manual Breast Pump


Summary of Contents for Rumble Tuff Manual Breast Pump
- Page 1 Rumble Tuff Manual Breast Pump Instructions & Assembly for Sweet Assist Device M2說明書(75-PA10400-RT01)20121224-A.indd 1 2013/1/9 上午 11:48:37...
- Page 2 M2說明書(75-PA10400-RT01)20121224-A.indd 2 2013/1/9 上午 11:48:37...
-
Page 3: Congratulations
We wish you and your baby a healthy and successful breast feeding experience. We Look forward to helping you preserve and provide the best possible nutrition for your baby. The Rumble Tuff Manual Breast Pump is perfect for many occasions. - Page 4 Table of Contents Congratulations ........................Indication for Use ..............................................Important Safeguards ..........................● CAUTION ..........................Parts Guide ................... ● Expression Collection Combo Kit (Classic Mode) ..................● Expression Collection Combo Kit (Assist Mode) ............How to Assemble the Expression Collection Combo Kit ........
- Page 5 Important Safeguards ® The Rumble Tuff Manual Breast Pump is designed for a single user and should never be shared or resold; doing so will void the warranty. READ ALL INSTRUCTIONS BEFORE USING CAUTION: ● Do not use this product for any other purpose than as indicated in the Instructions & Assembly.
-
Page 6: Parts Guide 3
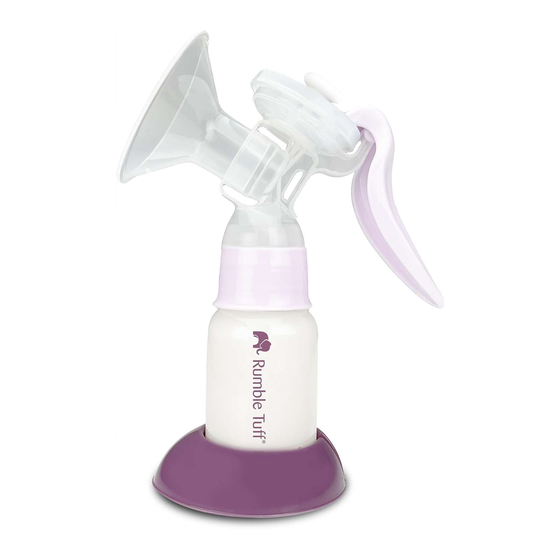
Parts Guide Spare Parts Sweet Assist Handle Kit (1 Valve and 1 O-ring) Extra 5 oz. Collection Bottle Non-Woven Bag Expression Collection Combo Kit Bottle Adapter Kit (2 sets) User Instructions & Assembly English 3 M2說明書(75-PA10400-RT01)20121224-A.indd 6 2013/1/9 上午 11:48:38... - Page 7 Parts Guide (Continued) ● Expression Collection Combo Kit (Classic Mode) Adjusting Valve Handle Manual-Pump Valve Stem Diaphragm Kit Manual Diaphragm Cup with O-Ring Breastshield Body Silicone Cushion Expression Tubing One-Way Valve Collection Kit Shield Connector with O-Ring Bottle Adapter Sweet Assist Sweet Assist Handle Kit Handle Body...
- Page 8 Parts Guide (Continued) ● Expression Collection Combo Kit (Assist Mode) Shield Connector O-Ring Tubing Breastshield Body Adjusting Valve Silicone Cushion Handle Expression One-Way Valve Collection Kit Sweet Assist Manual-Pump Valve Stem Handle Pump kit Diaphragm Kit Manual Diaphragm Bottle Adapter Cup with O-Ring Collection Bottle Sweet Assist Handle Body...
-
Page 9: How To Assemble The Expression Collection Combo Kit
How to Assemble the Expression Collection Combo Kit Your Rumble Tuff Manual Breast Pump comes pre-assembled; however, you will need to re-assemble it after each ® cleaning. (For cleaning instructions, see page 20) Below is a step-by-step guide for assembling the Expression Collection Combo Kit: 1. - Page 10 How to Assemble the Expression Collection Combo Kit (Continued) 3. With your thumb and forefinger, gently smooth closed any openings on the tip of the One-Way Valve and shape into a straight line. Note: This is critical to the optimal performance of the Pump. 4.
- Page 11 How to Assemble the Expression Collection Combo Kit (Continued) 5. With the Bottle Adapter in one hand, twist on the Collection Bottle for a secure fit. English 8 M2說明書(75-PA10400-RT01)20121224-A.indd 11 2013/1/9 上午 11:48:50...
- Page 12 How to Assemble the Manual-Pump Diaphragm Kit ● Expression Collection Combo Kit (Classic Mode) 1. With the Cup in one hand, place the Manual Silicone Diaphragm in the Cup (matching the shape of the Cup). Press around the edges of the Diaphragm for a secure fit. Make sure the Diaphragm is evenly mounted on the Cup and there is no gap in between them.
- Page 13 How to Assemble the Manual-Pump Diaphragm Kit (Continued) ● Expression Collection Combo Kit (Classic Mode) 3. Place the "U" shape slot of the Handle onto the recess of the Adjusting Valve Stem. (There are 2 recesses on the Adjusting Valve Stem.
- Page 14 5. With the Breastshield Body in one hand, place the Silicone Cushion in the Breastshield Body (matching the shape of the horn). Secure the lip of the Cushion around the edges of the horn. Your Manual Breast Pump will work with or without the Silicone Cushion.
- Page 15 How to Assemble the Manual-Pump Diaphragm Kit (Continued) ● Expression Collection Combo Kit (Assist Mode) 1. With the Cup in one hand, place the Manual Silicone Diaphragm in the Cup (matching the shape of the Cup). Press around the edges of the Diaphragm for a secure fit. Make sure the Diaphragm is evenly mounted on the Cup and there is no gap in between them.
- Page 16 How to Assemble the Manual-Pump Diaphragm Kit (Continued) ● Expression Collection Combo Kit (Assist Mode) 3. Place the "U" shape slot of the Handle onto the recess of the Adjusting Valve Stem. (There are 2 recesses on the Adjusting Valve Stem.
- Page 17 6. With the Breastshield Body in one hand, place the Silicone Cushion in the Breastshield Body (matching the shape of the horn). Secure the lip of the Cushion around the edges of the horn. Your Manual Breast Pump will work with or without the Silicone Cushion.
- Page 18 1. Hold the Manual Breast Pump to your breast so that your nipple is centered inside the Breastshield, then squeeze the handle toward the bottle to test the suction.
- Page 19 Using the Manual Pump (Continued) ● Expression Collection Combo Kit (Classic Mode) 2. You can adjust the suction level by turning the round knob on the top of the Adjusting Valve Stem. Turn clockwise to increase the suction and counter-clockwise to decrease it. Note: Do not over-turn the Adjusting Valve, as it will cause the Adjusting Valve to bulge and leak air, creating a suction problem.
- Page 20 Note: You can use the Manual Pump in either or both of the Expression patterns. To achieve the best results, use an expression pattern or combination of expression patterns, that closely match your baby's sucking habits. 1. Hold the Manual Breast Pump to your breast so that your nipple is centered inside the Breastshield. English 17 M2說明書(75-PA10400-RT01)20121224-A.indd 20...
- Page 21 Using the Manual Pump (Continued) ● Expression Collection Combo Kit (Assist Mode) 2. You can adjust the suction level by turning the round knob on the top of the Adjusting Valve Stem. Turn clockwise to increase the suction and counter-clockwise to decrease it. Note: Do not over-turn the Adjusting Valve, as it will cause the Adjusting Valve to bulge and leak air, creating a suction problem.
- Page 22 Using the Manual Pump (Continued) ● Expression Collection Combo Kit (Assist Mode) 3. You can operate the Sweet Assist handle in the way which is most comfortable for you, or let another give you a helping hand. Press by thumb Press by fingers By another's help Note: The Sweet Assist Handle is perfect for women with smaller hands, or those who have hand or wrist...
- Page 23 Before you use your Rumble Tuff ® Manual Breast Pump for the first time, disassemble and boil all parts of the Expression Collection Combo Kit in water for 10 minutes. Do not over-boil to avoid premature aging of the product materials.
- Page 24 Note: Before each use, visually inspect the individual components for cracks, chips, tears, discoloration or deterioration, as they may affect the efficiency of the Rumble Tuff ® Manual Breast Pump. In the event that damage to the device is observed, please discontinue using the device until parts have been replaced. English 21 M2說明書(75-PA10400-RT01)20121224-A.indd 24...
-
Page 25: Important Notes
Breastmilk Storage Guidelines Check with your healthcare provider or an International Board Certified Lactation Consultant for specific storage instructions. This information is based on current research and applies to mothers who have healthy, full-term babies who are storing their milk for home use. Important Notes: ●... - Page 26 Breastmilk Storage Guidelines (Continued) Place Temperature How long Things to know 39°F or colder ● Up to 72 hours is best. Store milk in the back of the main body of Refrigerator ● Up to 5-8 days is okay for very the refrigerator.
-
Page 27: Pumping Tips
If it feels uncomfortable or painful on your breasts while using the Manual Breast Pump, try decreasing the suction level by turning the Adjusting Valve. You may also try pumping with/without the Silicone Cushion. If you are still experiencing pain or discomfort, consult your healthcare professional or an international board certified lactation consultant. -
Page 28: Insufficient Vacuum
Troubleshooting ● Insufficient Vacuum ● Center your nipple in the Breastshield. Ensure a complete seal of the Breastshield, making sure there are no gaps between the breast and the Breastshield. Note: Please check for Classic Mode Assist Mode correct fitting of the shield. ●... - Page 29 Troubleshooting (Continued) O-ring O-ring ● Check the O-Ring to make sure it is seated in the groove. ● Make sure the Manual Pump Diaphragm Kit is locked into place on the Expression Collection Kit. Classic Mode Assist Mode ● Verify that the One-Way Valve tip is securely seated and properly sealed.
-
Page 30: Where To Get Replacement Parts
Troubleshooting (Continued) Where to get Replacement Parts: If you are missing a part or need a replacement part, please contact Rumble Tuff ® You can purchase replacement parts or additional accessories for your Rumble Tuff ® Manual Breast Pump by the following methods: ●... - Page 31 Technical Data Technical Specifications: VACUUM: Swift Expression:-150~-220mmHg(-20~-29.3kpa) Natural Expression:-180~250mmHg(-23.9~-33.3kpa) Ambient temperature range:+10 C to 40 C (50 F to 104 Relative Humidity range: 20% to 80% Key to Box Symbol: ● Consult instructions for use English 28 M2說明書(75-PA10400-RT01)20121224-A.indd 31 2013/1/9 上午 11:50:07...
-
Page 32: Warranty
, replace this product without charge for such ® ® replacement parts or labor. The purchaser shall bear all expenses related to returning this product to Rumble Tuff ® . This warranty does not apply to any part of the product that has been subject to misuse, abuse, or alteration. Only Rumble... - Page 33 8388 for a RA# ● Detailed description of the problem You, the purchaser, are responsible for all shipping charges. Do NOT send product without a RA#. To obtain a RA# and shipping address: Please contact Rumble Tuff ® Customer Service Department by;...
- Page 34 Rumble Tuff is owned and operated by ® A Cute Baby, Inc. 865 N 1430 W Orem UT 84057-6402 Tel: (801) 609-8168 Fax: (801) 796-2688 www.rumbletuff.com www.acutebaby.com 75-PA10400-RT01 M2說明書(75-PA10400-RT01)20121224-A.indd 34 2013/1/9 上午 11:50:07...
Need help?
Do you have a question about the Manual Breast Pump and is the answer not in the manual?
Questions and answers