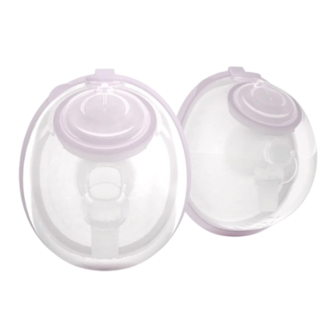
Summary of Contents for Rumble Tuff Go Cups
- Page 1 Go Cups HANDS-FREE COLLECTION CUPS USER MAUNUAL English 1-15 Spanish 17- 31 Follow our YouTube channel for pumping tips and how-to videos...
-
Page 2: Table Of Contents
PARTS PARTS INTRODUCTION IMPORTANT INFORMATION WARNING & DISCLAIMER 2x Tubing (connects to the cup) FEATURES CLEANING 2x Cup ASSEMBLY PLACEMENT IN BRA 2x Diaphragm POSITIONS FOR EXPRESSING DISCONNECTING COLLECTION CUPS AND MILK TRANSFER CORRECT BREAST SHIELD/FLANGE FIT CONNECTING TO BREAST PUMP CUP TEST AND TRIM TUBING... -
Page 3: Introduction
Exposure to harsh detergents may cause silicone to the go! Rumble Tuff® Go Cups provide appear cloudy over time. many great features: Store Rumble Tuff® Go Cups in a cool, dry space and avoid direct sunlight. Pump on the go Replace damaged or worn parts immediately. -
Page 4: Warning & Disclaimer
DO NOT boil tubing or adapters. Contains small parts, which may be a choking hazard for children. Rumble Tuff® Go Cups are a personal care item and intended for use by only one person. This device is intended for use with any Rumble Tuff®... -
Page 5: Cleaning
Remove Tubing and set aside. DO NOT insert any object into the tubing. Separate all parts. The Rumble Tuff® Go Cups are closed system which keep milk Rinse them with cold water immediately after use. from entering tubing. If milk is entering tubing, contact Wash in warm soapy water. -
Page 6: Assembly
ASSEMBLY ASSEMBLY (continued) Place diaphragm on top of breast shield/flange. Align triangle marks above cup and breast shield/ Firmly insert one-way valve into bottom of flange. breast shield/flange. Press around edge of diaphragm completely Press around edges of breast shield/flange for for secure fit. -
Page 7: Placement In Bra
Rumble Tuff® Go Cups should be used in Tuff® Go Cups operation. an up right position. Bra must keep Rumble Tuff® Go Cups in position. Bra must keep Rumble Tuff® Go Cups upright and ensure no slipping, sagging,or tilting. Insecure fit may cause a loss of suction. -
Page 8: Disconnecting Collection Cups And Milk Transfer
AND MILK TRANSFER SHIELD/FLANGE FIT Measure nipples before pumping session. Turn the pump off. Carefully remove tubing from Rumble Tuff® Go Cups. Carefully remove Rumble Tuff® Go Cups from bra Nipple and place on a firm and flat surface. Open the spout cover and pour the breast milk into a... -
Page 9: Connecting To Breast Pump
CUP TEST AND TRIM TUBING Insert ribbed end of connector into tubing. Insert smooth end of connector into the opening directly above diaphragm. Prior to placing Rumble Tuff® Go Cups For single in bra: pumping 1. Connect cups to pump and turn pump on. - Page 10 PARTES PARTES INTRODUCCIÓN INFORMACIÓN IMPORTANTE ADVERTENCIAS 2x Tubos CARACTERISTICAS (conexión con las copas) LIMPIEZA ENSAMBLAJE 2x Copas COLOCACIÓN EN SOSTÉN POSICIONES PARA EXPRESAR 2x Diafragmas DESCONECTAR Y ALMACENAR LA LECHE TAMAÑO CORRECTO DEL PROTECTOR DE SENOS CONEXIÓN AL EXTRACTOR PRUEBE LA COPA Y RECORTE DE TUBOS...
-
Page 11: Introducción
Felicitaciones en adquirir sus Copas de Lávese las manos con agua y jabón antes de usar. Colección Rumble Tuff® Go Cups. Ahora ya Asegúrese de que todas las piezas estén limpias y puede extraer con las manos libres y en secas antes de cada uso. -
Page 12: Advertencias
NUNCA hierva los tubos ni los adaptadores. Contiene piezas pequeñas que pueden representar un peligro de asfixia para los niños. Las Copas de Colección Rumble Tuff® Go Cups. son un artículo de cuidado personal y debe ser usado por un solo usuario. -
Page 13: Limpieza
Retire el tubo y déjelo a un lado. Separe todas las piezas. Las Rumble Tuff® Go Cups son un sistema cerrado, lo que previene que la leche materna entre en el tubo. Enjuague con agua fría después de cada uso. -
Page 14: Ensamblaje
ENSAMBLAJE ENSAMBLAJE (continuación) Coloque el diafragma en la parte superior del Alinee las marcas triangulares sobre la copa y protector de senos. Introduzca firmemente la el protector de senos. válvula unidireccional en la parte inferior. Presione alrededor de los bordes del protector de Presione alrededor de los bordes del diafragma senos para un ajuste seguro y asegúrese de que el para un ajuste seguro. -
Page 15: Colocación En Sostén
Asegúrese de que su sostén mantenga las Rumble Tuff® Go Cups en una posición segura. Asegúrese de que su sostén mantenga las Rumble Tuff® Go Cups en una posición verticaly no permita que se deslicen o se inclinen durante el uso. Esto puede producir una pérdida de succión. -
Page 16: Desconectary Almacenar La Leche
Mida su pezón antes de usar su extractor. Retire con cuidado el tubo de las copas. Retire con cuidado las as Rumble Tuff® Go Cups de su sostén y colóquelas sobre una superficie plana y firme. Vacié la leche materna en la bolsa de recolección de Pezón... -
Page 17: Conexión Al Extractor
PRUEBE LA COPA Y RECORTE DE TUBOS Inserte la parte inferior del adaptador dentro del tubo. Inserte la parte superior del adaptador directamente sobre el diafragma. Antes de colocar las RumbleTuff® Go Cups en su sostén:. Para extracción singular. 1. Conecte y encienda el extractor.


Need help?
Do you have a question about the Go Cups and is the answer not in the manual?
Questions and answers