Table of Contents
Advertisement
Quick Links
Advertisement
Table of Contents

Related Manuals for Rumble Tuff Whisper


Summary of Contents for Rumble Tuff Whisper
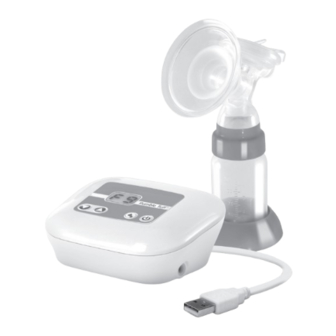
- Page 1 USB Electric Breast Pump Instructions & Assembly...
-
Page 2: Table Of Contents
.............. 14 Using your AC/DC Adapter ..............15 Using your Power Bank Getting Started ................. 16 ......16 How to Use Your Whisper Electric Breast Pump ..............18 LED Light Sign Guide ................18 Silent/Sound Mode Cleaning Instructions ..............19 .............. - Page 3 Table of Contents Troubleshooting ................21 ............21 Interruption of Electrical Service ..............21 Radio Frequency Energy ................21 Decreased Suction ................. 22 Pump Doesn't Start ........22 Breast Milk Buildup In the Breastshield Body ........... 22 Where to Get Replacement Parts ........
-
Page 4: Important Safeguards
Important Safeguards Important Safeguards The Rumble Tuff ® Electric Breast Pump is designed for a single user and should never be shared or resold; doing so will void the warranty. READ ALL INSTRUCTIONS BEFORE USING DANGER: To reduce the risk of electrocution: • Always unplug this product immediately after using. -
Page 5: Warning
Cord into your Rumble Tuff Electric Breast Pump. • Rumble Tuff has provided an AC/DC Adapter with this device. Use of an any AC/DC Adapter not approved by the manufacturer will void the warranty. • If you are infected with Hepatitis A, Hepatitis B, or have HIV (Human Immunodeficiency Virus), pumping breast milk does not reduce or remove the risk of transmitting the virus to your baby through breast milk. -
Page 6: Accessories And Parts
Accessories and Parts Included Accessories (For Double Pump) Breast Pump Main Unit Expression Collection Bottle Adapter Kits Combo Kits (2 Sets) (2 Sets) Vacuum Tubing (Double) AC/DC Adapter 2 USB Cables with Splitter (45 cm &190 cm) Included Accessories (For Single Pump) Breast Pump Main Unit Expression Collection Bottle Adapter Kits... -
Page 7: Expression Collection Combo Kit
Accessories and Parts Expression Collection Combo Kit Diaphragm Silicone Cushion (Optional) Flange Breastshield Body Membrane Valve Bottle Adapter Collection Bottle Bottle Base... -
Page 8: About Your Whisper
About Your Whisper Electric Breast Pump Main Unit LED Screen Vacuum Adjusting Mode Button Button Power Button Press the Up Down buttons to adjust the suction. Tubing Adapter Inlet USB Cable Storage Space Power Inlet Suction Level LED Mode LED Indicator... -
Page 9: Bottle Assembly
Bottle Assembly How to Assemble the Expression Collection Combo Kit Hold the Breastshield Body in one hand and make sure the bottle-thread side opening is facing up. Insert the Membrane Valve onto the bottom of the Breastshield Body. Verify that the membrane of the Membrane Valve is flat. - Page 10 Bottle Assembly How to Assemble the Expression Collection Combo Kit Optional If desired, place the Silicone Cushion into the Flange of the Breastshield. Note: Your Electric Breast Pump will work with or without the Silicone Cushion. Your comfort depends on your preference. Push the center of Silicone Cushion into the Flange.
- Page 11 Bottle Assembly How to Assemble the Expression Collection Combo Kit Place the Diaphragm in the Cup of the Breastshield Body. Note: Do not reverse the order of steps 6 through 9. Doing so will cause suction loss when pumping. Press around the edges of the Diaphragm for a secure fit.
- Page 12 Bottle Assembly How to Assemble the Expression Collection Combo Kit Twist the Bottle Adapter onto the Breastshield Body. Twist on the Collection Bottle for a secure fit. Connect the Tubing to the Tubing Connector located on the Cap. Note: Make sure that there is no moisture in the Tubing.
- Page 13 Bottle Assembly How to Assemble the Expression Collection Combo Kit The Expression Collection Combo Kit is assembled. Make sure the Tubing Adapter is properly inserted into the Tubing Adapter Inlet on the Electric Pump Main Unit.
-
Page 14: Power Options
Power Options Your Electric Breast Pump may be operated under any of the following power supply modes: Using your AC/DC Adapter (included) Connect the USB cable with the Adapter. Plug the AC/DC Adapter into an electrical outlet. Note: Do not leave only the AC/DC Adapter with or without USB cable on the electrical outlet after use. -
Page 15: Using Your Power Bank
Store the USB Cable in the storage compartment after use. Note: Keep the storage compartment lid closed while pumping to reduce noise. Caution: Contact your PC or laptop manufacturer before connection. Rumble Tuff is NOT responsible for PC or laptop connection problems. -
Page 16: Getting Started
Getting Started How to Use Your Whisper Electric Breast Pump Check for correct fitting of the shield. Hold the Expression Collection Combo Kit to your breast so that your nipple is centered in the Flange. Press the Power Button to begin pumping. - Page 17 Electric Breast Pump is left on but unattended for more than 30 minutes, it will automatically shut off. To view the Assembly Guide video, please visit Rumble Tuff online at www.rumbletuff.com/troubleshooting or scan this QR Code with your smartphone or tablet.
-
Page 18: Led Light Sign Guide
LED Light Sign Guide LED Indicator Silent/Sound Mode The Silent/Sound Mode can only be changed while in the OFF state. To change to Silent Mode, press both the and the buttons at the same time for 3 seconds. The LED Display (with “SL” displayed) will flash three times. When the device is on Silent Mode, all sounds are turned off. -
Page 19: Cleaning Instructions
Cleaning Instructions Sanitize Prior to First Use: ® Before you use your Rumble Tuff Electric Breast Pump for the first time, disassemble and boil all parts of the Expression Collection Combo Kit in water for 10 minutes. • Be sure to use enough water to keep all parts afloat while boiling. -
Page 20: Tubing Cleaning Instructions
Before each use, visually inspect each individual component for cracks, chips, tears, ® discoloration, or deterioration, as they may affect the efficiency of the Rumble Tuff Electric Breast Pump. In the event that damage to the device is observed, please discontinue use until the parts have been replaced. -
Page 21: Troubleshooting
• Inspect the Membrane and Valve very closely for tears or warping. This component is critical to achieve proper suction; even the tiniest tear will adversely affect pump performance. If damaged, replace the Membrane Valve with one of the spare valves provided with your Whisper Electric Breast Pump. -
Page 22: Pump Doesn't Start
• Make sure the AC/DC Adapter is properly plugged in. • Ensure the USB cable is well connected. • If the Pump still doesn't work, contact Rumble Tuff Customer Service for assistance (see Page 22). Breast Milk Buildup in the Breastshield Body... - Page 23 Troubleshooting To learn more about troubleshooting your pump, please visit www.rumbletuff.com/troubleshooting or scan this QR Code with your smartphone or tablet. Tips: If it feels uncomfortable or painful on your breasts while using the Pump, try decreasing the suction level by pressing the Vacuum Adjusting Button down Your satisfaction is our highest priority.
-
Page 24: Technical Data
Technical Data Power Requirements: • AC/DC Adapter (included) North American Plug Configuration: Brand: Acute Ideas Manufacturer: GangQi Electronic Co., Ltd. Model: GQ05-050100, 100V~240V AC, 50/60 Hz, 0.3A, Max plug type AC/DC Adapter with DC 5V/1.0A output. Technical Specifications: • VACUUM: Swift Expression: -9~-24kpa (-68~-180mmHg) Natural Expression: -13~-35kpa (-98~-263mmHg) • Ambient Temperature range: +10°C to 40°C (50°F to 104°F) -
Page 25: Warranty
TO A PERIOD OF 120 DAYS FROM THE DATE OF PURCHASE BY THE ORIGINAL PURCHASER. In the event that this product is found by Rumble Tuff to not meet the above limited warranty standard, as the purchaser's sole and exclusive remedy, Rumble Tuff will repair, or, at the discretion of Rumble Tuff, replace this product without charge for such replacement parts or labor. - Page 26 865 N 1430 W Orem UT 84057-6402 Tel: (801) 609-8168 Fax: (801) 796-2688 www.rumbletuff.com 75-PA208SU-RT00 Ver : A1702...
Need help?
Do you have a question about the Whisper and is the answer not in the manual?
Questions and answers