Table of Contents
Advertisement
AdvancedBionics.com
Advanced Bionics AG
Laubisrütistrasse 28
8712 Stäfa, Switzerland
+41.58.928.78.00
Manufactured by:
Advanced Bionics, LLC
California, U.S.A.
+1.661.362.1400
Naída CI Sound Processor
user guide
029-M303-85 Rev A
English, French, Spanish, German, Dutch, Portuguese
2013
©2013 Advanced Bionics AG and affiliates. All rights reserved.
Advertisement
Table of Contents
Troubleshooting

Related Manuals for Advanced Bionics Nadia CIQ70


Summary of Contents for Advanced Bionics Nadia CIQ70
- Page 1 Advanced Bionics AG Laubisrütistrasse 28 8712 Stäfa, Switzerland +41.58.928.78.00 Manufactured by: Advanced Bionics, LLC California, U.S.A. +1.661.362.1400 Naída CI Sound Processor user guide 029-M303-85 Rev A English, French, Spanish, German, Dutch, Portuguese 2013 ©2013 Advanced Bionics AG and affiliates. All rights reserved.
- Page 2 user guide for the Naída CI Sound Processor...
- Page 3 Labeling Labeling symbols and their meanings: European Community Mark of Conformity. Authorized to affix the CE Mark in 2013 Model number Date of manufacture Serial number Manufacturer Type of Protection: B Store at temperatures between -20˚C (-4˚F) and +55˚C (131˚F) Fragile Do not get wet See Instructions for Use...
- Page 4 Do not use any power supply with the sound processor, AB myPilot remote • control or ComPilot unless it is supplied by Advanced Bionics or Phonak. If needed, contact Advanced Bionics for a power supply replacement. Do not use the AB myPilot or the ComPilot when they are plugged in to power •...
-
Page 5: Naída Ci Sound Processor User Guide
If the sound processor or accessories become unusually hot or warm, discontinue • use immediately and contact Advanced Bionics or a clinician. Store additional headpieces away from items with magnetic strips (e.g. credit •... - Page 6 while stimulating the implant. Doing so could cause the implant and sound processor to lose lock. If this happens, power down the processor and power back on (by disengaging the battery and reattaching). The digitally-coded, inductive transmission technology used in this device is •...
- Page 7 Remove cochlear implant equipment prior to removing clothing that may contain electric • charge (e.g. sweaters). Do not touch TV or computer screens. If screens are touched, be sure to touch an object • other than your implant system to discharge any charge build-up prior to touching any part of your implant system.
-
Page 8: Table Of Contents
Table of Contents Introduction ..........................10 Purpose of this Guide ........................10 About the Naída CI Sound Processor ................10-11 The Naída CI Sound Processor ..................11 The Naída CI Sound Processor and Accessories Overview ......12-14 The Naída CI ............................12 The Universal Headpiece ......................13 AB myPilot ............................ - Page 9 Removing the Battery ........................23 Replacing the Battery ........................24 Understanding Naída CI LEDs ...................25-26 Understanding Internal Alarms ....................26 Using Naída CI Headpieces ..................26-28 The Universal Headpiece ......................26 Replacing the RF Cables ......................26-27 Adjusting Headpiece Magnet Strength .................27-28 Removing Headpiece Color Caps ....................
- Page 10 ComPilot ..............................48 Naída CI Listening Check and Listening Check Earbuds........48-49 Audio Accessories ..........................49 Color Customization ........................49 Naída CI Carrying Case ........................ 50 Zephyr by Dry and Store® ......................50 IP Rating Information ......................51 Care of the Naída CI Sound Processor and Accessories ........51-53 Changing Microphone Covers ....................51-52 Recommended Naída CI Operating and Storage Temperatures ......
-
Page 11: Introduction
Advanced Bionics and Phonak for the best possible hearing experience. The Naída CI provides access to the latest sound processing innovations by Advanced Bionics, the market leader in performance. This guide will provide all of the information needed to use and care for the Naída CI and its accessories. -
Page 12: The Naída Ci Sound Processor
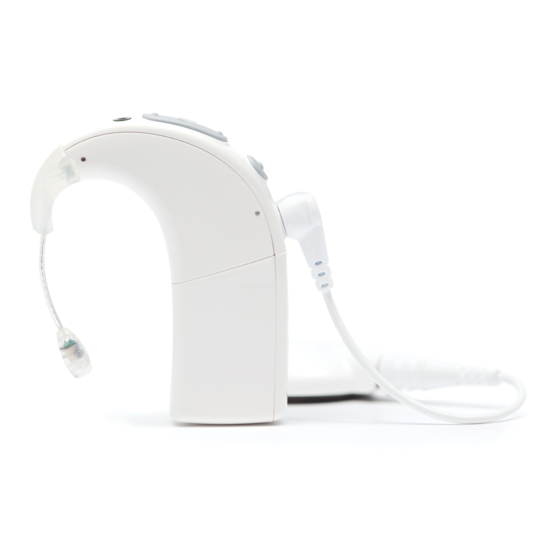
ComPilot AB myPilot LeDs Additional features include remote control access through the AB myPilot remote control and the ability to stream from the Phonak ComPilot. The Naída CI Sound Processor This section will familiarize you with the Naída CI Sound Processor and Accessories Volume Control Phonak Dual-Microphone Technology Volume Control and Tri-Colored LeDs... -
Page 13: The Naída Ci Sound Processor And Accessories Overview
The Naída CI is the newest and most advanced cochlear implant sound processor available. As evidence of Advanced Bionics’ dedication to providing the best hearing possible, the Naída CI provides access to AutoSound™ technology, which dynamically adapts to every listening environment, automatically adjusting volume levels to optimize hearing. -
Page 14: The Universal Headpiece
Color Cap Microphone Cable Connection Port The Universal Headpiece (UHP), works with all Advanced Bionics’ sound processors, and is intended for use with the Naída CI processor outside of water environments. Replacing Headpiece Cables For more information, refer to the section of the User Guide or the UHP and/or Cable Instructions for Use. -
Page 15: Compilot
ComPilot The ComPilot allows unparalleled connectivity for Naída CI recipients, connecting them wirelessly to Bluetooth® enabled phones and devices or MP3 players for speech or stereo music. It is also compatible with Phonak’s portfolio of FM receivers via a euro socket. Additionally, when unpaired, the ComPilot is able to stream to compatible Phonak instruments. -
Page 16: Performance Technology
Performance Technology Naída CI allows users access to Phonak’s Binaural VoiceStream Technology including UltraZoom, DuoPhone, QuickSync, and ZoomControl. These programmable features are set by your implant professional in the SoundWave fitting software. UltraZoom Zooms in on the voices of people facing you, while noise from the side and back is reduced. -
Page 17: Connecting The Universal Headpiece (Uhp) Color Caps
Connecting the Universal Headpiece (UHP) Color Caps Small Parts Hazard: The processor, UHP Color Caps, magnets, and WARNING: spacers may cause choking if swallowed. Attaching the UHP Color Cap Align the Color Cap with the headpiece. Gently press the cap and headpiece together. The Color Cap will snap into place. -
Page 18: Removing The Headpiece From The Naída Ci
Removing the Headpiece from the Naída CI Hold the cable’s connector (the right-angled Gently pull the cable’s connector away plastic plug, not the wire). from the Naída CI. Connecting the T-Mic 2/earhook Beginning with either the earhook or Using the provided T-Mic 2/Earhook tool, T-Mic 2 disconnected, align the T-Mic 2 place one of the pins in the small hole on or earhook flush with the processor. -
Page 19: Removing The T-Mic 2/Earhook
Pull the tool away from the processor, leaving the pin inside the Naída CI. Removing the T-Mic 2/earhook Remove the power source. Align the Gently press the tool in the hole, pushing pointed end of the T-Mic 2/Earhook the pin out the other side. tool with the hole on the processor that contains the pin holding the T-Mic 2/ Earhook on the Naída CI processor. -
Page 20: Attaching The T-Mic 2 Cover
Attaching the T-Mic 2 Cover Hold the T-Mic 2 Cover in one hand. In Gently turn the T-Mic 2 Cover clockwise the other hand, hold the T-Mic 2 at the into the T-Mic 2 Cover. Screw until the end that houses the microphone. Align parts meet together flush. -
Page 21: Wearing The Naída Ci
*enlarged view Continue turning until the T-Mic 2 Cover separates from the T-Mic 2. Discard used T-Mic 2 Covers. It is recommended to use the T-Mic 2 only when the T-Mic 2 cover is CAUTION: properly seated. The T-Mic 2 cover should be replaced every 3-4 months or if plugged by earwax. -
Page 22: Inserting The Naída Ci In The Clip
The Naída CI Clip comes in left and right configurations to provide improved wearing flexibility and the ability to wear the processor in a secure, completely off-the-ear style. This need is particularly great for small children and many physically active CI users. The Naída CI Clip is intended to attach directly to clothing, hair or in the preferred wearing location. -
Page 23: Removing The Naída Ci From The Clip
Depress the spring end of the clip to open and secure the sound processor to the desired location on clothing or in hair. Removing the Naída CI from the Clip Carefully remove the Naída CI, leading To disengage the Naída CI processor with the internal earhook portion. -
Page 24: Removing The Battery
The processor is turned ‘on’ when a charged battery is attached to the processor. In order to power ‘off’ the processor, the battery cartridge must be removed. When the battery is engaged the orange LED located in the middle of the volume control will flash to indicate battery charge followed by the green LED to indicate program position. -
Page 25: Replacing The Battery
Replacing the Battery Hold the Naída CI in one hand. Rotate Align the battery cartridge connector the RF cable upward to avoid bumping it with the processor housing side of upon battery placement. the connector. Slide the battery onto the processor until it clicks into place. -
Page 26: Understanding Naída Ci Leds
Understanding Naída CI LeDs The Naída CI LEDs are a programmable feature providing visual information about the Naída CI status, battery life, program position, and error conditions. Naída CI Sound Processor LED Indications Color Behavior Programmable Indication Orange No. Battery indicator is Blinks at start-up 4 quick blinks indicate that the •... -
Page 27: Understanding Internal Alarms
If the user would like to know the battery status of the Zn-Air Battery Pak they are currently using and have an AB myPilot paired to their device, they can conduct a Battery Check readout of the Naída CI. To ensure an accurate reading of the Zn-Air Battery Pak, wait at least 15 minutes after it has been attached to the Naída CI before performing a Battery Check readout. -
Page 28: Adjusting Headpiece Magnet Strength
If it appears damaged, replace it with a new cable. To attach the cable to the headpiece: Hold the headpiece in one hand and the Push the cable connector firmly into the cable connector in the other hand. headpiece connector. To attach the cable to the sound processor: Hold the sound processor in one hand and Push the cable connector firmly into the... -
Page 29: Removing Headpiece Color Caps
CI sound processor. A Color Cap must be in place at all times when using the headpiece. Color Caps can be replaced to change the look and style of the headpiece. To remove the headpiece Color Cap, only use the tool provided by Advanced Bionics. See the Color Cap or... -
Page 30: Changing Volume
The Program Button also allows the user to enter or exit Standby Mode. Standby Mode is a low power state the Naída CI can enter to save power without having to be turned off. Standby mode allows the PowerCel or Zn-Air Battery Pak to remain attached to the processor without causing a major drain on battery life. -
Page 31: Changing Sensitivity
To change volume: Pressing briefly on the bottom Pressing briefly on the top portion of the portion of the volume control will volume control will increase the volume. decrease the volume. The volume range available within a program can be changed or disabled by a hearing care professional in the SoundWave™... - Page 32 ComPilot MLxi The second method to access FM is by having a hearing care professional activate the telecoil in the FM program. The telecoil, used in conjunction with a looped room or the Phonak MyLink, will allow the recipient to hear the speaker without the use of connecting wires. Please see ComPilot User Guide or AB addendum for ComPilot for more information.
- Page 33 To attach an FM Receiver to the ComPilot: With the ComPilot turned off, hold the Firmly press the FM receiver into ComPilot in one hand. With the other hand, place on the ComPilot. align the three FM connector pins with the Europort on the ComPilot.
-
Page 34: Pairing To The Ab Mypilot
Pairing to the AB myPilot In order for the AB myPilot to control the Naída CI(s), it must be paired to the processor/s. The AB myPilot may be un-paired and paired to multiple Naída CI processors. This allows one AB myPilot to be used with all Naída CI recipients in a classroom. - Page 35 From this menu press the downward When the Naída CI is found, it will arrow button to highlight the Scan for show the recipient’s initials on the AB Devices option. myPilot, as well as the ear it is primarily programmed for. There will be a green circle with a checkmark in it to show that it is paired.
- Page 36 The screen will tell you which devices are paired by showing a green circle with a checkmark in it beside the recipient’s initials. Move to highlight the device you would like to un-pair using the downward arrow. Press the center button once you have highlighted the device. The green circle with the checkmark will disappear, and the device will be un-paired and will no longer be controlled by the AB myPilot remote.
-
Page 37: The Naída Ci Listening Check And Listening Check Earbuds
The Naída CI Listening Check and Listening Check earbuds Listening to the Microphone(s) and Auxiliary Inputs A convenient test mode is built in to all Naída CI processors to enable individuals with unaided hearing to listen to sound sources. With the AB myPilot Remote Control, all sound sources can be listened to independently. - Page 38 Insert the AB logo portion into the other Connect the top of the Naída CI portion of the Naída CI Listening Check. Listening Check Module to the processor You should feel the two portions snap into place. Once in place, the processor and PowerCel connectors will be exposed.
- Page 39 the FM transmitter to assess audio quality. If you select Wireless, you will be listening to whatever audio source is being streamed through the ComPilot (i.e. Bluetooth device, FM, battery-operated device, etc.). To begin the process, have the ComPilot turned on and the desired source streaming. It is a good idea to turn the volume down on any device that is directly connected to the ComPilot.
-
Page 40: Using The Telephone
Push them together until they snap into place. The Naída CI Listening Check requires a charged power source to function NOTe: correctly. If the power source being used to conduct the listening check has been depleted to an inadequate charge level, the user will not be able to complete the task. If the user attaches a discharged rechargeable PowerCel, AAA PowerPak or Off-the-Ear Power Option, a solid red LED will light up on the Naída CI. -
Page 41: Telephone Tips
is heard in both ears. Use a patch cable. A patch cable may be used to connect directly to a cellular or cordless • phone. The patch cable connects to the headset jack of the phone on one end and the auxiliary jack of the ComPilot on the other. -
Page 42: Battery Information
Telecoils are known to be susceptible to magnetic noise generated by CAUTION: most industrial lighting fixtures, store and airport security scanners, band scanners, power transformers, motor starters, and monitor screens. Battery Information 170 mAh Li-Ion Zn-Air Zn-Air (Tamperproof Cartridge) 110 mAh Li-Ion 230 mAh Li-Ion The Naída CI sound processor can be used with two disposable Zn-Air batteries, three sizes of rechargeable Lithium Ion PowerCels, the AAA PowerPak, or the PowerCel Adapter. -
Page 43: Assembling The Powercel Charger
Only use the charger provided for charging AB PowerCels. Do not use it CAUTION: to charge other batteries. Do not try to charge Naída CI PowerCels using a charger other than that provided by Advanced Bionics. Power Supply Adapters Battery Charger Power Supply The charging system consists of the charger, power supply, and power supply adapters. -
Page 44: Inserting The Powercels Into The Charger
The PowerCels do not need to be fully depleted before recharging. It is recommended that you use and recharge the PowerCel(s) at least once every three months. Please note that PowerCels will decrease in capacity with age, even if not in use. This is normal for all rechargeable batteries and should not be considered a defect. -
Page 45: The Zn-Air Battery Pak
The Zn-Air Battery Pak The Naída CI uses size 675 Power Implant disposable batteries (675P). Regular size 675 hearing instrument batteries will not be powerful enough for a cochlear implant. Inserting Zn-Air Batteries Holding the Zn-Air Battery Pak in one hand, Pull the battery drawer out of the gently but firmly push down on the lever on cartridge with the other hand. -
Page 46: Inserting Zn-Air Batteries (Tamperproof Cartridge)
Attach the battery cartridge to the Naída CI following the same instructions as attaching the Replacing the Battery. PowerCels to the Naída CI in the section Inserting Zn-Air Batteries (Tamperproof Cartridge) Use the same tool provided for T-Mic 2/ With the tool inserted in the hole, gently Earhook removal and replacement—Insert push in and downward until you feel the pointed end of the tool into the small... -
Page 47: Charger Led (Light Emitting Diode) Indicator
PowerCel. If there is a problem with either the PowerCel or the charger, please contact Advanced Bionics. The charger LED turns off (or may show a faint blue if the room is very dark to indicate either the battery is fully charged or there is a fault with the battery. -
Page 48: Warnings
User Guide. Using Naída CI Accessories Advanced Bionics supplies a range of accessories for use with the Naída CI, although not all accessories may be included in the sound processor kit. Discuss with the recipient’s hearing care professional which accessories are included with the Naída CI sound processor. -
Page 49: Headpieces
Headpieces The Naída CI sound processor is designed for use with the Universal Headpiece (UHP). Universal Headpiece (UHP) The UHP is intended to be used with the Naída CI during daily activities outside of water environments. ComPilot ComPilot MLxi When used with the ComPilot, the Naída CI is compatible with the Phonak MLxi wireless FM Using receiver. -
Page 50: Audio Accessories
The Naída CI has a convenient monitor mode, accessed by using the Naída CI Listening Check and Listening Check Earbuds. This mode enables someone with unaided hearing to listen to the Naída CI input sound sources. For instructions on how to listen to inputs using the Naída Listening to the Microphone(s) CI Listening Check and Listening Check Earphones, refer to the and Auxiliary Inputs... -
Page 51: Naída Ci Carrying Case
Naída CI Carrying Case Naída CI Carrying Case A carrying case is provided with the Naída CI for use when traveling or for storage when the sound processor and accessories are not in use. If the Naída CI is exposed to moisture or high levels of humidity, store components overnight in the Zephyr by Dry &... -
Page 52: Ip Rating Information
The Naída CI has a microphone filter located over the rear microphone to prevent dust and debris from damaging the microphone. Advanced Bionics recommends changing the microphone cover on the Naída CI every three months, or earlier if there is a notice in the degradation of sound quality. - Page 53 Carefully pull the tool out of the opening. The microphone cover should come out with the tool. The cover can be removed from the tool and then disposed of. Replacing the Microphone Cover With the microphone cover on the end Grasping the tool in one hand, use the blunt, of the tool, hold the Naída CI in the non-threaded end to put a new microphone...
-
Page 54: Recommended Naída Ci Operating And Storage Temperatures
-20°C (-4°F) 55°C (131°F) Approved Power Sources Advanced Bionics has verified the Naída CI to function with the power sources listed below; behavior when using power sources other than those listed here cannot be guaranteed. Approved Naída CI Power Sources... - Page 55 Replace the cable. Replace the headpiece. If these measures do not resolve the problem, contact a hearing care professional or Advanced Bionics immediately for further assistance. If no sound is heard or a solid red LED is indicated on the Naída CI processor LED, try the following troubleshooting steps: Remove the battery cartridge.
-
Page 56: Troubleshooting Naída Ci Leds
Verify that a charged PowerCel or two fully charged Zn-Air batteries are in place. Verify that the PowerCel is seated properly or the Zn-Air batteries are inserted correctly. If the problem continues, contact a hearing care professional or Advanced Bionics for further assistance. - Page 57 LED, replace the T-Mic 2. If the processor microphones do not show a blinking green LED with audio input, contact a hearing care professional or Advanced Bionics. During battery status check, no blink or only one orange blink is observed:...
-
Page 58: Troubleshooting Naída Ci Internal Alarms
If there are no blinks after the PowerCel replacement, clean the contacts with a hearing aid brush or dry cotton swab. If the problem continues, contact a hearing care professional or Advanced Bionics for further assistance. If the LED behaves differently following processor replacement or programming: Verify with the recipient’s implant hearing care professional whether any program changes... -
Page 59: Guidance And Manufacturer's Declaration
Guidance and Manufacturer’s Declaration Per IEC 60601-1-2 electromagnetic emissions The Naída CI is intended for use in the electromagnetic environment specified below. The customer or the user of the Naída CI should ensure that it is used in such an environment. emissions Test Compliance electromagnetic environment-Guidance... -
Page 60: Separation Distances Between Rf Communications Equipment And Naída Ci
These guidelines may not apply in all situations. Electromagnetic propagation NOTe: is affected by absorption and reflection from structures, objects and people. a Essential performance of the Naída CI per IEC 60601 requirements is defined as auditory stimulation within safe amplitudes. b Field strengths from fixed transmitters, such as base stations for radio (cellular/cordless) telephones and land mobile radios, amateur radio, AM and FM radio broadcast and TV broadcast cannot be predicted theoretically with accuracy. -
Page 61: Compatibility Tables
Compatibility Tables Implant Type HiRes 90K HiRes 90K Advantage Naída CI ✓ ✓ ✓ Neptune ✓ ✓ ✓ Harmony ✓ ✓ ✓ ✓ Auria ✓ ✓ ✓ Platinum Sound ✓ ✓ ✓ ✓ Processor (PSP) 1 Requires SoundWave 2.1 or later 2 Requires SoundWave 2.0 or later 3 Requires SoundWave 1.4 or later 4 Requires SClin2000 and CPI-11... -
Page 62: Cleaning & Maintenance
Servicing or modification of the Naída CI or its accessories by any entity other than • Advanced Bionics is not permitted and will void the manufacturer’s warranty. Performance Data The HiRes 90K Advantage implant with the HiFocus Electrode and Naída CI processor support the HiResolution family of sound processing strategies including HiRes, HiRes with Fidelity 120 (HiRes 120), and ClearVoice. -
Page 63: Contact Us
AdvancedBionics.com Advanced Bionics, IntelliLink, AutoSound, SoundWave, HiRes, HiRes Fidelity 120, HiRes Optima, CIS, MPS, ClearVoice, and Built Kid Tough are trademarks of Advanced Bionics in the United States of America and other countries. Dry & Store® is a registered trademark of Ear Technology Corporation VELCRO®...
Need help?
Do you have a question about the Nadia CIQ70 and is the answer not in the manual?
Questions and answers