Advanced Bionics Naida CI T-Mic 2 Instructions For Use Manual
Hide thumbs
Also See for Naida CI T-Mic 2:
- Instructions for use manual (88 pages) ,
- Instructions for use manual (84 pages)
Advertisement
Available languages
Available languages
Quick Links
Advanced Bionics AG
Laubisrütistrasse 28
8712 Stäfa, Switzerland
+41 58 928 78 00
Manufactured by:
Advanced Bionics LLC
California, U.S.A.
+1 661 362 1400
AdvancedBionics.com
029-M516-89
029-M516-89 Rev A
© 2015 Advanced Bionics AG. All Rights Reserved.
2013
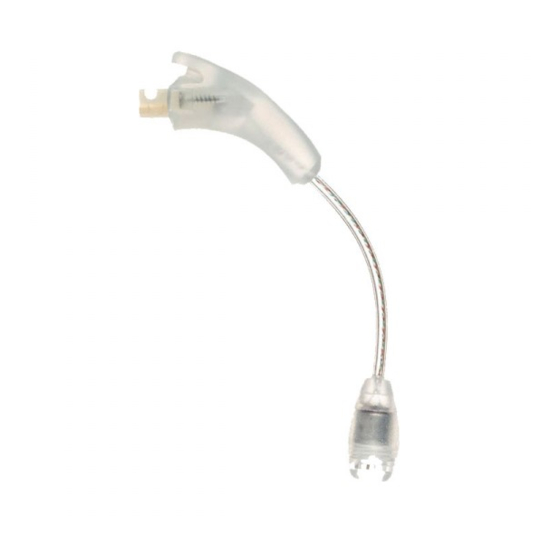
T-MIC 2
and EARHOOK
CI-5835
CI-5710
instructions for use
English, Français, Deutsch,
, Italiano
Advertisement

Related Manuals for Advanced Bionics Naida CI T-Mic 2


Summary of Contents for Advanced Bionics Naida CI T-Mic 2
- Page 1 +41 58 928 78 00 CI-5710 Manufactured by: Advanced Bionics LLC California, U.S.A. +1 661 362 1400 AdvancedBionics.com 029-M516-89 instructions for use 029-M516-89 Rev A 2013 © 2015 Advanced Bionics AG. All Rights Reserved. English, Français, Deutsch, , Italiano...
- Page 2 Labeling symbols and their meanings: European Community Mark of Conformity. Authorized to affix CE Marking in 2013 Model Date of number manufacture Serial Manufacturer Number Type of Store at temperatures Protection: B between -20˚C (-4˚F) and +55˚C (131˚F) Fragile Do not get wet Lot Number See Instructions for Use...
- Page 3 Warnings • CHOKING HAZARD –The Naída CI contains small parts that pose a hazard of inhalation or choking • It is recommended to use the T-Mic 2 only when the T-Mic 2 Cover is properly seated. Naída CI T-Mic 2 Microphone and Earhook The Naída CI T-Mic 2 and earhook are intended for use with the Naída CI sound processor.
- Page 4 Using the provided T-Mic 2 or earhook tool, place one of the pins in the small hole on the side of the tool. This will help to steady the pin as you line it up with the pin hole on the T-Mic 2 or earhook.
- Page 5 If a small portion of the pin extends beyond the processor, use the side of the tool to push the pin inwards so it lies flush with the processor. Pull the tool away from the processor, leaving the pin inside the Naída CI.
- Page 6 Removing the T-Mic 2 or Earhook Remove the power source. Align the pointed end of the 2 tool with the hole on the processor that contains the pin holding the T-Mic 2 or earhook on the Naída CI. Gently press the tool in the hole, pushing the pin out the other side.
- Page 7 The pin does not need to be removed from the processor. As long as the tool was pushed in flush on one side of the processor, the pin should be displaced enough to adequately remove the T-Mic 2 or earhook. Remove the tool from the Naída CI.
- Page 8 Attaching the T-Mic 2 Cover* Hold the T-Mic 2 Cover. In the other hand, hold the T-Mic 2 at the end that houses the microphone. Align the bot- tom of the T-Mic 2 over the T-Mic 2 Cover. Gently turn the T-Mic 2 into the T-Mic 2 Cover. Screw until they meet together flush.
- Page 9 Once you feel resistance, stop turning. Removing the T-Mic 2 Cover Grasp the end of the T-Mic 2 where the T-Mic 2 Cover is located, in one hand. Firmly hold the T-Mic 2 microphone portion in the other hand. Note: The T-Mic 2 Cover should be replaced at regular intervals to maintain sound quality.
- Page 10 Continue turning until the T-Mic 2 Cover separates from the T-Mic 2. NOTE: Do not attempt to service or modify the Naida CI or its accessories. Doing so may compromise system performance and will void the manufacturer’s warranty. Products should be serviced only at Advanced Bionics.
- Page 11 Recommended Operating and Storage Temperature Ranges Condition Minimum Maximum Operating Temperature 0°C (32°F) 45°C (115°F) Storage Temperature -20°C (-4°F) 55°C (131°F) Naída CI External Equipment and Accessories The products listed below are compatible Description Model Number Naída CI CI-5280-120, CI-5280-130, CI-5280-140, CI-5280-150, CI-5280-160, CI-5280-170, Q90 Sound Processor*...
- Page 12 Contact Advanced Bionics for more information. NOTE: model number extensions denote variants related to product color, size, and/or length.
- Page 14 Symboles d'étiquetage et leur signification : Marquage de conformité de la Communauté Européenne. Autorisé à apposer le marquage CE en 2013 Numéro Date de fabrication de modèle Numéro Fabricant de série Type de À stocker à une protection : B température comprise entre -20 ˚C (-4 ˚F) et +55 ˚C (131 ˚F)
- Page 15 Avertissements • RISQUE D'ÉTOUFFEMENT : le Naída CI contient des pièces de petite taille pouvant être inhalées et qui constituent un risque d'étouffement. • Nous vous recommandons d'utiliser uniquement le T-Mic 2 lorsque le cache du T-Mic 2 est correctement placé. Coude T-Mic 2 et coude standard Le coude T-Mic 2 et le coude standard pour Naída CI sont prévus pour être utilisés avec le processeur de son Naída CI.
- Page 16 À l'aide de l'outil pour T-Mic 2 ou du coude standard fourni, placez l'un des axes dans le trou de petite taille situé sur le côté de l'outil. Cela permet de stabiliser l'axe lorsque vous l'alignez avec le trou situé sur le T-Mic 2 ou le coude standard.
- Page 17 Si une petite partie de l'axe dépasse du processeur, utilisez le côté de l'outil pour pousser l'axe vers l'intérieur, afin de l'aligner avec le processeur. Retirez l'outil du processeur en laissant l'axe à l'intérieur du Naída Cl.
- Page 18 Retrait du T-Mic 2 ou du coude standard Débranchez la source d’alimentation. Alignez l'extrémité pointue de l'outil 2 avec le trou du processeur contenant l'axe qui maintient le T-Mic 2 ou le coude standard sur le Naída CI. Appuyez doucement l'outil dans le trou, tout en poussant l'axe de l'autre côté.
- Page 19 Il n'est pas nécessaire de retirer l'axe du processeur. Tant que l'outil est aligné avec un côté du processeur, l'axe devrait être suffisamment déplacé pour pouvoir retirer le T-Mic 2 ou le coude standard. Retirez l'outil du Naída CI. Tenez doucement le T-Mic 2 ou le coude standard vers le haut, près de la zone de contact avec le processeur et poussez vers l'avant, afin de le séparer du processeur.
- Page 20 Fixation du cache du T-Mic 2* Tenez fermement le cache du T-Mic 2. De l'autre main, tenez le T-Mic 2 depuis l'extrémité abritant le microphone. Alignez le bas du T-Mic 2 et le cache du T-Mic 2. Faites tourner doucement le T-Mic 2 dans le cache du T-Mic 2.
- Page 21 Dès que vous sentez une résistance, cessez de tourner. Retrait du cache du T-Mic 2 Tenez l'extrémité du T-Mic 2, là où se situe le cache T-Mic 2, d'une main. Maintenez fermement la partie microphone du T-Mic 2 de l'autre. Remarque : le cache T-Mic 2 doit être remplacé...
- Page 22 REMARQUE : ne tentez pas de réparer ou de modifier le processeur de son Naída CI ou ses accessoires. Cela pourrait compromettre les performances du système et rendrait la garantie du fabricant caduque. Les produits ne doivent être réparés que par Advanced Bionics.
- Page 23 Plages de température de fonctionnement et de stockage recommandées Condition Minimum Maximum Température de 0 °C (32 °F) 45 °C (115 °F) fonctionnement Température de -20 °C (-4 °F) 55 °C (131 °F) stockage Éléments externes et accessoires du Naída CI Les produits répertoriés ci-dessous sont compatibles Description Numéro de modèle...
- Page 24 Disponible uniquement sur les marchés bénéficiant † d'une approbation réglementaire et où le produit est disponible sur le marché. Contactez Advanced Bionics pour de plus amples informations. REMARQUE : les extensions des numéros de modèle peuvent varier selon la couleur, la taille et/ou la longueur...
- Page 26 Etikettensymbole und ihre Bedeutung: EU-Prüfzeichen. Anbringung des CE-Zeichens 2013 genehmigt Modell- Herstellungsdatum nummer Serien- Hersteller Nummer Schutzart: B Aufbewahrung bei Temperaturen zwischen -20˚C (-4˚F) und +55˚C (131˚F) Zerbrechlich Vor Nässe schützen Lot-Nummer Siehe Gebrauchsanweisung Geeignet für atmosphärischen Bereich zwischen 70 kPa und 106 kPa (bis 3000 m über dem Meeresspiegel und 380 m unter dem Meeresspiegel).
- Page 27 Warnhinweise • ERSTICKUNGSGEFAHR – Das Naída CI enthält Kleinteile, die eine Erstickungsgefahr darstellen, wenn sie verschluckt oder inhaliert werden. • Das T-Mic 2 sollte nur verwendet werden, wenn die T-Mic 2 Schutzkappe ordnungsgemäß aufgesetzt ist. Naída CI T-Mic 2 Mikrofon und Ohrbügel Das Naída CI T-Mic 2 und der Ohrbügel sind zur Verwendung mit dem Naída CI Soundprozessor vorgesehen.
- Page 28 Führen Sie nun mit dem Werkzeug für das T-Mic 2 bzw. den Ohrbügel einen der Stifte in das kleine seitliche Loch des Werkzeugs ein. Dadurch halten Sie den Stift stabil, während Sie ihn in das entsprechende Stiftloch des T-Mic 2 oder Ohrbügels einführen. Führen Sie den Stift vorsichtig in das Loch des T-Mic 2 oder Ohrbügels ein.
- Page 29 Wenn der Stift leicht aus dem Prozessor hervortritt, verwenden Sie die Außenseite des Werkzeugs, um den Stift wieder zurückzudrücken, so dass er wieder bündig zum Prozessor liegt. Legen Sie nun das Werkzeug weg und belassen den Stift im Naída CI.
- Page 30 T-Mic 2 oder Ohrbügel entfernen Entfernen Sie den Akku oder den Batterieeinsatz. Stecken Sie die Spitze des Werkzeugs in das Prozessorloch mit dem Stift, der das T-Mic 2 oder den Ohrbügel mit dem Naída CI verbindet. Schieben Sie nun das Werkzeug vorsichtig vor, bis der Stift auf der gegenüberliegenden Seite hervortritt.
- Page 31 Der Stift muss nicht vollständig entfernt werden. Wenn der Stift an einem Ende bündig zur Kante des Prozessormoduls liegt, kann das T-Mic 2 oder der Ohrbügel bereits entfernt werden. Ziehen Sie das Werkzeug aus dem Naída CI heraus. Fassen Sie nun mit Daumen und Zeigefinger das T-Mic 2 oder den Ohrbügel an der Kopfseite (an der Verbindung zum Prozessor) und ziehen Sie es/ihn vorsichtig ab.
- Page 32 Die T-Mic 2 Schutzkappe aufsetzen* Nehmen Sie die T-Mic 2 Schutzkappe zwischen Daumen und Zeigefinger der einen Hand. Halten Sie mit der anderen Hand das T-Mic 2 an dem Ende, an dem das Mikrofon angebracht ist. Setzen Sie die Schutzkappe auf das T-Mic 2 auf. Schrauben Sie nun vorsichtig die Schutzkappe auf das T-Mic 2 bis zum Anschlag auf.
- Page 33 Wenn Sie einen Widerstand verspüren, hören Sie auf zu schrauben. Die T-Mic 2 Schutzkappe entfernen Fassen Sie mit einer Hand die Schutzkappe des T-Mic 2 und halten Sie mit der anderen Hand das T-Mic 2 Mikrofon. Hinweis: Die T-Mic 2-Schutzkappe sollte in regelmäßigen Abständen überprüft werden, um die Klangqualität sicherzustellen.
- Page 34 T-Mic 2 abnehmen lässt. HINWEIS: Versuchen Sie nicht, das Naída CI oder sein Zubehör selbst zu reparieren oder zu modifizieren. Dadurch können Sie das System beschädigen und die Herstellergarantie erlischt. Jegliche Reparaturleistung darf nur von Advanced Bionics durchgeführt werden.
- Page 35 Konkaver CI-5307 UHP* T-Mic 2 CI-5835-100, CI-5835-200, CI-5835-300 Mikrofon* Ohrbügel* CI-5710-100, CI-5710-200 *Anwendungsteil gemäß IEC 60601-1 Nur in Ländern erhältlich, in denen sie zugelassen sind † und im Handel angeboten werden. Wenden Sie sich für weitere Informationen an Advanced Bionics.
- Page 36 HINWEIS: In den Modellnummern stehen die Erweiterungen jeweils für die Farbe, Größe und/oder die Länge des Produkts.
- Page 38 :סמלים על תוויות והמשמעויות שלהם סימן תאימות של האיחוד האירופי. אישור לשימוש 2013 בשנתCE בסימן תאריך ייצור מספר דגם יצרן מספר סידורי טמפרטורת אחסון בין B :סוג הגנה +55˚C -˚02- וC אין להרטיב שביר ראו הוראות שימוש מספר מנה ,106kPa-07 לkPa מתאים...
- Page 39 אזהרות מכיל חלקים קטנים שעלולים להיותNaída CI - סכנת חנק .מסוכנים במקרה של שאיפה או חנק T-Mic 2 רק כאשר כיסויT-Mic 2-מומלץ להשתמש ב .מחובר כהלכה Naída CI עבורT-Mic 2 מיקרופון וזווית מיועדים לשימושNaída CI עבורT-Mic 2 מיקרופון וזווית ...
- Page 40 או לזווית, הכניסו אחדT-Mic 2-תוך שימוש בכלי המצורף ל מהפינים לחור הקטן בצד הכלי. פעולה זו תעזור לכם לייצב . או בזוויתT-Mic 2-את הפין מול החור המתאים ב או בזווית ודחפוT-Mic 2-ישרו את הפין מול החור ב אותו בעדינות דרך החור. הפין יעבור מצד אחד של ...
- Page 41 ,אם חלק קטן של הפין בולט מעבר לקצה המעבד השתמשו בצד הכלי כדי לדחוף את הפין פנימה כך .שלא יבלוט מהמעבד הרחיקו את הכלי מהמעבד, תוך שאתם משאירים .Naída CI-את הפין בתוך ה...
- Page 42 או הזוויתT-Mic 2-הסרת ה הסירו את מקור המתח. ישרו את הקצה המחודד של הכלי מול החור במעבד שמכיל את הפין שמקבע את .Naída CI- או הזווית אל הT-Mic 2-ה לחצו בעדינות את הכלי לתוך החור, ודחפו את הפין .החוצה מהצד השני...
- Page 43 אין צורך להסיר את הפין מהמעבד. אם הכלי נלחץ עד שהיה צמוד בצד אחד של המעבד, יש להזיז את הפין . או הזוויתT-Mic 2-מספיק כדי להסיר בהצלחה את ה T-Mic 2-. אחזו בעדינות בNaída CI-הסירו את הכלי מה או בזווית בחלק העליון היכן שהוא מתחבר למעבד, ומשכו .קדימה...
- Page 44 *T-Mic 2 חיבור הכיסוי של . ביד השנייה, אחזו אתT-Mic 2 אחזו בכיסוי של בקצה שבו נמצא המיקרופון. ישרו אתT-Mic 2-ה מעל הכיסויT-Mic 2-החלק התחתון של ה .T-Mic 2 של .T-Mic 2 לתוך הכיסוי שלT-Mic 2-סובבו בעדינות את ה .הבריגו...
- Page 45 .כאשר אתם מרגישים בהתנגדות, הפסיקו לסובב T-Mic 2 הסרת הכיסוי של ,T-Mic 2 שעליו ממוקם כיסויT-Mic 2-אחזו בקצה של ה T-Mic 2 ביד אחת. אחזו בחוזקה את חלק המיקרופון של .ביד השנייה באופן סדיר כדיT-Mic 2 הערה: יש להחליף את הכיסוי של .לשמור...
- Page 46 .T-Mic 2- מהT-Mic 2 בעדינות את ההברגה של כיסוי .T-Mic 2- נפרד מהT-Mic 2 המשיכו לסובב עד שהכיסוי של או באביזרים שלו או לשנותNaída CI-הערה: אין לנסות לטפל ב אותם. הדבר עלול לפגוע בביצועי המערכת ויגרום לתפוגת אחריות .Advanced Bionics-היצרן. שירות למוצרים יתבצע רק ב...
- Page 47 טווחי טמפרטורה מומלצים להפעלה ולאחסון מקסימום מינימום מצב 45°C 0°C טמפרטורת פעולה 55°C -20°C טמפרטורת אחסון Naída CI ציוד חיצוני ואביזרים של המוצרים המפורטים להלן תואמים מספר דגם תיאור מעבד צלילים ,CI-5280-140 ,CI-5280-130 ,CI-5280-120 Naída CI ,CI-5280-170 ,CI-5280-160 ,CI-5280-150 *Q90 †...
- Page 48 זמין רק בשווקים שבהם התקבל אישור רגולטורי ושבהם † Advanced Bionics המוצר זמין מסחרית. צרו קשר עם .למידע נוסף הערה: סיומות מספרי דגם מתייחסות לאפשרויות השונות .מבחינת צבע, גודל ו/או אורך המוצר...
- Page 50 Simboli delle etichette e loro significati Marchio di conformità della Comunità Europea. Autorizzazione all'affissione del Marchio CE nel 2013 Numero del Data di produzione modello Numero di Produttore serie Tipo di Conservare a protezione: B temperature comprese tra -20°C (-4˚F) e +55°C (131˚F) Fragile Mantenere asciutto...
- Page 51 Avvertenze • RISCHIO DI SOFFOCAMENTO - Il Naída CI contiene parti di piccole dimensioni che comportano il rischio di inalazione o soffocamento. • Si consiglia di usare il T-Mic 2 soltanto quando la copertura del T-Mic 2 è correttamente posizionata. Microfono T-Mic 2 e curvetta auricolare Naída CI Il microfono T-Mic 2 e la curvetta auricolare Naída CI sono destinati all'uso con il processore sonoro Naída...
- Page 52 Utilizzando l'apposito strumento fornito in dotazione, posizionare uno dei pin nel piccolo foro presente su un lato dello strumento. Ciò contribuirà a tenere fermo il pin mentre si esegue l'allineamento dello stesso con il foro presente sul T-Mic 2 o sulla curvetta. Allineare il pin con il foro presente sul T-Mic 2 o sulla curvetta e farlo passare delicatamente attraverso il foro.
- Page 53 Se una piccola parte del pin si estende oltre il processore, utilizzare il lato dello strumento per spingerlo verso l'interno in modo che si trovi a filo con il processore. Estrarre lo strumento dal processore, lasciando il pin all'interno del Naída CI.
- Page 54 Rimozione del T-Mic 2 o della curvetta auricolare Rimuovere l'alimentatore. Allineare l'estremità appuntita dello strumento 2 con il foro presente sul processore che contiene il pin che tiene fermi il T-Mic 2 o la curvetta auricolare sul Naída CI. Premere delicatamente lo strumento nel foro, spingendo il pin fuori dall'altro lato.
- Page 55 Non è necessario rimuovere il pin dal processore. Mentre si spinge lo strumento a filo su uno dei lati del processore, il pin dev'essere spostato abbastanza da consentire l'adeguata rimozione del T-Mic 2 o della curvetta auricolare. Rimuovere lo strumento dal Naída CI. Afferrare delicatamente il T-Mic 2 o la curvetta auricolare dalla parte superiore, vicino al punto in cui sono collegati al processore, e tirare in avanti finché...
- Page 56 Collegamento della copertura del T-Mic 2* Tenere la copertura del T-Mic 2 in una mano. Nell'altra mano, tenere il T-Mic 2 dall'estremità che contiene il microfono. Allineare la parte inferiore del T-Mic 2 sulla copertura del T-Mic 2. Girare delicatamente il T-Mic 2 all'interno della copertura del T-Mic 2.
- Page 57 Appena si sente resistenza, smettere di girare. Rimozione della copertura del T-Mic 2 Afferrare con una mano l'estremità del T-Mic 2 dove si trova la relativa copertura. Tenere saldamente la porzione microfono del T-Mic 2 con l'altra mano. Nota: per mantenere sempre gli stessi livelli di qualità sonora, occorre sostituire la copertura del T-Mic 2 a intervalli regolari.
- Page 58 NOTA: non cercare di riparare o modificare il Naída CI o i suoi accessori. Si rischierebbe di pregiudicare il rendi- mento del sistema e di annullare la validità della garanzia del costruttore. I prodotti devono essere riparati soltanto presso gli stabilimenti Advanced Bionics.
- Page 59 Range di temperatura raccomandati per il funzionamento e lo stoccaggio Condizione Minimo Massimo Temperatura di 0°C (32°F) 45°C (115°F) funzionamento Temperatura di -20°C (-4°F) 55°C (131°F) conservazione Accessori e apparecchi esterni Naída CI I prodotti elencati di seguito sono compatibili Descrizione Numero modello Processore...
- Page 60 è stato messo in commercio. Per ulteriori informazioni, vi preghiamo di mettervi in contatto con Advanced Bionics. NOTA: le estensioni del numero di modello indicano varianti corrispondenti a colore, grandezza e/o lunghezza...
Need help?
Do you have a question about the Naida CI T-Mic 2 and is the answer not in the manual?
Questions and answers