Table of Contents
Advertisement
Quick Links
Advertisement
Table of Contents

Related Manuals for Dream Vision Siglos 1


Summary of Contents for Dream Vision Siglos 1
- Page 1 THE ULTIMATE 3D EXPERIENCE ACTIVE GLASSES...
- Page 2 Changes Dreamvision provides this manual ‘as is’ without warranty of any kind, either expressed or implied, including but not limited to the implied warranties or merchantability and fitness for a particular purpose. Dreamvision may make improvements and/or changes to the product(s) and/or the program(s) described in this publication at any time without notice.
-
Page 3: Table Of Contents
TABLE OF CONTENTS 1.0 SAFETY INSTRUCTIONS ..................... Important Information ........................5 Regional Specific Information......................5 Important Safeguards ........................5 2.0 INSTALLATION GUIDELINES ................... Introduction ............................7 THX-3D Display Certification .......................7 Environment of Use........................8 Air-Flow and Space Requirements ....................8 Ceiling Mounting the Unit ......................8 Projection Distance.........................9 Setting the Lens and using Lens Memories..................9 3.0 ... - Page 4 10.5 Anamorphic (works with 3D signal) ....................26 10.6 High Altitude Mode ........................26 10.7 Environment Setting ........................26 11.0 DISPLAY SETUP ........................12.0 FUNCTION ..........................12.1 Trigger ............................27 12.2 Off-Timer............................27 12.3 ECO Mode ............................27 12.4 Network ............................27 12.5 Remote Code A or B ........................28 12.6 Lamp Reset ...........................28 13.0 ...
-
Page 5: Safety Instructions
SAFETY INSTRUCTIONS 1.0 SAFETY INSTRUCTIONS 1.1 Important Information Lead-free regulation This product has a High Intensity Discharge (HID) lamp that contains a small amount of mercury. It also contains lead in some components. Disposal of these materials may be regulated in your community due to environmental considerations. - Page 6 SAFETY INSTRUCTIONS HAZARD. In order not to defeat the safeguards incorporated into this product, observe the following basic rules for its installation, use and service. The power input is auto-ranging from 100 to 240 VAC. Please read these Important Safeguards carefully before use. •...
-
Page 7: Installation Guidelines
INSTALLATION GUIDELINES stoves, and other products (including amplifiers) that produce heat. • When connecting other products such as VCR’s, and personal computers, you should turn off the power of this product for protection against electric shock. • Do not place combustible behind the cooling fan. For example, cloth, paper, matches, aerosol cans or gas lighters that present special hazards when over heated. -
Page 8: Environment Of Use
INSTALLATION GUIDELINES 2.3 Environment of Use This unit makes use of a light source lamp that reaches a high temperature during projection. Do not allow projection under the following conditions: • Projection with the unit laid on sides. • Projection at a location that blocks the air inlets or exhaust vents. -
Page 9: Projection Distance
INSTALLATION GUIDELINES is not liable for any product damage caused by mounting the unit with third party ceiling mount or when the environment is not suitable for ceiling-mount. Dimensions • Distances between left and right holes is D = 337 mm. •... -
Page 10: Adjust The Picture Zoom
INSTALLATION GUIDELINES position Adjust the picture to your screen. • The Vertical Shift level is between -80% and 80% of the Screen Height (0.80 x H). • The Horizontal Shift level is between -34% and 34% of the Screen Base (0.34 x B). •... -
Page 11: Remote Control Unit (Rcu)
(MPC or Color Profile) [Hide] the current display Backlight button Confirm button [Back] to previous menu Display [Menu] Siglos 1 Selects a Picture Mode Selects a Picture Mode PHOTO Selects [3D Format] Displays [3D Setting] menu CMD Clear Motion Drive... -
Page 12: Getting Started
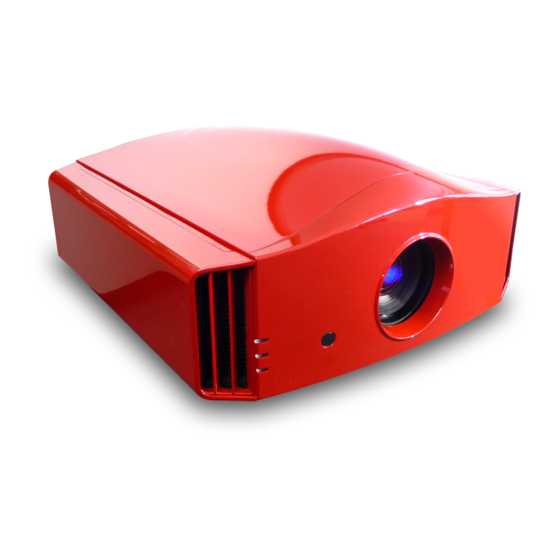
GETTING STARTED 4.0 GETTING STARTED 4.1 General View Front side Optical Lens* Air Inlets Operating LEDs Front IR receiver (*) Optical Lens: On the Siglos 2&3 models, the optical lens is protected by a motorized lens cover. Rear side Lamp trap Input Panel Navigation buttons... -
Page 13: Operating And Navigation Buttons
CONNECTIONS 4.3 Operating and Navigation Buttons Power button STANDBY/ON Input source INPUT OK button Directional keys MENU BACK Menu Back Button Description Power To turn ON or OFF the projector. Input source To switch input source between HDMI 1 and HDMI 2. OK button To select or to confirm action. -
Page 14: Connecting A Video Source To The Projector
CONNECTIONS 5.2 Connecting a Video Source to the Projector HDMI 2 HDMI 1 RF Dongle 3D syncro Emitter Audio/Video Connection Device to connect HDMI 1, HDMI 2 HDMI or DVI-D sources: Blu-ray Disc player, DVD-player equipped with HDMI (DVI compatible) output, Game Console, Computer with DVI-D output. -
Page 15: Menu Structure
MENU STRUCTURE 6.0 MENU STRUCTURE MAIN MENU SUBMENU AVAILABLE OPTIONS Picture Adjust Picture Mode (Digital Cinema) Cinema (5+4 User) (SF movies or animes) Animation (Video programs) Natural (Concerts, theatrical rep.) Stage (available only for 4K50/60p input) 4k50/60p User1 User2 User3 User4 Picture Modes (Siglos 2&3) - Page 16 MENU STRUCTURE Picture Adjust Advanced Color Profile Color Management: Off / On Color selection Axis Position -30 +30 -30 +30 Saturation -30 +30 Brightness -30 +30 Reset Confirm Color Temp. Xenon Modes (Siglos 2&3) (Film projector) Xenon1 (DCI projector) Xenon2 (Cooler than DCI) Xenon3 Preset value:...
- Page 17 MENU STRUCTURE Input Signal Color Space Auto (fixed to YCbCr(4:2:0) with YCbCr(4:4:4) 4Kp50/60 input) YCbCr(4:2:2) Control with HDMI (CEC) On, Off Aspect (Video only) if 3D, only 16:9 is available 16:9 Zoom Aspect (PC only) Auto Full Progressive (480i, 576i, 1080i) Auto, Off Mask 5%, 2.5%, Off...
-
Page 18: Picture Adjust
The preset Picture Modes are available and they can be applied to any input. A picture mode retains the picture adjustments. When adjusting the Picture Mode, you can also select pre-configured Color Profiles. Siglos 1 picture modes Video Digital Cinema... -
Page 19: Advanced Picture Mode
PICTURE ADjUST There are 12 Color profiles for 2D inputs and 7 for 3D inputs, depending on the selected picture mode, you may choose an available color profile preset: • Film1 available with Film Picture Profile, uses the Xenon filter and adjusted to Eastman Kodak film tone •... -
Page 20: Advanced Color Profile
PICTURE ADjUST All Clear: To delete all characters. OK: To save the current name, a save confirmation will appear. 7.3 Advanced Color Profile Expert Calibration is accessed only by using a programmable IR-RCU, RS-232C or LAN control. Two additional sets of Picture Modes can be activated. Each set designated as THX and ISF profiles have to be calibrated. Once done, these profiles are stored and displayed in the picture mode menu list but will not be modifiable. -
Page 21: Advanced Gamma
PICTURE ADjUST 7.7 Advanced Gamma Correction Value The Custom data can be set to: Correction Value: a unique value that will act as a gamma coefficient between 1.8 and 2.6, Normal, Brightness Priority, Contrast Priority, Gradation Priority, 1.8-2.6 or Import. Color Selection Select the color to which the Picture Tone, Dark / Bright Level settings would apply. -
Page 22: Clear Motion Drive (400Hz)
INPUT SIGNAL 7.9 Clear Motion Drive (400Hz) The Clear Motion function uses a 400Hz video processing to render a smooth and clear motion for movies shot at 24Hz or HD movies at 60Hz. Set the correct level between: • Off: Frame interpolation is disable. -
Page 23: Aspect Ratio
3D CONTENT AND 3D PROjECTION 8.4 Aspect Ratio When watching a movie or video program, you can manually set the desired aspect ratio to fill your screen. Select the correct aspect ratio depending on your source: For Video sources a) 4:3. -
Page 24: Projector 3D Settings
INSTALLATION 9.2 Projector 3D Settings 3D Formats Use this function to choose the correct 3D input format. Some input signals may contain 3D data such as 1080p Side-by-Side but encoded as if they were in 2D. This unit may treat them as standard 2D signals and will not project correctly. -
Page 25: Pixel Adjust
INSTALLATION Lens Memory Save Store into an available memory the lens focus, zoom and shift configuration. There are 5 memories for Siglos 1 model and 10 memories for the Siglos 2&3. Lens Memory Name Edit You can edit the Lens Memory Name within the limit of 10 characters. Same procedure as section “User Name Edit”, page 19. -
Page 26: Keystone (Vertical)
INSTALLATION Installation Style Flip the image to the left or right, up or down according to the projection state of the projector: Front, Ceiling Mount (F), Rear or Rear Ceiling mount (R) 10.3 Keystone (Vertical) Compensate for trapezoidal distortion caused by installation. Independently to the screen orientation, make sure that the projector is not tilt more than 5% up/down. -
Page 27: Display Setup
DISPLAY SETUP without altering the global picture settings. You may select the best template available in the Screen No. a) 001 - 009: select a profile between 001 and 009 when watching 3D content with 3D shutter glasses. Profile 001 is recommended when using Dreamvision’s active IR 3D-glasses. b) 010 to 106: select the best compensation profile depending on your screen and environment. -
Page 28: Remote Code A Or B
INFORMATION MENU 12.5 Remote Code A or B Select in the projector menu the code A or B according to the code selected on the RCU. You can change the code used by the RCU to communicate with the projector from A to B. To do so, press and hold for 3 sec simultaneously [MENU]+[BACK] buttons on the RCU. -
Page 29: Cinemascope Setup With Lens Zoom
CINEMASCOPE SETUPS 14.2 Cinemascope setup with Lens Zoom Select “Menu => Installation => Lens Memory 1” Zoom in, until the left and right borders of the picture fits the 2.35:1 screen borders. Save the lens position in the lens memory 1. You can also edit the memory 1 name to “Cinemascope”. Select “Menu =>... -
Page 30: Maintenance
MAINTENANCE [Anamo]rphic modes Anamo Mode A Anamo Mode B When you press sequentially the [Anamo]rphic button, you change the mode from OFF, Mode A and Mode B. • Mode A is intended to be used with an anamorphic lens to watch 2.35:1 content on a 2.35:1 screen. •... -
Page 31: Dirt On The Lens
MAINTENANCE 15.2 Dirt on the Lens The lens shall be cleaned using commercial blowers or lens cleaning papers (for cleaning glasses and cameras). Do not use fluid-type cleaning agents. This may lead to peeling of the surface coating film. The lens surface is fragile. -
Page 32: Troubleshooting
MAINTENANCE • Pull out the lamp unit using the handle. • Insert the new lamp unit until it is firmly in place. • Tighten the screws of the lamp unit. • Attach the lamp cover and fasten the lamp trap screw. Resetting Lamp Time After installing a new lamp, reset the lamp time using the OSD menu Turn On the unit. -
Page 33: Miscellaneous
MISCELLANEOUS Operating LED WARNING LAMP STANDBY/ON Description (orange/red) (orange) (green or red) blinks 1 time: the lamp failed to ignite, restart the projector after a complete cooldown cycle. continuous blinking blinks 2 times: lamp has shut down during ptojection, orange restart the projector after a complete cooldown cycle. -
Page 34: Available Operating Commands
MISCELLANEOUS Commad: from 2 to 4 bytes length Command Data: variable length End of Data fixed to 0Ah Available Operating commands Function Command Command Data Description Connection RS-232 00h 00h none Check the serial connection Power 50h 57h Switch the unit On. Switch the unit in standby mode. - Page 35 MISCELLANEOUS Function Command Command Data Description Picture Mode 50h 4Dh 50h 4Dh 30h 35h User 3 30h 46h User 4 Color Profile 50h 4Dh 50h 52h 30h 30h 30h 31h Film1 30h 32h Film2 31h 33h Film3 30h 33h Standard 30h 34h Cinema1 30h 35h...
- Page 36 MISCELLANEOUS Function Command Command Data Description Aspect Ratio 49h 53h 41h 53h Aspect Ratio set to 4:3 Aspect Ratio set to 16:9 Aspect Ratio set to Zoom (PC) Auto (PC) Just (PC) Full Anamorphic Modes 49h 4Eh 56h 53h Turn Off the Anamorphic mode Anamorphic mode set to Mode A Anamorphic mode set to Mode B Select 3D mode...
-
Page 37: Lan Protocol
MISCELLANEOUS You want to... Command to send Switch this unit Off send: 21h 89h 01h 50h 57h 30h 0Ah receive: 06h 89h 01h 50h 57h 0Ah Change active Input to HDMI2. send: 21h 89h 01h 49h 50h 37h 0Ah send: 21h 89h 01h 52h 43h 37h 33h 37h 31h 0Ah Change Lens Memory1 name to send: 21h 89h 01h 49h 4Ch 4Dh 31h 0Ah “TV-size”... -
Page 38: Infra Red, Long Hex-Pronto Compatible Rcu
MISCELLANEOUS Examples You want to... Command to send Switch this unit On 1. open TCP connection 2. receive PJ_OK: 50h 4Ah 5Fh 4Fh 4Bh 3. send PJREQ: 50h 4Ah 52h 45h 51h 4. receive PJACK: 50h 4Ah 41h 43h 4Bh 5. -
Page 39: Specifications
Unit size (W x D x H) 46 x 51 x 22 cm - 18.1" x 20.1" x 8.7" (excluding feet) Net Weight 14,3 Kg - 31.5 lbs for Siglos 1 15,1 Kg - 33.3 lbs for Siglos 2&3 Box size (W x D x H) 58 x 61 x 41cm - 22.8"... - Page 40 MISCELLANEOUS Dimensions 22 cm 8.7” 46 cm 51 cm 18.1” 20.1” 51 cm 20.1” 46 cm 18.1” R699850 - Siglos User Manual...
- Page 41 Operating the 3D-Glasses (2) Power button Indicating LED (1) Optical lenses (4) (2) Power button Indicating LED (1) (3) 3-positions button Optical lenses (4) (5) micro-USB slot and rechargeable battery 1. Charging the 3D-Glasses The 3D-Glasses come with a USB-rechargeable battery (5) that is charged using the USB to micro-USB cable.
- Page 42 R699850 - Siglos User Manual...
- Page 43 R699850 - Siglos User Manual...
- Page 44 Yunzi+ Series...
Need help?
Do you have a question about the Siglos 1 and is the answer not in the manual?
Questions and answers
Ik heb beeld met witte piksels er doorheen zeker op zwarte achtergrond goed te zien. Wat kan ik hier aan doen?