Go!Control 2GIG-CNTRL2 Operation & User’s Manual
Wireless z-wave services
Hide thumbs
Also See for 2GIG-CNTRL2:
- User manual (52 pages) ,
- Operation & user’s manual (24 pages) ,
- Installation & programming instructions (52 pages)

Related Manuals for Go!Control 2GIG-CNTRL2


Summary of Contents for Go!Control 2GIG-CNTRL2
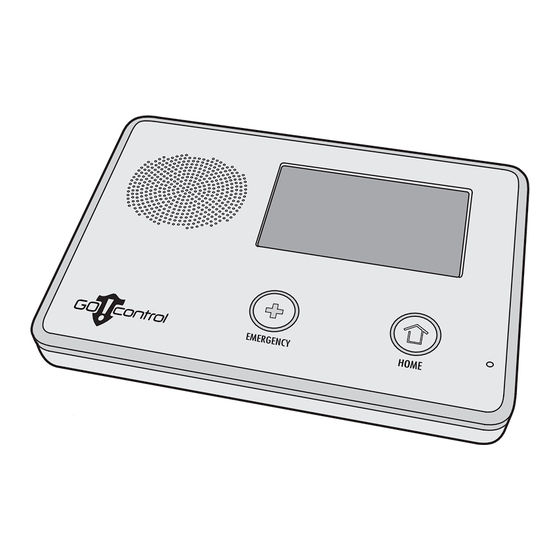
- Page 1 Wireless Security System 2GIG-CNTRL2 (2GIG-CP2) Z-Wave Services Operation & User’s Guide...
- Page 2 Z-Wave enabled household lights, appliances, and door locks from the Control Panel or from a portable Z-Wave remote controller. An exciting feature of the Go!Control Security System is the capability to ® remotely control your Z-Wave network of devices from your own computer using a Web browser over the Internet.
-
Page 3: Table Of Contents
Table of Contents Home Control Network Overview Network Maintenance The Z-Wave Network ....2 Removing Devices ....18 Z-Wave Association Reports . -
Page 4: Home Control Network Overview
“ Rules” can be assigned to trigger a Scene after a Control Panel “ event” such as arming your system or when an alarm occurs. The Go!Control Security System’s Z-Wave Services is a security enabled Z-Wave product, and has been designed to operate with Z-Wave certifi ed... -
Page 5: Services Access
Services Access Services Button Services are accessed through the system’s Home Screen. The Home Screen shows the system status with icons to indicate system conditions. It also displays the time and date. The Home Screen displays the SECURITY and SERVICES buttons. The Home Screen is normally displayed when the system is disarmed. If it is not currently being displayed, pressing the button on the Control Panel will display the Home Screen. -
Page 6: Network Setup
Network Setup Adding Devices Before a device will work in the home control Press to add network, it must be added (also called included) devices into the network. To add one or more devices into the network, use the following steps: 1. -
Page 7: Naming Devices
Network Setup Naming Devices Devices in the home control network can be named to make it easy to identify the individual lamp or appliance being controlled. The custom name will show on the Control Panel’s display. Press one of the To name each installed switch, lock or device types thermostat device, use the following steps:... -
Page 8: Basic Operation
Basic Operation Binary Switches Binary switch modules can be turned ON or OFF. They cannot be set to in-between levels as multi-level (dimmer) switch modules can. To control a binary switch module, use the Press SWITCHES following steps: button 1. From the Home Screen press the SERVICES Manage Z-Wave Devices Screen button. -
Page 9: Multi-Level Switches
Basic Operation Multi-level Switches Multi-level (dimmer) switch modules can be turned ON, OFF, or set to 12 different dimming levels. To control a multi-level switch module, use the Press SWITCHES following steps: button 1. From the Home Screen press the SERVICES Manage Z-Wave Devices Screen button. -
Page 10: Viewing Thermostats
Basic Operation Viewing Thermostats Z-Wave compatible thermostats can be controlled using the Services feature. ✓ NOTE: Several types of Z-Wave compatible Press thermostats are available. Each type THERMOSTATS provides different features. All thermostat button Z-wave features are supported, except for Manage Z-Wave Devices Screen scheduling. -
Page 11: Controlling Thermostats
Basic Operation Controlling Thermostats To adjust a thermostat’s settings, use the following steps. ✓ NOTE: Several types of Z-Wave compatible thermostats are available. Each type will display different supported options. Setting the Mode Thermostat Settings Screen 1. Use the ← or → arrows on each side of the mode display to choose between off, heat, cool, auto, auxilliary heat, resume, fan only, furnace, Use arrows to... -
Page 12: Door Locks
Basic Operation Door Locks Z-Wave door locks can be locked or unlocked from the Control Panel, at the lock with the lock’s keypad, or with the lock’s metal key. The currently supported Z-Wave lock models Press DOOR available are: LOCKS button •... -
Page 13: Door Lock User Codes
Basic Operation Door Lock User Codes Each Control Panel user (1-32) can be assigned Door Lock User Codes for controlling one or more Z-Wave locks. The user’s Door Lock User Codes are independent of the user’s Control Panel User Code that arms and disarms the system. Door Lock User Codes cannot be added, removed, or changed directly from the lock. -
Page 14: Scenes & Rules
Scenes & Rules Controlling Multiple Devices Beyond simple controlling of a single device, multiple device control commands can be assigned using a “ Scene”. A Scene can be run on its own, or “ Rules” can be assigned to Press SCENES trigger a Scene after a Control Panel “event”... -
Page 15: Z-Wave Switches
Scenes & Rules Z-Wave Switches 7A. Use the ← or → arrows to choose a switch device (if there is more than one device), then select an ON, OFF, or a dimming level for the switch. Press OK. Choose a device, then set the action New Switch Action Screen Z-Wave Thermostats... -
Page 16: Editing Scenes
Scenes & Rules Editing Scenes Scenes can be edited to change a device’s action, remove a device’s action, or rename the Scene. To edit a Scene, use the following steps. Press SCENES button Changing a Device’s Action Manage Z-Wave Devices Screen 1. -
Page 17: Running Scenes
Scenes & Rules Running Scenes Scenes can be run by hand manually, or be automatically run when triggered by a Rule. To run a Scene manually, use the following steps: Press SCENES button 1. From the Home Screen press the SERVICES button. -
Page 18: Triggering Devices From Events
Scenes & Rules Triggering Devices from Events A Scene can be run on its own, or “ Rules” can be assigned to trigger a Scene after a Control Panel “event” such as arming your system or Press RULES button when an alarm occurs. ✓... -
Page 19: Editing Rules
Scenes & Rules Editing Rules Rules can be edited to change an event that triggers the Rule or to change the Scene that the Rule runs. Press RULES button Changing a Rule’s Action To change a Rule’s action, use the following steps: Manage Z-Wave Devices Screen 1. -
Page 20: Network Maintenance
Network Maintenance Removing Devices When a device will no longer be used in the home control network, it should be removed (also called excluded) from the network so the system will not try to communicate with the missing device. Press to remove devices To remove one or more devices from the Z-Wave Toolbox Screen... -
Page 21: Network Diagnostics
Network Maintenance Network Diagnostics Services button The Services Z-Wave network periodically turns orange checks to determine if a network device has become un-plugged, has failed, or is missing. The network can also be checked manually by pressing the CHECK NETWORK button on the Manage Z-Wave Devices screen. -
Page 22: Advanced Setup
Advanced Setup Advanced Toolbox The Advanced Toolbox can be used (only by Installers) to add a secondary controller, reset and view installed controllers, view the currently installed network devices, or rediscover the network devices. On the Z-Wave Toolbox Screen, press ADVANCED TOOLBOX to access the Advanced Z-Wave Toolbox Advanced Toolbox functions. -
Page 23: View Controllers
Advanced Setup Advanced Toolbox (cont.) View Controllers The Control Panel can display each Z-Wave controller programmed into the network. Use the following steps to display the controllers. 1. From the Advanced Toolbox Screen, press the VIEW CONTROLLERS button. 2. Each programmed controller will be displayed. -
Page 24: Rediscover Network
Advanced Setup Advanced Toolbox (cont.) Rediscover Network During normal operation the network decides the best path to route signals from one device to another. If devices are moved to different positions in the installation, it is recommended to rediscover the network so the routing path will be re-confi... -
Page 25: Important Information
Important Information Limited Warranty This 2gig Technologies Inc. product is warranted against defects in material and workmanship for twelve (12) months. This warranty extends only to wholesale customers who buy through 2gig Technologies Inc. authorized distribution channels. 2gig Technologies Inc. does not warrant this product to consumers. Consumers should inquire from their selling dealer as to the nature of the dealer’s warranty, if any. - Page 26 Index Adding devices 4 Multi-level switches 2, 7 Additional Z-Wave devices 4 ADD RULE button 16 NAME button 14 ADD SCENES button 12 Naming devices 5 Advanced setup 20, 21, 22 Network diagnostics 19 Advanced toolbox 20, 21, 22 Network maintenance 18, 19 ADVANCED TOOLBOX button 20 Network setup 4, 5 Auto disarm option 10...
- Page 27 Index UNLOCK button 10 Un-plugged device 19 View all devices 21 VIEW ALL DEVICES button 21 View controllers 21 VIEW CONTROLLERS button 21 Viewing thermostats 8 Warranty service 23 Z-Wave Association reports 2 Z-Wave devices 2 Z-Wave door locks 13 Z-Wave network 2 Z-Wave sirens 4 Z-Wave switches 13...
- Page 28 YOUR LOCAL ALARM INSTALLATION AND SERVICE PROFESSIONAL: Copyright © 2012 v1.9 233494 X4...
Need help?
Do you have a question about the 2GIG-CNTRL2 and is the answer not in the manual?
Questions and answers