
Related Manuals for Thermador CJ302B


Summary of Contents for Thermador CJ302B
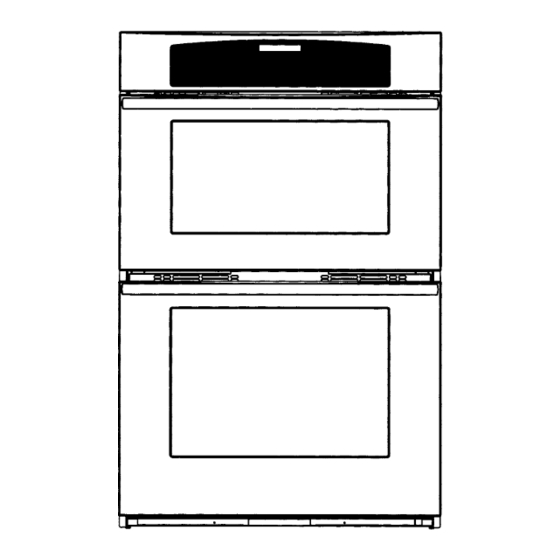
- Page 1 SERVICE MANUAL ® THERMADOR BUILT-IN OVENS MODELS: CJ302B / CJ302W / CJ302S © 2001 BSH Home Appliances Corp. Lit No. 94-30-007A October 2001...
-
Page 2: Table Of Contents
20-Ampere Fuse, Fuse Failure .......... 60 Measuring For Microwave Radiation Leakage .... 6-7 Diode, High Voltage Transformer, Magnetron Tube ..61 Thermador Warranty ............8 Microwave Board, Stirrer Motor, Microwave Transformer Cooling Fan & Air Switch ......62 Servicing Components CJ Lower Oven Component Locations ............ -
Page 3: General
CJ302B / CJ302W / CJ302S THIS MANUAL IS DESIGNED TO BE USED ONLY BY QUALIFIED SERVICE PER- SONNEL. THERMADOR RECOMMENDS THAT CUSTOMERS DO NOT SERVICE THEIR OWN UNITS, DUE TO THE COMPLEXITY AND THE RISK OF HIGH- VOLTAGE ELECTRICAL SHOCK. -
Page 4: Symbols You Will See In The Manual
THERMADOR ASSUMES NO RESPONSIBILITY FOR ANY REPAIRS M A D E O N O U R P R O D U C T S B Y A N Y O N E O T H E R T H A N AUTHORIZED THERMADOR SERVICE TECHNICIANS. -
Page 5: Avoid Exposure To Excessive Microwave Energy
Lit. No. 94-30-007A CJ Oven Service Manual TO AVOID EXPOSURE TO EXCESSIVE MICROWAVE ENERGY Observe these precautions before and during servicing: Do not operate or allow the oven to be operated with the door open. Make the following safety checks on all ovens to be serviced before activating the magnetron or other microwave source, and make repairs as necessary: a) Interlock Operation. -
Page 6: Cautions To Observe When Troubleshooting
CJ Oven Service Manual Lit. No. 94-30-007A CAUTIONS TO OBSERVE WHEN TROUBLESHOOTING Unlike many other appliances, the microwave oven is high-voltage, high-current equipment. Although it is free from danger in ordinary use, extreme care should be taken during repair. CAUTION Remove your wristwatch when working close to or when replacing the magnetron. -
Page 7: Avoid Electrical Shock
Lit. No. 94-30-007A CJ Oven Service Manual WARNING To Avoid Electrical Shock: • Disconnect the power to the appliance before servicing. • For those checks requiring the use of elec- trical power, exercise extreme care. • Do not attempt high-voltage tests. RESPECT HIGH-VOLTAGE Page 5... - Page 8 • To prevent false readings, hold the test more than 5 mw/cm inform probe by the grip portion of the handle Thermador immediately. After only, and move it along the shaded area shown in the following illustration. repairing or replacing any radiation safety device, keep a written record •...
- Page 9 Thermador and inform the owner and after all necessary components are that the microwave cannot be used. replaced or adjusted. Special care should 7.
-
Page 10: Thermador Warranty
THERMADOR DOES NOT ASSUME ANY RESPONSIBILITY FOR INCIDENTAL OR CONSE- QUENTIAL DAMAGES. Some states do not allow the exclusions or limitation of incidental or consequential damages, so the above limitation or exclusion may not apply to you. This war- ranty gives you specific legal rights. -
Page 11: Servicing Components
Lit. No. 94-30-007A CJ Oven Service Manual SERVICING THE COMPONENTS COMPONENT LOCATIONS The serviceable components for the upper Refer to the pages that show the components oven and plenum are in this section of the you wish to service. manual. Components are shown below. TOP PLENUM COMPONENTS Magnetron Crossflow Top... - Page 12 CJ Oven Service Manual Lit. No. 94-30-007A UPPER CJ OVEN COMPONENTS Support Rack Stirrer Motor Plain Jetplate Washer Stirrer Bottom Screw Assembly Rack Clip Support Jetplate Rack Element, Jet Concealed Enclosure Light Assembly Jetplate Top REMOVING THE TRIM, AND TOP PLENUM COVERS To remove the top front plenum cover: WARNING a) Remove the seven (7) screws.
-
Page 13: Removing Electronic Oven Control Board
Lit. No. 94-30-007A CJ Oven Service Manual REMOVING THE ELECTRONIC OVEN CONTROL BOARD WARNING Remove the six screws from the electronic oven control board. Turn off the electrical power going to the 3 Screws oven before servicing. CAUTION When you work on the oven, be careful when handling the sheet metal parts. - Page 14 CJ Oven Service Manual Lit. No. 94-30-007A REMOVING THE FUSEBLOCK & MICROWAVE PCB CONTROL WARNING BK-126 Turn off the electrical power going to the oven before servicing. CAUTION 20 Amp Fuse Screw When you work on the oven, be careful when handling the sheet metal parts.
-
Page 15: Removing Light Transformer
Lit. No. 94-30-007A CJ Oven Service Manual REMOVING THE LIGHT TRANSFORMER & DOUBLE LINE BREAK RELAY WARNING Turn off the electrical power going to the oven before servicing. CAUTION When you work on the oven, be careful when handling the sheet metal parts. There are sharp edges present and you can cut YL-82 YL-63... -
Page 16: The Stirrer Motor Assembly
CJ Oven Service Manual Lit. No. 94-30-007A Stirrer Motor Assembly Do Not Dissassemble Stirrer Motor Assembly Proper alignment of these components is critical. This assembly is aligned and assembled at the factory. Replace Entire Assembly! Important The stirrer motor assembly is comprised of the folloing parts: (1) Stirrer Motor (1) Stirrer Shaft (1) Stirrer Motor... -
Page 17: Removing Stirrer Motor Assembly
Lit. No. 94-30-007A CJ Oven Service Manual REMOVING THE STIRRER MOTOR ASSEMBLY WARNING Remove the stirrer shield (4 screws). Turn off the electrical power going to the Remove the 28 mounting screws that at- oven before servicing. tach the stirrer motor assembly to the can. lift the stirrer motor assembly out of the CAUTION stirrer motor cavity. -
Page 18: Removing Magnetron Fan Assembly
CJ Oven Service Manual Lit. No. 94-30-007A REMOVING THE MAGNETRON FAN ASSEMBLY WH-124 BU-25 WARNING Turn off the electrical power going to the oven before servicing. CAUTION When you work on the oven, be careful when handling the sheet metal parts. There are sharp edges present and you can cut yourself if you are not careful. -
Page 19: Removing Crossflow Top Cooling Blower
Lit. No. 94-30-007A CJ Oven Service Manual REMOVING THE CROSSFLOW TOP COOLING BLOWER WARNING Disconnect the wires from the terminals of the crossflow top cooling blower. Turn off the electrical power going to the Remove the three screws from the blower oven before servicing. - Page 20 CJ Oven Service Manual Lit. No. 94-30-007A REMOVING THE HIGH VOLTAGE MICROWAVE CAPACITOR WARNING Disconnect the wires from the terminals of the high voltage microwave capacitor. Turn off the electrical power going to the oven before servicing. Remove the capacitor mounting bracket screw and remove the bracket and capaci- CAUTION tor from the transformer side shield.
-
Page 21: Removing High Voltage Diode
Lit. No. 94-30-007A CJ Oven Service Manual REMOVING THE HIGH VOLTAGE DIODE WARNING Disconnect the wires from the terminals of the high voltage diode. Turn off the electrical power going to the Remove the mounting screw from the di- oven before servicing. ode and remove the diode from the shield. - Page 22 CJ Oven Service Manual Lit. No. 94-30-007A REMOVING THE HIGH VOLTAGE MICROWAVE TRANSFORMER WARNING Heat Sink Bracket Screw Screw Turn off the electrical power going to the oven before servicing. CAUTION When you work on the oven, be careful when handling the sheet metal parts. There are sharp edges present and you can cut yourself if you are not careful.
- Page 23 Lit. No. 94-30-007A CJ Oven Service Manual Remove the four mounting screws from Remove the heat sink plate from the top the high voltage microwave transformer of the high voltage microwave trans- and remove the transformer from the former. oven. 10.
- Page 24 CJ Oven Service Manual Lit. No. 94-30-007A REMOVING THE MAGNETRON, & MAGNETRON THERMAL CUTOUT WARNING Remove the two screws from the vent cover and remove the piece insulation in- Turn off the electrical power going to the side. oven before servicing. CAUTION When you work on the oven, be careful when handling the sheet metal parts.
- Page 25 Lit. No. 94-30-007A CJ Oven Service Manual To reinstall the magnetron on the To reinstall the magnetron thermal cut- waveguide, use the cross-tightening out: method to tighten the four screws, as fol- a) Connect the wires (BK-130 & BK131) lows: to the terminals.
-
Page 26: Removing Control Panel Assembly
CJ Oven Service Manual Lit. No. 94-30-007A REMOVING THE CONTROL PANEL ASSEMBLY, DISPLAY BOARD, & TOUCH PANEL GLASS WARNING c) Disconnect the cables from the touch panel glass filter board connectors. Turn off the electrical power going to the d) Remove the nine indicated screws from oven before servicing. - Page 27 Lit. No. 94-30-007A CJ Oven Service Manual REMOVING THE UPPER OVEN DOOR SWITCH WARNING Pull the upper latch plate forward and push the oven door switch out of the Turn off the electrical power going to the mounting hole. oven before servicing. Disconnect the wires from the oven door CAUTION switch.
-
Page 28: Monitor & Secondary Switch Assembly
CJ Oven Service Manual Lit. No. 94-30-007A REMOVING THE DOOR LATCH ASSEMBLY, HIGH-TEMP CUTOUT, AND THE MONITOR & SECONDARY SWITCH ASSEMBLY WARNING Disconnect the five cables from the touch glass filter board connectors at P2, P4, P6, Turn off the electrical power going to the P10, and P11 and remove the control panel oven before servicing. - Page 29 Lit. No. 94-30-007A CJ Oven Service Manual To remove the high-temp cutout: 10. To remove the monitor and secondary switch assembly: a) Use an angled 1/4˝ socket and remove the two hex-head screws from the Note: We have placed 2 access holes on high-temp cutout bracket.
-
Page 30: Removing A Halogen Light Assembly
Lit. No. 94-30-007A CJ Oven Service Manual REMOVING A HALOGEN LIGHT ASSEMBLY WARNING Turn off the electrical power going to the Screw oven before servicing. (1 of 20) CAUTION Metal Screen When you work on the oven, be careful when handling the sheet metal parts. There are sharp edges present and you can cut yourself if you are not careful. - Page 31 CJ Oven Service Manual Lit. No. 94-30-007A Tech Tips!! When you reassemble the halogen light as- sembly: 1. Position the wiring neatly inside the oven liner cutout for the halogen light and press the assembly into place so its edges are flush with the outside of the liner.
- Page 32 Lit. No. 94-30-007A CJ Oven Service Manual REMOVING THE TOP PLATE WARNING Turn off the electrical power going to the oven before servicing. CAUTION When you work on the oven, be careful when handling the sheet metal parts. There are sharp edges present and you 2 Front Screws can cut yourself if you are not careful.
- Page 33 CJ Oven Service Manual Lit. No. 94-30-007A REMOVING THE STIRRER BLADE ASSEMBLY Stirrer Stirrer JetPlate washer Assembly Top Clip Stirrer screw Access hole for mounting screw JetPlate Top Light Assembly WAVE GUIDE WARNING 2 flat head 1/8 " Allen Turn off the electrical power going to the screws oven before servicing.
- Page 34 Lit. No. 94-30-007A CJ Oven Service Manual REMOVING THE MEAT PROBE JACK WARNING Screw Turn off the electrical power going to the oven before servicing. Meat Probe Jack Access CAUTION Panel When you work on the oven, be careful when handling the sheet metal parts. There are sharp edges present and you can cut yourself if you are not careful.
-
Page 35: Removing The Jet Plate Top Element
CJ Oven Service Manual Lit. No. 94-30-007A REMOVING THE JET PLATE ELEMENT NOTE: The Jet Plate Element is concealed un- WARNING der the base of the CJ Upper Oven Module. To replace this part, you will need to pull the oven Turn off the electrical power going to the out of the wall and remove the element from oven before servicing. - Page 36 Lit. No. 94-30-007A CJ Oven Service Manual REMOVING THE TOP OVEN THERMAL SENSOR WARNING Pull the oven thermal sensor forward un- til the wire splices are inside the oven. Turn off the electrical power going to the oven before servicing. CAUTION Cut Wires Here...
-
Page 37: Removing Upper Oven Door Gasket
CJ Oven Service Manual Lit. No. 94-30-007A REMOVING THE UPPER OVEN DOOR GASKET Fully open the oven door. Pull the ends of the oven door gasket out of the hole in the door liner. Unclip the gasket from the door liner and remove it. -
Page 38: Removing The Oven Door
Lit. No. 94-30-007A CJ Oven Service Manual REMOVING and REINSTALLING the UPPER MICROWAVE OVEN DOOR Fully open the oven door. REMOVING THE OVEN DOOR CAUTION: Be careful handling the oven door when removing it, as it is very heavy. Never lift the door by the handle. - Page 39 CJ Oven Service Manual Lit. No. 94-30-007A REINSTALLING THE OVEN DOOR Grasp the oven door by the sides near the top, and carefully close it until the hook Hold the oven door by the sides approxi- in the hinge contacts the hinge support mately 2/3 of the way down and insert (approximately 3/4 of the way).
- Page 40 Lit. No. 94-30-007A CJ Oven Service Manual Lower the oven door to its fully open po- sition. Tech Tip!! Rotate the U-clips on the hinges forward to the unlocked position. Make sure that the door seal is tight against the front of the oven liner and that the door Rotate U-Clip is not crooked.
-
Page 41: Outer Glass Assembly
CJ Oven Service Manual Lit. No. 94-30-007A REMOVING THE UPPER OVEN DOOR HANDLE & OUTER GLASS ASSEMBLY CAUTION To remove the outer oven door glass: a) Remove the four screws from the left When you work on the oven, be careful and right glass support brackets and when handling the sheet metal parts. -
Page 42: Removing An Oven Door Hinge, Actuator Arm, Center Glass, Rf Screen & Inner Glass
Lit. No. 94-30-007A CJ Oven Service Manual REMOVING AN OVEN DOOR HINGE, ACTUATOR ARM, CENTER GLASS, RF SCREEN, & INNER GLASS To remove the actuator arm: CAUTION a) Remove the four screws from the baffle When you work on the oven, be careful and remove the baffle. - Page 43 CJ Oven Service Manual Lit. No. 94-30-007A b) Remove the insulation strip from To remove the RF screen and the inner around the center glass assembly. glass: a) Remove the bottom insulation from the Center Glass Assembly door. b) Remove the forty-eight screws from the screen and remove the screen from over the inner glass .
- Page 44 Lit. No. 94-30-007A CJ Oven Service Manual Service Tech Tip!! Alert!! The center glass is heat-treated and has the letters “HB” stamped in two places near one After reinstalling the oven door, check of the edges. around the door for microwave radiation leakage.
-
Page 45: Troubleshooting
CJ Oven Service Manual Lit. No. 94-30-007A TROUBLESHOOTING TESTING THE COMPONENTS Resistance Measurements WARNING TO AVOID ELECTRICAL SHOCK DISCONNECT THE POWER TO THE APPLIANCE BEFORE TESTING. 20A TIME-DELAY FUSE Refer to Page 12 to access the 20A time-delay fuse. To test the 20A time-delay fuse, perform the following steps. - Page 46 Lit. No. 94-30-007A CJ Oven Service Manual LIGHT TRANSFORMER DOUBLE LINE BREAK RELAY Switch (N.O.) Secondary Solenoid Terminals Primary Terminals Refer to Page 13 to access the double line break relay. To test the double line break relay, per- Refer to Page 13 to access the light transformer. form the following steps.
-
Page 47: Stirrer Motor
CJ Oven Service Manual Lit. No. 94-30-007A STIRRER MOTOR HIGH VOLTAGE DIODE Cathode (–) Anode (+) ➛ Diode Symbol Connectors ➛ CAUTION: DISCHARGE THE HIGH VOLT- AGE CAPACITOR BEFORE TESTING THE DIODE. REFER TO PAGE 17 FOR THE PRO- CEDURE. Refer to Page ?? to access the high voltage diode. -
Page 48: High Voltage Capacitor, High Voltage Transformer
Lit. No. 94-30-007A CJ Oven Service Manual HIGH VOLTAGE CAPACITOR HIGH VOLTAGE TRANSFORMER Terminals Tan Lead Primary Orange Leads (secondary) Terminals CAUTION: DISCHARGE THE HIGH VOLT- (secondary) AGE CAPACITOR BEFORE TESTING IT. CAUTION: DISCHARGE THE HIGH VOLT- REFER TO PAGE 17 FOR THE PROCEDURE. AGE CAPACITOR BEFORE TESTING THE TRANSFORMER. - Page 49 CJ Oven Service Manual Lit. No. 94-30-007A MAGNETRON MAGNETRON THERMAL CUTOUT (TCO) Reset Button Terminals Filament Terminals CAUTION: DISCHARGE THE HIGH VOLT- AGE CAPACITOR BEFORE TESTING THE MAGNETRON THERMAL CUTOUT. RE- CAUTION: DISCHARGE THE HIGH VOLT- FER TO PAGE 17 FOR THE PROCEDURE. AGE CAPACITOR BEFORE TESTING THE MAGNETRON.
- Page 50 Lit. No. 94-30-007A CJ Oven Service Manual MAGNETRON FAN MOTOR CROSSFLOW BLOWER MOTOR Terminals Terminals Refer to Page 15 to access the magnetron fan Refer to Page 16 to access the crossflow blower. motor. To test the motor, perform the follow- To test the motor, perform the following steps.
-
Page 51: Door Latch Assembly
CJ Oven Service Manual Lit. No. 94-30-007A DOOR LATCH ASSEMBLY MONITOR & SECONDARY SWITCHES Latch Interlock Switch Latch Motor (N.O.) Terminals Terminals Common Monitor Switch Common (N.C.) Terminals Secondary Switch Door Unlock Switch Door Lock (N.O.) Terminals (N.O.) Terminals Switch (N.O.) Terminals Refer to Page 25-26 to access the monitor and Refer to Page 25 to access the door latch assem-... -
Page 52: Door Switch
Lit. No. 94-30-007A CJ Oven Service Manual DOOR SWITCH OVEN THERMAL SENSOR Terminals (N.O.) Refer to Page 35 to access the oven thermal sensor. To test the sensor, perform the follow- Refer to Page 24 to access the door switch. To ing steps. -
Page 53: Lower Oven Bake Element
CJ Oven Service Manual Lit. No. 94-30-007A LOWER OVEN BROIL ELEMENT LOWER OVEN BAKE ELEMENT Terminals Terminals Refer to Page 79 to access the broil element. To Refer to Page 81 to access the bake element. To test the element, perform the following steps. test the element, perform the following steps. - Page 54 Lit. No. 94-30-007A CJ Oven Service Manual UPPER OVEN JET CONCEALED UPPER OVEN MULLION ELEMENT ELEMENT Refer to Page 34 to access the jet concealed Refer to Page 9 to access the mullion element element. To test the element, perform the fol- terminals.To test the element, perform the fol- lowing steps.
- Page 55 CJ Oven Service Manual Lit. No. 94-30-007A LOWER OVEN MEAT PROBE JACK Terminals Refer to Page 33 to access the meat probe jack. To test the jack, perform the following steps. Set the ohmmeter to the R x 1 scale. Disconnect one of the wires from the meat probe jack.
-
Page 56: Microwave Pcb Control
Lit. No. 94-30-007A CJ Oven Service Manual MICROWAVE PCB CONTROL Header P3: Receives 12-volts AC from the halogen light transformer at pins 1 & 2, and Refer to Page 12 to access the microwave PCB Pins 3 & 4 output 12-volts DC to activate the control. -
Page 57: Microwave Components Description
CJ Oven Service Manual Lit. No. 94-30-007A MICROWAVE COMPONENTS DESCRIPTION Fuse Diode Capacitor (High Voltage) Transformer High Temp Cutout (mag. tube) Magnetron Tube Page 56... - Page 58 Lit. No. 94-30-007A CJ Oven Service Manual CJ oven switches Door activated switches 1) Upper oven door switch 2) Lower oven door switch 3) Monitor switch 4) Secondary switch Door latch assembly switches 1) Latch interlock switch (primary) 2) Latch lock switch 3) Latch unlock switch Air switches 1) Lower oven air switch...
- Page 59 CJ Oven Service Manual Lit. No. 94-30-007A Door Switch Terminals (N.O.) Upper/lower oven door switch: Door switch circuit: The normally open oven door switch is The board sends out signal voltage (24 V.A.C.) mounted on the oven latch plate. This switch to the switch.
- Page 60 Lit. No. 94-30-007A CJ Oven Service Manual Switches Activated by Hook Monitor switch/secondary switch: These switches are activated by a spring action hook on the microwave oven door. When the door is opened and closed, these switches are activated (see illustration below). Switches Door Hook...
- Page 61 CJ Oven Service Manual Lit. No. 94-30-007A Oven Mounted Switches These switches are mounted on a bracket located on the right side of the plenum behind the control panel. (see Front View, below). Front View Monitor Switch Secondary N.C. Switch Top View Monitor Switch Circuit Secondary Switch Circuit...
- Page 62 Lit. No. 94-30-007A CJ Oven Service Manual Door Latch Assembly Switches: The door latch assembly has 3 mounted switches. The n.o. latch interlock switch (primary), the n.o. lock switch, and the n.o. unlock switch. These switches are positioned as follows in the idle state (unlatched); Normally Open Latch Interlock Switch Open Normally Open Latch Unlock Switch...
- Page 63 CJ Oven Service Manual Lit. No. 94-30-007A Latch Interlock Switch (Primary) Circuit In Microwave The N.O. latch interlock switch is open with the door unlatched. When microwave mode is selected, the latch motor runs. The cam on the latch assembly closes the N.O. latch interlock switch and completes the circuit to the microwave board.
- Page 64 Lit. No. 94-30-007A CJ Oven Service Manual Latch Unlock Switch The N.O. latch unlock switch is closed with the door latch unlatched. The unlock switch in the closed position sends a signal to the board that the door is not latched. This prevents the board from proceeding into self clean or microwave.
- Page 65 CJ Oven Service Manual Lit. No. 94-30-007A Air Switches The air switches are used to complete the 24 V.A.C. signal voltage circuit from the DAC control through the air switches, and back to the DAC control board. The 2 N.O. air switches are mounted in the rear of the oven.
- Page 66 Lit. No. 94-30-007A CJ Oven Service Manual 20 AMPERE FUSE The Microwave Oven is protected from interlock switch failure by a 20 ampere Fuse. A defective switch or any other factor causing an overload on the microwave circuit will blow the fuse and stop the operation of the microwave section of the oven. The fuse is located in a fuse holder in the upper plenum.
- Page 67 CJ Oven Service Manual Lit. No. 94-30-007A DIODE The diode is a device used to convert alternating current (AC) into pulsating direct current (DC) allowing it to pass forward in one direction while blocking the current flow in the opposite direction. There is no charge stored in this part. HIGH VOLTAGE TRANSFORMER The high voltage transformer has one primary winding and two secondary windings.
-
Page 68: Interlock Switches
Lit. No. 94-30-007A CJ Oven Service Manual MICROWAVE BOARD The Microwave Board has one snap relay (K1).; Two Pin Headers (P1 and P3) and two 1/4” terminals (P2-1 and P2-2). K1 Relay: This relay transfers 120 Volts AC to the high voltage transformer to activate the micro- wave circuit. - Page 69 CJ Oven Service Manual Lit. No. 94-30-007A “CJ” CONTROLS Page 68...
-
Page 70: "Cj" Relay Board Matrix
Lit. No. 94-30-007A CJ Oven Service Manual “CJ” RELAY BOARD MATRIX REPLAY FUNCTION Upper Oven Latch Motor Lower Oven Latch Motor None None Upper Oven Cooling Motor Lower Oven Cooling Motor Upper Oven Halogen Lamp Lower Oven Halogen Lamp Upper Oven Both Jet Blowers Upper Oven Convection Elements Upper Oven Jet Plate Mullion Element Upper Oven Tube Fan, Stirrer Motor... - Page 71 CJ Oven Service Manual Lit. No. 94-30-007A ➝ ➝ ➝ ➝ ➝ ➝ ➝ ➝ ➝ ➝ ➝ ➝ ➝ ➝ ➝ ➝ ➝ ➝ ➝ ➝ ➝ ➝ ➝ ➝ ➝ Page 70...
- Page 72 Lit. No. 94-30-007A CJ Oven Service Manual ➝ ➝ ➝ ➝ ➝ ➝ ➝ ➝ ➝ ➝ ➝ ➝ ➝ ➝ ➝ ➝ ➝ ➝ ➝ ➝ ➝ ➝ ➝ Page 71...
- Page 73 CJ Oven Service Manual Lit. No. 94-30-007A Digital (DAC) appliance control The digital appliance control (DAC) control is a microproccessor based control. What this means is that the dac control uses signal voltage to detect switch function. The switches used with the DAC control to detect signal voltage are; Door switches: activated by door movement.
- Page 74 Lit. No. 94-30-007A CJ Oven Service Manual Digital (DAC) appliance control (continued) The following switches receive signal voltage from the DAC control board and return the signal voltage to the DAC control board. Both door switches: closing the oven door closes these switches. The completed circuit signals the DAC control that the door is closed and the oven is ready to self clean or microwave.
- Page 75 CJ Oven Service Manual Lit. No. 94-30-007A Voltages When troubleshooting, testing and repairing the ovens, you will observe these voltages; 1) 4000 volts (half wave doubler) for microwave section. 2) 120/240 volts for elements and jet blowers 3) 24 volts D.C. for relay coils, and microwave board triac. 4) 24 volts A.C.
-
Page 76: "Cj" Dac Relay Board
Lit. No. 94-30-007A CJ Oven Service Manual “CJ” DAC RELAY BOARD (Digital Appliance Controls) There are 2 relay boards, 1 for a single oven and 1 for a double oven. You can use the double oven board for a single oven. You must use a double oven board for a double oven. The relay board has 14 snap relays activated by 24 volts d.c., 8 small pin headers that carry signal voltage to components, and 5 large pin headers that provide or transfer 120 volts ac to components. - Page 77 CJ Oven Service Manual Lit. No. 94-30-007A DAC RELAY BOARD (continued) The relay board has 8 small pin headers. They are identified as P2, P3, P5, P6, P9, P10, P11, P14, P15. These small pin headers carry signal voltage to specific components.
- Page 78 Lit. No. 94-30-007A CJ Oven Service Manual DAC RELAY BOARD (continued) The relay board has 5 large pin headers. They are identified as P0, P1, P7, P8, P18. These large pin headers carry current to specific components. The pin numberts are identified on the schematic. P0 large pin header has 8 pins and are identified as follows;...
- Page 79 CJ Oven Service Manual Lit. No. 94-30-007A DAC RELAY BOARD (continued) P7 large pin header has 4 pins and are identified as follows; P7-1 Blank P7-2 Blank P7-3 Current from L2 to K11 relay P7-4 Current to upper oven convection motor P8 large pin header has 4 pins and are identified as follows;...
-
Page 80: Wire Harness
Lit. No. 94-30-007A CJ Oven Service Manual Explanation of the Wire Harness Connector Housing Wires The wire harness is shown in the illustration above. PIN Header PIN Header The wire harness’ slide onto the pin headers of the relay board, display head, and touch control boards. -
Page 81: Wire Harnesses
CJ Oven Service Manual Lit. No. 94-30-007A Wire Harnesses (Continued) The “CJ” oven uses 5 wire harnesses to transfer signal voltage between the DAC control (relay board), display head, and touch control boards (glued on the glass). The 5 wire harness’ connect to the corresponding pin headers on the corresponding components (relay board, display head, touch control board). -
Page 82: Troubleshooting Chart For
Lit. No. 94-30-007A CJ Oven Service Manual Troubleshooting chart for relay board header pin failures Wire harness off at pin header; or circuits open: Lower oven sensor: Control functions normal. When sensor opens, f-61 code will appear. If sensor shorts, f-60 will appear. Cooling fan is on constantly. - Page 83 CJ Oven Service Manual Lit. No. 94-30-007A Relay board transformer: No fail code, no display at all. Board is dead. Both cooling motors and halogen lights: Will accept modes. In about 45 seconds F-34 will appear in the upper oven or F-64 will appear in the lower oven because the Coolingmotors did not come on to close the air switches and signal the board.
-
Page 84: "Cj" Oven Control Panel
Lit. No. 94-30-007A CJ Oven Service Manual MICROWAVE PROBE JETDIRECT BAKE UPPER LIGHT PANEL LOCK CLOCK CONVECTION LOWER COOKSMART SELF CLEAN BROIL ROAST UPPER TIMER 1 TIMER OFF TIMER 2 1-2-3-4 PAUSE PROOF STOP COOK LOWER CS+1 - CS+3 - BREAD, DESSERT MEAT/CASSEROLES RESUME... -
Page 85: Electronic Oven Controls
CJ Oven Service Manual Lit. No. 94-30-007A ELECTRONIC OVEN CONTROLS HANDLING THE BOARDS Touch Control Board The Touch Control Board and the Display Handle the Touch Control Board only by the Head are subject to failure if static electricity is edges of the glass and the plastic frame. -
Page 86: Control Panel Assembly
Lit. No. 94-30-007A CJ Oven Service Manual Control Panel Assembly The control panel assembly is comprised of the following parts; Control panel: There are a total of 6 control panels. 2 black, 2 white and 2 stainless. The control panels are what determines the color of the unit. Curved glass touch panel: There are 2 glass touch panels. -
Page 87: Glass Touch Panel
CJ Oven Service Manual Lit. No. 94-30-007A Glass touch panel The glass touch panel is comprised of a piece of curved glass with 2 control boards glued onto it. Left side touch control board: The large touch control board is glued on the left side of the curved glass. -
Page 88: Display Head
Lit. No. 94-30-007A CJ Oven Service Manual Display Head The display head has a total of 8 pin headers (0nly 7 are used), they are identified as P1, P2, P4, P6, P8, P10 and P11. P1 pin header has 18 pins and connects to the left touch control board (P1). -
Page 89: Troubleshooting Chart For Display Head Pin Failures
CJ Oven Service Manual Lit. No. 94-30-007A Troubleshooting chart for display head pin header failures Wire harness off at pin header or open circuits Accepts display signals from relay board: Glass control panel is completely dead. No display, circuit must be reset. Accepts communication signals from relay board: Glass control panel is completely dead. - Page 90 Lit. No. 94-30-007A CJ Oven Service Manual “CJ” LOWER OVEN (SAME AS “C” AND “CM”) Bracket Screws Broil Element Brackets BACK OF LINER Hidden Bake Element Under Oven Liner Broil Element 2 Top Front Mounting Screws White Wires Access Panel Cover Hex Nut Meat Probe...
-
Page 91: Removing The Hidden Bake Element
CJ Oven Service Manual Lit. No. 94-30-007A REMOVING THE HIDDEN BAKE ELEMENT (LOWER OVENS ONLY) WARNING Refer to Figure B (Page 86) for the following steps. Turn off the electrical power circuit to Unwrap and remove the indicated wire the oven at the main junction box be- tie from the support bracket. - Page 92 Lit. No. 94-30-007A CJ Oven Service Manual REMOVING THE HIDDEN BAKE ELEMENT (LOWER OVENS ONLY) Support Bracket Remove Screws Rear Panel Bake Element Remove Wires Remove Screws 3 Screws Wire Tie Flange Flange FigureA Remove 6 Screws Figure B Bend Flange Bend Flange Down Down...
-
Page 93: Removing The Oven Temperature Sensor
CJ Oven Service Manual Lit. No. 94-30-007A REMOVING THE OVEN TEMPERATURE SENSOR WARNING Remove the screws from the bracket and pull the oven temperature sensor forward Turn off the electrical power circuit to the until the wire connectors are through the oven at the main junction box before ser- opening. -
Page 94: Removing The Convection Bake Element
Lit. No. 94-30-007A CJ Oven Service Manual REMOVING THE CONVECTION BAKE ELEMENT WARNING door (see Page 94). Remove the racks from the oven. Turn off the electrical power circuit to the oven at the main junction box before ser- Remove the front screws from the left and vicing this unit. -
Page 95: Removing A Convection Fan Motor
CJ Oven Service Manual Lit. No. 94-30-007A REMOVING A CONVECTION FAN MOTOR WARNING Remove the hex nut from the front of the convection blade. NOTE: The nut has left- Turn off the electrical power circuit to the rotating threads. oven at the main junction box before ser- vicing this unit. - Page 96 Lit. No. 94-30-007A CJ Oven Service Manual Oven Liner White Wire (#44) Brown Wire (#45) Fan Motor Bracket with Insulation Fan Motor Screws Convection Blade E-Ring Flat Washer Hex Nut (Left-Rotating Thread) Top Screw Top Screw Convection Baffle Bottom Screws Page 95...
-
Page 97: Removing A Halogen Lamp Holder
CJ Oven Service Manual Lit. No. 94-30-007A REMOVING A HALOGEN LAMP HOLDER WARNING Turn off the electrical power circuit to the Halogen Lamp oven at the main junction box before ser- vicing this unit. Lamp Holder CAUTION When you work on the oven, be careful when handling the sheet metal parts. -
Page 98: Removing Lamp Transformer
Lit. No. 94-30-007A CJ Oven Service Manual REMOVING THE LAMP TRANSFORMER & LOWER OVEN DOUBLE LINE BREAK RELAY WARNING To remove an old oven relay (see Illustration, below): Turn off the electrical power circuit to the a) Remove the screws and disconnect the oven at the main junction box before ser- wires from the relay terminals. - Page 99 CJ Oven Service Manual Lit. No. 94-30-007A REMOVING the OVEN LIGHT SWITCH, the OVEN DOOR LATCH ASSEMBLY and the HI-TEMP CUTOUT in LOWER OVEN WARNING To remove the oven door latch assembly (see Inset 2, Page 89): Turn off the electrical power circuit to the a) Use a 1/4"...
- Page 100 Lit. No. 94-30-007A CJ Oven Service Manual REMOVING the OVEN LIGHT SWITCH, the OVEN DOOR LATCH ASSEMBLY and the HI-TEMP CUTOUT Inset 1 TECH NORMALLY OPEN (GOLD) CONTACTS DOOR OPEN = SWITCH OPEN TIP!! NORMALLY CLOSED DOOR OPEN = SWITCH CLOSED You will need the following tools to remove the components: 1/4"...
-
Page 101: Removing The Air Switches
CJ Oven Service Manual Lit. No. 94-30-007A REMOVING THE AIR SWITCHES Refer to illustrations below and on Page 91 for WARNING the following steps. Turn off the electrical power to the oven. Turn off the electrical power circuit to the oven at the main junction box before ser- Pull the oven out of its mounting location vicing this unit. - Page 102 Lit. No. 94-30-007A CJ Oven Service Manual REMOVING THE AIR SWITCHES Figure 2 Air switch Lower air switch 2 wires 2 screws Switch Bracket Figure 3 Air switch through the diverter Page 101...
-
Page 103: Removing A Blower
CJ Oven Service Manual Lit. No. 94-30-007A REMOVING A BLOWER WARNING e) Disconnect the four wires from the mo- tor terminals. Turn off the electrical power circuit to the f) Install the new blower in the mounting oven at the main junction box before ser- bracket and mount the assembly to the vicing this unit. - Page 104 Lit. No. 94-30-007A CJ Oven Service Manual REMOVING A BLOWER BACK OF PLENUM Mounting Bracket Screw Screw Lt. Blue (97) Screw White (98) White Dk. Blue Upper Blower (24) (23) Upper Blower Figure A Lower Blower Figure B Blower Wire (24) To Blower Wire (23) To Upper Blower Motor Upper Blower Motor...
-
Page 105: Removing An Oven Door
CJ Oven Service Manual Lit. No. 94-30-007A REMOVING AN OVEN DOOR Refer to the illustration below for the follow- To remove the door: ing steps. a) Grasp the door by the sides toward the Open the door to its fully open position. back and raise the front of the door sev- eral inches (there will be some resis- Raise the hinge latch over the hook on each... -
Page 106: Removing The Oven Door Gasket
Lit. No. 94-30-007A CJ Oven Service Manual REMOVING THE OVEN DOOR GASKET attached to the gasket out of the holes in CAUTION the oven door (see Inset 2 on the illustra- tion). When you work on the oven, be careful Position the new fiberglass gasket around when handling the sheet metal parts. -
Page 107: Removing The Oven Door Components
CJ Oven Service Manual Lit. No. 94-30-007A REMOVING THE OVEN DOOR COMPONENTS To remove any of the oven door compo- CAUTION nents, remove the oven door from the oven (see Page 94). When you work on the oven, be careful Refer to illustration, below, as you remove when handling the sheet metal parts. -
Page 108: Removing Oven Module
Lit. No. 94-30-007A CJ Oven Service Manual REMOVING THE OVEN MODULE (30") Convection Kit—#35-00-687 Turn off the electrical power to the oven. WARNING To make servicing easier, remove the oven Turn off the electrical power circuit to the door (see Page 94). oven at the main junction box before ser- Remove the oven from the wall. -
Page 109: Troubleshooting
CJ Oven Service Manual Lit. No. 94-30-007A TROUBLESHOOTING TESTING THE COMPONENTS WARNING TO AVOID ELECTRICAL SHOCK • DISCONNECT THE POWER TO THE APPLIANCE BEFORE SERVICING. • FOR THOSE CHECKS REQUIRING THE USE OF ELECTRICAL POWER, EXERCISE EXTREME CARE. • DO NOT PERFORM HIGH-VOLTAGE TESTS. THE AIR SWITCH THE BLOWER MOTOR Refer to Page 92 to access the blower motor. -
Page 110: The Convection Fan Motor
Lit. No. 94-30-007A CJ Oven Service Manual THE CONVECTION FAN MOTOR THE LAMP TRANSFORMER Refer to Page 84 to access the convection fan Refer to Page 87 to access the lamp transformer. motor. With no power applied, remove the wires With no power applied, disconnect the mo- from the terminals of the lamp transformer. - Page 111 CJ Oven Service Manual Lit. No. 94-30-007A THE OVEN DOOR LATCH ASSEMBLY The oven door latch locks the oven door during the If the reading is not correct, remove and re- CLEAN cycle (see the illustration at the bottom of place the switch.
- Page 112 Lit. No. 94-30-007A CJ Oven Service Manual THE HIDDEN BAKE THE BROIL ELEMENT ELEMENT Refer to Page 79 to access the broil element. With no power applied, remove the wires Refer to Pages 80 and 81 to access the bake ele- from the terminals of the broil element.
-
Page 113: The Convection
CJ Oven Service Manual Lit. No. 94-30-007A THE CONVECTION THE HI-TEMP CUTOUT BAKE ELEMENT The hi-temp cutout contacts open at or above 350˚F ±8˚ and are manually reset by pressing the Refer to Page 83 to access the convection bake reset button. -
Page 114: Fault Codes
Lit. No. 94-30-007A CJ Oven Service Manual Fault Codes CODE FAULT DETECTION Power board incompatibility Communication error with power board Vcc lift-off (power board) Power board not calibrated Display board EEPROM error Misc. power board error Upper oven cancel key shorted high Lower oven cancel key shorted high Upper oven cancel key shorted low Lower oven cancel key shorted low... - Page 115 CJ Oven Service Manual Lit. No. 94-30-007A Page 114...
-
Page 116: Cj302 Wiring Diagram
Lit. No. 94-30-007A CJ Oven Service Manual See 11 x 17 Page CJ302 Wiring Diagram Page 115... - Page 118 CJ Oven Service Manual Lit. No. 94-30-007A See 11 x 17 Page CJ302 Schematic Drawing Page 116...
- Page 120 Lit. No. 94-30-007A CJ Oven Service Manual Notes Page 117...
- Page 121 5551 McFadden Avenue, Huntington Beach, CA 92649 • 800/735-4328 RO8577CJ • 94-30-007A • © 2001 BSH Home Appliances Corp. • Litho U.S.A. 10/01...
Need help?
Do you have a question about the CJ302B and is the answer not in the manual?
Questions and answers