
Related Manuals for McQuay CK20AR


Summary of Contents for McQuay CK20AR
- Page 1 CEILING CASSETTE SPLIT TYPE AIR CONDITIONER INSTALLATION MANUAL COVER-CK-20A 2/1/01, 10:34 AM...
-
Page 2: Ceiling Cassette Split Type Air Conditioner
CEILING CASSETTE SPLIT TYPE AIR CONDITIONER MODEL COOLING ONLY HEAT PUMP CK20AR / ACK20AR / MCK020AR / YCK20AR CK20A / ACK20A / YCK20A SL20BRK / ALC20BRK / MLC020BRK / YSL20BRK SL20B / ALC20B / YSL20B CK25AR / ACK25AR / MCK025AR / YCK25AR... -
Page 3: Table Of Contents
CONTENTS - Accessory Parts page 13 - Safety Precautions page 02 - Indicator Lights page 14 - Installation Diagram page 03 - Overall Checking page 15 - Outline And Dimensions page 04 - Standard Operation Conditions page 15 - Installation of Indoor Unit page 5 - Auto Random Re-start Function page 15... -
Page 4: Installation Diagram
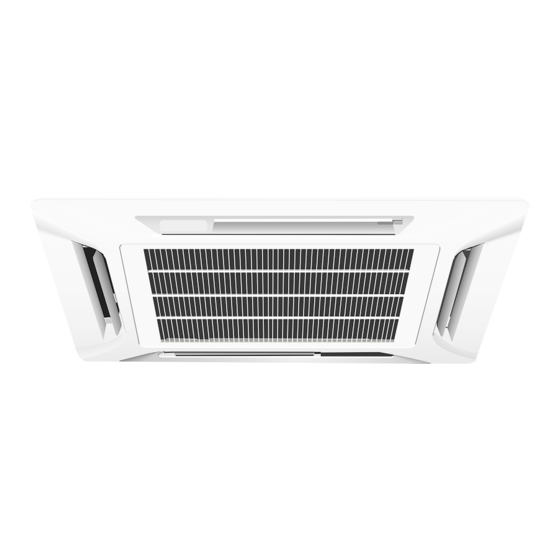
INSTALLATION DIAGRAM Wireless Remote Control Drain Hose INDOOR UNIT Air Discharge Louver IR Receiver LED Light Front Panel Air Intake Grille Air Filter (behind the grille) Air Discharge Louver Remote Control Refrigerant Piping Air Intake Air Intake OUTDOOR UNIT Air Discharge Wired Remote Control Drain Hose Air Discharge Louver... -
Page 5: Outline And Dimensions
OUTLINE AND DIMENSIONS Indoor Unit : CK20A / 25A / 30A / 40A / 50A & AR • (With Wireless Remote Control & With Wired Remote Control) All dimensions are in mm. MODEL CK 20A/AR CK 25A/AR CK 30A/AR CK 40A/AR CK 50A/AR Outdoor Unit : SL20B / 25B All dimensions are in mm. -
Page 6: Installation Of Indoor Unit
Outdoor Unit : SL30C / 40C / 50C & CR 746.5 141.5 141.5 400.0 40.0 40.0 320.0 1030.0 50.0 85.0 All dimensions are in mm. Sharp edges and coil surfaces are potential locations which may cause ! Caution injury hazards. Avoid from being in contact with these places. INSTALLATION OF THE INDOOR UNIT Preliminary Site Survey •... - Page 7 Unit Installation 890.0 mm (Ceiling board opening) • Measure and mark the position for the hanging rod. Drill the hole for the angle nut on the ceiling and fix the 790.0 mm (Hanging rod) hanging rod. • The installation template is extended according to temperature and humidity.
- Page 8 Drain Piping Work • Drain pipe must be in downward gradient for smooth drainage. • Avoid installing the drain pipe in up and down slope to prevent reversed water flow. • During the drain pipe connection, be careful not to exert Indoor Unit extra force on the drain connector at indoor unit.
- Page 9 Control Box LED Wire From Front Panel Air Swing Wire NOTE Install the front frame panel firmly to prevent cool air leakage which will cause condensation and water dripping. Indoor Unit Cool Cool Air Leak Air Leak Ceiling Board Ceiling Board Panel Panel Bad Installation...
-
Page 10: Installation Of Outdoor Unit
INSTALLATION OF OUTDOOR UNIT Preliminary site survey • A place protected from rain, direct sunlight and well-ventilated wherever practicable. • A place capable of bearing the weight of the outdoor unit and isolating noise and vibration. • A place where there are no obstruction of air flow into or out the unit. •... -
Page 11: Electrical Wiring Connection
0.400 kg 0.480 kg 0.900 kg 0.500 kg 0.500 kg L = 20 m 1.150 kg 0.750 kg 0.750 kg Heat Pump MODEL INDOOR CK20AR CK25AR CK30AR CK40AR CK50AR OUTDOOR SL20BRK SL25BRK SL30CR SL40C SL50C L <= 5 m L = 7 m 0.050 kg... - Page 12 IMPORTANT : These values are for information only. They should be checked and selected to comply with local and/or national codes and regulations. They are also subject to the type of installation and size of conductors. Interconnection Cable COMP COMP Outdoor Unit Indoor Unit Terminal...
- Page 13 IMPORTANT : These values are for information only. They should be checked and selected to comply with local and/or national codes and regulations. They are also subject to the type of installation and size of conductors. CK20AR / 25AR <> SL20BRK / 25BRK Outdoor Coil Sensor...
-
Page 14: Vacuuming And Charging
CK40AR / CK50AR <> SL40CR / SL50CR Outdoor Coil Sensor Outdoor COMP Unit Terminal Interconnection Cable Indoor Unit COMP Terminal Block Power Supply Cable There must be a double pole switch with minimum 3mm contact gap and fuse/circuit breaker as recommended in the fixed installation circuit. -
Page 15: Indicator Lights
Possible Opening Dimension For Duct Connection PCD fl140 fl100 Air Discharge Knock Out Hole Air Intake Knock Out Hole NOTE • Avoid using the short duct on which the air discharge grille can be completely closed, to prevent evaporator freezing. •... -
Page 16: Overall Checking
OVERALL CHECKING • Ensure that :- 1) The unit has been mounted solidly and rigid in position. 2) Piping and connections are leak proof after charging. 3) Proper wiring has been installed. • Drainage check - pour some water into the main drain pipe from the flexible drain hose. •... -
Page 17: Service And Maintenance
SERVICE AND MAINTENANCE SERVICE PARTS MAINTENANCE PROCEDURES PERIOD 1. Remove any dust adhered on the filter by using a vacuum cleaner or At least once wash in lukewarm water (below 40 C) with neutral cleaning detergent. every 2 weeks. Indoor air filter 2. - Page 18 • In the event that there is any conflict in the interpretation of this manual and any translation of the same in any language, the English version of this manual shall prevail. • The manufacturer reserves the right to revise any of the specification and design contain herein at any time without prior notification.
Need help?
Do you have a question about the CK20AR and is the answer not in the manual?
Questions and answers