Table of Contents
Advertisement
Advertisement
Table of Contents

Related Manuals for John Lewis JLDV 09


Summary of Contents for John Lewis JLDV 09
- Page 1 JLDV 09 Tumble Dryer Instruction manual...
-
Page 2: Important Safety Information
These warnings have been provided in the interest of safety. You MUST read them carefully before installing or using the appliance. If you are unsure of the meanings of these warnings contact the John Lewis branch from which you purchased the appliance. - Page 3 • Items that have been soiled with substances Installation such as cooking oil acetone, petrol, • This appliance is heavy. Care should be kerosene, spot removers, turpentine, taken when moving it. waxes and wax removers should be • When unpacking the appliance, check that washed in hot water with an extra amount it is not damaged.
-
Page 4: Child Safety
• Garments which have been in contact with Child safety volatile petroleum products should not be • This appliance is designed to be operated machine dried. If volatile cleaning fluids are by adults. used, care should be taken to ensure that •... -
Page 5: Table Of Contents
Contents Important safety information For the installer Product description Technical data Control Panel Installation 1. PROGRAMME KNOB Appliance positioning 2. HALF POWER Removing transport safety packaging 3. LONG ANTICREASE Fitting the vent hose 4. ALARM Changing door stop 5. TIME Electrical connection 6. - Page 6 Water hardness Environment Environmental tips Environmental information Service...
-
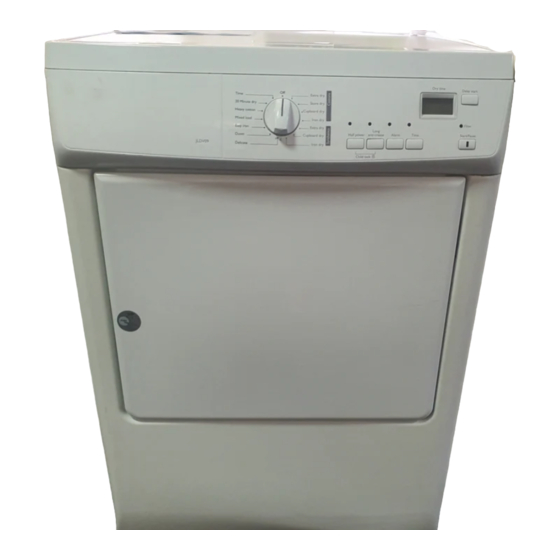
Page 7: Product Description
Product description Control panel Adjustable feet Door Sideways vent outlets / back vent outlet Fluff filter Ring nut Rating plate Lamp for inside light... -
Page 8: Control Panel
Control Panel 1. PROGRAMME KNOB 4. ALARM By operating the knob you can select the When the drying cycle has finished, an proper drying program or turn the appliance intermittent audible signal will sound. By off. depressing button ALARM the acoustic signal is switched off in the following cases: 2. -
Page 9: Start / Pause Button
2. Press the TIME button repeatedly until the 3. To activate the delay timer, press the desired programme duration is shown in START PAUSE button. The amount of the display, e.g. for a time remaining until the programme is set programme of 20 minutes. -
Page 10: Before First Use
Before first use In order to remove any residues which may a brief drying cycle (ca. 30 min.) with damp have been produced during production, wipe cloths in the machine. the dryer drum with a damp cloth or carry out Sorting and preparing laundry •... -
Page 11: Programme Chart
Type of Weight Type of Weight laundry laundry Pillow case 200 g Man's work 600 g shirt Tablecloth 250 g Man's pyjamas 500 g Towelling 200 g towel Blouse 100 g Tea cloth 100 g Men's 100 g underpants Night dress 200 g Ladies' briefs 100 g... -
Page 12: Additional Functions
Additional functions/ Programmes Application/properties options Thorough drying of thick or HALF POWER , LONG SYNTHETICS multi-layered fabrics, e.g. 3 kg ANTICREASE , ALARM , EXTRA DRY pullovers, bedding, table DELAY START linen. For thin fabrics which are not HALF POWER , LONG ironed, e.g. - Page 13 Additional functions/ Programmes Application/properties options Special programme with anti-crease mechanism for easy care textiles such shirts and blouses; for minimum ironing effort. The result depends on the type and Automatic) HALF POWER 1 kg (or 5 quality of textiles. (The EASY IRON LONG ANTICREASE , shirts)
-
Page 14: Daily Use
Additional functions/ Programmes Application/properties options HALF POWER , LONG For further drying of TIME 7 kg ANTICREASE , ALARM , individual items of laundry. DELAY START , TIME 1) In accordance with IEC61121 2) select HALF POWER option 3) Automatic Daily use Switching machine on Turn the programme selector to any... -
Page 15: Selecting The Programme
Selecting the programme button 4-TIME button 6-DELAY START Setting child lock The child lock can be set to prevent a programme being accidentally started or a programme in operation being accidentally changed. The child lock function locks all buttons and the programme knob. The child lock can be activated or deactivated by holding down the ALARM and TIME buttons simultaneously for 5 seconds. -
Page 16: Drying Cycle Complete / Removing Laundry
1. Open door. The programme can no longer be 2. Remove laundry. changed directly once the programme has started. If nevertheless there is an 3. Remove filter after clothes has been attempt to change the programme on removed. Clean the filter. the programme knob or if an function Warning! Before you replace the button (excluding the ALARM... -
Page 17: Cleaning And Maintenance
Cleaning and maintenance Warning! The tumble dryer is not to be used if industrial chemicals have been used for cleaning! Cleaning fluff filter The filter collect all the fluff which accumulates during drying. To ensure that the dryer works perfectly, the fluff filter must be cleaned after every drying cycle. -
Page 18: Cleaning The Drum
Cleaning the drum Clean operating screen and housing Caution! Do not use abrasives or steel wool to clean the drum. Caution! Do not use furniture cleaners or aggressive cleaning agents Lime in the water or cleaning agents to clean the machine. may form a barely visible lining on the Use a damp cloth to wipe down the inside of the drum. - Page 19 Residue on inside surface of Clean inside surface of drum and drum or drum ribs. drum ribs. Conductance of water at Re-programme standard setting installation site differs from for degree of drying (see standard setting of machine. ‘Programming options’ chapter). Loading door does not close.
-
Page 20: Machine Settings
Warning! For safety reasons, the cover must be screwed down tightly. If this is not done, the dryer must not be operated. Machine settings ALARM SIGNAL could slightly influence the residual humidity of the laundry at the end of the cycle. Your permanent off dryer allows you to regulate the sensitivity of the drying sensor based on conductivity values... -
Page 21: Environmental Tips
your household waste disposal service or the shop where you purchased the product. Packaging material The packaging materials are environmentally friendly and can be recycled. The plastic components are identified by markings, e.g. >PE<, >PS<, etc. Please dispose of the packaging materials in the appropriate container at the community waste disposal facilities. -
Page 22: Service
Pre-draining Drying cycle Residual dampness Revolutions per minute Energy in kWh in litres as a % 1000 4.20 1400 3.64 Service In the event of technical faults, please first Model check whether you can remedy the problem description: yourself with the help of the operating instructions - see chapter What to do if…. -
Page 23: Technical Data
Technical data Height x width x depth 85 x 60 x 58 cm Drum volume 108 l Depth with loading door open 109 cm Height can be adjusted by 1.5 cm Weight when empty approx. 30kg max. 7 kg Loading volume (depends on programme) Voltage 230-240 V Required fuse... -
Page 24: Removing Transport Safety Packaging
• The tumble dryer must be installed in a Removing transport clean place, where dirt does not build up. safety packaging • Air must be able to circulate freely all round the appliance. Do not obstruct the front Caution! Before use all parts of the ventilation grille or the air intake grilles at transport packaging must be removed. - Page 25 should now be sealed with the special snap covers provided. Once connected to the dryer, run the vent hose to the desired outlet point, ensuring that the run’s overall length is less than 2 m, and that it contains no more than two bends. As to the outlet itself, if you have decided on a fixed wall/window grille, a good local builder’s merchant should be able to supply...
-
Page 26: Changing Door Stop
Note that to avoid condensation problems, it is essential that the dryer be fitted with the flexible hose to carry its “exhaust” at least beyond the kitchen units; preferable outside the kitchen. In order to prevent the appliance from overheating, it is important that the steam exhaust is unobstructed. -
Page 27: Electrical Connection
Unscrew cover plates D from the front of the machine, rotate through 180°, screw on the opposite side. Unscrew door lock E , push down slightly and remove from the front of the machine. Press snap-in button F in and down, press cover down slightly and remove from front of the machine. - Page 28 If you fit your own plug, the colours of the Warning! THIS APPLIANCE wires in the mains lead of your appliance may MUST BE EARTHED. not correspond with the markings identifying Should the appliance power the terminals in your plug. supply cable need to be replaced, Proceed as follows: this must be carried out by a...
-
Page 29: Special Accessories
A special stacking kit is available through your Warning! The manufacturer dealer, to enable the mounting of the dyer on declines any responsibility for top of a front loading washing machine with damage or injury through failure cover’s depth between 48 and 60 cm. Read to comply with the above safety carefully the instructions supplied with the kit. - Page 32 John Lewis Partnership 171 Victoria Street London SW1E 5NN www. johnlewis.com 136909470-01-30012009...
Need help?
Do you have a question about the JLDV 09 and is the answer not in the manual?
Questions and answers