Table of Contents
Advertisement
Advertisement
Table of Contents

Related Manuals for John Lewis JLTDH17


Summary of Contents for John Lewis JLTDH17
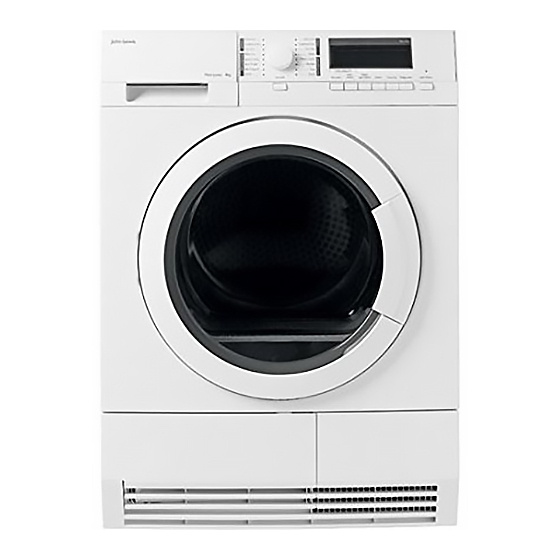
- Page 1 Tumble Dryer JLTDH17 User manual...
-
Page 2: Table Of Contents
Contents Safety instructions Product description Accessories Control panel Before first use Programmes Using the appliance Hints and tips Care and cleaning Cleaning the primary filter Draining the condensed water container Cleaning the heat exchanger filters Technical information Installation Permanent connection Repairs - after sales service Tumble Dryer user manual... -
Page 3: Safety Instructions
Safety instructions In the interest of your safety and to rubber pads must not be dried in the tumble ensure the correct use, before installing dryer. and first using the appliance, read this • Make sure that there is access to the mains user manual carefully, including its hints plug after the installation. - Page 4 • Do not seat or lean on the load door. The • The rear surface of the appliance must be put appliance can tilt. against the wall • If the appliance is installed on the carpet or Warning! equivalent, adjust the feet. Air must flow •...
-
Page 5: Child Safety
Child safety • This machine is not intended for use by young children or infirm persons without supervision. • Children often do not recognise the hazards associated with electrical appliances. Children should be supervised to ensure that they do not play with the appliance. Warning! •... -
Page 6: Product Description
Product description Water container Rating plate Control panel Drum light Load door (reversible) Primary filter Sliding button to open the heat exchanger door Airflow slots Adjustable feet Heat exchanger door Heat exchanger filters cover Lock knob Tumble Dryer user manual... -
Page 7: Accessories
Accessories Stacking kit Accessory name: DK11. It is available from your authorized vendor (can be attached to some types of the tumble dryers) The accessory for through draining of the condensed water into a basin, siphon, gully, etc. After the installation, the water container is drained automatically. -
Page 8: Drying Rack
Drying rack Accessory name: RA5, RA6, RA11, RA12 It is available from your authorized vendor (can be attached to some types of the tumble dryers). Do the check with the vendor or on the web site if the accessory is compatible with your appliance. -
Page 9: Control Panel
Control panel The programme dial The programme indicators The display The On/Off push button with the Auto Off function The Start/Pause push button The function push buttons Display Symbol Description extra dryness level: minimum, moderate, maximum anti-crease time: default, interval (30 min. - 120 min.) —... - Page 10 Symbol Description initial laundry centrifugation (800 — 1800 rpm) — default - - - buzzer activated child lock activated time drying function activated drain the water container indicator clean the primary filter indicator clean the heat exchanger filters indicator drying cycle phase indicator cooling cycle phase indicator crease guard cycle phase indicator delay start activated...
-
Page 11: Before First Use
Before first use Clean the tumble dryer drum with a moist cloth or set a short programme (e.g. 30 minutes time programme) with the load of moist cloths. Caution! The compressor and its system in the tumble dryer is filled with the special agent which is free from fluoro-chloro-hydrocarbons. -
Page 12: Programmes
Programmes Available Fabric Programmes Load Properties functions mark Cottons To dry cotton pieces of clothing. Drying level: extra all except Time Extra dry 8 kg dry. Cupboard dry To dry cotton pieces of clothing. Drying level: all except Time 8 kg cupboard dry. - Page 13 Available Fabric Programmes Load Properties functions mark To dry easy care fabrics such shirts and blouses; for minimum ironing effort. The results can be different 1 kg (or for to the different types of fabric and its finish. Put all except Time Easy iron 5 shirts) fabrics in the tumble dryer straight.
-
Page 14: Using The Appliance
Using the appliance Preparing the laundry Important! Do not put more laundry than the maximum load which is 8kg. Important! Dry only the laundry applicable to dry in the tumble dryer. Loading the laundry Make sure if the laundry is applicable to dry in the tumble dryer. -
Page 15: Special Functions
Setting a programme When the function is activated the applicable symbol comes into the view on the display. The Dry plus function This function helps to get the laundry more dried. There are 3 possible selections: minimum - the default selection which is related to the programme. -
Page 16: Starting A Programme
Starting a programme • cycle interruption The buzzer function is by default always on. You can use this function to activate or deactivate the sound. The Time dry function Operates only with the Time programme. Lets the user to set special time of drying programme from minimum 10 min. -
Page 17: Hints And Tips
Hints and tips Ecological hints • Do not use fabric softener to wash and then dry. In the tumble dryer laundry becomes soft automatically. • Use the condensate as distilled water, e.g. for steam ironing. If it is necessary clean the condensate before (e.g. - Page 18 Push at the same time 2 buttons (see the illustration) and hold down until you see the correct setting: – the indication is off and the indicator comes into the view — the indication is permanently off – the indication is on and the indicator comes into the view —...
-
Page 19: Care And Cleaning
Care and cleaning Cleaning the primary filter The filter collects the fluff. The fluff occurs while the cloths are dried in the At the end of each cycle the indicator (clean tumble dryer. the primary filter) is on to tell you that the primary filter must be cleaned. -
Page 20: Draining The Condensed Water Container
Use a moist hand to clean the filter. If necessary clean the filter with warm water using a brush. Close the filter. Remove fluff from the filter socket. For this a vacuum cleaner can be used. Put the filter inside the filter socket. Draining the condensed water Caution! Do not operate the tumble dryer without the... -
Page 21: Cleaning The Heat Exchanger Filters
To drain the condensed water container automatically you can install draining accessory (see chapter: ACCESSORIES) To drain the condensed water container: Pull the condensed water container and keep it in horizontal position. Move the plastic connection out and drain the condensed water container into a sink or equivalent receptacle. - Page 22 To clean the filters: Open the loading door. Move the release button on the bottom of the door opening and open the heat exchanger door. Turn the blockage to unlock the heat exchanger cover. Lower the heat exchanger filters cover. Tumble Dryer user manual...
- Page 23 Lift the primary filter. Hold the heat exchanger filter and pull it out from the bottom compartment. Push the hook to open the filter. Use a moist hand to clean the filter. If necessary clean the filter with warm water using a brush.
- Page 24 Clean the small filter from the base If necessary, one time for each 6 months, remove the fluff from the heat exchanger compartment. You can use a vacuum cleaner. 10. Put the small filter and heat exchanger filter back. 11. Close the heat exchanger cover. 12.
-
Page 25: Cleaning The Drum
Caution! Do not operate the tumble dryer when the heat exchanger filters are blocked with fluff. This could cause the damage to the tumble dryer. This also increases energy consumption. Do not use sharp objects to clean the heat exchanger compartment. -
Page 26: Something Not Working
Something not working Possible cause Remedy Problem The tumble dryer is not connected to mains Connect in at mains socket. Check fuse in supply. fuse box (domestic installation). The tumble The loading door is opened. Close the loading door. dryer does not The Auto/Off button was not pushed. - Page 27 Possible cause Remedy Problem Do the selection of time programme. The time value must be related to the load. To Too small laundry volume. dry one item or small quantities of the Drying cycle laundry we recommend to use short times. too short.
-
Page 28: Technical Information
Technical information height x width x depth 850 x 600 x 600 mm (maximal 640 mm) drum volume 118 l maximum depth with the load door opened 1090 mm maximum width with the load door opened 950 mm adjustable height 850 mm (+ 15 mm - feet regulation) the appliance weight 53 kg... -
Page 29: Installation
Installation Appliance positioning Unpacking • The tumble dryer must be installed in a clean Caution! position, where dirt does not collect. • Air must flow freely around the appliance. Make sure that the front airflow slots in the Before use all parts of the transport packaging bottom of the appliance are not blocked . -
Page 30: Permanent Connection
Installation under a counter The data about mains voltage, type of current and the necessary fuse are on the rating plate and in the “TECHNICAL INFORMATION” The appliance can be installed as freestanding or chapter. The rating plate is behind the load door below the kitchen counter with correct space (see the “PRODUCT DESCRIPTION”... - Page 31 The switch must not break the yellow and green coloured ground wire. Tumble Dryer user manual...
-
Page 32: Repairs - After Sales Service
An authorised service engineer should service and information contained within this instruction this product, and only genuine spare parts manual, the next step is to contact John Lewis should be used. Under no circumstances should technical support on: you attempt to repair the appliance yourself. - Page 33 John Lewis, Stratford (Opening 2011) John Lewis, Cribbs Causeway 0117 959 1100 John Lewis at home, Swindon 01793 733180 John Lewis at home, Croydon 020 8662 4730 John Lewis, Trafford 0161 491 4040 John Lewis, Edinburgh 0131 556 9121 John Lewis at home, Turnbridge Wells...
- Page 34 Tumble Dryer user manual...
- Page 35 Tumble Dryer user manual...
- Page 36 136920730-B-302012...
Need help?
Do you have a question about the JLTDH17 and is the answer not in the manual?
Questions and answers