Advertisement
Advertisement
Table of Contents

Related Manuals for Yada BT53328


Summary of Contents for Yada BT53328
-
Page 2: Table Of Contents
TABLE OF CONTENTS 1. Introduction ....................................1 2. Package Contents ..................................2 3. Product Specifications ................................3 4. Installation Guide ..................................3 5. Pairing and Connecting ................................7 6. Operation Guide ................................... 7 7. Settings ......................................8 8. Safety Information ..................................8 9. -
Page 3: Introduction
1. INTRODUCTION Please read all of the installation instructions carefully before installing the product. Improper installation will void manufacturer’s warranty. The installation instructions do not apply to all types of vehicles, and are written as guidelines to assist in installing the system. Consult an experienced technician if you are not comfortable installing the product. -
Page 4: Package Contents
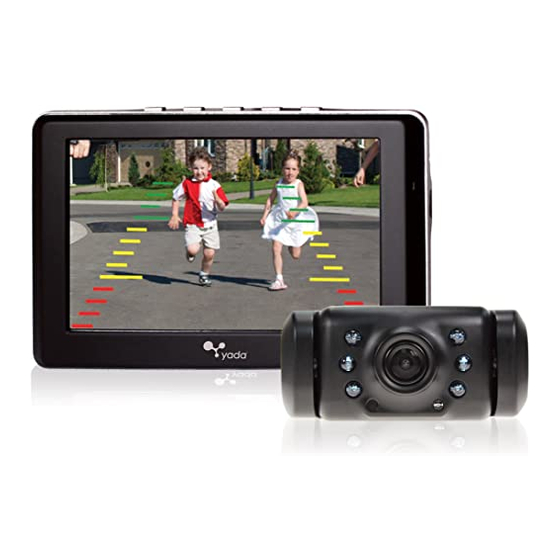
2. PACKAGE CONTENTS 1. 3.5” or 4.3” Dash Monitor or 3.5” Mirror Monitor 2. Weatherproof Rearview Camera 3. Windshield mount for Dash 3.5” Dash Monitor Monitor only 4. 12V/24V Power Adaptor 5. Hardwire Power Cable for Dash Monitor or 3.5” Mirror Monitor 4.3”... -
Page 5: Product Specifications
4. INSTALLATION GUIDE MIRROR MONITOR INSTALLATION 1. Attach black Hook and Loop straps to the back of the Yada mirror by sliding the metal clip into the mirror brackets. Push in all the way until the straps are secure. 2. Make sure the connection for each strap is facing the same way- rather up or down- to allow for easy adjusting of the mirror. - Page 6 Tip: Use both hands on either side of the mirror to snap into place evenly. Make sure the mirror is centered before snapping into place. 6. Once the Yada mirror is in place, reach behind and one by one reattach the Hook and Loop straps together to hold the Yada mirror tight in place.
- Page 7 BACKUP CAMERA INSTALLATION Note: Camera installation on diesel vehicles may require different wiring install. See Below. You can also watch some common installation videos at www.letsyada.com for more information. Caution: This unit is designed to operate on a 12V/24V DC NEGATIVE GROUND electrical system. Connecting to other types of electrical systems will cause damage to your vehicle.
- Page 8 11. Replace the light socket back into the reverse light housing. 12. Replace any interior panels that may have been removed to access the taillight and close your trunk or rear hatch. 13. Standing with the license plate in one hand and the Camera in the other hand, slide the Camera along the top of the license plate in order to determine the placement.
-
Page 9: Pairing And Connecting
5. PAIRING AND CONNECTING Pairing is not necessary as the unit has already been paired. If you are not able to connect the camera, please try to pair the camera by the following steps: 1. Go to the monitor and do the following step: a. -
Page 10: Settings
7. SETTINGS You can adjust the contrast and brightness of the Monitor according to your desired level. Note: Contrast and Brightness setting ONLY works while the backup image is on the screen. Power Menu Parking Aid Line To Adjust Contrast Down 1. - Page 11 from actual conditions. Objects viewed in the rear view monitor differ from actual distance because a wide-angle lens is used. Objects in the rear view monitor will appear visually opposite than when viewed in the rear view and outside mirrors. Use the inside mirror or glance over your shoulder to properly judge distances to other objects.
- Page 12 the system may not operate normally. The Digital Camera can withstand the effects of rain, snow, and inclement weather. • When strong light directly enters a camera, objects may not be displayed clearly. • The screen may flicker under fluorescent light. •...
-
Page 13: Maintenance & Warranty
9. MAINTENANCE & WARRANTY CLEANING • If dirt, rain or snow attaches to the Camera, the monitor may not clearly display objects. If water droplets, snow or mud adhere to the Camera lens, rinse with water and wipe with a dry cloth. •... - Page 14 installation, removal or reinstallation of the product, or damage to any mobile phone device or vehicle. OWNER’S RESPONSIBILITIES: Winplus North America will make every effort to provide warranty service within a reasonable period of time. SHOULD YOU HAVE ANY QUESTIONS ABOUT SERVICE RECEIVED OR IF YOU WOULD LIKE ASSISTANCE IN OBTAINING SERVICE, PLEASE CALL TOLL FREE 1.866.294.9244 DURING REGULAR BUSINESS HOURS MONDAY THROUGH FRIDAY 9:00 AM TO 5:00PM.
- Page 15 field of vision and does not provide a comprehensive view of the rear area of the vehicle. You should always look around outside your vehicle and use your mirrors to confirm rearward clearance and that your vehicle can back up safely. Winplus North America and/or its affiliates are not responsible for a user’s intended or actual use of the Backup Camera.
- Page 16 WINPLUS AUSTRALIA/HONG KONG LIMITED WARRANTY This Yada product is warranted against faulty workmanship for a period of 2 years from date of purchase. Liability is limited to replacement of the product and claims for associated or consequential loss or damage will not be accepted. Warranty is void and does not apply if the product has been damaged or rendered faulty by accident, abuse, misuse, incorrect application or if the product has been modified or tampered with.
-
Page 17: General Information
10. GENERAL INFORMATION CUSTOMER SERVICE/CONTACT For questions or issues regarding the product, please visit www.letsyada.com or contact Winplus in your area/region to speak to our customer service representative: Winplus North America Tel.: 866-294-9244 Tel.: 909-752-3074 Winplus Europe Tel.: 44-1440-7138888 Winplus Australia Tel.: 61-3-8727-7600 Winplus New Zealand Tel.: 64-9-5254575... - Page 18 • Reorient or relocate the receiving antenna • Increase the separation between the equipment and receiver • Connect the equipment into an outlet on a circuit different from that to which the receiver is connected • Consult the dealer or an experienced radio/TV technician for help This device complies with Part 15 of the FCC Rules.
- Page 19 IMPORTANT NOTE: FCC Radiation Exposure Statement: This equipment complies with FCC radiation exposure limits set forth for an uncontrolled environment. End users must follow the specific operating instructions for satisfying RF exposure compliance. This transmitter must not be co-located or operating in conjunction with any other antenna or transmitter.
- Page 20 Tel: 852-2798-8932 11 On Lai Street, Shatin, N.T., Hong Kong Fax: 852-2795-0241 www.winplus.com www.letsyada.com © 2014 Winplus North America Inc. All Rights Reserved. Winplus, the logo design, and Yada® are trademarks or registered trademarks of Winplus North America Inc. ML-53328_V2...
Need help?
Do you have a question about the BT53328 and is the answer not in the manual?
Questions and answers