
Related Manuals for Avigilon 29MP-HD-PRO-C


Summary of Contents for Avigilon 29MP-HD-PRO-C
-
Page 1: Installation Guide
Installation Guide Avigilon High Definition Professional IP Camera Models: 29MP-HD-PRO-C, 29MP-HD-PRO-M, 16MP-HD-PRO-C, 16MP-HD-PRO-M, 11MP-HD-PRO-C, 11MP-HD-PRO-M, 8MP-HD-PRO-C and 8MP-HD-PRO-M 920-0002A-Rev2... -
Page 3: Important Safety Information
Do not expose to rain or moisture. • For indoor use only. If used outdoors, an approved outdoor mounting adapter or enclosure is required. Consult with Avigilon for more information. • Installation must be performed by qualified personnel only, and must conform to all local codes. - Page 4 Power over Ethernet (PoE), rated 48 VDC, 9 W min. • Any external power supply connected to this product may only be connected to another Avigilon product of the same model series. External power connections must be properly insulated. •...
- Page 5 Changes or modifications made to this equipment not expressly approved by Avigilon Corporation or parties authorized by Avigilon Corporation could void the user’s authority to operate this equipment. Disposal and Recycling Information...
- Page 6 European Union: This symbol means that according to local laws and regulations your product should be disposed of separately from household waste. When this product reaches its end of life, take it to a collection point designated by local authorities. Some collection points accept products for free. The separate collection and recycling of your product at the time of disposal will help conserve natural resources and ensure that it is recycled in a manner that protects human...
-
Page 7: Other Notices
Avigilon reserves all rights to all software not covered under the eCos license. This includes all portions of software that were not distributed to Avigilon as part of the eCos operating system. -
Page 8: Table Of Contents
Table of Contents Overview ......1 Rear View ....... . 1 Front View . -
Page 9: Overview
Provides information about the network connection. See the section about connecting to the network video recorder for more information. The Connection Status LED can be turned off for operating in covert installations. See the Avigilon Control Center Client User Guide for more information. Ethernet Port Accepts an Ethernet connection to a network. -
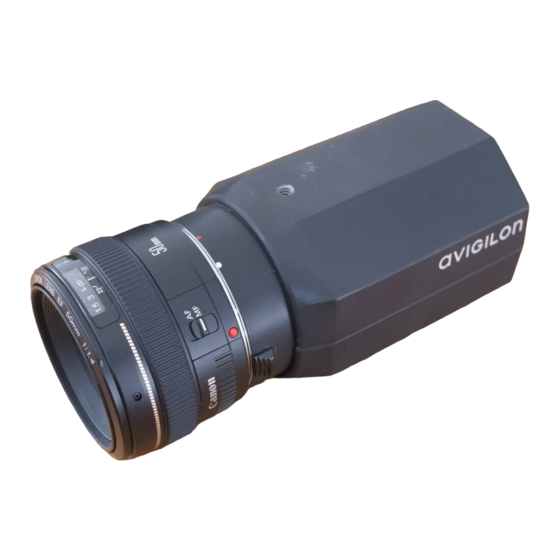
Page 10: Front View
Front View Camera Mounts (top and bottom) Lens Release Button Lens Mount Feature Description Lens Mount ® Accepts Canon EF and EF-S lenses. Lens Release Releases lenses that are mounted to the camera. Button Camera Mounts Provides mounting points for the camera. Mounts accept 1/4”-20 UNC bolts commonly found on tripods and mounting brackets. -
Page 11: Installation
Small slotted screwdriver with 5/64” or 2 mm blade width — for connecting power when not using Power over Ethernet. Package Contents Ensure the package contains the following: • Avigilon High Definition IP Camera • Dust Cap • Terminal Block Installation Steps Complete the following procedures to install the camera. -
Page 12: Mounting The Lens
To avoid poor image quality caused by incorrect lens selection, only use lenses that are recommended by Avigilon for use with this camera model. For a list of lenses recommended for use with this camera model, contact your Avigilon dealer or representative. -
Page 13: Mounting The Camera
Mounting the Camera Camera mounting points are provided on both the top and bottom of the camera body. Use these mounting points to mount the camera on a bracket, in an enclosure, or on a tripod. The mounting points have ¼”-20 UNC threaded holes which allow them to accept standard photographic mounting bolts. - Page 14 Insert the two power wires into the two terminals on the power connector block. The connection can be made with either polarity. Use a small slotted (5/64” or 2 mm blade width) screwdriver to loosen and tighten the terminals. Attach the power connector block back into the receptacle on the device.
-
Page 15: Aiming And Focusing The Camera
See the instructions that accompany the lens for details. For best results, use the Avigilon Control Center software to focus the camera. The camera lens must be set to auto focus (AF) mode to ensure the software focus control functions correctly. -
Page 16: Ip Address Selection
Zeroconf (APIPA). If the IP address is set using Zeroconf, the IP address will be in the 169.254.* subnet. A static IP address can be set from the Avigilon Control Center software, consult the software user guide for details. -
Page 17: Advanced Features
Advanced Features Upgrading the Firmware The firmware can be field-upgraded through the Avigilon Control Center software. Consult the software user guide for details on how firmware upgrades are performed. It is possible for the firmware to become corrupted during an upgrade —... -
Page 18: Connecting To External Devices
Connecting to External Devices External devices are connected through the I/O terminal. The pinout for the I/O terminal is shown in the following table and diagram. Consult the software user guide for details on how to configure the external devices. Table:External I/O Terminals Function Description... -
Page 19: Cleaning
Follow the cleaning instructions provided by the manufacturer. Avigilon recommends using the Type 2 Sensor Swab™ and Eclipse® cleaning solution made by Photographic Solutions, Inc. For a worldwide list of dealers, visit the Photographic Solutions, Inc. website at www.photosol.com. -
Page 20: Body
Body Use a dry or lightly dampened cloth to clean the camera body. Caution — Do not use strong or abrasive detergents when cleaning the camera body. -
Page 21: Specifications
Electrical Power Source VDC: 12-24 V VAC: 24 V PoE: IEEE802.3af Class 3 compliant Power Consumption 13 W (29MP-HD-PRO-C and 29MP-HD-PRO-M only) Power Connector 2-pin terminal block Environmental Operating -10 °C to +50 °C (14 °F to 122 °F) Temperature Storage Temperature -10 °C to +70 °C (14 °F to 158 °F) -
Page 22: Limited Warranty & Technical Support
Avigilon’s entire liability and your exclusive remedy against Avigilon for any failure of this product to operate properly. In no event shall Avigilon be liable for any indirect, incidental, special, consequential, exemplary, or punitive damages whatsoever (including but not limited to, damages for loss of profits or confidential or other... - Page 23 © 9/27/11 Avigilon Corporation...
Need help?
Do you have a question about the 29MP-HD-PRO-C and is the answer not in the manual?
Questions and answers