Lexmark E460dw User Manual
Lexmark printer user's guide
Hide thumbs
Also See for E460dw:
- User manual (182 pages) ,
- Service manual (184 pages) ,
- Manual (170 pages)
Table of Contents
Advertisement
Quick Links
Lexmark E460dn and E460dw
User's Guide
August 2008
www.lexmark.com
Lexmark and Lexmark with diamond design are trademarks of Lexmark International, Inc., registered in the United States and/or other countries.
All other trademarks are the property of their respective owners.
© 2008 Lexmark International, Inc.
All rights reserved.
740 West New Circle Road
Lexington, Kentucky 40550
Advertisement
Table of Contents

Related Manuals for Lexmark E460dw


Summary of Contents for Lexmark E460dw
- Page 1 User's Guide August 2008 www.lexmark.com Lexmark and Lexmark with diamond design are trademarks of Lexmark International, Inc., registered in the United States and/or other countries. All other trademarks are the property of their respective owners. © 2008 Lexmark International, Inc.
-
Page 2: Table Of Contents
Installing printer software...31 Setting up wireless printing...31 Information you will need to set up the printer on a wireless network... 31 Installing the printer on a wireless network (Windows) ... 32 Installing the printer on a wireless network (Macintosh)... 33 Verifying printer setup...36... - Page 3 Printing a directory list... 64 Printing the print quality test pages ... 64 Canceling a print job...65 Canceling a print job from the printer control panel ... 65 Canceling a print job from the computer ... 65 Clearing jams...67 Avoiding jams...67 Identifying jams in the paper path...68...
- Page 4 231 paper jam...74 233 paper jam...75 234 paper jam...76 235 paper jam...77 242 paper jam...77 251 paper jam...78 Understanding printer menus...80 Menus list...80 Paper menu...81 Default Source menu... 81 Paper Size/Type menu ... 81 Configure MP menu... 84 Substitute Size menu... 85 Paper Texture menu ...
- Page 5 Ordering a photoconductor kit ...137 Ordering a maintenance kit ...137 Replacing supplies...137 Replacing the toner cartridge ...137 Replacing the photoconductor kit ...139 Recycling Lexmark products...141 Moving the printer...142 Moving the printer to another location...142 Shipping the printer ...142 Administrative support...143 Finding advanced networking and administrator information...143...
- Page 6 Setting up e-mail alerts...146 Restoring the factory default settings...146 Troubleshooting...147 Solving basic printer problems...147 Printer control panel display is blank or displays only diamonds...147 Solving printing problems...147 Jobs do not print...147 Confidential and other held jobs do not print ...148 Multiple-language PDFs do not print...148...
- Page 7 Toner specks...160 Transparency print quality is poor...160 Streaked horizontal lines...160 Streaked vertical lines ...161 Solid black or white streaks appear on transparencies or paper...162 Embedded Web Server does not open...162 Check the network connections ...162 Check the network settings ...162 Contacting Customer Support...163 Notices...164 Product information...164...
-
Page 9: Safety Information
CAUTION—HOT SURFACE: The fuser and the inside of the printer near the fuser may be hot. To reduce the risk of injury from a hot component, allow the surface to cool before removing paper from this area. - Page 10 • Lift the printer off of the optional drawer and set it aside instead of trying to lift the drawer and printer at the same time. Note: Use the handholds located on both sides of the printer to lift it off the optional drawer.
-
Page 11: Learning About The Printer
Follow the set of instructions for local, network, or wireless, depending on what you need. Help Description The Help gives you instructions for using the software. While in any Lexmark software program, click Help, Tips Customer support Description Telephone support... -
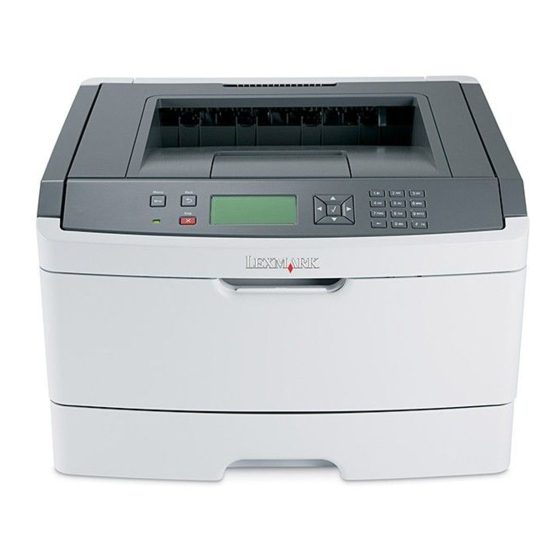
Page 12: Printer Configurations
Printer configurations Basic model The following illustration shows the printer front with its basic features or parts: Front door release button Paper stop Standard exit bin Printer control panel System board door Standard 250-sheet tray (Tray 1) Multipurpose feeder door... - Page 13 Rear door Ethernet port USB port Parallel port Note: If your printer is a wireless model, the wireless antenna is attached here. The wireless antenna replaces the parallel port for the wireless printer model. Power cord socket Power switch Locking device...
-
Page 14: Configured Models
Configured models The following illustration shows the printer configured with an optional 250-sheet drawer: Front door release button Paper stop Standard exit bin Printer control panel System board door Standard 250-sheet tray (Tray 1) Optional 250-sheet drawer (Tray 2) Multipurpose feeder door... -
Page 15: Understanding The Printer Control Panel
The following illustration shows the printer configured with an optional 550-sheet drawer: Front door release button Paper stop Standard exit bin Printer control panel System board door Standard 250-sheet tray (Tray 1) Optional 550-sheet drawer (Tray 2) Multipurpose feeder door... - Page 16 The following diagrams and tables provide more information about the printer control panel items: Item Description ) Opens the menus Menus button ( Note: The menus are available only when the printer is in the Ready state. Returns the display to the previous screen...
- Page 17 Shows messages that communicate the status of the printer or that indicate possible printer problems that must be resolved. The display is also capable of showing pictures of Show Me instructions, which show you how to perform a task like clearing a jam.
-
Page 18: Using The Standard Exit Bin And Paper Stop
The paper stop also aids in neater stacking of the paper. To open the paper stop, pull it so it flips forward. Learning about the printer... - Page 19 Do not leave the paper stop in the open position if you are printing on transparencies. Doing so may cause creases in the transparencies. • When moving the printer to another location, make sure the paper stop is closed. Learning about the printer...
-
Page 20: Additional Printer Setup
Selecting a location for the printer When selecting a location for the printer, leave enough room to open trays, covers, and doors. If you plan to install any options, leave enough room for them also. It is important to: •... -
Page 21: Installing Internal Options
If you have other devices attached to the printer, then turn them off as well, and unplug any cables going into the printer. -
Page 22: Accessing The System Board To Install Internal Options
If you have other devices attached to the printer, then turn them off as well, and unplug any cables going into the printer. -
Page 23: Installing A Memory Card
If you have any other devices attached to the printer, then turn them off as well, and unplug any cables going into the printer. -
Page 24: Installing A Flash Memory Or Firmware Card
If you have other devices attached to the printer, then turn them off as well, and unplug any cables going into the printer. - Page 25 Push the card firmly into place. Notes: • The entire length of the connector on the card must touch and be flush against the system board. • Be careful not to damage the connectors. Close the system board door. Additional printer setup...
-
Page 26: Installing Hardware Options
Installing hardware options Installing a 250- or 550-sheet drawer The printer supports an optional 250- or 550-sheet drawer. Only one drawer may be installed on the printer at one time. CAUTION—SHOCK HAZARD: If you are installing an optional drawer after setting up the printer, then turn the printer off and unplug the power cord from the wall outlet before continuing Unpack the drawer, and then remove any packing material from the outside of the drawer. -
Page 27: Attaching Cables
Connect the printer to a computer or a network. • For a local connection, use a USB or parallel cable. • For a network connection, use an Ethernet cable. Connect the power cord to the printer first and then to a wall outlet. Additional printer setup... -
Page 28: Installing The Printer On A Wired Network
Note: The Ethernet port is a feature on network models only. USB port Parallel port Note: If your printer is a wireless model, the wireless antenna is attached here. The wireless antenna replaces the parallel port for the wireless printer model. Power cord socket Installing the printer on a wired network Use the following instructions to install the printer on a wired network. -
Page 29: For Macintosh Users
37. Locate the printer IP address in the TCP/IP section of the network setup page. You will need the IP address if you are configuring access for computers on a different subnet than the printer. - Page 30 From the second pop-up menu, select Local AppleTalk zone. Select the printer from the list. Click Add. Note: If the printer doesn't show up in the list, you may need to add it using the IP address. Contact your system support person for assistance. Additional printer setup...
-
Page 31: Installing Printer Software
Installing printer software A printer driver is software that lets the computer communicate with the printer. The printer software is typically installed during the initial printer setup. If you need to install the software after setup, follow these instructions: For Windows users Close all open software programs. -
Page 32: Installing The Printer On A Wireless Network (Windows)
WPA includes encryption as an additional layer of security. The choices are AES or TKIP. Encryption must be set for the same type on the router and on the printer or the printer will not be able to communicate on the network. -
Page 33: Installing The Printer On A Wireless Network (Macintosh)
Installing the printer on a wireless network (Macintosh) Prepare to configure the printer Locate the printer MAC address on the sheet that came with the printer. Write the last six digits of the MAC address in the space provided below: MAC address: ___ ___ ___ ___ ___ ___ If your printer has faxing capabilities, then connect the telephone cable. -
Page 34: Configure The Printer For Wireless Access
Select Infrastructure as your Network Mode if you are using a wireless router. Select the type of security you use to protect your wireless network. Enter the security information necessary for the printer to join your wireless network. Click Submit. -
Page 35: Configure Your Computer To Use The Printer Wirelessly
From the Network pop-up menu, select your wireless network. Configure your computer to use the printer wirelessly To print to a network printer, each Macintosh user must install a custom PostScript Printer Description (PPD) file and create a printer in the Print Center or Printer Setup Utility. -
Page 36: Verifying Printer Setup
Select the printer from the list. Click Add. Verifying printer setup Once all hardware and software options are installed and the printer is turned on, verify that the printer is set up correctly by printing the following: . • Menu settings page—Use this page to verify that all printer options are installed correctly. A list of installed options appears toward the bottom of the page. -
Page 37: Printing A Network Setup Page
After the menu settings page prints, Ready appears. Printing a network setup page If the printer is attached to a network, print a network setup page to verify the network connection. This page also provides important information that aids network printing configuration. -
Page 38: Loading Paper And Specialty Media
Configuring Universal paper settings The Universal Paper Size is a user-defined setting that lets you print on paper sizes that are not preset in the printer menus. Set the Paper Size for the specified tray to Universal when the size you want is not available from the Paper Size menu. -
Page 39: Loading The Standard 250-Sheet Tray
Loading the standard 250-sheet tray The printer has two trays to select from: the standard tray (Tray 1), also known as the 250-sheet tray, and either the optional 250-sheet tray or the optional 550-sheet tray (Tray 2). Only one optional drawer (which includes an optional tray) may be attached to the printer at one time. - Page 40 Pull the tray completely out. Squeeze the width guide tabs on the right guide as shown, and slide the width guides to the sides of the tray. Notice that the two width guides move in unison when you move just the right width guide. Squeeze the length guide tabs together as shown, and slide the length guide to the correct position for the paper size being loaded.
- Page 41 If you are loading a longer size of paper like A4 or legal, squeeze the length guide tab and slide the length guide backwards to the position for the length of paper you are loading. The tray extends backwards as shown. If you are loading A6-size paper: Squeeze the length guide tab shown as follows, and slide the length guide toward the center of the tray to the A5 size position.
- Page 42 Flex the sheets back and forth to loosen them, and then fan them. Do not fold or crease the paper. Straighten the edges on a level surface. Load the paper stack toward the back of the tray as shown with the recommended print side facedown. Note: Notice the maximum fill line on the side of the width guide which indicates the maximum height for loading paper.
- Page 43 If a different type of paper was loaded than the type previously loaded in the tray, change the Paper Type setting for the tray from the printer control panel. For more information, see “Setting the Paper Size and Paper Type” on page 38.
-
Page 44: Loading The Optional 250- Or 550-Sheet Tray
Loading the optional 250- or 550-sheet tray Only one optional drawer, which includes either a 250- or 550-sheet tray, may be attached to the printer at a time. Regardless of the number of sheets in the optional tray, it is referred to as Tray 2. -
Page 45: Using The Multipurpose Feeder
Using the multipurpose feeder You may want to use the multipurpose feeder when you print on different sizes and types of papers or specialty media, such as card stock, transparencies, paper labels, and envelopes. You may also want to use the multipurpose feeder for single-page print jobs on letterhead or on other specialty media you do not keep in a tray. -
Page 46: Loading The Multipurpose Feeder
Guide the extension down gently so the multipurpose feeder is extended fully and open. Loading the multipurpose feeder Squeeze the tab located on the right width guide, and move the guides out fully. Prepare the paper or specialty media for loading. •... - Page 47 • Flex a stack of envelopes back and forth to loosen them, and then fan them. Straighten the edges on a level surface. Note: Fanning prevents the edges of envelopes from sticking together. It also helps them feed properly to avoid jams.
- Page 48 • Load paper, transparencies, and card stock with the recommended print side faceup and the top edge entering the printer first. For more information on loading transparencies, see the packaging the transparencies came • Load letterhead with the logo faceup and the top edge entering the printer first.
-
Page 49: Linking And Unlinking Trays
Slide the paper gently into the multipurpose feeder until it comes to a stop. Paper should lie flat in the multipurpose feeder. Make sure the paper fits loosely in the multipurpose feeder and is not bent or wrinkled. From the printer control panel, set the Paper Size and Paper Type. Linking and unlinking trays In addition to linking trays to each other, you can also link the multipurpose feeder to the trays. -
Page 50: Unlinking Trays
Assign a Custom Type <x> name to a tray to link or unlink it. Associate the same Custom Type <x> name to each tray that you want to link. Only trays with the same custom names assigned will link. Make sure the printer is on and Ready appears. From the printer control panel, press... -
Page 51: Changing A Custom Type
Changing a Custom Type <x> name If the printer is on a network, you can use the Embedded Web Server to define a name other than Custom Type <x> for each of the custom paper types that are loaded. When a Custom Type <x> name is changed, the menus display the new name instead of Custom Type <x>.Name -
Page 52: Paper And Specialty Media Guidelines
Moisture content The amount of moisture in paper affects both print quality and the ability of the printer to feed the paper correctly. Leave paper in its original wrapper until it is time to use it. This limits the exposure of paper to moisture changes that can degrade its performance. -
Page 53: Unacceptable Paper
Condition paper before printing by storing it in its original wrapper in the same environment as the printer for 24 to 48 hours before printing. Extend the time several days if the storage or transportation environment is very different from the printer environment. Thick paper may also require a longer conditioning period. -
Page 54: Using Recycled Paper And Other Office Papers
Lexmark consistently tests its printers with recycled paper (20–100% post-consumer waste) and a variety of test paper from around the world, using chamber tests for different temperature and humidity conditions. Lexmark has found no reason to discourage the use of today's recycled office papers, but generally the following property guidelines apply to recycled paper. -
Page 55: Supported Paper Sizes, Types, Weights, And Capacities
Note: For an unlisted paper size, select the closest larger listed size. For information on card stock and labels, see the Card Stock & Label Guide. Paper types and weights supported by the printer The printer engine and the duplex path support 60–90 g/m supports 60–163 g/m (16–43 lb) paper weights. -
Page 56: Paper Sizes Supported By The Printer
Paper sizes supported by the printer Paper size Dimensions 210 x 297 mm (8.3 x 11.7 in.) 148 x 210 mm (5.8 x 8.3 in.) 105 x 148 mm (4.1 x 5.8 in.) 184 x 267 mm Executive (7.3 x 10.5 in.) -
Page 57: Paper Capacities
It is recommended to print no more than 20 pages of paper labels per month. Note: Only one optional drawer may be installed on the printer at a time. The maximum amount of paper that can be loaded depends on whether you have an optional 250- or 550-sheet tray. -
Page 58: Printing
54. Printing a document Load paper into a tray or feeder. From the printer control panel Paper menu, set the Paper Type and Paper Size to match the loaded paper. Do one of the following: For Windows users With a document open, click File Click Properties, Preferences, Options, or Setup, and then adjust the settings as needed. -
Page 59: Printing On Specialty Media
Printing on specialty media Tips on using letterhead Page orientation is important when printing on letterhead. Use the following table to determine which direction to load the letterhead: Source or process Print side • Printed letterhead Standard 250-sheet design is placed tray facedown. -
Page 60: Tips On Using Transparencies
• Before loading transparencies, fan the stack to prevent sheets from sticking together. • We recommend Lexmark part number 70X7240 for letter-size transparencies and Lexmark part number 12A5010 for A4-size transparencies. Tips on using envelopes Print samples on the envelopes being considered for use before buying large quantities. -
Page 61: Tips On Using Labels
Note: Labels can be printed at a higher fusing temperature up to 220°C (428°F) if Label Weight is set to Heavy. Select this setting using the Embedded Web Server, or from the printer control panel Paper menu. –... -
Page 62: Printing Confidential And Other Held Jobs
Holding jobs in the printer When sending a job to the printer, you can specify that you want the printer to hold the job in memory until you start the job from the printer control panel. All print jobs that can be initiated by the user at the printer are called held jobs. -
Page 63: Printing Confidential And Other Held Jobs
For a confidential job, also enter a four-digit PIN. Click OK or Print, and then go to the printer to release the job. From the printer control panel, press the down arrow button until Held jobs appears, and then press Press the down arrow button until Press the down arrow button until If you selected a job name, proceed to step 11 on page 63. -
Page 64: Printing Information Pages
See “Printing a menu settings page” on page 36 and “Printing a network setup page” on page 37 for more information on printing these pages. Printing a font sample list To print samples of the fonts currently available for your printer: Make sure the printer is on and Ready appears. From the printer control panel, press... -
Page 65: Canceling A Print Job
The print quality test pages print. Press the down arrow button until Exit Config Menu appears, and then press Resetting the Printer appears briefly, followed by a clock, and then Ready appears. Canceling a print job Canceling a print job from the printer control panel If the job is formatting or already printing, and Cancel a job appears on the first line of the display: Press the arrow buttons until Cancel appears. - Page 66 When you send a job to print, a small printer icon appears in the right corner of the taskbar. Double-click the printer icon. A list of print jobs appears in the printer window. Select a job to cancel. From the keyboard, press Delete.
-
Page 67: Clearing Jams
To resolve the jam messages, you must clear the entire paper path, and press printing. The printer prints a new copy of the page that jammed if Jam Recovery is set to On or Auto; however, the Auto setting does not guarantee the page will print. -
Page 68: Identifying Jams In The Paper Path
Identifying jams in the paper path The following illustration shows the path that paper travels through the printer. The path varies depending on the input source (tray or feeder) and depending on whether a duplex (two-sided) print job is being sent. - Page 69 Standard exit bin Front door Multipurpose feeder door Tray 1 Optional 250- or 550-sheet tray (Tray 2) Rear door Jam message numbers and how to access each jam Jam number To access the jam Try one or more of the following: •...
-
Page 70: 200 Paper Jam
• If it is not visible, open the front door, and then remove the unit. Lift the flap at the front of the printer, and then remove any jammed sheets. 200 paper jam Remove the tray from the printer. - Page 71 If you do not see it, open the front door, and then remove the photoconductor kit and toner cartridge (unit). Note: When the photoconductor kit and toner cartridge are together, they are called a unit. Lift the flap in front of the printer, and remove any jammed sheets. Align and insert the unit.
-
Page 72: Paper Jam
201 paper jam CAUTION—HOT SURFACE: The fuser and the inside of the printer near the fuser may be hot. To reduce the risk of injury from a hot component, allow the surface to cool before removing paper from this area. -
Page 73: 202 Paper Jam
202 paper jam CAUTION—HOT SURFACE: The fuser and the inside of the printer near the fuser may be hot. To reduce the risk of injury from a hot component, allow the surface to cool before removing paper from this area. -
Page 74: Paper Jam
231 paper jam CAUTION—HOT SURFACE: The fuser and the inside of the printer near the fuser may be hot. To reduce the risk of injury from a hot component, allow the surface to cool before removing paper from this area. -
Page 75: Paper Jam
Remove the jam. Close the rear door. Close the front door. Press If this does not clear the jam, complete the steps in “233 paper jam” on page 75. 233 paper jam Remove the tray from the printer. Clearing jams... -
Page 76: 234 Paper Jam
If this does not clear the jam, complete the steps in “231 paper jam” on page 74. 234 paper jam A single jam or multiple jams are in the duplex area of the printer when the printer is turned on. To locate and remove the jammed sheets, complete all the steps in: •... -
Page 77: Paper Jam
235 paper jam A duplex print job was sent to the printer using a size of paper not supported for duplex printing. A sheet is jammed in the standard exit bin. To remove the jam, gently pull the jammed sheet out of the standard exit bin. -
Page 78: Paper Jam
Remove the jam. Insert the optional tray. Press 251 paper jam A sheet of paper or specialty media failed to feed completely from the multipurpose feeder. Part of it may be still visible. If it is visible, gently pull the jammed sheet from the front of the multipurpose feeder. Clearing jams... - Page 79 If the sheet is not visible, complete the following steps: Open the front door, and then remove the unit. Lift the flap at the front of the printer, and then remove any jammed sheets of paper that are short lengths of paper.
-
Page 80: Understanding Printer Menus
Understanding printer menus Menus list A number of menus and menu items are available to make it easy for you to change printer settings: Paper Menu Default Source Paper Size/Type Configure MP Substitute Size Paper Texture Paper Weight Paper Loading... -
Page 81: Paper Menu
Paper Type settings match, then the trays are automatically linked. The multipurpose feeder may also be linked. When one tray is empty, the job prints using paper from the linked tray. • The A6 paper size is supported only in Tray 1 and the multipurpose feeder. Understanding printer menus... - Page 82 Letter is the US factory default setting. A4 is the international factory default setting. • The menu item applies only when the multipurpose feeder (MP Feeder) is configured for Manual. From the Paper menu, Configure MP must be set to Manual. Understanding printer menus...
- Page 83 Specifies the type of paper loaded in the multipurpose feeder Notes: • Plain Paper is the factory default setting. • From the Paper menu, Configure MP must be set to Cassette in order for MP Feeder to appear as a menu item. Understanding printer menus...
-
Page 84: Configure Mp Menu
The menu item applies only when the multipurpose feeder (MP Feeder) is configured for Manual. From the Paper menu, Configure MP must be set to Manual. Description Determines when the printer selects paper from the multipurpose feeder Notes: • Cassette is the factory default setting. -
Page 85: Substitute Size Menu
Specifies the relative texture of the bond paper loaded in a specific tray Note: Rough is the factory default setting. Specifies the relative texture of the envelopes loaded in a specific tray Note: Normal is the factory default setting. Understanding printer menus... -
Page 86: Paper Weight Menu
Note: Rough is the factory default setting. Specifies the relative texture of the custom paper loaded in a specific tray Notes: • Normal is the factory default setting. • Settings appear only if the custom type is supported. Understanding printer menus... - Page 87 Note: Normal is the factory default setting. Normal Heavy Light Weight Specifies the relative weight of the paper loaded in a specific tray Light Heavy Weight Specifies the relative weight of the paper loaded in a specific tray Heavy Understanding printer menus...
-
Page 88: Paper Loading Menu
Duplex Notes: • Duplex sets the printer default to 2-sided printing for every print job unless 1-sided printing is selected from Print Properties. • If Duplex is selected, all print jobs are sent through the duplex unit, including 1-sided jobs. -
Page 89: Custom Types Menu
Duplex Notes: • Duplex sets the printer default to 2-sided printing for every print job unless 1-sided printing is selected from Print Properties. • If Duplex is selected, all print jobs are sent through the duplex unit, including 1-sided jobs. -
Page 90: Reports Menu
Network Setup Page Description Sets the portrait width Notes: • If the width exceeds the maximum, then the printer uses the maximum width allowed. • 8.5 inches is the US factory default setting. Inches can be increased in 0.01-inch increments. -
Page 91: Print Directory
Note: This menu item appears only for printers with an internal print server installed. Prints a report in English of all the fonts available for the printer language currently set in the printer Note: A separate list is available for PCL and PostScript emulations. Each emulation report contains print samples and information about the available fonts for each language. -
Page 92: Standard Network Or Network
• When the Off setting is used, the printer uses PCL emulation if PCL SmartSwitch is set to On. It uses the default printer language specified in the Setup menu if PCL SmartSwitch is set to Off. Sets the printer to perform the special processing required for bidirectional...Menus -
Page 93: Reports Menu (Under The Network/Ports Menu)
• “NetWare menu” on page 96 • “LexLink menu” on page 97 Note: The Wireless menu appears only when the printer is connected to a wireless network. Std Network Setup or Net <x> Setup • The Setup Page contains information about the network printer settings, such as the TCP/IP address. -
Page 94: Network Address
A setting value of 0 disables the timeout. • If a value of 1–9 is selected, the setting is saved as 10. Allows the printer to print a banner page Note: Off is the factory default setting. Network Setup TCP/IP... -
Page 95: Ipv6 Menu
Specifies the Zero Configuration Networking setting Note: Yes is the factory default setting. Enables the built-in FTP server, which allows files to be transferred to the printer Note: Yes is the factory default setting. Enables the built-in Web server (Embedded Web Server). When enabled, the printer can be monitored and managed remotely using a Web browser. -
Page 96: Network Mode
Description Specifies the network mode Notes: • Infrastructure mode lets the printer access a network using an access point. • Ad hoc is the factory default setting. Ad hoc mode configures the printer for wireless networking directly between it and a computer. -
Page 97: Network Number
Note: Yes is the factory default setting. Network Setup LexLink menu Description Activates or deactivates LexLink support Note: Off is the factory default setting. Shows the assigned LexLink nickname Note: The LexLink nickname can be changed only from the Embedded Web Server. Understanding printer menus... -
Page 98: Usb Menu
3K to <maximum size allowed> Mac Binary PS Auto Description Sets the printer to automatically switch to PCL emulation when a print job received through a USB port requires it, regardless of the default printer language Notes: • On is the factory default setting. -
Page 99: Parallel Menu
Sets the network address information for an external print server that is attached to the printer using a USB cable Note: This menu item is available only if the printer is attached to an external print server through the USB port. -
Page 100: Parallel Buffer
The parallel buffer size setting can be changed in 1-K increments. • The maximum size allowed depends on the amount of memory in the printer, the size of the other link buffers, and whether Resource Save is set to On or Off. -
Page 101: Smtp Setup Menu
ENA Gateway sets the gateway information for an external print server that is attached to the printer using a parallel cable Note: Parallel with ENA is available only if the printer is attached to an external print server through the parallel port. -
Page 102: Security Menu
• None is the factory default setting for Device-Initiated E-mail and User-Initiated E-mail. Description Limits the number and time frames of failed login attempts from the printer control panel before all users are locked out Notes: • “Login failures” specifies the number of failed login attempts before users are locked out. -
Page 103: Confidential Print Menu
Off is the factory default setting. • Once a limit is reached, the jobs for that user name and that PIN are deleted. Limits the amount of time a confidential job stays in the printer before it is deleted Notes: •... -
Page 104: Configure Log
4 is the factory default setting for Severity of events to log. Description Lets you view the current date and time settings for the printer. The format for the date and time is: YYYY-MM-DD HH:MM: YYYY is the four-digit year... -
Page 105: Settings Menu
Note: All languages may not be available for all printers. Minimizes the use of energy, paper, or specialty media Notes: • Off is the factory default setting. Off resets the printer to its factory default settings. • The Energy setting minimizes the power used by the printer. -
Page 106: Quiet Mode
• Single sounds three quick beeps. 88 Cartridge is low appears on the display. Sets the amount of time the printer waits after a job is printed before it goes into a reduced power state Notes: • 30 minutes is the factory default setting. - Page 107 This setting has no effect on PostScript emulation print jobs. For more information on PPDS emulation, see the Technical Reference available on the Lexmark Web site at www.lexmark.com. Sets the amount of time in seconds the printer waits for additional...
-
Page 108: Setup Menu
• PCL is the factory default printer language. • Setting a printer language as the default does not prevent a software program from sending print jobs that use another printer language. Sets the logical and physical printable area Notes: •... -
Page 109: Finishing Menu
• This menu appears only if optional flash memory is installed. Specifies how the printer handles temporary downloads, such as fonts and macros stored in RAM, when the printer receives a job that requires more memory than is available Notes: •... -
Page 110: Separator Sheets
Specifies the paper source for separator sheets Notes: • Tray 1 (standard tray) is the factory default setting. • From the Paper menu, Configure MP must be set to Cassette in order for Multi-Purpose Feeder to appear as a menu setting. Understanding printer menus... -
Page 111: Quality Menu
Positioning depends on the number of images and whether the images are in portrait or landscape orientation. Specifies the orientation of a multiple-page sheet Notes: • Auto is the factory default setting. The printer chooses between portrait and landscape. • Landscape uses Long Edge. •... -
Page 112: Utilities Menu
Print, and then adjust the settings from the Print dialog and pop-up menus. • To set Enhance Fine Lines using the Embedded Web Server, type the network printer IP address in a browser window, and from Print Settings, click Quality Menu. Automatically adjusts the contrast enhancement applied to images Note: Auto is the factory default setting. -
Page 113: Defragment Flash
Assists in isolating the source of a print job problem Notes: • When Activate is selected, all data sent to the printer is printed in hexadecimal and character representation and control codes are not executed. • To exit Hex Trace, turn the printer off or reset the printer. -
Page 114: Postscript Menu
• Resident is the factory default setting. • A formatted optional flash memory card must be installed in the printer and operating properly for this menu item to be available. • The optional flash memory card cannot be Read/Write, Write, or password protected. - Page 115 60 is the US factory default setting. 64 is the international factory default setting. • The printer sets the amount of space between each line based on the Lines per Page, Paper Size, and Orientation settings. Select the desired Paper Size and Orientation before setting Lines per Page.
-
Page 116: Tray Renumber
The printer supports one standard 250-sheet tray and can have only one optional drawer installed, either the 250- or 550-sheet drawer. Therefore, only Tray 1 and Tray 2 of the Tray values apply to your printer • The factory default settings appear even if the source is not installed. -
Page 117: Html Menu
Sets the page orientation for HTML documents Note: Portrait is the factory default setting. Sets the page margin for HTML documents Notes: • 19 mm is the factory default setting. • Margin size can be increased in 1-mm increments. Understanding printer menus... -
Page 118: Image Menu
Rev Landscape Help menu The Help menu consists of a series of Help menu pages that are stored in the printer as PDFs. They contain information about using the printer and performing printing tasks. English, French, German, and Spanish translations are stored in the printer. Other translations are available on the Software and Documentation CD. - Page 119 Provides a list of the paper sizes supported in trays, drawers, and feeders Provides information about resolving print defects Provides a list of the printer control panel menus and menu items Provides help in locating additional information Provides information about connecting the printer locally (USB) or to a network...
-
Page 120: Understanding Printer Messages
Understanding printer messages When Manual Feeder appears on the display, it refers to the multipurpose feeder. List of status and error messages Activating Menu Changes Wait for the message to clear. Busy Wait for the message to clear. Busy ... -
Page 121: Cartridge Life Exceeded
Deleting held jobs Wait for the message to clear. Disabling Menus Wait for the message to clear. Note: While the menus are disabled, printer settings cannot be changed from the printer control panel. Understanding printer messages if the paper was changed. -
Page 122: Enabling Menus
The printer is in Hex Trace mode. Hex Trace Ready The printer is in the Ready state, and Hex Trace is active. You can use Hex Trace to troubleshoot printer problems. Invalid Engine Code You need to download valid engine code for the printer. -
Page 123: Menus Are Disabled
Network <x>, <y> indicates a network interface is the active communication link, where <x>, <y> indicates the active interface is connected to the printer through channel y on PCI connector x. If x equals 0, then the standard network interface is active. -
Page 124: No Jobs To Cancel
Wait for the message to clear. Power Saver The printer is saving power while it waits for the next print job. Send a job to print to take the printer out of Power Saver mode. Printing Wait for the message to clear. -
Page 125: Resetting Without Replacing May Affect Print Quality
Replace PC Kit This is the early warning message for the photoconductor kit. The printer continues printing unless the value for the Cartridge Alarm is changed from the printer control panel or set to On from the Supply Notifications Web page (located on the Embedded Web Server). -
Page 126: Restoring Factory Defaults
You attempted to log in too many times with an incorrect PIN • You attempted to log in using an incorrect password number for access to a printer feature, setting, or menu that you do not have access to. Note: There is a defined limit on the number of login attempts. Once the limit is reached, this message appears and the printer enters a lockout mode. -
Page 127: Insufficient Memory To Support Resource Save Feature
USB/USB <x> The USB port is the active communication link. The printer is processing data through the specified USB port. Wait for the message to clear. Waiting, too many events … DO NOT POWER OFF The printer received too much information. This message appears while it sorts or processes all the information it received. -
Page 128: Insufficient Memory For Flash Memory Defragment Operation
42.xy Cartridge region mismatch Install a toner cartridge that matches the region number of the printer. x indicates the value of the printer region. y indicates the value of the cartridge region. x and y can have the following values:... -
Page 129: Not Enough Free Space In Flash Memory For Resources
Press the down arrow button until Continue appears, and then press printing. • The printer cannot find a requested font. From the PPDS menu, select Best Fit, and then select On. The printer will find a similar font and reformat the affected text. •... -
Page 130: Too Many Flash Options Installed
80 Routine maintenance needed The printer needs to have scheduled maintenance done. Order a maintenance kit, which contains a fuser and a transfer roller. Contact Customer Support, and report the message. 84 PC Kit life warning The photoconductor kit is near exhaustion. -
Page 131: Yy Paper Jam
231.yy Paper jam The message indicates either where the paper is jammed or the number of pages jammed. Open the front door. Open the rear door. Remove the jam. Close both doors. Press to continue printing. Understanding printer messages... - Page 132 The message indicates either where the paper is jammed or the number of pages jammed. Remove the jam from the standard exit bin. Check the paper size to ensure that it is supported by the printer. Press to continue printing.
-
Page 133: 1565 Emulation Error, Load Emulation Option
1565 Emulation error, load emulation option The printer automatically clears the message in 30 seconds and then disables the download emulator on the firmware card. To fix this, download the correct download emulator version from the Lexmark Web site at www.lexmark.com. Understanding printer messages... -
Page 134: Maintaining The Printer
Make sure all areas of the printer are dry before beginning a new print job. Storing supplies Choose a cool, clean storage area for the printer supplies. Store supplies right side up in their original packing until you are ready to use them. -
Page 135: Conserving Supplies
Note: The computer must be connected to the same network as the printer. Type the printer IP address into the address field of your Web browser. Note: If you do not know the IP address of the printer, print a network setup page and locate the IP address in the TCP/IP section. -
Page 136: Ordering Supplies
To order supplies in the U.S., contact Lexmark at 1-800-539-6275 for information about Lexmark authorized supplies dealers in your area. In other countries or regions, visit the Lexmark Web Site at www.lexmark.com or contact the place where you purchased the printer. -
Page 137: Ordering A Photoconductor Kit
Ordering a photoconductor kit Depending on your printer model, the printer issues a message or a light sequence to let you know the photoconductor kit is near its end of life. At this time, order a photoconductor kit. You can also see the status of the photoconductor kit by printing a network setup page. - Page 138 To replace the toner cartridge: Open the front door by pressing the button on the left side of the printer and lowering the door. Press the button on the base of the photoconductor kit, and then pull the toner cartridge out using the handle.
-
Page 139: Replacing The Photoconductor Kit
Note: The photoconductor kit is one item only. Open the front door by pressing the button on the left side of the printer and lowering the front door. Pull the photoconductor kit and toner cartridge out of the printer as a unit by pulling on the toner cartridge handle. - Page 140 Place the unit on a flat, clean surface. Press the button on the base of the photoconductor kit. Pull the toner cartridge up and out using the handle. Unpack the new photoconductor kit. Be careful not to touch the photoconductor drum. Maintaining the printer...
-
Page 141: Recycling Lexmark Products
Push the toner cartridge until it clicks into place. Install the unit into the printer by aligning the arrows on the guides of the unit with the arrows in the printer. Push the unit as far as it will go. -
Page 142: Moving The Printer
Disconnect all cords and cables from the printer before moving it. • Lift the printer off of the optional drawer and set it aside instead of trying to lift the drawer and printer at the same time. Note: Use the handholds located on both sides of the printer to lift it off the optional drawer. -
Page 143: Administrative Support
To access the Embedded Web Server, type the printer IP address into the address field of your Web browser. Note: If you do not know the IP address of the printer, then print a network setup page and locate the IP address in the TCP/IP section. -
Page 144: Checking The Device Status
Type the printer IP address in the address field of your Web browser. Note: If you do not know the IP address of the printer, then print a network setup page and locate the IP address in the TCP/IP section. -
Page 145: Adjusting Power Saver
Type the printer IP address into the address field of your Web browser. Note: If you do not know the IP address of the printer, then print a network setup page and locate the IP address in the TCP/IP section. -
Page 146: Setting Up E-Mail Alerts
Type the printer IP address into the address field of your Web browser. Note: If you do not know the IP address of the printer, then print a network setup page and locate the IP address in the TCP/IP section. -
Page 147: Troubleshooting
• The printer driver settings are correct. Once you have checked each of these possibilities, turn the printer off, wait for about 10 seconds, and then turn the printer back on. This often fixes the problem. Printer control panel display is blank or displays only diamonds The printer self test failed. -
Page 148: Confidential And Other Held Jobs Do Not Print
Contact your system support person to make sure the network is functioning correctly. Copies of the printer software are also available on the Lexmark Web site at www.lexmark.com. AKE SURE YOU ARE USING A RECOMMENDED For more information, visit the Lexmark Web site at www.lexmark.com. -
Page 149: Job Takes Longer Than Expected To Print
Incorrect characters print Make sure the printer is not in Hex Trace mode. If Ready Hex appears on the display, you must exit Hex Trace mode before you can print your job. Turn the printer off and back on to exit Hex Trace mode. -
Page 150: Large Jobs Do Not Collate
Option does not operate correctly or quits after it is installed These are possible solutions. Try one or more of the following: ESET THE PRINTER Turn the printer off, wait for about 10 seconds, and then turn the printer on. Troubleshooting... -
Page 151: Drawers
Print a menu settings page and check to see if the option is listed in the Installed Options list. If the option is not listed, reinstall it. AKE SURE THE OPTION IS SELECTED From the program you are using, select the option. Mac OS 9 users should make sure the printer is set up in the Chooser. Drawers These are possible solutions. -
Page 152: Solving Paper Feed Problems
Solving paper feed problems Paper frequently jams These are possible solutions. Try one or more of the following: FLEX AND STRAIGHTEN THE PAPER IN THE TRAY OR FEEDER Turn the stack of paper over, if possible, when you reload it into the tray or feeder. HECK THE PAPER Use recommended paper and other specialty media. -
Page 153: Solving Print Quality Problems
Solving print quality problems The information in the following topics may help you solve print quality problems. If these suggestions still do not correct the problem, then contact Customer Support. You may have a printer part that requires adjustment or replacement. -
Page 154: Blank Pages
If the printer still prints blank pages, it may need to be serviced. For more information, contact Customer Support. Characters have jagged or uneven edges If you are using downloaded fonts, verify that the fonts are supported by the printer, the host computer, and the software program. -
Page 155: Gray Background
For Macintosh users: From the Print dialog, make sure the Paper Type setting matches the paper loaded in the tray. • From the printer control panel Paper menu, make sure the Paper Type setting matches the paper loaded in the tray. Troubleshooting... -
Page 156: Incorrect Margins
For Macintosh users: From the Print dialog, make sure the Paper Type setting matches the paper loaded in the tray. • From the printer control panel Paper menu, make sure the Paper Type setting matches the paper loaded in the tray. HE PAPER HAS ABSORBED MOISTURE DUE TO HIGH HUMIDITY •... -
Page 157: Print Is Too Dark
For Macintosh users: From the Print dialog, make sure the Paper Type setting matches the paper loaded in the tray. • From the printer control panel Paper menu, make sure the Paper Type setting matches the paper loaded in the tray. HE TONER CARTRIDGE MAY BE DEFECTIVE Replace the toner cartridge. -
Page 158: Print Is Too Light
HECK THE PAPER TYPE SETTING Make sure the paper type setting matches the paper loaded in the tray: From the printer control panel, check the Paper Type setting from the Paper menu. Before sending the job to print, specify the correct type setting: •... -
Page 159: Skewed Print
Move the guides in the tray to the correct positions for the paper size loaded. HECK THE PAPER Make sure you are using paper that meets the printer specifications. Toner fog or background shading appears on the page These are possible solutions. Try one or more of the following: HE TONER CARTRIDGE MAY BE DEFECTIVE Replace the toner cartridge. -
Page 160: Toner Specks
These are possible solutions. Try one or more of the following: HE TONER MAY SMEAR WHEN PAPER IS FED FROM A SPECIFIC SOURCE From Print Properties, the Print dialog, or the printer control panel, select another tray or feeder to feed the paper for the job. -
Page 161: Streaked Vertical Lines
These are possible solutions. Try one or more of the following: HE TONER MAY SMEAR WHEN PAPER IS FED FROM A SPECIFIC SOURCE From Print Properties, the Print dialog, or the printer control panel, select another tray or feeder to feed paper for the job. -
Page 162: Solid Black Or White Streaks Appear On Transparencies Or Paper
Make sure the printer and computer are turned on and connected to the same network. HECK THE NETWORK SETTINGS Depending on the network settings, you may need to type https:// instead of http:// before the printer IP address to access the Embedded Web Server. For more information, see your system administrator. -
Page 163: Contacting Customer Support
You need to know your printer model type and serial number. For more information, see the label on the inside top front cover of the printer. The serial number is also listed on the menu settings page. In the U.S. or Canada, call (1-800-539-6275). For other countries/regions, visit the Lexmark Web site at www.lexmark.com. -
Page 164: Notices
The following paragraph does not apply to any country where such provisions are inconsistent with local law: LEXMARK INTERNATIONAL, INC., PROVIDES THIS PUBLICATION “AS IS” WITHOUT WARRANTY OF ANY KIND, EITHER EXPRESS OR IMPLIED, INCLUDING, BUT NOT LIMITED TO, THE IMPLIED WARRANTIES OF MERCHANTABILITY OR FITNESS FOR A PARTICULAR PURPOSE. -
Page 165: United States Government Rights
This software and any accompanying documentation provided under this agreement are commercial computer software and documentation developed exclusively at private expense. Trademarks Lexmark, Lexmark with diamond design, and MarkVision are trademarks of Lexmark International, Inc., registered in the United States and/or other countries. PrintCryption, is a trademark of Lexmark International, Inc. -
Page 166: Federal Communications Commission (Fcc) Compliance Information Statement
Note: To assure compliance with FCC regulations on electromagnetic interference for a Class B computing device, use a properly shielded and grounded cable such as Lexmark part number 1021231 for parallel attach or 1021294 for USB attach. Use of a substitute cable not properly shielded and grounded may result in a violation of FCC regulations. -
Page 167: Industry Canada Compliance Statement
A declaration of conformity with the requirements of the directives has been signed by the Director of Manufacturing and Technical Support, Lexmark International, Inc., S.A., Boigny, France. This product satisfies the Class B limits of EN 55022 and safety requirements of EN 60950. - Page 168 Operation is allowed in all EU and EFTA countries, but is restricted to indoor use only. A declaration of conformity with the requirements of the directives is available from the Director of Manufacturing and Technical Support, Lexmark International, S. A., Boigny, France. Notices...
- Page 169 Alulírott, Lexmark International, Inc. nyilatkozom, hogy a termék megfelel a vonatkozó alapvetõ követelményeknek és az 1999/5/EC irányelv egyéb elõírásainak. Íslenska Hér með lýsir Lexmark International, Inc. yfir því að þessi vara er í samræmi við grunnkröfur og aðrar kröfur, sem gerðar eru í tilskipun 1999/5/EC. Italiano Con la presente Lexmark International, Inc.
-
Page 170: Noise Emission Levels
Slovensky Lexmark International, Inc. týmto vyhlasuje, že tento produkt spĺňa základné požiadavky a všetky príslušné ustanovenia smernice 1999/5/ES. Slovensko Lexmark International, Inc. izjavlja, da je ta izdelek v skladu z bistvenimi zahtevami in ostalimi relevantnimi določili direktive 1999/5/ES. Svenska Härmed intygar Lexmark International, Inc. att denna produkt står i överensstämmelse med de väsentliga egenskapskrav och övriga relevanta bestämmelser som framgår av direktiv 1999/5/EG. -
Page 171: Energy Star
Laser notice The printer is certified in the U.S. to conform to the requirements of DHHS 21 CFR Subchapter J for Class I (1) laser products, and elsewhere is certified as a Class I laser product conforming to the requirements of IEC 60825-1. -
Page 172: Statement Of Limited Warranty
—Is manufactured from new parts, or new and serviceable used parts, which perform like new parts —Is, during normal use, free from defects in material and workmanship If this product does not function as warranted during the warranty period, contact a Remarketer or Lexmark for repair or replacement (at Lexmark's option). -
Page 173: Extent Of Limited Warranty
Remarketer or Lexmark, or ship it prepaid and suitably packaged to a Lexmark designated location. You are responsible for loss of, or damage to, a product in transit to the Remarketer or the Lexmark designated location. -
Page 174: Limitation Of Liability
Lexmark's liability for actual damages from any cause whatsoever will be limited to the amount you paid for the product that caused the damages. This limitation of liability will not apply to claims by you for bodily injury or damage to real property or tangible personal property for which Lexmark is legally liable. - Page 175 Lexmark that cannot be excluded or modified. If any such provisions apply, then to the extent Lexmark is able, Lexmark hereby limits its liability for breach of those provisions to one of the following: providing you a replacement copy of the Software Program or reimbursement of the price paid for the Software Program.
- Page 176 If you have such statutory rights, you will notify Lexmark in writing of any intended reverse engineering, reverse assembly, or reverse compilation. You may not decrypt the Software Program unless necessary for the legitimate Use of the Software Program.
- Page 177 Software Program and requested by you. Lexmark agrees not to use this information in a form that personally identifies you except to the extent necessary to provide such services.
-
Page 178: Index
Calibrating 120 calling Customer Support 163 Cancel not available 120 Canceling 120 canceling a job from Macintosh 65 from the printer control panel 65 from Windows 65 card stock loading 45 tips 61 Cartridge Life Exceeded 121 Cartridge Low 120 Cartridge Nearly Low 120 Change <src>... - Page 179 146 notice of paper jam 146 notice of paper needed 146 notice that different paper is needed 146 factory defaults, restoring printer control panel menus 146 FCC notices 166, 167 fiber optic network setup 28 finding information customer support 11...
- Page 180 242 77 251 78 paper labels loading 45 Paper Loading menu 88 Paper Size/Type menu 81 paper sizes supported by the printer 56 paper stop, using 18 Index Paper Texture menu 85 paper types duplex support 55 supported by printer 55...
- Page 181 12 configurations 12 minimum clearances 20 moving 142 selecting a location 20 shipping 142 printer control panel 15 factory defaults, restoring 146 printer message 201.yy Paper jam 131 printer messages 1565 Emulation error, load emulation option 133 200.yy Paper jam 131...
- Page 182 Programming System Code 125 Quality menu 111 Ready 125 recommended print side 53 recycled paper using 54 recycling Lexmark products 141 WEEE statement 170 Remote Management Active 125 Remove paper from standard bin 125 Remove paper from standard output bin 125...
- Page 183 160 streaked vertical lines 161 toner fog or background shading 159 toner rubs off 159 toner specks 160 troubleshooting, printer options drawers 151 flash memory card 151 memory card 151 option not working 150 Universal Paper Size 89...
Need help?
Do you have a question about the E460dw and is the answer not in the manual?
Questions and answers