Table of Contents
Advertisement
E230, E232, E330, E332n
User's Reference
November 2003
www.lexmark.com
Lexmark and Lexmark with diamond design are trademarks of Lexmark International, Inc.,
registered in the United States and/or other countries.
© 2003 Lexmark International, Inc. All rights reserved.
740 West New Circle Road
Lexington, Kentucky 40550
Advertisement
Table of Contents
Troubleshooting

Related Manuals for Lexmark E230


Summary of Contents for Lexmark E230
- Page 1 E230, E232, E330, E332n User’s Reference November 2003 www.lexmark.com Lexmark and Lexmark with diamond design are trademarks of Lexmark International, Inc., registered in the United States and/or other countries. © 2003 Lexmark International, Inc. All rights reserved. 740 West New Circle Road...
-
Page 2: Table Of Contents
Chapter 2: Print media tasks and tips... 13 What types of print media can be loaded? ... 14 Where can print media be loaded in the printer? ... 15 Tips on choosing the right print media ... 16 Paper ... 16 Preprinted forms and letterhead ... - Page 3 How to add a flash card... 46 How to install a 550-sheet drawer ... 48 How to get the printer driver to recognize installed options... 49 Chapter 5: Using the operator panel ... 50 Overview of the operator panel ... 51 Understanding the operator panel lights ...
- Page 4 Macintosh ... 94 How to configure for TCP/IP... 95 Assigning a printer IP address ... 95 Verifying the IP settings ... 95 How to set up the printer for network printing... 96 Windows ... 96 Macintosh ... 100 UNIX/Linux ... 102 NetWare ...
- Page 5 Chapter 9: Troubleshooting ... 115 General problems... 116 Print quality problems... 118 How to clean the printhead lens ... 122 Index... 125 Contents...
-
Page 6: Notices
Eire, send to Lexmark International Ltd., Marketing and Services Department, Westhorpe House, Westhorpe, Marlow Bucks SL7 3RQ. Lexmark may use or distribute any of the information you supply in any way it believes appropriate without incurring any obligation to you. You can purchase additional copies of publications related to this product by calling 1-800-553-9727. -
Page 7: Licensing Notice
Lexmark modified version is similarly provided without warranty. See the warranty disclaimers in the referenced licenses for additional details. To obtain source code files for the Lexmark modified GNU licensed software, launch the drivers CD that shipped with your printer and click Contact Lexmark. - Page 8 Companies participating in this program introduce products that power down when they are not being used. This feature will cut the energy used by up to 50 percent. Lexmark is proud to be a participant in this program. As an ENERGY STAR Partner, Lexmark International, Inc. has determined that this product meets the ENERGY STAR guidelines for energy efficiency.
-
Page 9: Printer Energy Consumption
Power Saver Timeout. The factory default Power Saver Timeout is 15 minutes for the Lexmark E230 and 30 minutes for the Lexmark E232, Lexmark E330, and Lexmark E332n. - Page 10 Lexmark is legally liable. In no event will Lexmark be liable for any lost profits, lost savings, incidental damage, or other economic consequential damages.
-
Page 11: Chapter 1: Printer Overview
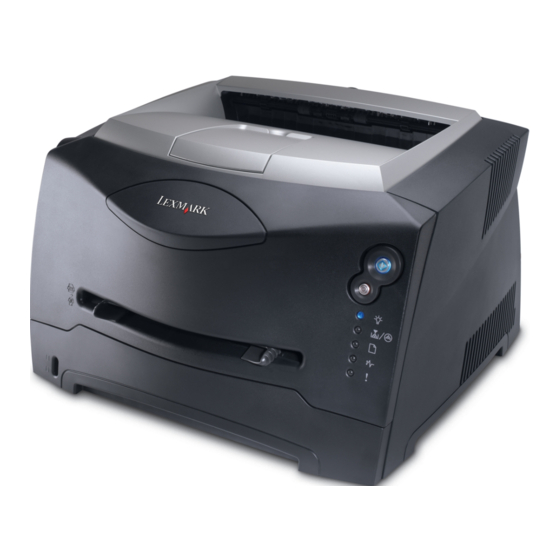
Printer overview 150-sheet output bin Paper support Front cover Manual feeder 250-sheet tray Optional 550-sheet drawer Printer overview Operator panel Rear paper exit Power button Dust cover (some models) - Page 12 • Press and release Cancel • Press and hold Cancel to resume printing. twice quickly to display a secondary error code. to cancel the job currently printing. until all of the lights come on to reset the printer. Printer overview...
-
Page 13: Chapter 2: Print Media Tasks And Tips
Print media tasks and tips Section What types of print media can be loaded? Where can print media be loaded in the printer? Tips on choosing the right print media Tips on storing print media and supplies Tips on preventing jams... -
Page 14: What Types Of Print Media Can Be Loaded
What types of print media can be loaded? Get the most out of your printer by properly loading the trays. Never mix media types within a tray. Source Sizes Tray 1 A4, A5, JIS B5, letter, legal, executive, folio, (250-sheet tray) -
Page 15: Where Can Print Media Be Loaded In The Printer
550-sheet drawer. An output bin on top of the printer holds up to 150 sheets. The single-sheet rear exit provides a straight-through paper path to help reduce curling and potential jams. This is especially useful for specialty media, such as transparencies, envelopes, paper labels, card stock, or index cards. -
Page 16: Tips On Choosing The Right Print Media
Refer to the Card Stock & Label Guide available on our Lexmark Web site at more information about which paper provides optimum results for your printing environment. -
Page 17: Envelopes
Envelopes • Use envelopes made from 24 lb (90 g/m • Do not use envelopes that: – Have excessive curl – Are stuck together – Are damaged in any way – Contain windows, holes, perforations, cutouts, or embossments – Use metal clasps, string ties, or metal folding bars –... -
Page 18: Card Stock
Do not place anything on top of paper packages. Storing supplies Choose a cool, clean storage area for your printer supplies. Store supplies right side up in their original packaging until you are ready to use them. Do not expose supplies to: •... -
Page 19: Tips On Preventing Jams
Tips on preventing jams You can avoid most paper jams by correctly loading paper and specialty media in the printer. The following hints can help you avoid paper jams: • Do not load wrinkled, creased, or damp paper. • Never mix media types within a tray. -
Page 20: How To Load The 250-Sheet And 550-Sheet Trays
How to load the 250-sheet and 550-sheet trays Follow these instructions to load paper in the 250-sheet tray and 550-sheet tray. Remove the tray. Note: If you are going to load legal or folio size paper, you have to extend the length of the paper tray. - Page 21 Load the paper in the tray with the print side facing down. Note: Load letterhead paper with the design side facing down. The top edge of the sheet with the logo should be placed at the front of the tray. Make sure the paper is below the max fill line on the side guides.
- Page 22 Insert the tray. Extend the paper support on the output bin. Print media tasks and tips...
-
Page 23: Extending The Tray For Legal Or Folio Size Paper
To load legal or folio size paper, you need to extend the paper tray. You should also attach the dust cover on the back of the printer to protect the tray while it is extended. Press down on the latch at the back of the tray. -
Page 24: How To Load The Manual Feeder
How to load the manual feeder The manual feeder is located at the front of your printer and can only feed one sheet of print media at a time. You can use the manual feeder to make quick runs of paper types or sizes that are not currently loaded in the paper tray. -
Page 25: How To Use The Rear Exit
To use the rear exit, simply open the rear exit door. When the rear exit door is open, all print media comes out the rear exit. When closed, all media is sent to the output bin on top of the printer. -
Page 26: How To Clear Paper Jams
How to clear paper jams When a paper jam occurs, the printer stops and the operator panel’s Paper Jam Continue lights come on. Press and release Continue twice quickly to display the specific secondary error paper jam light sequence. See “Secondary error codes”... - Page 27 Open the front cover and remove the print cartridge assembly. Warning: Do not leave the print cartridge assembly exposed to direct light for an extended period of time. Extended light exposure can cause print quality problems. Remove any jams in the area behind the print cartridge assembly. Print media tasks and tips...
- Page 28 Lift the flap at the front of the printer and remove any jams beneath the flap. Open the rear exit and remove any jams. After you have cleared the jams, reinstall the print cartridge assembly, make sure all printer covers and trays are closed, and then press Continue Note: The printer reprints the pages that caused the paper jam.
-
Page 29: Chapter 3: Printing Tasks
Printing tasks Section How to manually feed a print job How to print on both sides of the paper (manual duplex) How to print multiple page images on one page (N-up printing) How to print a booklet How to print a poster How to print on letterhead How to print using an overlay or a watermark How to cancel a print job... -
Page 30: How To Manually Feed A Print Job
How to manually feed a print job The manual feeder is located at the front of your printer and can only feed one sheet of print media at a time. For information on acceptable print media to use in the manual feeder, see print media can be loaded?”... - Page 31 If you experience problems with paper feed, turn the paper over. Adjust the paper guides to the print media’s width. Hold both sides of the print media close to the manual feeder and push it into the printer until it automatically engages.
-
Page 32: How To Print On Both Sides Of The Paper (Manual Duplex)
Front of sheet To manually duplex a print job: From the computer’s software application, select File Click Properties (or Options, Printer, or Setup, depending on the application) to view the printer driver settings. From the Page Layout tab, select 2-sided printing. - Page 33 Select the appropriate Input options for your print job. Click OK. Click OK on the Print window. The printer prints every other page of the document first. Once the first side of your job prints, the Load Paper light comes on and the Continue Load the paper back into the printer with the already-printed side up and the top of the page toward the front of the tray.
-
Page 34: How To Print Multiple Page Images On One Page (N-Up Printing)
2-Up means two page images are printed on one page, 4-up means four page images are printed on one page, and so on. The printer uses the Multipage Order, Multipage View, and Multipage Border settings to determine the order and orientation of the page images, and whether a border is printed around each page image. -
Page 35: How To Print A Booklet
Sheets per Bundle option to specify how many physical pages are put into one bundle. The printer will print the necessary number of bundles, which you can then bind into one booklet. Printing in bundles helps the outside edge of the pages line up more evenly. -
Page 36: How To Print A Poster
From the computer’s software application, select File Click Properties (or Options, Printer, or Setup, depending on the application) to view the printer driver settings. From the Page Layout tab, click More Page Layout Options. -
Page 37: How To Print On Letterhead
Watermarks are simple text. You can create overlays and watermarks and then download them directly to the printer, or you can create an overlay or watermark file on your system and then download it to the printer. -
Page 38: Using An Overlay
Using an overlay From the computer’s software application, select File Click Properties (or Options, Printer, or Setup, depending on the application) to view the printer driver settings. Click the Other Options tab. Click Overlays. Select which pages receive the overlay. -
Page 39: How To Cancel A Print Job
Right-click the document you want to stop printing, and then click Cancel. From a Macintosh computer When you send a job to print, the printer icon appears on the desktop. Double-click the printer icon on your desktop. A list of print jobs appears. -
Page 40: Chapter 4: How To Install Options
Section How to access the system board How to add a memory card How to add a flash card How to install a 550-sheet drawer How to get the printer driver to recognize installed options How to install options Page... -
Page 41: How To Access The System Board
To install a memory or flash card you must access the printer system board. CAUTION: Turn the printer off and unplug the power cord before continuing. Open the front cover by pressing the button on the left side of the printer and lowering the cover. How to install options... - Page 42 Open the rear exit. Open the side cover by pressing the two detents on the front right side of the machine and swinging the cover back. How to install options...
- Page 43 Remove the two screws at the top and side of the metal plate covering the system board. Remove the metal plate by rotating it towards the front and to the right. How to install options...
-
Page 44: How To Reattach The System Board Cover
Insert the two tabs on the right side of the metal plate into the holes toward the back of the system board and rotate the system board until it is flush against the printer. Screw in the two screws at the top and side of the metal plate. -
Page 45: How To Add A Memory Card
The system board has one connector for an optional memory card. The printer can support up to 64MB of additional memory (for a total of 80MB) for the Lexmark E232 and up to 128MB (for a total of 160MB) for the Lexmark E330 and Lexmark E332n. The Lexmark E230 does not support additional memory. -
Page 46: How To Add A Flash Card
If you are installing a flash card after setting up the printer, turn the printer off and unplug the power cord before continuing. Note: Flash cards designed for other Lexmark printers may not work with your printer. Access the system board (see Unpack the flash card. - Page 47 The entire length of the connector on the flash card must touch and be flush against the system board. Be careful not to damage the connectors. Reattach the system board cover (see How to get the printer driver to recognize installed How to reattach the system board options. How to install options...
-
Page 48: How To Install A 550-Sheet Drawer
Unpack the 550-sheet drawer and remove any packing material. Place the drawer in the location you have chosen for your printer. Align the holes in the printer with the positioning posts on the 550-sheet drawer and lower the printer into place. -
Page 49: How To Get The Printer Driver To Recognize Installed Options
How to get the printer driver to recognize installed options After the printer is turned on, the printer driver should automatically recognize an option you installed. If it does not, you can add it manually. Note: If you have not installed your printer driver yet, follow the appropriate instructions... -
Page 50: Chapter 5: Using The Operator Panel
Using the operator panel Section Overview of the operator panel Understanding the operator panel lights Operator panel codes Using the operator panel Page... -
Page 51: Overview Of The Operator Panel
Press and release Cancel • Press and hold Cancel to resume printing. twice quickly to display a secondary error code. to cancel the job currently printing. until all of the lights come on to reset the printer. Using the operator panel... -
Page 52: Understanding The Operator Panel Lights
The operator panel lights mean different things, depending on their sequence. Lights that are off, on, and/or blinking indicate printer conditions such as printer status, intervention, or service. The following tables show the most common light sequences. Click the indicated page for more information on what it means. - Page 53 Common light sequences (continued) = On = Blinking = Slow blink Empty = Off Page: Continue Ready Toner Low / Replace PC Kit Load Paper Paper Jam Error * See “Secondary errors” on page 54 for more information. Using the operator panel...
-
Page 54: Secondary Errors
Secondary errors • When the Error and Continue • When the Paper Jam has occurred. Press and release Continue The following table shows what these light sequences mean and where to go for help lights are both on, a secondary error has occurred. and Continue lights are both on, a paper jam secondary error twice quickly to display the secondary error code light sequence. - Page 55 Toner Low / Replace PC Kit Load Paper Paper Jam Error * Paper jams at the input sensor can be either after the paper leaves the tray and enters the printer or in the manual feeder. Using the operator panel...
- Page 56 Secondary Error codes (continued) = On = Blinking Empty = Off Page: Continue Ready Toner Low / Replace PC Kit Load Paper Paper Jam Error Using the operator panel...
-
Page 57: Operator Panel Codes
• Press and hold Cancel Note: If you want to change the Power Saver setting, it can only be set from the Local Printer Setup Utility (see page to print the menu settings pages for a to reset the printer. - Page 58 • The printer is formatting the flash memory. • The printer is storing resources, such as fonts or macros, in flash memory. • The printer is printing a directory, font list, menu settings pages, or Print Quality Test Pages.
- Page 59 Waiting Light sequence: • Continue—On • Ready—On What this light sequence means: The printer is waiting until a print timeout occurs, or until it receives additional data. What you can do: • Press Continue • Press and release Cancel •...
- Page 60 Press and hold Cancel Not ready Light sequence: • Continue—On What this light sequence means: The printer is not ready to receive or process data, or the printer ports are offline. What you can do: • Press Continue • Press and release Cancel •...
- Page 61 Continue—On • Load Paper—On What this light sequence means: The printer is out of media, or the media did not feed properly. What you can do: • Load media into tray 1 or the optional 550-sheet tray and press Continue •...
- Page 62 Continue—On • Load Paper—Blink What this light sequence means: The printer prompts you to load a single sheet of media in the manual feed. What you can do: • Load media, with the side to be printed facing the front of the printer, into the manual feed.
- Page 63 Toner low Light sequence: • Toner Low/Replace PC Kit—On What this light sequence means: The printer is ready to receive and process data. In addition, the toner in the toner cartridge is getting low. What you can do: • Press Continue of current printer settings.
- Page 64 Photoconductor kit near full Light sequence: • Continue—On • Toner Low/Replace PC Kit—Blink What this light sequence means: The photoconductor kit’s drum is almost full and will need replacing soon. Note: The Toner Alarm (see page 103) must be turned on for this message to appear.
- Page 65 • Toner Low/Replace PC Kit—On • Error—On What this light sequence means: The toner cartridge is not installed, or the printer detects a toner cartridge error. What you can do: • If the toner cartridge is not installed, install it.
- Page 66 • Error—Blink What this light sequence means: The toner cartridge you are using was not designed for your printer. What you can do: Install a toner cartridge made for your printer (see do I need and how do I order them?” on page...
- Page 67 What this light sequence means: The printer has a service error and printing has stopped. What you can do: Turn the printer off and back on. If the lights are still blinking, contact the place where you bought your printer. Using the operator panel...
- Page 68 • Continue—On • Error—On What this light sequence means: The printer has one of the following errors: • Memory is full, insufficient to save what is in the buffer, or insufficient to defragment flash memory. • A page is too complex to print or is shorter than the set page margins.
-
Page 69: Secondary Error Codes
Secondary error codes • When the Error and Continue • When the Paper Jam has occurred. Press and release Continue lights are both on, a secondary error has occurred. and Continue lights are both on, a paper jam secondary error twice quickly to display the secondary error code light sequence. - Page 70 Paper Jam—On What this light sequence means: A paper jam has occurred at the input sensor, which can be either after the paper leaves the tray and enters the printer or in the manual feeder. What you can do: Clear the paper jam. See for more information.
- Page 71 Load Paper—On • Paper Jam—On What this light sequence means: A paper jam has occurred as the paper is exiting the printer. What you can do: Clear the paper jam. See for more information. “How to clear paper jams” on page 26 “How to clear paper jams”...
- Page 72 Paper jam in Tray 1 Light sequence: • Continue—On • Toner Low/Replace PC Kit—On • Load Paper—On • Paper Jam—On What this light sequence means: A paper jam has occurred in Tray 1. What you can do: Clear the paper jam. See for more information.
- Page 73 Light sequence: • Continue—On • Ready—Blink • Error—On What this light sequence means: The printer does not have enough memory to save the data in the buffer. What you can do: • Install additional memory (see on page 45). •...
- Page 74 Toner Low/Replace PC Kit—On • Error—On What this light sequence means: The printer memory does not have the free space necessary to collate the print job. This may happen due to one of these errors: • Memory is full. •...
- Page 75 Continue—On • Toner Low/Replace PC Kit—Blink • Error—On What this light sequence means: The printer has received a request for a PPDS font which is not installed. What you can do: • Press and release Cancel • Press and hold Cancel •...
- Page 76 Continue—On • Load Paper—Blink • Error—On What this light sequence means: The printer has insufficient memory to free unused space in flash memory. What you can do: • Delete fonts, macros, and other data in RAM. • Install additional printer memory.
- Page 77 • Error—On What this light sequence means: The printer has lost the connection to an external print server (also called an external network adapter or ENA). This light sequence is displayed if your printer is connected to the network, but it cannot detect the print server when you turn on the printer.
- Page 78 • Toner Low/Replace PC Kit—On • Error—On What this light sequence means: The printer is processing data, but the memory used to store pages is full. What you can do: • Press Continue printing the job (the job may not print correctly).
- Page 79 What this light sequence means: The paper length is too short to print the formatted data. This occurs when the printer does not know the media size loaded in the tray, or there is a problem feeding the media. What you can do: •...
- Page 80 45 to install flash memory. • Press and release Cancel • Press and hold Cancel to clear the message and continue for instructions on how to cancel the print job. to reset the printer. Using the operator panel “How...
- Page 81 Press Continue printing. The job may not print correctly. • Reformat the flash memory. Refer to the Technical Reference on Lexmark’s Web site for more information about reformatting flash. • If the error message remains, the flash memory may be defective and should be replaced.
- Page 82 Invalid network code Light sequence: • Ready—On • Load Paper—Blink • Error—On What this light sequence means: The code in an internal print server has not been programmed, or the programmed code is not valid. What you can do: Download valid network code to the internal print server. Using the operator panel...
-
Page 83: Chapter 6: Understanding The Printer Configuration Menus
Utilities menu Printing the Printer Settings Configuration sheet To help resolve printing problems or to change printer configuration settings, advanced users can print the Printer Settings Configuration sheet for instructions on advancing through the configuration menus to select and save new settings. -
Page 84: Configuration Menus Overview
Press and hold Continue • Press and hold Cancel • Turn off the printer to exit the menus. Understanding the printer configuration menus , Toner Low/Replace PC Kit to advance through menus and menu items. to advance to the setting you need. -
Page 85: Network Menu
Network menu Use the Network menu to change printer settings on jobs sent through a network port (either Standard Network or Network Opt <x>). Setting Use this setting to: NPA Mode Send print jobs to the printer and query printer status information simultaneously. -
Page 86: Parallel Menu
Macintosh binary PostScript print jobs. * Factory default Setup menu Use the Setup menu to configure how the printer formats the end of a line depending on the computer system being used. Setting Use this setting to: Auto CR after LF Specify whether the printer automatically performs a carriage return after a line feed control command. -
Page 87: Usb Menu
USB menu Use the USB menu to change printer settings on jobs sent through a Universal Serial Bus (USB) port. Setting Use this setting to: NPA Mode Send print jobs to the printer and query printer status information simultaneously. MAC Binary PS Configure the printer to process Macintosh binary PostScript print jobs. -
Page 88: Chapter 7: Software And Network Tasks
How to print the menu settings and network setup pages How to print a test page How to configure for TCP/IP How to set up the printer for network printing Using the printer resident Web page Using the Local Printer Setup Utility... -
Page 89: How To Install Drivers For Local Printing
How to install drivers for local printing A local printer is a printer attached to your computer using a USB or parallel cable. The printer driver is software that lets your computer communicate with your printer. The procedure to install drivers depends on the operating system you are using. Use the following table to find driver installation instructions for your particular operating system. - Page 90 Click Install Software. Click Printer and Software. Note: You may need administrative access to install printer drivers on your computer. Click Agree to accept the license agreement. Select Custom, and then click Next. Follow the instructions on your screen to complete installing the drivers.
-
Page 91: Macintosh
Macintosh Macintosh OS 8.6 or later is required for USB printing. To print locally to a USB-attached printer, you must create a desktop printer icon (Macintosh 8.6–9.x) or create a queue in Print Center (Macintosh OS X). Creating a desktop printer icon (Macintosh 8.6–9.x) Install a printer PostScript Printer Description (PPD) file on your computer. - Page 92 Click Create, and then click Save. Specify a printer name, and then click Save. Your printer is now saved as a desktop printer. Creating a queue in Print Center (Macintosh OS X) Install a printer PostScript Printer Description (PPD) file on your computer.
-
Page 93: Unix/Linux
Local printing is supported on many UNIX and Linux platforms, such as Sun Solaris and Red Hat. The Sun Solaris and Linux packages are available on the drivers CD and on our Lexmark Web site at www.lexmark.com. The User’s Guide in each package gives detailed instructions for installing and using Lexmark printers in UNIX and Linux environments. -
Page 94: How To Print The Menu Settings And Network Setup Pages
On the menu settings page: – Verify that the options you installed are correctly listed under “Installed Features.” If an option is not listed under Installed Features, turn off the printer, unplug the power cord, and reinstall the option. –... -
Page 95: How To Configure For Tcp/Ip
“Verifying the IP settings” on page 95 If your network is not using DHCP, then you must manually assign an IP address to the printer. An easy way to do this is to use the Print Server TCP/IP Setup Utility. -
Page 96: How To Set Up The Printer For Network Printing
• Lexmark custom printer driver System drivers are built into Windows operating systems. Custom drivers are available on the drivers Updated system and custom drivers are available on our Lexmark Web site at www.lexmark.com. Supported network printer ports • Microsoft IP port—Windows NT 4.0, Windows 2000, Windows XP, and Windows Server 2003 •... - Page 97 Enter the IP address in the text box. Click Add Port. Click Done until you return to the Method of Connection screen. Select the newly-created port from the list, and then select the model of the printer you want to install. Click Finish to complete the installation.
- Page 98 CD. Check the following to make sure the printer was successfully shared. • The printer object in the Printers folder now has a shared indicator. For example, in Windows NT 4.0, a hand appears under the printer object. •...
- Page 99 The path will look similar to the following: \\<server host name>\<shared printer name> Note: If this is a new printer, you may be prompted to install a printer driver. If no system driver is available, then you need to provide a path to available drivers.
-
Page 100: Macintosh
To print to a network printer, each Macintosh user must install a custom PostScript Printer Description (PPD) file and either create a desktop printer on the computer (Mac OS 8.6 to 9.x) or create a print queue in Print Center (Mac OS X). Follow the instructions for your operating system. - Page 101 Network Setup page under AppleTalk for Zone. Select the new printer from the list, and then click Add. Note: If you don’t know which printer to select, look on the Network Setup page under the AppleTalk heading to find the default name of the printer.
-
Page 102: Unix/Linux
Guide in each package gives detailed instructions for installing and using Lexmark printers in UNIX and Linux environments. You can download these packages from our Lexmark Web site. You may also find the driver package you need on the drivers CD. -
Page 103: Using The Local Printer Setup Utility
Using the Local Printer Setup Utility The Local Printer Setup Utility, located on the drivers CD, lets you change printer settings not available from your printer driver (for example, activating Alarm Control if you want the printer to sound an alarm when it needs attention). -
Page 104: Chapter 8: Supplies Information
What supplies do I need and how do I order them? How to conserve supplies How to know when you need new supplies How to change a toner cartridge Lexmark Return Program Recycling Lexmark products How to change a photoconductor kit Supplies information... -
Page 105: What Supplies Do I Need And How Do I Order Them
Within the United States or Canada, you can order Lexmark supplies from any authorized Lexmark supplies dealer. To locate the dealer nearest you, call 1-800-539-6275. In other countries, visit the Lexmark online store at www.lexmark.com or contact the place where you bought your printer. -
Page 106: How To Know When You Need New Supplies
You can still print for a short time while this sequence is displayed, but print quality begins to decrease as the toner level decreases. To ensure print quality and to avoid damage to the printer, the printer stops operating after the photoconductor kit has reached a maximum of 40,000 pages. (See “Replace photoconductor kit... -
Page 107: Recognizing The Operator Panel Light Sequences
“Toner low” and “Replace photoconductor kit” lights. Toner low Photoconductor kit near full * If the operator panel lights display this sequence, the printer will not print any more jobs until the photoconductor kit is replaced. Supplies information Replace Replace... -
Page 108: How To Change A Toner Cartridge
When replacing a toner cartridge, do not leave the new cartridge exposed to direct light for an extended period of time. Extended light exposure can cause print quality problems. Open the front cover by pressing the button on the left side of the printer and lowering the cover. Supplies information... - Page 109 Pull the toner cartridge up and out using the handle. Unpack the new toner cartridge. Note: You can use the packing material from the new cartridge to ship the old cartridge back to Lexmark for recycling. See more information. Rotate the cartridge in all directions to distribute the toner.
- Page 110 Install the new toner cartridge by aligning the white rollers on the toner cartridge with the white arrows on the tracks of the photoconductor kit and pushing the toner cartridge in as far as it will go. The cartridge clicks into place when correctly installed. Close the front cover.
-
Page 111: Lexmark Return Program
Lexmark Return Program The Lexmark Return Program is an environmental program in which Lexmark sells new toner cartridges at a special price with the agreement that you will return them, at no cost, only to Lexmark for recycling. Regular toner cartridges without this agreement are also available. -
Page 112: How To Change A Photoconductor Kit
Extended light exposure can cause print quality problems. Open the front cover by pressing the button on the left side of the printer and lowering the cover. Supplies information... - Page 113 Pull the print cartridge assembly out of the printer by pulling on the toner cartridge handle. Note: Do not press the button on the print cartridge assembly. Place the print cartridge assembly on a flat, clean surface. Remove the toner cartridge: Press the button on the base of the print cartridge assembly.
- Page 114 Install the print cartridge assembly into the printer by aligning the green arrows on the guides of the print cartridge assembly with the green arrows on the tracks in the printer and pushing the print cartridge assembly in as far as it will go.
-
Page 115: Chapter 9: Troubleshooting
Troubleshooting Section General problems Print quality problems • How to clean the printhead lens Troubleshooting Page... -
Page 116: General Problems
To change Custom 6 back to its default settings for Paper Type, Paper Texture, and Paper Weight, use the Local Printer Setup Utility on the drivers CD that shipped with your printer. If you already installed the printer drivers and utilities, skip to step 7. - Page 117 Dust is gathering on the Attach the dust cover to the back of the printer. This protects the paper tray from the paper tray when it is environment as well as keep the tray from being knocked out of position while it is extended.
-
Page 118: Print Quality Problems
ABCDE ABCDE ABCDE To replace the fuser, call a service technician. † This setting can be changed using the Local Printer Setup Utility. See Utility” on page 103 for more information. Cause • The printhead lens is dirty. • Either the toner cartridge or the fuser is defective. - Page 119 ABCDE ABCDE ABCDE To replace the fuser, call a service technician. † This setting can be changed using the Local Printer Setup Utility. See Utility” on page 103 for more information. Cause • The Toner Darkness setting is too light.
- Page 120 Skewed print (Print is inappropriately slanted.) To replace the fuser, call a service technician. † This setting can be changed using the Local Printer Setup Utility. See Utility” on page 103 for more information. Cause • The toner cartridge is defective.
- Page 121 Paper curls badly once it prints and exits to the bin To replace the fuser, call a service technician. † This setting can be changed using the Local Printer Setup Utility. See Utility” on page 103 for more information. Cause The toner cartridge is defective or empty.
-
Page 122: How To Clean The Printhead Lens
How to clean the printhead lens You can solve some print quality problems by cleaning the printhead lens. Turn the printer off. Open the front cover by pressing the button on the left side of the printer and lowering the cover. Troubleshooting... - Page 123 Remove the print cartridge assembly out of the printer by pulling on the toner cartridge handle. Note: Do not press the button on the print cartridge assembly. Place the print cartridge assembly on a flat, clean surface. Warning: Do not leave the print cartridge assembly exposed to direct light for an extended period of time.
- Page 124 Install the print cartridge assembly into the printer by aligning the green arrows on the guides of the print cartridge assembly with the green arrows on the tracks in the printer and pushing the print cartridge assembly in as far as it will go.
-
Page 125: Index
95 jams 26 labels 17 legal 23 letterhead 16, 37 Lexmark Cartridge Collection Program 111 Lexmark Return Program 111 lights 51, 52 Linux 93, 102 Load Paper light manual feeder 62 Tray 1 or 550-sheet tray 61 loading 250-sheet tray (Tray 1) 20... - Page 126 Manual duplex 62 Not ready 60 Offline 60 Photoconductor kit near full 64 Print side two 62 Printer error 68 Printing a directory 58 Printing a font list 58 Printing menu settings pages 58 Printing Print Quality Test Pages 58...
- Page 127 Paper jam in Tray 2 72 Paper jams as a printed job exits the tray 71 Paper jams as it exits the tray into the printer 71 PPDS font error 75 Short paper 79 Unformatted flash 81 service error lights 67...
Need help?
Do you have a question about the E230 and is the answer not in the manual?
Questions and answers