Gorenje BOC 6322 AX User Instructions
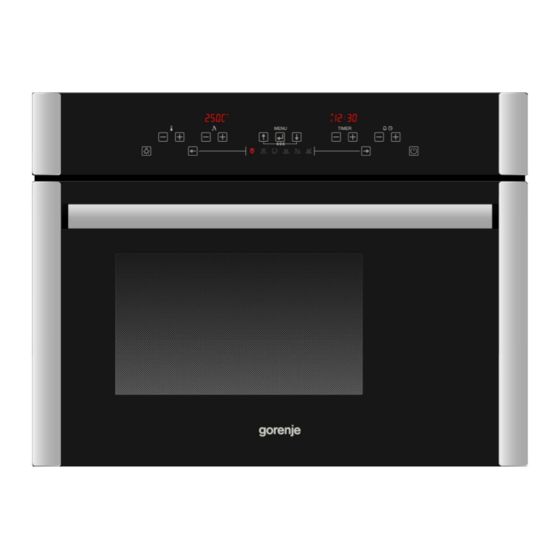
Compact steam & hot-air oven
Hide thumbs
Also See for BOC 6322 AX:
- Instructions for use and installation (768 pages) ,
- Installation - use - maintenance (35 pages)
Table of Contents
Advertisement
Advertisement
Table of Contents

Subscribe to Our Youtube Channel
Related Manuals for Gorenje BOC 6322 AX


Summary of Contents for Gorenje BOC 6322 AX
- Page 1 BOC 6322 AX USER INSTRUCTIONS FOR COMPACT STEAM & HOT-AIR OVEN MOD. BOC 6322 AX...
- Page 3 Simbol na izdelku ali njegovi embalaži označuje, da z izdelkom ni dovoljeno ravnati kot z običajnimi gospodinjskimi odpadki. Izdelek odpeljite na ustrezno zbirno mesto za predelavo električne in elektronske opreme. S pravilnim načinom odstranjevanja izdelka boste pomagali preprečiti morebitne negativne posledice in vplive na okolje in zdravje ljudi, ki bi se lahko pojavile v primeru nepravilnega odstranjevanja izdelka.
- Page 4 Symbol na výrobku nebo jeho balení udává, že tento výrobek nepatří do domácího odpadu. Je nutné odvézt ho do sběrného místa pro recyklaci elektrického a elektronického zařízení. Zajištěním správné likvidace tohoto výrobku pomůžete zabránit negativním důsledkům pro životní prostředí a lidské zdraví, které by jinak byly způsobeny nevhodnou likvidací...
-
Page 5: Safety Precautions
IMPORTANT INFORMATION Read this instruction manual carefully. This will enable you to operate your appliance safely and correctly. Please keep the instruction manual and assembly instructions in a safe place. Please pass on this instruction manual and assembly instructions to the new owner if you sell the appliance. Before installation This appliance is suitable for cooking food in ordinary homes for non-professional purposes;... -
Page 6: Packaging Disposal
Any work on the appliance must be done with the appliance disconnected from the electrical power supply. It is not permitted to modify, tamper with or attempt repairs on the appliance, especially with tools (screwdrivers and the like), either inside or outside the appliance. Repairs must only be carried out by authorized personnel, especially on the electrical parts. -
Page 7: Installation
INSTALLATION Remove the appliance from the package and check that the product and power cord are NOT damaged. Otherwise, contact the retailer before operating the appliance. Do not lift the product by the door handle. Packaging (e.g. paper, polystyrene) may be hazardous to children (danger of suffocation). Keep packaging out of the reach of children. - Page 8 Installation scheme...
- Page 9 Oven dimensions Column installation Undertop installation Oven dimensions...
-
Page 10: Before First Use
BEFORE FIRST USE First start-up When the oven is connected to the mains power supply for the first time, a wait message ( ) and some product identification information appear on the display. Do not touch the keypad during this brief period. N.B. - Page 11 WATER HARDNESS The water hardness basically expresses the quantity of magnesium and calcium salts present in the water. The hardness is generally expressed in French degrees (° fH). The oven is equipped with an automatic system that determines the appropriate moment to perform a boiler descaling cycle.
-
Page 12: Technical Data
HEATING UP OF THE OVEN N.B. Disconnect the oven from the mains power, or move the omnipolar switch to OFF, before cleaning the oven. Before using the oven, thoroughly clean the inside using a soft cloth or non-abrasive sponge dampened with warm water and washing-up liquid. -
Page 13: Description Of Oven
DESCRIPTION OF OVEN Control panel and data display Drip pan Pitcher compartment Grill Pitcher 10 Handle Filter compartment 11 Door Filter cap 12 Cooking chamber Food or temperature probe 13 Side grills Perforated drip pan 14 Food probe connector 15 Connector cap; to be inserted on the connector (14) when not using the probe (6) Preliminary operation to be done before switching on the oven, or before choosing a cooking cycle Before switching on the oven check that the cap (15) is inserted on its place (14). -
Page 14: Description Of The Control Panel
DESCRIPTION OF THE CONTROL PANEL Description of the keys 1. Keys for setting the cooking chamber temperature and display area for the temperature indication ( + to increase, - to decrease, min. 30° C - max.23 0° C * depending on the cycle selected) 2. - Page 15 ACCESSORIES The accessories supplied with the oven increase the number of cooking modes and possibilities. The drip pan and grill accessories can be placed on various Level 4 levels of the slide guide located inside the oven. This allows the user to set the most suitable height (levels) depending on the cooking to be carried out.
-
Page 16: Oven Operation
OVEN COOLING SYSTEM The oven is equipped with a cooling fan to ensure proper operation and reduce the temperature of the external surfaces of the oven. The fan is always active during the cooking process, and it is possible to feel the jet of air that comes out between the front panel and the door of the oven. - Page 17 SELECTING THE COOKING MODE Min-Max. Food Function name and Chamber Function description probe T symbol temp. default T default During steam cooking, the steam coming from the boiler flows STEAM into the cooking chamber. 40 – 100 COOKING The steam heats the cooking chamber and cooks the food. This cooking mode is ideal for cooking any type of vegetables, and it preserves the colour, taste and above all the organoleptic properties of the food.
-
Page 18: Selecting The Cooking Mode
TURNING THE OVEN ON/OFF Press the key for at least 1 sec. The writing <<ON>> appears on the display, the oven light turns on and then the following message appears: N.B. Deactivate the keypad lock if it is active. See section HOW TO DEACTIVATE THE KEYPAD LOCK the oven will turn off automatically, after 5 minutes, if no selection is made. -
Page 19: Setting The Temperature
USING A COOKING FUNCTION THAT DOES NOT INCLUDE STEAM When the oven is used with a cycle that does not include steam, the container may remain in its seat without compromising the cooking result. N.B. In order for the STEAM REGENERATION or PROFESSIONAL cooking modes to be carried out successfully, the oven must be allowed to cool sufficiently if it was previously used for a similar cooking process. -
Page 20: How To Use The Alarm Function
HOW TO USE THE ALARM FUNCTION Press one of the two keys to activate the function. The symbol begins to flash and the display shows the message: ALARM and the digits 00.00 appear. Use the keys individually to set the desired time. The maximum time that can be set is 23 hours and 59 minutes. -
Page 21: Setting The Cooking Time
SETTING THE COOKING TIME Turn the oven on and select a cooking function. Use the keys to set the cooking time. The initial display of the time is set in mm.ss, then hh.mm. (h=hours, m= minutes, s=seconds) The maximum time that can be set is 10 hours. Then activate the cooking. - Page 22 COOKING/BAKING WITH A FOOD PROBE The oven is supplied with a food and temperature probe, which is an accessory shaped like a large pin inserted in a grip that ends with a cable and a plug. The food probe connected to the electronics allows to measure the temperature inside the meat or other food that is being cooked.
- Page 23 HOW TO CHANGE THE FOOD PROBE TEMPERATURE Press one of the two keys to change, with steps of +/-1° C, the food probe temperatur e. Maximum temperature that can be set: 90° C Minimum temperature that can be set: 30° C The food probe temperature value is displayed with the following graphic symbol to the left: Notes: The chamber temperature must be higher than the food probe temperature.
-
Page 24: Memory Functions
MEMORY FUNCTIONS The oven electronics offers the possibility to store your cooking settings in appropriate memory areas. This information may be retrieved at a later time in order to cook with the same previous settings, obtaining consistent and unfailing results. The following can be stored in the memory: cooking cycle cooking chamber temperature... - Page 25 RESETTING YOUR SELECTED SETTINGS Press the keys simultaneously to cancel the oven start/stop program. The oven will automatically activate and display the message: The oven turns off all the heating elements. The display shows the message: accompanied by a buzzer signal. The buzzer signal can be turned off by pressing any key.
- Page 26 SELECTING THE TYPE OF FOOD – FACTORY PRESET AUTOMATIC COOKING PROGRAMMES HOW TO MOVE INSIDE THE MENU Turn on the oven. When the following message is displayed: press the key: to display the first item in the list: To view the menu structure: press the key: to scroll down the list press the key:...
- Page 27 Menu Structure OVERVIEW...
- Page 28 BREAD/PIZZA recipe list Cooking Food probe Dish: chamber temperature * Cooking time Level Cooking cycle temperature ° C ° C SAVOURY FOCACCIA ’ BREAD ’ BREAD ’ PIZZA TIMBALES recipe list Cooking Food probe Dish: chamber temperature * Cooking time Level Cooking cycle temperature °...
- Page 29 MEAT recipe list The cooking modes listed have been determined for pieces of meat weigthing about 1 Kg. Cooking Food probe Cooking Dish: chamber temperature * Cooking time Level cycle temperature ° C ° C HAUNCH OF PORK BEEF RUMP VEAL RUMP ROAST PORK PORK NECK...
- Page 30 FISH recipe list Cooking Food probe Dish: chamber temperature * Cooking time Level Cooking cycle temperature ° C ° C MUSSELS AND ’ CLAMS .10’ PLAICE FILLET SCORPION FISH .30’ FILLET PRAWNS AND FLAT ’ LOBSTER ’ TROUT VEGETABLES recipe list Cooking Food probe Cooking...
- Page 31 COOKING/BAKING WITH A FOOD PROBE The oven is supplied with a food and temperature probe, which is an accessory shaped like a large pin inserted in a grip that ends with a cable and a plug. The food probe connected to the electronics allows to measure the temperature inside the meat or other food that is being cooked.
- Page 32 HOW TO CHANGE THE FOOD PROBE TEMPERATURE Press one of the two keys to change, with steps of +/-1° C, the food probe temperatur e. Maximum temperature that can be set: 90° C Minimum temperature that can be set: 30° C The food probe temperature value is displayed with the following graphic symbol to the left: Notes: The chamber temperature must be higher than the food probe temperature.
- Page 33 HOW TO PERSONALIZE THE RECIPE LIST Select an item from the list and set the data according to your own needs. Remember that it is possible to cook by time (cooking time) or with the food probe. Activate the cooking, then press the key repeatedly until the following text appears: Press key: to confirm and store the new settings.
- Page 34 HOW TO DELETE YOUR OWN RECIPE Select menu and select the recipes item, with key Scroll the items with key or key until the text YOUR OWN RECIPES is displayed. Confirm the selection with key Use one of the two keys to scroll the items until the following text is displayed: Press key...
-
Page 35: Reset Settings
RESET SETTINGS This function is used to reset the system in case of problems. Caution: All the system variables are returned to the original values and your own recipes are deleted. Select the item : with key and follow the instructions provided on the display. -
Page 36: Setting Keypad Lock
SETTING KEYPAD LOCK: This option allows to select the mode in which the keypad lock is set: manual or automatic. It is recommended to select the automatic mode ( ), especially if there are children present. The keys are locked automatically when the keypad remains inactive for 1 minute. The keypad lock is activated by simultaneously pressing the keys on the far left and on the far right In both cases, when the keypad lock is activated the display shows the message: followed, if the oven is off, by the key symbol... - Page 37 CLEANING START cleaning cycle Menu items: COOKING CHAMBER BOILER DESCALING CLEANING OF OVEN CAVITY WITH STEAM The purpose is to facilitate the removal of any residue of food, grease, etc. after a cooking process. The oven fills the cooking chamber with a certain quantity of steam for a fixed period of time (10 min.). Activate the cooking chamber cleaning cycle with key and follow the instructions provided on the display.
-
Page 38: Boiler Wash
BOILER WASH When finished, the system performs a boiler wash cycle and empties the dirty water into the pitcher. It will then be necessary to assist the appliance which will guide you step by step through the operations to be carried out. -
Page 39: Maintenance
MAINTENANCE WARNING MESSAGES - The meaning of some warning messages. Generally 1L. of water in the pitcher is sufficient for a steam cooking process, nevertheless the message in question may be displayed for two reasons: The water in the pitcher has finished. The pitcher is not inserted completely in its seat. - Page 40 WHAT TO DO IN CASE OF AN ANOMALY PROBLEM SOLUTION The oven does not work. Check whether the omnipolar switch or any residual- current circuit breaker (cut-out) of the electrical system is off. In case of problems with the electrical system, consult a qualified electrician.
-
Page 41: Error Codes Table
ERROR CODES TABLE The electronic system continually performs a series of diagnostic tests. If some parameters are incorrect, the control unit deactivates the functions and displays an error code (Err followed by three numerical digits); all the heating elements are turned off, including the fan inside the cooking chamber. The cooling fan remains on. Take note of the error code and contact an Authorized Service Centre, specifying the error code. - Page 42 HOW TO REMOVE THE SIDE GRILL PAN SUPPORTS 1. Unscrew (turning anti-clockwise) the front knurled nuts (D). 2. Extract, one at a time, the side grills (G). HOW TO REASSEMBLE THE SIDE GRILLS Insert the support grills one at a time. (G) Pay attention to the index on the grill.
-
Page 43: How To Change The Oven Light Bulb
HOW TO CHANGE THE OVEN LIGHT BULB Disconnect the appliance from the power supply or place the omnipolar switch in the OFF position. Check that the oven is at room temperature, otherwise wait for it to cool. The oven light bulb must have the following characteristics: •... - Page 44 HOW TO DISASSEMBLE THE OVEN DOOR 1. Open the oven door completely. 2. Locate the hinges (C) , see the drawing to the side: 3. Tip back the brackets (A) on the two hinges (C). 4. Grip the door on the two sides and close it slowly halfway, the brackets (A) will hook onto the door of the appliance.
-
Page 45: Oven Details
HOW TO REASSEMBLE THE OVEN DOOR 1. Insert the two brackets into the appropriate openings, keeping the door semi-closed. 2. Open the door completely. 3. Tip over the two hinges (C) moving them forward. OVEN DETAILS Touch-Control Keypad This is a particular type of keypad which is touch-sensitive. To give a command to the oven, it is enough to indicate and apply light pressure on the point of the keypad where the symbol corresponding to the instruction is located.
Need help?
Do you have a question about the BOC 6322 AX and is the answer not in the manual?
Questions and answers