Table of Contents
Advertisement
Advertisement
Table of Contents

Subscribe to Our Youtube Channel
Related Manuals for Leckey Kidwalk


Summary of Contents for Leckey Kidwalk
- Page 1 Kidwalk Seating System User Instructions...
-
Page 3: Table Of Contents
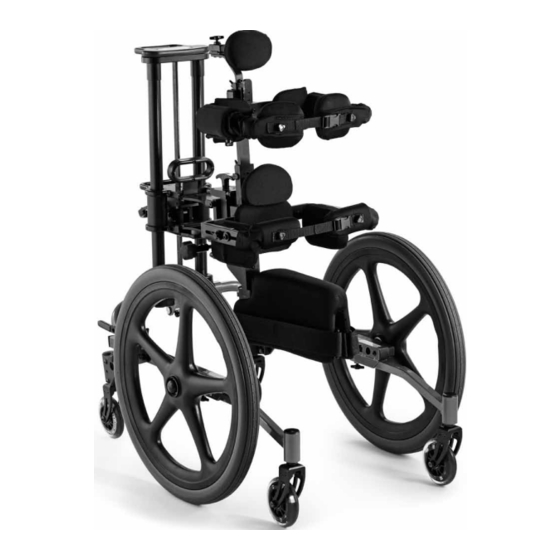
The Kidwalk has been designed as a posturally supportive mobility system that moves with the child giving them the freedom to move and walk while keeping their hands free to explore their surroundings. This manual shows you how you can quickly and easily make use of all of the functions. -
Page 4: Intended Use
1. Intended Use 4. Product History Record The Kidwalk is the first partial weight Your Leckey product is classified as bearing, posturally supportive mobility a Class 1 Medical device and as such system that is designed to move with the... -
Page 5: Safety Information
6.4 If in any doubt to the continued safe use of from all direct sources of heat including naked your Leckey product or if any parts should fail, flames, cigarettes, electric and gas heaters. please cease using the product and contact our customer services department or your local dealer as soon as possible. -
Page 6: How To Unpack And Assemble
How to unpack and assemble the Kidwalk... - Page 7 Check parts Assembling the Kidwalk Congratulations on purchasing your To assemble your Kidwalk firstly open Kidwalk. Your Kidwalk comes as standard the box and remove and identify the with a base assembly, mast assembly, two following parts: wheels, two axles and two axle spacers (Size 1 only).
- Page 8 7.1 Attaching and Removing the wheels First press the button at the end of the axle and remove the spacer (A) (Size 1 only). Push the button (B) at the end of the axle to allow the axle to slide through the wheel bearings.
- Page 9 7.2 Changing the wheel position Move the wheel lock before changing the wheel position. The wheel lock is pre-set to the centre wheel position. To change the position of the wheel lock, remove the thumb screw (A). Move the wheel lock forward or rearward to coincide with the new wheel position.
- Page 10 7.3 Attaching the Mast assembly Locate the mast release pin (A) on the base frame. Pull the pin outward and twist until the pin is in the locked out position. Place the mast assembly over the locator pins (B) on the base assembly. Rotate the locking pin until it engages into the mast assembly.
- Page 11 7.4 Attaching the lateral chest system To attach the lateral chest system, slide the extension tube at the back of the lateral chest system into the top of the receiver tube (A) on the mast assembly. Set the pads at the required height and tighten both adjustment screws (B).
- Page 12 7.5 Attaching the headpad Insert the extension tube into the receiver tube on the lateral chest system, set at the required height and secure with screw (A), then insert the headpad into the extension tube with the pad facing forward and tighten the adjustment screw (B) securely.
- Page 13 The correct hole is the one which corresponds to the position of the large wheels. The Kidwalk must be used with its anti-tippers or cruiser wheels at all times. Please ensure you replace the anti- tippers into the frame when not using...
-
Page 14: Clinical Setup For Postural Management
Leckey recommend a written record is maintained of all clinical set ups for this product. We recommend you set up the Kidwalk in the following order: 1. Take child’s measurements 2. Adjust seat height 3. -
Page 15: Adjusting The Seat Height
8.1 Measurements and 8.2 Adjusting the Initial Set Up Seat Height To set up the Kidwalk effectively the following Using the lift/release handle (A) or the measurements should be taken and recorded: fine tune adjustment handle (B) adjust the seat height to 1” lower than the inside leg 1. - Page 16 8.3 Adjusting the hip 8.4 Adjusting the Lateral support width Chest System Flip the front hip support pads upward and Loosen the knobs (B) on the back side of the outward. Set the hip pad width to allow the upper body pads. Slide the pads outward child’s hips to be easily placed between enough to allow the child to fit between the hip pads by turning the knob (A) located...
- Page 17 Place the child into the unit. Ensure that the child’s hips are as far back as possible into the Kidwalk. Once the child is all the way back on the seat, flip the front hip pads towards the child until they are snug and holding their hips in place.
- Page 18 The Kidwalk provides forward and rearward prompting angle adjustment. Move the mast in small increments to assist in positioning the child or facilitate better gait.
-
Page 19: Seat Depth Adjustment
8.9 Seat depth adjustment 8.10 Removing the child To remove the child from the Kidwalk, The seat has been pre-set to align with first lock the wheels, unfasten the buckles of the centre axle position on the frame. If it... -
Page 20: Frequent Adjustments For Daily Use
6 by a technically and clinically competent person who has been trained in the use of the product. Leckey recommend that a written record is maintained of all parents and carers who have been trained in the... - Page 21 9.1 Adjusting the lateral 9.2 Adjusting the headpad chest assembly To adjust the height, loosen the adjustment Adjust the headpad height and depth by screw (A), slide the lateral chest system loosening the knobs (C & D), setting to the up or down on the extension tube to desired desired height and depth and retightening.
- Page 22 9.3 Transportation and storage The Kidwalk may be disassembled for ease of transport or storage. If necessary, the large wheels may be removed. See section 7 Attaching and Removing the Wheels.
-
Page 23: Cleaning & Care Information
Isopropyl ensure straps secure firmly. If in any doubt Alcohol or Mineral Spirit to the continued safe use of your Leckey product or if any parts should fail, please 4 Always ensure the product is dry cease using the product and contact our before use. -
Page 24: Annual Product Inspection
If in any doubt to the continued safe use of your Leckey product or if any parts should 6. Leckey recommends that a written fail, please cease using the product and... -
Page 25: Product Servicing
In the UK & ROI please contact the Leckey Service Centre on UK 0800 318265 or ROI 1800 626020 and our customer service department will be delighted to assist you with your servicing requirements. -
Page 26: Technical Information
Standard Product (includes frame, pelvic support system, standard swivel seat, prone angle adjustment, quick release wheels and anti-tip bars) KW01 Size 1 Kidwalk – Candy Red with 20” wheels KW02 Size 2 Kidwalk – Candy Blue with 24” wheels Seat Options KW06 Extended Seat 8”... - Page 27 Size 1 - 7 5 - 12 (approx) Codes KW01 KW02 inches inches Base Width 27.5 Base Height Overall Length 825-875 33-35 900-950 36-38 Mast Height 33.5 37.25 Wheels Castors Seat Height 225-550 9-22 375-700 15-30 Max. User Weight 30kgs 65lbs 50kgs 110lbs...
- Page 28 Leckey T: 028 9060 2277 19A Ballinderry Road F: 028 9060 0795 Lisburn BT28 2SA E: info@leckey.com Northern Ireland W: www.leckey.com United Kingdom 24 hour postural care for babies, kids & adults. Sleeping, Sitting, Standing, Walking, Moving, Bathing, Toileting. LS236-02...
Need help?
Do you have a question about the Kidwalk and is the answer not in the manual?
Questions and answers