Table of Contents
Advertisement
Quick Links
Download this manual
See also:
User Manual
For your own safety, please read this user manual carefully before you initial start-up.
Every person involved with the installation, operation and maintenance of this device have to:
- be qualilfied
- follow the instructions of this manual
INTRODUCTION
Thank you for having chosen a EUROLITE TS-3. You will see you have acquired a powerful and versatile
device.
Unpack your TS-3.
Before you initial start-up, please make sure that there is no damage caused by transportation. Should there
be any, consult your dealer and do not use the device.
SAFETY INSTRUCTIONS
Be careful with your operations. With a dangerous voltage you can suffer a dangerous
electric shock when touching the wires!
This device has left our premises in absolutely perfect condition. In order to maintain this condition and to
ensure a safe operation, it is absolutely necessary for the user to follow the safety instructions and warning
notes written in this user manual.
Important:
Damages caused by the disregard of this user manual are not subject to warranty. The dealer
will not accept liability for any resulting defects or problems.
If the device has been exposed to drastic temperature fluctuation (e.g. after transportation), do not switch it
on immediately. The arising condensation water might damage your device. Leave the device switched off
until it has reached room temperature.
Never let the power-cord come into contact with other cables! Handle the power-cord and all connections
with the mains with particular caution!
USER MANUAL
TS-3 DMX-Scanner
CAUTION!
14
Advertisement
Table of Contents

Summary of Contents for EuroLite TS-3 DMX-Scanner
-
Page 1: Safety Instructions
- be qualilfied - follow the instructions of this manual INTRODUCTION Thank you for having chosen a EUROLITE TS-3. You will see you have acquired a powerful and versatile device. Unpack your TS-3. Before you initial start-up, please make sure that there is no damage caused by transportation. Should there be any, consult your dealer and do not use the device. -
Page 2: Operating Determinations
Make sure that the available voltage is not higher than stated on the rear panel. Make sure that the power-cord is never crimped or damaged by sharp edges. Check the device and the power-cord from time to time. Always disconnect from the mains, when the device is not in use or before cleaning it. Only handle the power-cord by the plug. -
Page 3: Description Of The Device
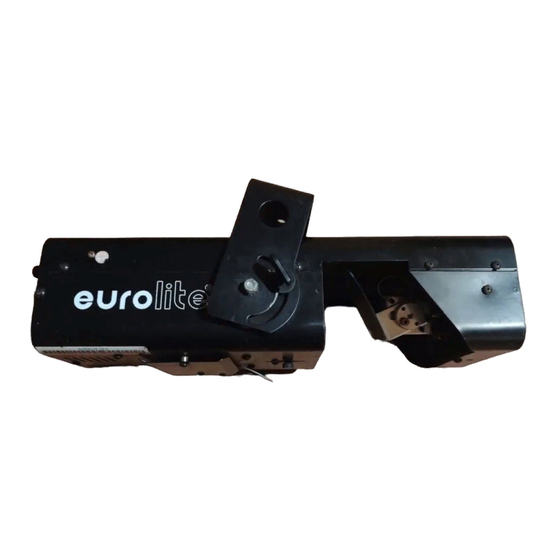
• Master/Slave-function • 4 high-quality stepping-motors • Automatic lamp off during blackout or when sound-signal is missing • EFR 15 V/150 W lamp included in the delivery Overview eurolite ® (1) Housing cover (2) Housing screws... -
Page 4: Installation
LIGHTING CONTROL PROTOCOL DMX-512 Microphone DMX Out Sensitivity XLR occupation: 1: Ground 2: Signal (–) 3: Signal (+) Fuse: DMX In T 2 A, 250 V Power supply: 230 V AC, 50 Hz ~ For setting the DMX Blackout starting address see projector head. -
Page 5: Master/Slave-Operation
Do not install lamps with a higher wattage! Lamps with a higher wattage generate temperatures the device was not designed for. Damages caused by non-observance are not subject to warranty. Procedure: Step 1: Unscrew the fixation screw(s) of the service lid. Step 2: Remove the service lid. -
Page 6: Dmx-512 Connection / Connection Between Fixtures
DMX-512 connection / connection between fixtures Projector 3 Projector 2 Projector 1 Starting address 9 Starting address 5 Starting address 1 LIGHTING CONTROL LIGHTING CONTROL LIGHTING CONTROL PROTOCOL DMX-512 PROTOCOL DMX-512 PROTOCOL DMX-512 Microphone Microphone Microphone 120 Ohms DMX Out DMX Out DMX Out Sensitivity... -
Page 7: Connection With The Mains
Occupation of the DIP-switches: Setting the DMX- DIP-switch no. starting address: Projector number 64 128 256 Starting address & channels Projector 1 - channels 1-4 Projector 2 - channels 5-8 Projector 3 - channels 9-12 Projector 4 - channels 13-16 Projector 5 - channels 17-20 Connection with the mains This device falls under protection-class I. -
Page 8: Dmx-Controlled Operation
DMX-controlled operation You can control the projectors individually via your DMX-controller. Every DMX-channel has a different occupation with different features. In order to call up the different features, you first have to ignite the lamp (control channel 4, DMX-value 6-63). DMX-protocol Control channel 1 - Horizontal mirror movement (Pan) (within 130°) Push slider up in order to move the mirror horizontally (PAN). -
Page 9: Cleaning And Maintenance
CLEANING AND MAINTENANCE DANGER TO LIFE! Disconnect from mains before starting maintenance operation! We recommend a frequent cleaning of the device. Please use a soft lint-free cloth moistened with any good glass cleaning fluid. Never use alcohol or solvents! There are no servicable parts inside the device except for the lamp and the fuse. Maintenance and service operations are only to be carried out by authorized dealers.


Need help?
Do you have a question about the TS-3 DMX-Scanner and is the answer not in the manual?
Questions and answers