Advertisement
Available languages
Available languages
Table of Contents
- 1 Important Safety Instructions
- 2 Fused Safety Plug
- 3 User Servicing Instructions
- 4 Assembly Instructions
- 5 Cord Management
- 6 Remote Control Battery Installation/Replacement Instructions
- 7 HY-254 Series Fan Operation
- 8 HY-280 Series Fan Operation
- 9 HY-254 Remote Control Operation
- 10 HY-280 Series Remote Control Operation
- Download this manual
Owner's Manual
IMPORTANT SAFETY
INSTRUCTIONS
READ AND SAVE THESE SAFETY
INSTRUCTIONS BEFORE USING
THIS FAN
When using electrical appliances,
basic precautions should always
be followed to reduce the risk of
fire, electric shock, and injury to
persons, including the following:
FOR US MODELS ONLY – This product
employs overload protection (fuse). A blown
fuse indicates an overload or short-circuit
situation. If the fuse blows, unplug the product
from the outlet. Replace the fuse as per the
User Servicing Instructions (follow product
marking for proper fuse rating) and check
the product. If the replacement fuse blows,
a short-circuit may be present and the
product should be discarded or returned to an
authorized service facility for examination and/
or repair.
1.
Use this fan only as described in this
manual. Other use not recommended as
it may cause fire, electric shock or injury
to persons.
2.
This product is intended for household
use ONLY and not for commercial,
industrial or outdoor use.
3.
To protect against electric shock, do not
place fan in window, immerse unit, plug
or cord in water or spray with liquids.
The Honeywell Trademark is used by Kaz USA, Inc. under license from Honeywell International Inc.
Honeywell International Inc. makes no representation or warranties with respect to this product.
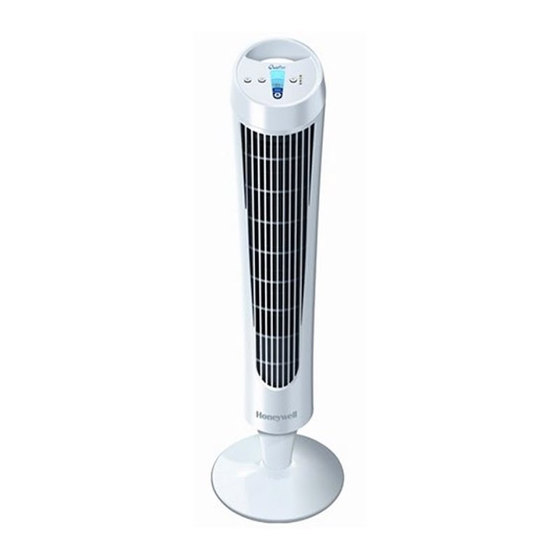
QUIETSET
®
WHOLE ROOM TOWER FAN
HY-254 Series
HY-280 Series
4.
This appliance has a polarized plug
(one blade is wider than the other). To
reduce the risk of shock, this plug is
intended to fit only one way in a polarized
outlet. If the plug does not fit fully in the
outlet, reverse the plug. If it still does
not fit, contact a qualified electrician.
DO NOT attempt to defeat this safety
feature.
5.
Close supervision is necessary when any
appliance is used by or near children.
6.
Turn the fan OFF and unplug the fan from
the outlet when not in use, when moving
the fan from one location to another and
before cleaning.
7.
To disconnect the fan, first turn the unit
OFF, grip the plug and pull it from the wall
outlet. Never pull the plug by the cord.
8.
Do not operate the fan in the presence of
explosive and/or flammable fumes.
9.
Do not place the fan or any parts near
an open flame, cooking or other heating
appliance.
10. Do not operate the fan with a
damaged cord or plug or if the product
malfunctions, is dropped
or damaged in any manner
(see warranty).
11. Avoid contact with moving fan parts.
12. The use of attachments not
recommended by the manufacturer may
be hazardous.
13. Place the fan on a dry level surface.
14. Do not hang or mount fan on a wall
or ceiling.
15. Do not operate if the fan housing is
damaged.
1
Advertisement
Table of Contents

Subscribe to Our Youtube Channel
Related Manuals for Honeywell QUIETSET HY-254 Series


Summary of Contents for Honeywell QUIETSET HY-254 Series
-
Page 1: Important Safety Instructions
15. Do not operate if the fan housing is damaged. The Honeywell Trademark is used by Kaz USA, Inc. under license from Honeywell International Inc. Honeywell International Inc. makes no representation or warranties with respect to this product. - Page 2 16. A loose fit between the AC outlet 18. Do not run fan cord under carpeting. Do (receptacle) and plug may cause not cover cord with throw rugs, runners, overheating and a distortion of the plug. or similar coverings. Do not route cord Contact a qualified electrician to replace under furniture or appliances.
-
Page 3: Assembly
ASSEMBLY INSTRUCTIONS A. Pedestal Assembly Fig. 1 • L ine up the left and right pedestal assembly and firmly snap together (Fig. 1). B. Base Assembly • A lign the two portions of the circular base and snap together by gently pushing the 4 extrusions (Fig. 2, Item A) into the adjacent Pedestal Assembly circles of the connecting piece (Fig. 2, Item B). Fig. 2 C. Securing the Pedestal to the Base Extrusions • A lign the 3 screw holes on bottom of pedestal with the 3 holes in the base such that the power cord holder is at the rear of the unit . (Fig. 3) • S ecure the base assembly to the pedestal by inserting and Base Assembly tightening the 3 screws in the 3 holes located on the bottom Fig. 3 of the base (Fig. 4). D. -
Page 4: Cord Management
CORD MANAGEMENT The cord management feature is located on the back side Fig. 8a Fig. 8b of the fan. Simply double up the excess cord length, and place the two pieces of cord in the notch (Fig 8b). The notch will hold the cord so that the excess length will not drag on the ground. ASSEMBLY INSTRUCTIONS REMOTE CONTROL BATTERY INSTALLATION/ REPLACEMENT INSTRUCTIONS Fig. 9 A. Remove battery door by sliding downward in direction of arrow. B. Insert 2 AAA batteries into the remote following the directional guides in the recessed slots (Fig. 9). Batteries are included. C. R eplace battery door by sliding upward opposite of arrow direction until door snaps in place. NOTE: DO NOT MIX OLD AND NEW BATTERIES. DO NOT MIX ALKALINE, STANDARD (CARBON-ZINC) OR RECHARGEABLE (NICKEL-CADMIUM) BATTERIES. SEE RECYCLERS IN YOUR AREA FOR PROPER DISPOSAL OF BATTERIES. HY-254 SERIES FAN OPERATION FAN OPERATION FAN OPERATION On/Off Model HY-254 To turn fan on, press the Power button ( ) located on the left side of the control panel. -
Page 5: Hy-280 Fan Operation
HY-254 SERIES REMOTE CONTROL OPERATION On/Off Press the Power button ( ) once to turn the fan on. Press the Power button a second time to turn the fan off. Speed Control The fan will automatically start on “Sleep” speed when initially turned on. To adjust the speed up or down, press the Fan Speed button ( ) repeatedly to increase level Oscillation Fig. 10 To activate the Oscillation feature, press the Oscillation button ( ) once. Press the Oscillation button again to turn the Oscillation feature off. Remote Control Storage When it is not in use, the remote control may be stored in the recessed area located behind the controls (Fig. 10). HY-280 SERIES FAN OPERATION On/Off Model HY-280 To turn fan on, press the Power button ( ) located on the left side of the control panel. -
Page 6: Hy-280 Remote Control Operation
HY-280 SERIES FAN OPERATION CONTINUED Temperature Model HY-280 A. Press and hold the Temperature Control ® Button to enter temperature mode. B. C urrent room temperature is displayed for 3 seconds, then display begins to flash at 1 second intervals. If temperature is not selected, unit will revert back to “speed mode” after 10 seconds. C. P ress the temperature button repeatedly to increase the temperature by one degree intervals starting from room temperature. You will have to cycle through 90° to get back to the 60° point. (This is the minimum.) For Canada, the temperature cycle range is 15°C to 30°C. D. O nce the desired temperature is selected, the fan will revert back to room temperature display. Note: The fan speed will adjust automatically to achieve the desired temperature. The fan will stop if the room temperature drops below setpoint and will turn on again if the room temperature climbs above setpoint. • If the user hits the “Power” button, this will override all functions and the unit will shut “OFF”. The temperature setting will be cleared. • If the Timer button is selected, the temperature will not be affected. The chosen temperature will remain in effect and the room temperature will continue to be displayed. Timer will function with or without Temperature Mode. - Page 7 HY-280 SERIES REMOTE CONTROL OPERATION CONTINUED Temperature Mode can be accessed through the remote control. A. Press the Temperature Mode button ( ) once and release. Fig. 11 Display will begin to flash. B. Press the “+” and “-” buttons to change the setpoint. Note: Once the setpoint is selected, the fan speed will adjust automatically to achieve the desired temperature. The fan will stop if the room temperature drops below the setpoint and will restart if the room temperature climbs above the setpoint. Remote Control Storage When it is not in use, the remote control may be stored in the recessed area located behind the controls (Fig. 11). USER SERVICING INSTRUCTIONS CLEANING AND STORAGE • Ensure the fan is turned off and unplugged. • Use only a soft cloth to gently wipe the outer surfaces of the fan clean. • To clean between the grills and fan blade area, we recommend using a pipe cleaner, flexible dust wand, vacuum cleaner or compressed air to gently remove the dust.
- Page 8 1 YEAR LIMITED WARRANTY You should first read all instructions before C. This warranty does not cover damage resulting attempting to use this product. from any unauthorized attempts to repair or from any use not in accordance with the A. This 1 year limited warranty applies to instruction manual.
- Page 9 11. Évitez tout contact avec les pièces mobiles. La marque de commerce Honeywell est utilisée par Kaz USA, Inc. avec l’autorisation de Honeywell International, Inc. Honeywell International Inc. ne fait aucune assertion et n’offre aucune garantie en ce qui concerne ce produit.
- Page 10 12. L’emploi d’accessoires non recommandés par Inc. pour le faire vérifier et réparer au le fabricant peut se révéler dangereux. besoin. 13. Posez l’appareil sur une surface plane et sèche. 18. Ne pas acheminer le cordon sous de la moquette. Ne pas le recouvrir de carpettes, 14.
- Page 11 INSTRUCTIONS DE MONTAGE A. Assemblage du piédestal Fig. 1 • Faites concorder les parties gauche et droite et emboîtez-les fermement par pression (fig. 1). B. Assemblage du socle • Faites concorder les deux parties du socle rond et emboîtez-les en poussant délicatement les 4 protubérances (fig. 2, article A) Ensemble du piédestal de l’une dans les cercles adjacents de l’autre (fig. 2, article B). Fig. 2 Protubérances C. Fixation du piédestal au socle Extrusions • Faites concorder les 3 trous de vis de la partie inférieure du piédestal et les 3 trous du socle, en veillant à ce que la rainure du cordon d’alimentation soit à l’arrière (fig. 3). • Fixez le socle au piédestal en insérant et en serrant les 3 vis Ensemble du socle dans les 3 trous du fond du socle (fig. 4). Fig. 3 D. Attachez le ventilateur colonne au piédestal • Avec soin, mettez le ventilateur sur son flanc et posez-le sur une Arbre de table. Enfilez le cordon au centre du piédestal et du socle.
- Page 12 GESTION DU CORDON Le dispositif de gestion du cordon se trouve sur la face arrière Fig. 8a Fig. 8b du ventilateur. Faites une boucle du cordon excédentaire puis insérez les deux parties du cordon dans l’encoche (fig. 8b). L’encoche maintiendra le cordon afin que la longueur en trop ne traîne pas par terre. INSTRUCTIONS DE MONTAGE MISE EN PLACE DES PILES DE LA TÉLÉCOMMANDE/ INSTRUCTIONS DE REMPLACEMENT Fig. 9 A. Faites glisser le volet du compartiment des piles dans le sens de la flèche. B. Placez 2 piles AAA tel que l’indiquent les guides directionnels des rainures (fig. 9). Les piles sont fournies. C. F aites coulisser le volet du compartiment dans le sens inverse de la flèche jusqu’à ce qu’il s’assujettisse fermement. REMARQUE : NE MÉLANGEZ NI DES PILES USAGÉES ET NEUVES NI DES PILES ALCALINES, STANDARD (CARBONE-ZINC) ET RECHARGEABLES (NICKEL-CADMIUM). RENSEIGNEZ-VOUS QUANT À L’ÉLIMINATION DES PILES AUPRÈS DES RECYCLEURS DE VOTRE RÉGION. MODE D’EMPLOI DU VENTILATEUR DE LA SÉRIE HY-254 Marche et arrêt HY-254...
- Page 13 EMPLOI DE LA TÉLÉCOMMANDE DE LA SÉRIE HY-254 Marche et arrêt Pressez la touche d’alimentation ( ) une fois pour mettre le ventilateur en marche, une deuxième fois pour l’éteindre. Commande de vitesse Le ventilateur démarre automatiquement au réglage « Sommeil ». Pour augmenter ou réduire la vitesse, pressez la touche de vitesse du ventilateur ( ) coup sur coup. Oscillation Fig. 10 Pressez la touche d’oscillation ( ) une fois pour activer l’oscillation, une deuxième fois pour la désactiver. Rangement de la télécommande Lorsqu’elle ne sert pas, la télécommande peut être rangée dans le renfoncement, derrière les commandes (fig. 10). MODE D’EMPLOI DU VENTILATEUR DE LA SÉRIE HY-280 Marche et arrêt HY-280 Pressez la touche d’alimentation ( ), à gauche...
- Page 14 MODE D’EMPLOI DU VENTILATEUR DE LA SÉRIE HY-280 (SUITE) Température HY-280 A. Pressez longuement la touche de température ® pour accéder au mode température. B. La température ambiante actuelle s’affiche pendant 3 secondes puis l’afficheur clignote toutes les secondes. Si vous ne choisissez pas de température, l’appareil revient au mode « vitesse » au bout de 10 secondes. C. M odifiez la température au besoin à l’aide des touches de température. Appuyer sur la touche élève la température d’un degré alors qu’appuyer sur la touche l’abaisse d’un degré. *Pour le Canada, la plage de température couvre de 15 à 30 °C. D. U ne fois la température choisie, la température ambiante s’affiche de nouveau.
- Page 15 EMPLOI DE LA TÉLÉCOMMANDE DE LA SÉRIE HY-280 (SUITE) Accès au mode température à partir de la télécommande. Fig. 11 A. Pressez la touche de température ( ) une fois et relâchez-la. L’afficheur commencera à clignoter. B. Pressez la touche « + » ou « - » pour modifier le point de consigne. Remarque : Une fois le point de consigne sélectionné, la vitesse du ventilateur change automatiquement pour procurer la température désirée. Le ventilateur s’arrête si la température ambiante baisse au-dessous du point de consigne puis se remet en marche quand elle le surpasse. Rangement de la télécommande Lorsqu’elle ne sert pas, la télécommande peut être rangée dans le renfoncement, derrière les commandes (fig. 11). INSTRUCTIONS D’ENTRETIEN DESTINÉES À L’UTILISATEUR ENTRETIEN ET RANGEMENT • Assurez-vous que le ventilateur soit éteint et débranché.
- Page 16 GARANTIE LIMITÉE DE 1 AN B. À sa discrétion, Kaz USA, Inc. réparera ou Prière de lire toutes les instructions avant de tenter d’utiliser ce produit. remplacera ce produit si l’on constate qu’il comporte un vice de matière ou de main- A.
- Page 17 13. Coloque el ventilador en una superficie comercial, industrial o en el exterior. seca y plana. La marca registrada Honeywell es utilizada por Kaz USA, Inc. bajo licencia de Honeywell International Inc. Honeywell International Inc. no hace ninguna declaración o garantía con respecto a este producto.
- Page 18 14. No cuelgue ni monte el ventilador en la 18. No pase el cable del ventilador debajo de pared o el techo. alfombras. No cubra el cable con tapetes, 15. No opere si la cubierta del ventilador está alfombrillas o cubiertas similares. No dañada.
- Page 19 INSTRUCCIONES DE MONTAJE A. Montaje del Pedestal Fig. 1 • Alinée el ensamble del pedestal izquierdo y del derecho y encájelos juntos con firmeza (Fig. 1). B. Montaje de la Base • Alinee las dos partes de la base circular y encájelas a presión empujando suavemente las 4 protuberancias (Fig. 2, Pieza A) Montaje del Pedestal dentro de los círculos adyacentes de la pieza de conexión Fig. 2 (Fig. 2, Pieza B). Protuberancias Extrusions C. Sujeción del Pedestal a la Base • Alinee los 3 agujeros de los tornillos en la parte inferior del pedestal con los 3 agujeros en la base de forma que el sujetador del cable eléctrico esté en la parte posterior de la Montaje de la Base unidad (Fig. 3). Fig. 3 • Asegure el montaje de la base al pedestal introduciendo y apretando los 3 tornillos en los 3 agujeros ubicados en la parte inferior de la base (Fig. 4). Poste de Posicionamiento D.
- Page 20 MANEJO DEL CABLE La característica del manejo del cable está ubicada en la parte Fig. 8a Fig. 8b posterior del ventilador. Simplemente doble el exceso de cable, y coloque las dos piezas del cable en la muesca (Fig. 8b). La muesca sostendrá el cable de manera que el exceso no se arrastre en el suelo. INSTRUCCIONES DE MONTAJE INSTALACIÓN DE BATERÍAS DEL CONTROL REMOTO/ Fig. 9 INSTRUCCIONES DE REEMPLAZO A. Retire la tapa de las baterías deslizándola hacia abajo en la dirección de la flecha. B. Introduzca 2 baterías AAA en el control remoto siguiendo la guía de acomodo dentro de las ranuras del compartimiento (Fig. 9). Baterías incluidas. C. Coloque de nuevo la tapa deslizándola hacia arriba en sentido opuesto a la dirección de la flecha hasta que la tapa encaje en su lugar. NOTA: NO MEZCLE BATERÍAS NUEVAS Y USADAS. NO MEZCLE LAS BATERÍAS ALCALINAS, ESTÁNDAR (CARBÓN-ZINC) O RECARGABLES (NIQUEL-CADMIO). VISITE LOS SITIOS DE RECICLAJE EN SU ÁREA PARA UN DESECHO APROPIADO DE LAS BATERÍAS. OPERACIÓN DEL VENTILADOR SERIES HY-254 FAN OPERATION FAN OPERATION Encendido/Apagado...
- Page 21 OPERACIÓN CONTROL REMOTO SERIES HY-254 Encendido/Apagado Presione una vez el botón de Encendido ( )para encender el ventilador. Presione de nuevo el botón de Encendido para apagar el ventilador. Control de Velocidad El ventilador se encenderá automáticamente en la velocidad “Dormir” cuando se encienda por primera vez. Para ajustar la velocidad hacia arriba o hacia abajo, presione el botón de Velocidad del Ventilador ( ) repetitivamente para aumentar el nivel. Fig. 10 Oscilación Para activar la característica de Oscilación, presione una vez el botón de Oscilación ( ). Presione el botón de Oscilación de nuevo para apagar la característica de Oscilación. Almacenaje del Control Remoto Cuando no esté en uso, el control remoto puede ser almacenado en el hueco ubicado detrás de los controles (Fig. 10). OPERACIÓN DEL VENTILADOR SERIES HY-280 Encendido/Apagado HY-280 Para encender el ventilador, presione el botón...
- Page 22 OPERACIÓN DEL VENTILADOR SERIES HY-280 CONTINUACIÓN Temperatura HY-280 A. Presione y mantenga presionado el Botón de ® Control de Temperatura para entrar al modo de temperatura. B. La temperatura actual de la habitación se mostrará durante 3 segundos, después la lectura empezará a parpadear en intervalos de 1 segundo. Si la temperatura no fue seleccionada, la unidad regresará al “modo de dormir” después de 10 segundos. C. Ajuste la temperatura al nivel deseado utilizando los botones de Control de Temperatura. Al presionar el botón aumentará la temperatura en un grado. Al presionar el botón bajará la temperatura en un grado. *Para Canadá el rango del ciclo de temperatura es de 15°C a 30°C. D. Una vez que seleccione la temperatura deseada, el ventilador volverá a mostrar la temperatura ambiente.
- Page 23 OPERACIÓN DEL CONTROL REMOTO SERIES HY-280 CONTINUACIÓN El Modo de Temperatura puede ser accesado a través del Fig. 11 control remoto. A. Presione una vez y suelte el botón de Modo de Temperatura ( ). La pantalla empezará a parpadear. B. Presione los botones de “+” y “-“ para cambiar la temperatura deseada. Nota: Una vez que seleccione la temperatura deseada, la velocidad del ventilador se ajustará automáticamente para alcanzar la temperatura deseada. El ventilador se parará si la temperatura ambiente desciende por debajo del nivel deseado y se reiniciará si la temperatura ambiente asciende por encima del nivel deseado. Almacenaje del Control Remoto Cuando no esté en uso, el control remoto puede ser almacenado en el hueco ubicado detrás de los controles (Fig. 11).
- Page 24 1 AÑO DE GARANTIA LIMITADA Primero debe leer todas las instrucciones B. A su consideración, Kaz USA, Inc. reparará o antes de intentar usar este producto. cambiará este producto si encuentra defecto en materiales o de fabricación. Los productos A. Esta garantía limitada por 1 año aplica defectuosos deben de regresarse al lugar de para reparación o reposición del producto compra de acuerdo con las políticas de la...
Need help?
Do you have a question about the QUIETSET HY-254 Series and is the answer not in the manual?
Questions and answers