Table of Contents
Advertisement
Quick Links
M e g a P ix e l Ne two rk Cam er a
KNC-SPDNi300
Installation Guide
Table of Contents
INTRODUCTION
PACKAGE CONTENTS
INSTALL THE HARDWARE
Introduction
IP PTZ SPEED DOME Installation Guide
This installation guide provides instructions for installing the Network Camera on
your network. For all other aspects of using the product, please see the User's
Manual, available on the CD included in this package, or from http://www.ktnc.co.kr
Installation steps
1. Check the package contents against the list below.
2. Product description
3. Install the hardware, Set RS485 Device Configuration
4. Set an IP address
5. Set the admin and user ID and password, See User's Manual.
instructions in further usage.
Im po r t a nt !
This product must be used in compliance with local laws and regulations.
Package Contents
Camera
Wall Mount Bracket
Software CD
Terminal Block(5p)
Screws(4ea)
Washers(4ea)
Terminal Block(2p)
Terminal Block(2p)
Plastic
Anchors(4ea)
Coupler
L-Wrench
Screws / Plastic Anchors / L-wrench / Washers / RJ45 coupler
M164-S P D N i3 0 0- 0 0 1
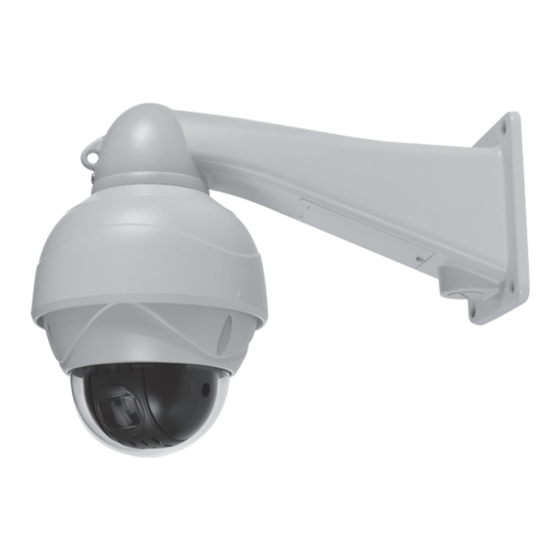
Install the hardware
IP PTZ SPEED DOME is designed to be installed using standing bracket on the wall or ceiling.
Note:
• It is recommended that megapixel lens are used to optimize performance.
• Please keep the lens clean.
• Any foreign objects and finger marks on the lens can cause inferior image quality in low light level
conditions
③
①
Installation Guide
Screws(4ea)
Plastic anchors(4ea)
②
Washers(4ea)
Safety Wire
Connect the Camera Safety Wire
to the Installation Base.
Setting Dome Camera
The device can communicate with external switching device such as multiplexer or DVRs by
setting the Rotary switch and Dip switch. Refer to tables below for setting the dome camera
ID and protocol selection. Total length of the cable for communication should not exceed
1km.
Setting the address (ID) of dome camera
To prevent wrong operation and malfunction, each dome camera has a unique address (ID).
The default setting is 0[ID001]. The value of rotary switch is in hexadecimal.
ex) SW301 : A, SW302 : F
0xAF => ID175
* Check appendix sheet
Dome camera ID setting (Rotary Switch, SW301, SW302)
Important:
PTZ - Device configurations in SETUP must have same value of physical rotary & DIP switches.
X16
X1
SW301
SW302
Setting the protocol of dome camera
Dome camera protocol setting.(DIP Switch, SW303)
No2
Protocol
Off
KT&C, Pelco D/P(default)
On
Pelco P/Others
Dome camera baud rate setting.(DIP Switch, SW303)
Important:
PTZ - Device configurations in SETUP must have same value of physical rotary & DIP switches.
No3
No4
Baud Rate(bps)
Off
Off
2400
Off
On
4800
On
Off
9600
On
On
38400(default)
Dome camera termination setting Off/On
(NO5, DIP Switch, SW303)
Press reset switch for more than 10 seconds, the camera is initialized (Factory default)
SW302
SW301
Reset Switch
SW303
Advertisement
Table of Contents

Related Manuals for KT&C KNC-SPDNi300


Summary of Contents for KT&C KNC-SPDNi300
- Page 1 IP PTZ SPEED DOME is designed to be installed using standing bracket on the wall or ceiling. The device can communicate with external switching device such as multiplexer or DVRs by KNC-SPDNi300 setting the Rotary switch and Dip switch. Refer to tables below for setting the dome camera...
- Page 2 Connection Interface and Wiring cables 3. When the Network Camera appears in the window, select the Network Camera which needs to 8. The video image displays in your browser. assign the IP address. A. Refresh Device List – Rescan local network to find the Network Camera. * Caution B.
Need help?
Do you have a question about the KNC-SPDNi300 and is the answer not in the manual?
Questions and answers