Table of Contents
Advertisement
Quick Links
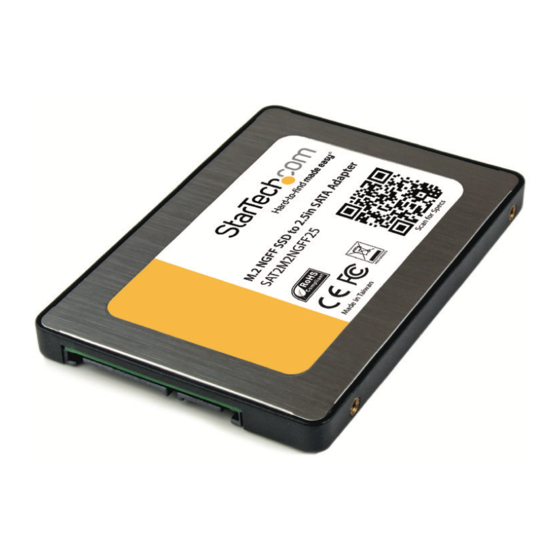
M.2 NGFF SSD to 2.5in SATA Adapter
SAT2M2NGFF25
*actual product may vary from photos
DE: Bedienungsanleitung - de.startech.com
FR: Guide de l'utilisateur - fr.startech.com
ES: Guía del usuario - es.startech.com
IT: Guida per l'uso - it.startech.com
NL: Gebruiksaanwijzing - nl.startech.com
PT: Guia do usuário - pt.startech.com
For the most up-to-date information, please visit: www.startech.com
Manual Revision: 09/24/2014
Advertisement
Table of Contents

Subscribe to Our Youtube Channel
Related Manuals for StarTech.com SAT2M2NGFF25


Summary of Contents for StarTech.com SAT2M2NGFF25
- Page 1 DE: Bedienungsanleitung - de.startech.com FR: Guide de l'utilisateur - fr.startech.com ES: Guía del usuario - es.startech.com IT: Guida per l'uso - it.startech.com NL: Gebruiksaanwijzing - nl.startech.com PT: Guia do usuário - pt.startech.com For the most up-to-date information, please visit: www.startech.com Manual Revision: 09/24/2014...
- Page 2 StarTech.com. Where they occur these references are for illustrative purposes only and do not represent an endorsement of a product or service by StarTech.com, or an endorsement of the product(s) to which this manual applies by the third-party company in question. Regardless of any direct acknowledgement elsewhere in the body of this document, StarTech.com hereby...
-
Page 3: Table Of Contents
Table of Contents Introduction ....................1 Packaging Contents ..........................1 System Requirements ..........................1 Assembled Adapter View ..............2 Assembled Adapter View ........................2 Open Adapter View ..........................2 M.2 NGFF SSD Installation ..............3 Hard Drive Initialization ................10 Technical Support ..................11 Warranty Information ................11 Instruction Manual... -
Page 4: Introduction
Introduction Packaging Contents • 1x M.2 NGFF SSD to 2.5” SATA Adapter • 1x SSD mounting kit • 1x Mini Screw driver • 1x Instruction manual System Requirements • M.2 NGFF solid state drive (SSD) • SATA Host Device Instruction Manual... -
Page 5: Assembled Adapter View
Assembled Adapter View Assembled Adapter View 1. Top mounting holes 2. Side mounting holes 3. SATA DATA & Power Combo (7+15 pin) 4. HDD plate 5. HDD plate mounting holes Open Adapter View 1. M.2 (NGFF) SSD Connector 2. Drive installation bracket 3. -
Page 6: M.2 Ngff Ssd Installation
M.2 NGFF SSD Installation WARNING: SSD Drives and storage adapters require careful handling. If you are not careful with your SSD Drive, lost data may result. Always handle your drive with caution. Be sure that you are properly grounded by wearing an anti-static strap when handling computer components or discharge yourself of any static electricity build-up by touching a large grounded metal surface (such as the computer case) for several seconds. - Page 7 2. Determine if the drive installation bracket requires relocating by assessing your drive length. The board is labeled with the respective drive types for length but if your drive type is unknown,place your SSD next to the M.2 (NGFF) SSD connector, note which drive installation hole matches the height of your SSD.
- Page 8 Note: It may require a small prying tool or tweezers to carefully remove the board. b) Remove the nut holding the bracket in place on the reverse side using a small set of plyers (Not included). Instruction Manual...
- Page 9 c) Reseat the drive installation bracket in the drive installation hole that matches your SSD. Replace the removed nut on the reverse side by using a small set of plyers (not included). Instruction Manual...
- Page 10 d) Carefully reseat the main board inside the adapter enclosure. 4. Using the included screw driver. Remove the screw located in the front of the hard drive installation bracket. Instruction Manual...
- Page 11 5. Slide the M.2 connector on the SSD into the M.2 receprical connector on the SAT2M2NGFF25. Note: The connector on your M.2 SSD is keyed so the drive will only fit one way. 6. Press the drive down toward the drive mounting bracket, and drive the removed screw through the mounting hole on your SSD drive and into the drive mounting bracket using a Philips head screw driver.
- Page 12 7. Replace the HDD plate on the bottom of the adapter case, and drive four of the included case screws into the HDD plate mounting holes on the HDD plate, into the HDD plate mounting holes on the adapter. 8. The SSD has now been installed, and is ready to be implemented in your 2.5” SATA drive application.
-
Page 13: Hard Drive Initialization
Hard Drive Initialization If the M.2 NGFF SSD is new or otherwise blank, it may need to be initialized and formatted before use. Follow the steps below in a Windows interface to initialize the drive. 1. From the main Windows desktop, right-click on “My Computer” (“Computer” in Vista/ 7 / 8), then select Manage. -
Page 14: Technical Support
Limitation of Liability In no event shall the liability of StarTech.com Ltd. and StarTech.com USA LLP (or their officers, directors, employees or agents) for any damages (whether direct or indirect, special, punitive, incidental, consequential, or otherwise), loss of profits, loss of business, or any pecuniary loss, arising out of or related to the use of the product exceed the actual price paid for the product. - Page 15 StarTech.com is an ISO 9001 Registered manufacturer of connectivity and technology parts. StarTech.com was founded in 1985 and has operations in the United States, Canada, the United Kingdom and Taiwan servicing a worldwide market.
Need help?
Do you have a question about the SAT2M2NGFF25 and is the answer not in the manual?
Questions and answers