
Related Manuals for Jydepejsen Trend-line


Summary of Contents for Jydepejsen Trend-line
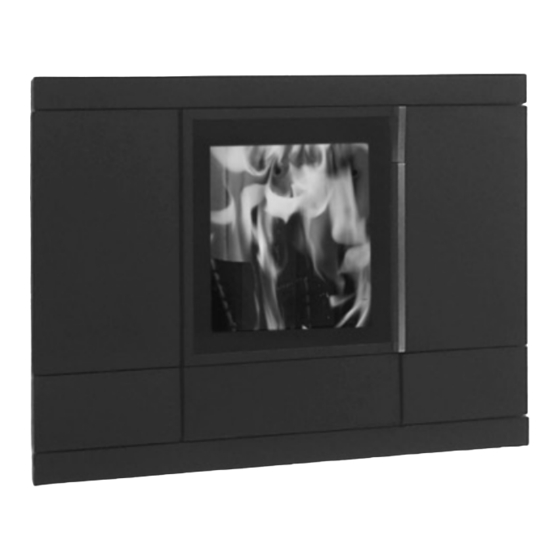
- Page 1 Betjeningsvejledning - DK Användarhandbok - S Operating instructions - GB Trend-line Troja Soft-line Fine-line Mosaik Royal-line Zeus Athene Avanti Cubic - fire by design...
- Page 2 Indhold - DK 1. Indledning 2. Opstilling 3. Garanti 4. Fyringsvejledning 5. Vedligeholdelse 6. Reservedelsoversigter Jydepejsen A/S - November 2008 – 6. edition...
- Page 3 Forankringen af denne udføres i samråd med forhåndler/skorstensfejer. Hvis du har en Trend-line 2, som er en drejelig model, skal du være opmærksom på opstilling som illustreret neden- for, med hensyn til afstand til brændbart materiale.
- Page 4 Hvis uheldet er ude, og din brændeovn skal repareres under garantien, skal du kunne forevise dateret og kvitteret faktura, hvorpå forhandlerens og ovnmodellens navn fremgår. Ved garantireparationer dækkes omkostninger til nye reservedele og arbejdsløn af Jydepejsen A/S. Eventuelle omkostninger såsom arbejdsløn til af- og genmontering af skorsten er kun dækket ved forudgående aftale med Jydepejsen A/S.
- Page 5 4. Fyringsvejledning Det er meget vigtigt at sikre sig, at der er et godt træk i skorstenen. Det er alfa og omega, at skorstenen arbejder sammen med ovnen. Din forhandler eller skorstensfejer vil være i stand til at rådgive dig om dine skorstensforhold. Såfremt skorstenen ikke har været brugt i en længere periode, skal denne kontrolleres for blokeringer før ibrugtag- ning.
- Page 6 Fine-line, Soft-line, Cubic, Zeus, Athene, Mosaik, Troja , Avanti og Trend-line: Opstartsfasen Lufthjulet skrues op på maksimum Læg tændblokke og optændingspinde i bunden af brændkammeret. Optændingspindene ca. 1,5 kg. bygges op som et tændstikhus. Herefter antændes bålet. Lågen bør stå på klem et par minutter under opstartsfasen.
- Page 7 5. Vedligeholdelse Tætningsbånd og vermiplader er sliddele som skal udskiftes. Hvor ofte dette skal ske, afhænger af brugen af bræn- deovnen. I nogle tilfælde udskiftes disse dele hvert år og i andre hvert 2. / 3. år. Tætningsbånd skal som hoved- regel udskiftes, når det er fladtrykt, og lågen ikke slutter tæt mod brændeovnens front.
- Page 8 A. Fine-line, Soft-line, Cubic, Zeus, Athene, Troja, Avanti og Trend-line: Den nederste røgvenderplade skubbes lidt op i bagkant, således at bagpladen / bagpladerne kan tages Fjern de 2 små...
- Page 9 6. Reservedelsoversigter Type Beskrivelse Varenr. Trend-line / Troja / Zeus / Athene / Fine-line / Soft-line / Avanti / Hera efter 01.09.2004 Vermi sideplade, højre 400 x 148,3 x 25 mm 44101040-0 Vermi sideplade, venstre 400 x 148,3 x 25 mm 44101050-0 Vermi side, venstre skrå...
- Page 10 Royal-line 2 + 3 Type Beskrivelse Varenr. Royal-line 2 Vermi sideplade (4 stk. pr. ovn) 295 x 209 x 25 mm 44104060 Vermi bagplade 400 x 258 x 25 mm 44104080 Vermisæt (u/røgvenderplade) 44104050 Glas 349 x 260 x 5 mm 44001300 Royal-line 3 Vermi sideplade (4 stk.
- Page 11 Type Beskrivelse Varenr. Trend-line før 01.09.2004 Vermi side 395 x 158 x 20 mm 44102020 Vermi side højre skrå 395 x 133,9 x 20 mm 44102040 Vermi side venstre skrå 395 x 133,9 x 20 mm 44102030 Vermi bagplade 211,2 x 245,6 x 20 mm 44102050 Vermi bagplade skrå...
- Page 12 Innehåll - S 1. Inledning 2. Uppställning 3. Garanti 4. Eldningsanvisningar 5. Underhåll 6. Reservdelsförteckning...
- Page 13 Monteringen får inte reducera hållbarheten på skorstenens konstruktion. Monteringen utförs i samm- råd med sotare och återförsäljare. Har du den vridbara Trend-line 2 måste du kontrollera att den placeras enligt ritningen nedan, med tanke på avstån- det till brännbart material.
- Page 14 3. Garanti Fabriksnya braskaminer från Jydepejsen A/S har fem års garanti mot genombränning vid korrekt eldning. Vid eventu- ell reklamation under garantitiden skall du kontakta den återförsäljare som sålde kaminen till dig. Garantin omfattar inte: • Vermiculitplattor • Rökvändarplattor •...
- Page 15 4. Eldningsanvisningar Det är mycket viktigt att det är bra drag i skorstenen. Det är a och o att skorstenen arbetar tillsammans med bras- kaminen. Din återförsäljare eller sotare bör kunna ge dig råd om hur just din skorsten fungerar. Har inte skorstenen använts under längre tid måste man kontrollera att den inte är blockerad före användning.
- Page 16 Fine-line, Soft-line, Cubic, Zeus, Athene, Avanti, Mosaik, Troja och Trend-line: Startfasen Lufthjulet skruvas upp maximalt. Lägg tändblock och trästickor i botten av brännkammaren. Trästickorna (ca 1,5 kg) byggs upp som ett tändstickshus. Sedan tänder du på. Luckan bör stå på glänt i ett par minuter under startfasen.
- Page 17 5. Underhåll Tätningslist och vermiplattorna är förbrukningsvaror som ska bytas. Hur ofta beror på hur mycket braskaminen används. I vissa fall behövs de bytas varje år och i andra fall vartannat eller vart tredje år. Tätningslisten ska i regel bytas när den har blivit platt och luckan inte sluter tätt mot braskaminens front. Nya packningar och lim kan beställas från din återförsäljare, som också...
- Page 18 Nästa avsnitt innehåller olika anvisningar för byte av vermiculitplattorna. Se till att du följer anvisnin- garna som gäller för just din braskamin. Fine-line, Soft-line, Cubic, Zeus, Athene, Troja, Avanti och Trend-line: Byte av vermiplattor Den nedersta rökvändarplattan lyfts upp lite i bakkant, så att bakplattan (bakplattorna) kan lyftas ur.
- Page 19 6. Reservdelsförteckning Produktnamn Mått H x B x D Produktnr. Trend-line / Troja / Zeus / Athene / Fine-line / Soft-line / Avanti / Hera efter 01.09.2004 Vermi sidoplatta, höger 400 x 148,3 x 25 mm 44101040-0 Vermi sidoplatta, vänster...
- Page 20 Royal-line 2 + 3 Produktnamn Mått H x B x D Produktnr. Royal-line 2 Vermi sidoplatta 295 x 209 x 25 mm 44104060 Vermi bakplatta 400 x 258 x 25 mm 44104080 Vermi-set (utan rökvändarplatta) 44104050 Glas 349 x 260 x 5 mm 44001300 Royal-line 3 Vermi sidoplatta (4 stk.
- Page 21 Produktnamn Mått H x B x D Produktnr Trend-line innan 01.09.2004 Vermi sidoplatta 395 x 158 x 20 mm 44102020 Vermi sidoplatta höger, lutande 395 x 133,9 x 20 mm 44102040 Vermi sidoplatta vänster, lutande 395 x 133,9 x 20 mm...
- Page 22 Contents - GB 1. Introduction 2. Installation 3. Warranty 4. Stoking instructions 5. Maintenance 6. Spare parts lists...
-
Page 23: Installation
The anhoring must be done in consultation with your dealer/ chimney sweep. If you have a turnable Trend-line 2, note that the installation must be done as illustrated below, with regards to combustible material. - Page 24 When this is settled, the next step is that you make the stove and the chimney cooperate. This is done by following the operating instructions and using fuel which inflames easily in the combustion chamber, until a decent draught is obtained. For further information on correct lighting and stoking, please refer to Jydepejsen´s „Manual for instal- lation and stoking“.
- Page 25 However, never add more than 2 kg of wood every 1.5–2 hours. Please remember that the exterior surfaces of the stove in particular will become very hot during firing. Fine-line, Soft-line, Cubic, Zeus, Athene, Mosaik, Troja, Avanti and Trend-line: Initial lighting Turn the air wheel to the maximum Add firelighters and billets to the bottom of the fire box (combustion chamber).
-
Page 26: Maintenance
Stoking Open the air vent completely. To minimize the underpressure, the door should be ajar for about one minute before you open it. Open the door slowly. Add 2 – 3 pieces of firewood to the combustion chamber. Close the door. Let the door be ajar untill the fire has caught the wood, then close the door and turn down the air supply to obtain steady and calm flames. - Page 27 Adjustment of the self-closing spring (B1) It is possible that the springs turn wry when you dismount the door from the stove. In this case you must replace them with new springs. Furthermore, you need to adjust the springs before they will function completely. For this purpose you need a 4 mm Allen key and a 1 mm Allen key, for the adjustment.
- Page 28 The following sections describe different instructions for changing the vermiculite panels. Please make sure that you follow the instructions which are in accordance with your stove model. A. Fine-line, Soft-line, Cubic, Troja, Trend-line, Avanti, Zeus & Athene: Change of the vermiculite panels Push the rear edge of the baffle plate upwards, to take out the rear panel / panels in the combustion chamber.
-
Page 29: Spare Parts Lists
6. Spare parts lists Type Description Article no. Trend-line / Troja / Zeus / Athene / Fine-line / Soft-line / Avanti / Hera after 01.09.2004 Vermiculite side panel, right 400 x 148,3 x 25 mm 44101040-0 Vermiculite side panel, left... - Page 30 Royal-line 2 + 3 Type Description Article no. Royal-line 2 Vermiculite side panel (4 stk. pr. ovn) 295 x 209 x 25 mm 44104060 Vermiculite rear panel 400 x 258 x 25 mm 44104080 Vermiculiteset (without baffle plate) 44104050 Glass 349 x 260 x 5 mm 44001300 Royal-line 3...
- Page 31 Type Description Article no. Trend-line before 01.09.2004 Vermiculite side 395 x 158 x 20 mm 44102020 Vermiculite side right bevelled 395 x 133,9 x 20 mm 44102040 Vermiculite side left bevelled 395 x 133,9 x 20 mm 44102030 Vermiculite rear panel...
- Page 32 Demounting / mounting of handle...
- Page 33 Change from rear to top smoke outlet - Fine-line...
- Page 34 Fresh air intake (The air box must be mounted on the existing air wheel on the stove DO NOT DISMOUNT THE AIR WHEEL! The illustrations below show a dismounted air wheel, but ONLY for visual reasons!)
- Page 35 Trend-line soapstone - convection...
- Page 36 Trend-line with full soapstone cladding Soapstone assembling...
- Page 37 Mosaik Change of glass front...
- Page 38 Soft-line with full soapstone cladding Soapstone assembling 1,5 cm ...
- Page 39 J Y D E P E J S E N...
- Page 40 Jydepejsen A/S . Nr. Felding . DK-7500 Holstebro salg@jydepejsen.dk . www.jydepejsen.com...
Need help?
Do you have a question about the Trend-line and is the answer not in the manual?
Questions and answers