Table of Contents
Advertisement
Quick Links
lación & instrucciones de uso | instalação & instruções de utilização | installation & directions for use |
installation & gebrauchsanweisung | instalace & návod k použití | installation & mode d'emploi | installa-
tie & gebruiksaanwijzing | installazione & istruzioni per l'uso | instalación & instrucciones de uso | instala-
ção & instruções de utilização | installation & directions for use | installation & gebrauchsanweisung |
instalace & návod k použití | installation & mode d'emploi | installatie & gebruiksaanwijzing | installazione
& istruzioni per l'uso | instalación & instrucciones de uso | instalação & instruções de utilização | installa-
tion & directions for use | installation & gebrauchsanweisung | instalace & návod k použití | installation &
mode d'emploi | installatie & gebruiksaanwijzing | installazione & istruzioni per l'uso | instalación &
instrucciones de uso | instalação & instruções de utilização | installation & directions for use | installation
to give to the uSer
& gebrauchsanweisung | instalace & návod k použití | installation & mode d'emploi | installatie & gebruik-
saanwijzing | installazione & istruzioni per l'uso | instalación & instrucciones de uso | instalação & instru-
ções de utilização | installation & directions for use | installation & gebrauchsanweisung | instalace &
návod k použití | installation & mode d'emploi | installatie & gebruiksaanwijzing | installazione & istruzioni
per l'uso | instalación & instrucciones de uso | instalação & instruções de utilização | installation & direc-
tions for use | installation & gebrauchsanweisung | instalace & návod k použití | installation & mode
d'emploi | installatie & gebruiksaanwijzing | installazione & istruzioni per l'uso | instalación & instrucciones
de uso | instalação & instruções de utilização | installation & directions for use | installation & gebrauch-
sanweisung | instalace & návod k použití | installation & mode d'emploi | installatie & gebruiksaanwijzing
| installazione & istruzioni per l'uso | instalación & instrucciones de uso | instalação & instruções de utiliza-
ção | installation & directions for use | installation & gebrauchsanweisung | instalace & návod k použití |
installation & mode d'emploi | installatie & gebruiksaanwijzing | installazione & istruzioni per l'uso | insta-
lación & instrucciones de uso | instalação & instruções de utilização | installation & directions for use |
installation & gebrauchsanweisung | instalace & návod k použití | installation & mode d'emploi | installa-
tie & gebruiksaanwijzing | installazione & istruzioni per l'uso | instalación & instrucciones de uso | instala-
ção & instruções de utilização | installation & directions for use | installation & gebrauchsanweisung |
instalace & návod k použití | installation & mode d'emploi | installatie & gebruiksaanwijzing | installazione
& istruzioni per l'uso | instalación & instrucciones de uso | instalação & instruções de utilização | installa-
tion & directions for use | installation & gebrauchsanweisung | instalace & návod k použití | installation &
mode d'emploi | installatie & gebruiksaanwijzing | installazione & istruzioni per l'uso | instalación &
instrucciones de uso | instalação & instruções de utilização | installation & directions for use | installation
& gebrauchsanweisung | instalace & návod k použití | installation & mode d'emploi | installatie & gebruik-
saanwijzing | installazione & istruzioni per l'uso | instalación & instrucciones de uso | instalação & instru-
ções de utilização | installation & directions for use | installation & gebrauchsanweisung | instalace &
návod k použití | installation & mode d'emploi | installatie & gebruiksaanwijzing | installazione & istruzioni
per l'uso | instalación & instrucciones de uso | instalação & instruções de utilização | installation & direc-
tions for use | installation & gebrauchsanweisung | instalace & návod k použití | installation & mode
d'emploi | installatie & gebruiksaanwijzing | installazione & istruzioni per l'uso | instalación & instrucciones
de uso | instalação & instruções de utilização | installation & directions for use | installation & gebrauch-
sanweisung | instalace & návod k použití | installation & mode d'emploi | installatie & gebruiksaanwijzing
| installazione & istruzioni per l'uso | instalación & instrucciones de uso | instalação & instruções de utiliza-
ção | installation & directions for use | installation & gebrauchsanweisung | instalace & návod k použití |
installation & mode d'emploi | installatie & gebruiksaanwijzing | installazione & istruzioni per l'uso | insta-
lación & instrucciones de uso | instalação & instruções de utilização | installation & directions for use |
installation & gebrauchsanweisung | instalace & návod k použití | installation & mode d'emploi | installa-
[en]
tie & gebruiksaanwijzing | installazione & istruzioni per l'uso | instalación & instrucciones de uso | instala-
ção & instruções de utilização | installation & directions for use | installation & gebrauchsanweisung |
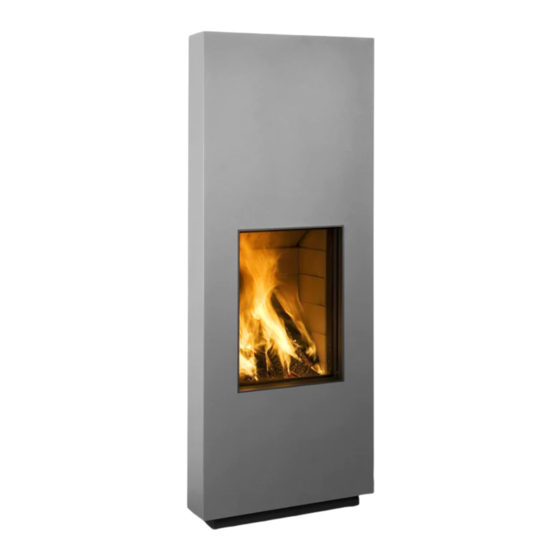
installation instructions and directions for
instalace & návod k použití | installation & mode d'emploi | installatie & gebruiksaanwijzing | installazione
& istruzioni per l'uso | instalación & instrucciones de uso | instalação & instruções de utilização | installa-
use of SF15 cladding for the Stûv 21/65H
1010 – SN 77016 > ...
Advertisement
Table of Contents

Related Manuals for Stuv 21/65H


Summary of Contents for Stuv 21/65H
- Page 1 & návod k použití | installation & mode d'emploi | installatie & gebruiksaanwijzing | installazione & istruzioni per l’uso | instalación & instrucciones de uso | instalação & instruções de utilização | installa- use of SF15 cladding for the Stûv 21/65H 1010 – SN 77016 > …...
-
Page 2: Table Of Contents
This cladding has been designed to We recommend that you read these offer you maximum comfort and instructions prior to installation. safety. It has been manufactured Some configurations might have an with the greatest of care. If however impact on the sequence of operations you should find the slightest to be performed. -
Page 3: Presentation Of The Product
PreSeNtAtioN oF the ProduCt dimensions Ø 285 Ø 285 Ø 285 Ø 170 Ø 170 Ø 170 recommendations Read the installation instructions and It is extremely important to insulate The installation of the stove, its directions for use before installation the stove using the insulation kits accessories and surrounding materials and actual usage. -
Page 4: Overview
overview [1] the façade (grey) [2] the structure : support [a] and front part [b] [3] the side panels (white) [1 +2 +3] = ref. 11021262 Optional [4] the fireplace extension [a] and its finished corner iron [b] (in white) ref. -
Page 5: Preparation Of The Area
PrePArAtioN oF the AreA feu/ blanc): 0,5 pt Combustion air inlet Outside air inlet : The outside air for combustion can be fed in : – either through the wall (Ø 170 mm, distance from the ground :140 ± 5 mm) - [diagram 1]. Ø... -
Page 6: Holding Capacity Of The Structure
holding capacity of the structure Ensure that the resistance of the With installation of a "stove version" floor is sufficiently strong to support or "fireplace column version" where the stove and the construction of the wall is not plumb, there will be a the cladding. -
Page 7: Circulation Of Convection Air
Circulation of convection air Natural or forced convection ? Please note... Natural convection is sufficient in most With installation of the "stove" and cases [photo 1]. "fireplace column" versions, the air inlets and outlets are in the cladding. This method of heat diffusion obviously enables easier installation With installation of the semi-recessed (no electrical connection) is less... -
Page 8: Tools
0,4 x 2,5 0,4 x 2,5 tools ph 2 ph 2 3 - 4 - 5 1 x 7 - 2 x 10 + hexagonal 10 10 cm 1 x 13 - 2 x 17 10 cm 10 cm 0,4 x 2,5 0,4 x 2,5 "extension"... -
Page 9: Installation
iNStAllAtioN on taking delivery of the equipment Checking the contents If accessories have been ordered (fan kit, outside air inlet kit, fireplace extension), they will be in an seperate package. Please check all accessories are supplied as ordered. The installation instructions and the directions for use are attached to the packaging. -
Page 10: Unpacking
unpacking moving the cladding – with a pallet truck : leave it on its pallet, – using a hand-lift truck, turn the cladding on its back and leave the palette in position. Using a hand-lift truck or pallet loader, move the main part of the SF15 cladding close to its final destination. -
Page 11: Preparing The Cladding
Preparing the cladding Unscrew the 2 top locking screws (Allen key 3) on the façade [photo 1]. Open the façade and take it off its hinges [photo 1]. Put it down carefully. Using the cutting pliers, cut the fasteners holding the side panels [photos 3 &... - Page 12 Using a size 10 spanner, unscrew the hinges (at the top and the bottom) [photos 1 & 2] and the bearing [photo 3]. Using the size 3 Allen key, unscrew the 12 screws on the front part of the structure (left and right) [diagram 4]. Remove the front part of the structure [photo 5].
-
Page 13: Positioning Of The Combustion Air Inlet
Using a slot screwdriver, bend the 2 attachment "lugs" (brackets) of the structure's support [photos 1 & 2]. Attach the vertical insulation into the top of the structure's support [photo 3]. With a rear connection, knock out the pre-cut piece (U-shaped) from the insulation and position it with the “U”... - Page 14 Attachment of combustion air inlet valve control (optional). Attach the valve's open/close control in the position provided on the front part of the structure [photo 1]. Using the thread, screw in the control [photo 2]. Insert the ball grip [photos 4 & 5]. Check the mechanism [photos 5 &...
-
Page 15: Connection To The Smoke Flue
Using the screw gun and the size 10 socket wrench, fit the Stûv 21/65H extension (total elevation) [photo 6]. Position the stove's large insulation panel at the rear (on the 21/65H) [photo 7]. Put the Stûv 21/65H into its SF15 cladding. Use the grips [photo 8]. -
Page 16: Insulating The Fireplace
Note : the stove must be insulated using the insulation kits provided. Insert the 2 side insulation panels of the Stûv 21/65H [photo 1]. Using the cutter, cut the U shape out of the cladding's upper insulation [photo 2]. The cut-out is to pass the duct through or for access for sweeping later. -
Page 17: Positioning Of The Side Panels
Positioning of the side panels Insert the side panels, hooked part at the top, on the wall side [photo 1]. If no cladding extension is being fitted, bend the hooked parts of the panels outwards [photo 2]. inserting fireplace extension (optional) Unpack the fireplace extension. -
Page 18: Connecting The Upper Insulation Plate To The Extension
Connecting the upper insulation plate to the extension Insert the lug included in the insulation kit through the opening of the convection air outlet. From the top of the structure, attach the lug by sandwiching the extension (M5x20 countersunk heads) [diagrams 1, 2 &... -
Page 19: Positioning Of The Opening Grip Of The Stove's Glass Door
Reinsert the grip cylinder into this parallel-piped rectangle [photo 3 & 4]. Re-close the door of the Stûv 21/65H keeping the grip at the bottom to prevent the glass door from coming up [photo 5] (avoid using the grip which has just been stuck on). -
Page 20: Additional Fan
Additional fan Remove the stove's base plate [photos 1 & 2]. Remove the rectangular opening to access the fan [photo 3]. Unscrew the fan control plate [photo 4]. Connect the fan and control [photo 5]. Insert the control from inside the stove and bring it back out through the square section in the SF15 structure left open by the fan control plate... - Page 21 Do not forget the connection to earth [diagram 1]. Connect the fan to the property's electrical circuit [diagram 2]. Put the fan in its final position with the opening as far back as possible [photo 3]. For further details on the installation of the fan and the stove, please refer to the stove's installation instructions.
-
Page 22: Use
Please note Some parts of the cladding can become very hot even during normal usage (nominal power). un dessin importé handling opening the façade que l’épaisseur des traits reste identique !!!!!!! There is a gripping point for opening en 7 pt (cotes) !!!!!!! the façade. -
Page 23: Maintenance
mAiNteNANCe Be careful ! Wait until the stove has cooled down completely before carrying out maintenance. Clean with a dry cloth. Use a typical, non-abrasive household detergent to clean the surfaces. Never use solvents (acetone, white spirit). Marks left by indelible markers cannot be removed !!! hAB2165hSF15 - installation &... -
Page 24: Chimney-Sweeping
Chimney-sweeping Do the sweeping at least once a year in accordance with local and national regulations in force. If part of the connecting duct is horizontal, we advise 2 sweepings in every season of heating use. Pass on this information to the chimney sweep (see Stûv 21 instruction for use). - Page 25 the façade rubs on the front of the framework [diagram 1]: Adjust the height of the façade. Using a wedge, slightly raise the door of the façade and adjust one of the adjustable screws on the hinges [photos 2 & 3] If you have any other problems contact your distributor.
- Page 26 www.stuv.com...
- Page 27 Jules Borbouse 4 01680 Vantaa T 51 33 10 93 B-5170 Bois-de-Villers (Belgium) T 400 872 858 importer for estonia info@stuv.com – www.stuv.com www.takkamaailma.com Tulering Kaminasalong Oü importer for the uK importer for Sweden Sopruse 145 – 13417 Tallinn Jet Master Fires Ltd –...
- Page 28 & gebrauchsanweisung | instalace & návod k použití | installation & mode d'emploi | installa- use of SF15 cladding for the Stûv 21/65H tie & gebruiksaanwijzing | installazione & istruzioni per l’uso | instalación & instrucciones de uso | instala- ção &...
Need help?
Do you have a question about the 21/65H and is the answer not in the manual?
Questions and answers