Table of Contents
Advertisement
Quick Links
Advertisement
Table of Contents

Related Manuals for ThinkPad T440p


Summary of Contents for ThinkPad T440p
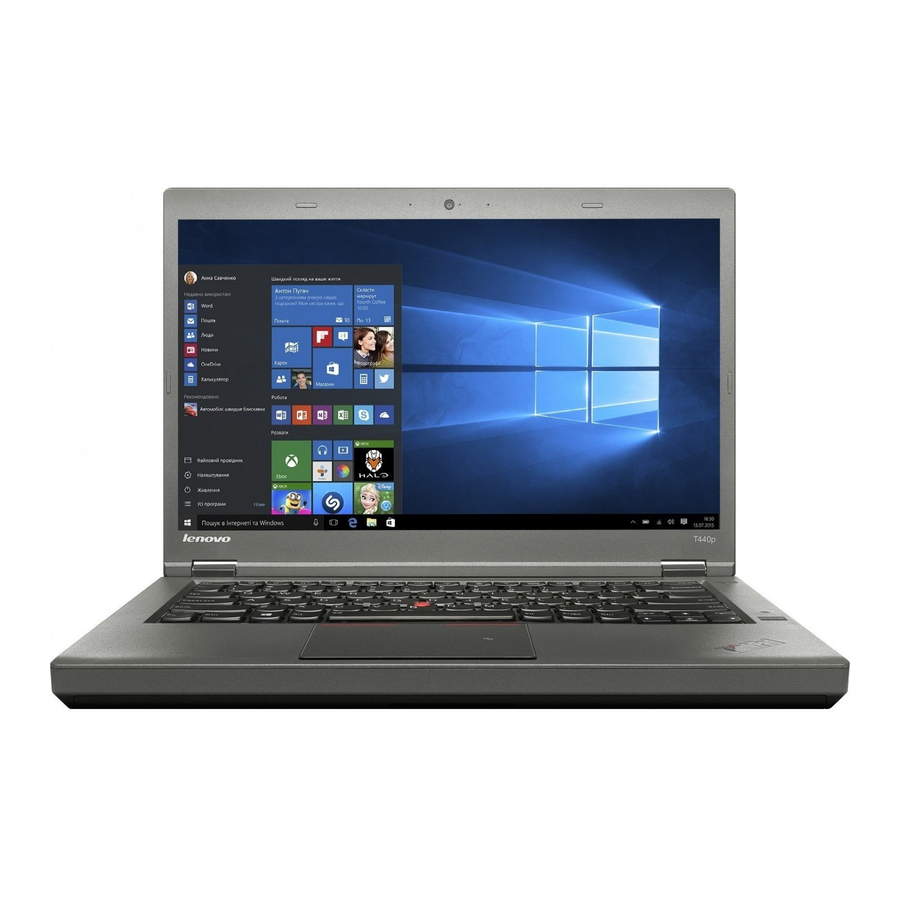
- Page 1 Hardware Maintenance Manual ThinkPad T440p...
- Page 2 Note: Before using this information and the product it supports, be sure to read the general information under Appendix A “Notices” on page 95. Third Edition (July 2014) © Copyright Lenovo 2013, 2014. LIMITED AND RESTRICTED RIGHTS NOTICE: If data or software is delivered pursuant a General Services Administration “GSA”...
-
Page 3: Table Of Contents
Contents About this manual... Passwords ....Power-on password ... Chapter 1. - Page 4 1010 External battery pack ..1180 Speaker assembly ... 1020 Big door ....1190 Microprocessor .
-
Page 5: About This Manual
Use this manual along with the advanced diagnostic tests to troubleshoot problems effectively. Before servicing a ThinkPad product, be sure to read all the information under Chapter 1 “Safety information” on page 1 and Chapter 2 “Important service information” on page 19. - Page 6 Hardware Maintenance Manual...
-
Page 7: Chapter 1. Safety Information
Chapter 1. Safety information This chapter presents following safety information that you need to be familiar with before you service a ThinkPad notebook computer. • “General safety” on page 1 • “Electrical safety” on page 1 • “Safety inspection guide” on page 2 •... -
Page 8: Safety Inspection Guide
This guide addresses only those items. You should use good judgment to identify potential safety hazards due to attachment of non-ThinkPad features or options not covered by this inspection guide. If any unsafe conditions are present, you must determine how serious the apparent hazard could be and whether you can continue without first correcting the problem. -
Page 9: Handling Devices That Are Sensitive To Electrostatic Discharge
4. Check for cracked or bulging batteries. 5. Remove the cover. 6. Check for any obvious non-ThinkPad alterations. Use good judgment as to the safety of any non-ThinkPad alterations. 7. Check inside the unit for any obvious unsafe conditions, such as metal filings, contamination, water or other liquids, or signs of fire or smoke damage. -
Page 10: Grounding Requirements
– When working on a double-insulated or battery-operated system, use an ESD common ground or reference point. You can use coax or connector-outside shells on these systems. – Use the round ground prong of the ac plug on ac-operated computers. Grounding requirements Electrical grounding of the computer is required for operator safety and correct system function. - Page 11 DANGER DANGER DANGER DANGER DANGER Chapter 1 Safety information...
- Page 12 Hardware Maintenance Manual...
- Page 13 PERIGO PERIGO PERIGO PERIGO PERIGO Chapter 1 Safety information...
- Page 14 PERIGO PERIGO PERIGO DANGER DANGER Hardware Maintenance Manual...
- Page 15 DANGER DANGER DANGER DANGER DANGER DANGER Chapter 1 Safety information...
- Page 16 VORSICHT VORSICHT VORSICHT VORSICHT Hardware Maintenance Manual...
- Page 17 VORSICHT VORSICHT VORSICHT VORSICHT Chapter 1 Safety information...
- Page 18 Hardware Maintenance Manual...
- Page 19 Chapter 1 Safety information...
- Page 20 Hardware Maintenance Manual...
- Page 21 Chapter 1 Safety information...
- Page 22 Hardware Maintenance Manual...
- Page 23 Chapter 1 Safety information...
- Page 24 Hardware Maintenance Manual...
-
Page 25: Chapter 2. Important Service Information
Chapter 2. Important service information This chapter introduces following important service information that applies to all machine types supported by this manual: • “Strategy for replacing FRUs” on page 19 – “Strategy for replacing a hard disk drive or a solid-state drive” on page 19 –... -
Page 26: Important Notice For Replacing A System Board
Important notice for replacing a system board Some components mounted on a system board are very sensitive. Improper handling of a system board can cause damage to those components, and may cause a system malfunction. Attention: When handling a system board: •... - Page 27 3. Click Check Warranty Status. 4. On the Warranty Status Lookup page, click Parts Lookup. 5. Type your machine type and serial number, and then click Submit. eSupport also can be used to view the general FRU list for a product. To get the general FRU list for a product, do the following: 1.
- Page 28 Hardware Maintenance Manual...
-
Page 29: Chapter 3. General Checkout
Chapter 3. General checkout This chapter introduces following information: • “What to do first” on page 23 • “Checkout guide” on page 24 – “Lenovo Solution Center” on page 24 – “Quick test programs” on page 24 – “UEFI diagnostic program” on page 25 –... -
Page 30: Checkout Guide
Checkout guide Use the following procedures as a guide in identifying and correcting problems with the ThinkPad notebook computers. Note: The diagnostic tests are intended to test only ThinkPad products. The use of non-ThinkPad products, prototype cards, or modified options can lead to false indications of errors and invalid system responses. -
Page 31: Uefi Diagnostic Program
The quick test programs are applicable on the following operating systems: ® ® • Microsoft Windows • Microsoft Windows 8 • Microsoft Windows 7 • Microsoft Windows XP ® • Microsoft Windows Server 2003 • Microsoft Windows Server 2008 To download and install a quick test program, go to http://www.lenovo.com/diags, and follow the instructions on the Web site. -
Page 32: Bootable Diagnostic Programs
• The Optical device test is not available when there is no optical drive installed on your computer. • The Recover Bad Sectors Tool is not available when there is no M.2 solid-state drive installed on your computer. Bootable diagnostic programs If the computer you are servicing is not installed with the UEFI diagnostic program, you can download a bootable diagnostic program from the Lenovo Support Web site. -
Page 33: Checking The Ac Power Adapter
6. Disconnect the ac power adapter and turn on the computer. If the computer can be turned on, it means that the battery pack is functional. If you suspect a power problem, see the appropriate one of the following power supply checkouts: •... -
Page 34: Checking The Coin-Cell Battery
To check whether the battery charges properly during operation, do the following: 1. Discharge the battery until the remained battery power is less than 50%. 2. Connect the computer to ac power to charge the battery. If the battery status icon in the Windows notification area indicates that the battery is not charging, remove the battery and let it return to room temperature. -
Page 35: Chapter 4. Related Service Information
Select the CD/DVD drive as the 1st Boot Device. 2. Insert the Operating System Recovery Disc into the DVD drive. 3. Press F10 to save the ThinkPad Setup program configuration changes. Follow the instructions on the screen to begin the recovery process. -
Page 36: Using The Windows Recovery Solutions (For Windows 8 And Windows 8.1 Only)
11. After you have completed the Windows setup, you might want to restore the original startup sequence. Start the ThinkPad Setup program and then press F9 to restore the default settings. Press F10 to save changes and exit the ThinkPad Setup program. -
Page 37: Resetting Your Computer To The Factory Default Settings
Move your pointer to the top-right or bottom-right corner of the screen to display the charms. Click Settings ➙ Change PC settings ➙ Update and recovery ➙ Recovery. 2. In the Refresh your PC without affecting your files section, click Get started. 3. -
Page 38: Using The Windows Recovery Environment
Using the Windows recovery environment The Windows recovery environment on your computer is capable of operating independently from the Windows 8 or Windows 8.1 operating system. This enables you to recover or repair the operating system even if the Windows 8 or Windows 8.1 operating system fails to start. After two consecutive failed boot attempts, the Windows recovery environment starts automatically. -
Page 39: Passwords
Passwords As many as three passwords may be needed for any ThinkPad notebook computer: the power-on password, the hard disk password, and the supervisor password. If any of these passwords has been set, a prompt for it will be displayed on the screen whenever the computer is turned on. -
Page 40: Supervisor Password
A supervisor password protects the system information stored in the ThinkPad Setup. The user must enter the supervisor password in order to get access to the ThinkPad Setup and change the system configuration. Attention: If the supervisor password has been forgotten and cannot be made available to the service technician, there is no service procedure to reset the password. -
Page 41: Power Management
7. Type the current master hard disk password in the Enter Current Password field. Then leave the Enter New Password field blank, and press Enter twice. 8. Press F10. 9. Press F10 to save changes and exit the ThinkPad Setup program. The user hard disk password and the master hard disk password have been removed. Power management To reduce power consumption, the computer has three power management modes: screen blank, sleep, and hibernation. -
Page 42: Hibernation Mode
If no numeric code is displayed, check the narrative descriptions of symptoms. If the symptom is not described there, go to “Intermittent problems” on page 39. Note: For a device not supported by diagnostic codes in the ThinkPad notebook computers, see the manual for that device. -
Page 43: Numeric Error Codes
1. Run the ThinkPad Setup program. The settings Bad CRC of Security Settings in EFI Variable. Enter the will be corrected automatically. Then save the ThinkPad Setup program. – The checksum of the Security current settings by pressing F10. settings in the EFI Variable is not correct. -
Page 44: Error Messages
Table 2. Numeric error codes (continued) Symptom or error FRU or action, in sequence 2112 1. Reseat the M.2 device. Read error on HDD2 (M.2) 2. Replace the M.2 device. 3. Replace the system board. 2200 Replace the system board. Machine Type and Serial Number are invalid. -
Page 45: No-Beep Symptoms
Lenovo and it should be replaced. Notes: • This policy applies to all ThinkPad notebooks purchased on 1 January, 2008 or later. • Lenovo will not provide warranty replacement if the LCD is within specifications because we cannot guarantee that any replacement LCD will have zero pixel defects. -
Page 46: Undetermined Problems
2. Visually check each FRU for damage. Replace any damaged FRU. 3. Remove or disconnect all of the following devices: a. Non-ThinkPad devices b. Devices attached to the docking station or the port replicator c. Printer, mouse, and other external devices d. -
Page 47: Chapter 5. Status Indicators
Chapter 5. Status indicators This chapter presents the system-status indicators that show the status of the computer. Table 7. Status indicators Indicator Meaning Speaker-mute indicator On: The speakers are muted. Microphone-mute indicator On: The microphones are muted. Camera-status indicator On: The camera is in use. ©... - Page 48 Table 7. Status indicators (continued) Indicator Meaning Blinks three times: The computer is initially connected to power. System-status indicator On: The computer is in use. Off: The computer is off or in hibernation mode. Blinks slowly: The computer is in sleep mode. Blinks fast: The computer is entering hibernation mode.
-
Page 49: Chapter 6. Function Keys
Chapter 6. Function keys The following table describes the functions of function keys and key combinations. Table 8. Function keys Function key and Description key combination Mutes or unmutes the speakers. If you mute the sound and turn off your computer, the sound will remain muted when you turn on your computer again. - Page 50 Hardware Maintenance Manual...
-
Page 51: Chapter 7. Locations
Serial Ultrabay Enhanced bay Microphones Smart card slot (on some models) Power button Fingerprint reader (on some models) Security-lock slot NFC logo (on some models) ThinkPad trackpad USB connector ® Always-on USB connector TrackPoint pointing stick © Copyright Lenovo 2013, 2014... -
Page 52: Left View
Left view ® Fan louvers Mini DisplayPort connector Video Graphics Array (VGA) connector USB 3.0 connectors Audio connector Media-card reader Bottom view Battery Keyboard drainage holes SIM-card slot Speaker Docking station connector Hardware Maintenance Manual... -
Page 53: Locating Frus And Crus
CRU within thirty (30) days of your receipt of the replacement CRU. See your Lenovo Limited Warranty documentation for full details. ThinkPad computers contain the following types of CRUs: – Self-service CRUs: These CRUs unplug or are held by no more than two screws. Examples of these types of CRUs include the ac power adapter, power cord, and hard disk drive. -
Page 54: Major Frus And Crus
Major FRUs and CRUs Table 9. Major FRUs and CRUs FRU descriptions Self-service Optional-service LCD unit Keyboard bezel assembly Fingerprint reader card Fingerprint bezel Hardware Maintenance Manual... - Page 55 Table 9. Major FRUs and CRUs (continued) FRU descriptions Self-service Optional-service Power-button card Smart-card reader Magnesium frame Ethernet card Optical drive Memory module Coin-cell battery M.2 wireless WAN card or M.2 solid-state drive M.2 wireless LAN card External battery Base cover assembly Big door Speaker assembly Hard disk drive or solid-state drive (depending on the model)
-
Page 56: Lcd Frus
LCD FRUs Table 10. LCD FRUs No. FRU descriptions Self-service Optional-service LCD bezel LCD hinge Hardware Maintenance Manual... -
Page 57: Miscellaneous Parts And Other Frus
Table 10. LCD FRUs (continued) No. FRU descriptions Self-service Optional-service Antenna assembly Camera/microphone-combo-card cable Camera/microphone combo card LCD rear-cover assembly LCD cable assembly LCD panel Miscellaneous parts and other FRUs Table 11. Miscellaneous part FRU descriptions Self-service Optional-service Screw pack Table 12. - Page 58 Hardware Maintenance Manual...
-
Page 59: Chapter 8. Fru Replacement Notices
(30) days of your receipt of the replacement CRU. See your Lenovo Limited Warranty documentation for full details. Screw notices Loose screws can cause a reliability problem. In the ThinkPad notebook computer, this problem is addressed with special nylon-coated screws that have the following characteristics: • They maintain tight connections. -
Page 60: Retaining Serial Numbers
4. When the logo is displayed, press Esc. The ThinkPad Config Information Update Utility interface is displayed. 5. Type 1 under Enter the action desired, then press Enter. The ThinkPad Serial Number Update Utility for Asset ID screen is displayed. -
Page 61: Retaining The Uuid
2. When the logo is displayed, press Esc. The ThinkPad Config Information Update Utility interface is displayed. 3. Type 1 under Enter the action desired, then press Enter. The ThinkPad Serial Number Update Utility for Asset ID screen is displayed. - Page 62 1. Insert the latest version of LENOVO ThinkPad Hardware Maintenance Diskette or Maintenance Key, and then restart the computer. 2. From the main menu, select 6. Set ECA Information. 3. To write the ECA information, select 1. Write ECA/rework number from EEPROM, and follow the instruction;...
-
Page 63: Chapter 9. Removing Or Replacing A Fru
Chapter 9. Removing or replacing a FRU This chapter provides instructions on how to remove or replace a FRU. CRU statement for customers: You can resolve some problems with your product with a replacement part you can install yourself, called a “Customer Replaceable Unit”... -
Page 64: Before Servicing The Computer
Before servicing the computer Some models you are servicing might have a SIM card that a customer has installed. If the computer you are servicing has a SIM card installed, remove it before you start the servicing. To remove the SIM card, locate the SIM card slot inside the battery compartment, and then gently pull the card out of the slot. -
Page 65: 1020 Big Door
1020 Big door For access, remove this FRU: • “1010 External battery pack” on page 58 Removal steps of the big door Step Screw (quantity) Color Torque Black 0.392 Nm M2.5 × 8 mm, flat-head, nylon-coated (2) (4.0 kgf-cm) Chapter 9 Removing or replacing a FRU... - Page 66 Applying labels to the big door: The new big door FRU is shipped with a kit containing labels of several kinds. Apply those labels when you replace the big door. For the labels that are not shipped with the new big door, peel them from the old big door, and adhere them to the new one.
-
Page 67: 1030 Hard Disk Drive Or Solid-State Drive
1030 Hard disk drive or solid-state drive For access, remove these FRUs: • “1010 External battery pack” on page 58 • “1020 Big door” on page 59 Attention: • Do not drop the drive or apply any physical shock to it. The drive is sensitive to physical shock. Improper handling can cause damage and permanent loss of data. -
Page 68: 1040 Optical Drive
When installing: Ensure that the hard disk drive or solid-state drive is firmly attached. 1040 Optical drive For access, remove these FRUs in order: • “1010 External battery pack” on page 58 • “1020 Big door” on page 59 Removal steps of optical drive Release the captured screw Step Screw (quantity) -
Page 69: 1050 M.2 Wireless Lan Card
Remove the optical drive. 1050 M.2 wireless LAN card For access, remove these FRUs: • “1010 External battery pack” on page 58 • “1020 Big door” on page 59 Removal steps of the M.2 wireless LAN card Step Screw (quantity) Color Torque M2 ×... -
Page 70: 1060 M.2 Wireless Wan Card Or M.2 Solid-State Drive
When installing: Plug the gray cable into the connector marked MAIN or 1 on the card; and plug the black cable into the connector marked AUX or 2 on the card. 1060 M.2 wireless WAN card or M.2 solid-state drive For access, remove these FRUs: •... -
Page 71: 1070 Memory Module
When installing: Plug the orange cable into the connector marked MAIN on the card; and plug the blue cable into the connector marked AUX on the card. 1070 Memory module For access, remove these FRUs: • “1010 External battery pack” on page 58 •... -
Page 72: 1090 Fan Assembly
• “1020 Big door” on page 59 DANGER Use only the authorized battery specified for your computer. Any other battery could ignite or explode. Removal steps of the coin-cell battery When installing: Ensure that the connector is firmly attached. 1090 Fan assembly For access, remove these FRUs: •... -
Page 73: 1100 Keyboard
When installing: • Before you attach the thermal fan assembly to the computer, apply thermal grease, at an amount of 0.2 grams. Either too much or too less application of grease can cause a thermal problem due to imperfect contact with a component. For the new thermal fan assembly, you must peel the thin film off from the rubbers. - Page 74 Removal steps of the keyboard To reveal the screw heads beneath the frame, use the flat end of the multi-tool in the shipping package of the new keyboard to slide the keyboard forward by 2.5 mm (0.1 inch). Note: Do not press and hold the keys while sliding the keyboard frame, otherwise the keyboard frame cannot be moved.
- Page 75 Use the cross end of the multi-tool to loosen the screws. Chapter 9 Removing or replacing a FRU...
- Page 76 Installation steps of the keyboard Attach the connectors and then turn over the keyboard. Insert the keyboard into the keyboard bezel as shown. Ensure that the front edge of the keyboard is under the frame of the keyboard bezel. Ensure that the screw heads are exposed completely. Otherwise, reveal the screw heads by sliding the keyboard frame forward with the flat end of the keyboard multi-tool.
- Page 77 Tighten the screws with the cross end of the keyboard multi-tool to secure the keyboard in place. Slide the keyboard frame backward by 2.5 mm (0.1 inch) with the flat end of the keyboard multi-tool to hide the latches of the keyboard frame under the keyboard bezel. Note: Do not press and hold the keys while sliding the keyboard frame, otherwise the keyboard frame cannot be moved.
-
Page 78: 1120 Keyboard Bezel Assembly
Insert the flat end of the keyboard multi-tool into the sides as shown to push the keyboard frame backward. Ensure that there is no gap between the keyboard frame and keyboard bezel. 1120 Keyboard bezel assembly For access, remove these FRUs in order: •... - Page 79 Removal steps of the keyboard bezel assembly Remove the screws 1 in ascending alphabetical order (a to g) as illustrated. Then remove the screws 2 in ascending alphabetical order (a to d) as illustrated. Step Screw (quantity) Color Torque Black 0.181 Nm M2 ×...
-
Page 80: 1130 Touch Pad
When installing: Ensure that the connectors are firmly attached. Remove the keyboard bezel assembly. 1130 Touch pad For access, remove these FRUs: • “1010 External battery pack” on page 58 • “1020 Big door” on page 59 • “1100 Keyboard” on page 67 •... -
Page 81: 1140 Power-Button Card
Removal steps of the touch pad Step Screw (quantity) Color Torque M2 × 1.5 mm, big head, nylon-coated (4) Black 0.181 Nm (1.85 kgf-cm) 1140 Power-button card For access, remove these FRUs: • “1010 External battery pack” on page 58 •... -
Page 82: 1150 Smart-Card Reader
Step Screw (quantity) Color Torque Black 0.181 Nm M2 × 3 mm, big head, nylon-coated (1) (1.85 kgf-cm) When installing: Ensure that the connector is firmly attached. 1150 Smart-card reader For access, remove these FRUs: • “1010 External battery pack” on page 58 •... -
Page 83: 1160 Base Cover Assembly
Step Screw (quantity) Color Torque 0.181 Nm M2 × 2.5 mm, flat-head, nylon-coated (2) Silver (1.85 kgf-cm) When installing: Ensure that the connector is firmly attached. 1160 Base cover assembly For access, remove these FRUs in order: • “1010 External battery pack” on page 58 •... - Page 84 Detach the connectors. When installing: Ensure that the connectors are firmly attached. Hardware Maintenance Manual...
-
Page 85: 1170 Ethernet Card
When installing: Ensure that the cables are correctly routed and the connectors are firmly attached. Remove the base cover assembly. 1170 Ethernet card For access, remove these FRUs: • “1010 External battery pack” on page 58 • “1020 Big door” on page 59 •... -
Page 86: 1180 Speaker Assembly
Removal steps of the Ethernet card Step Screw (quantity) Color Torque Black 0.181 Nm M2 × 3 mm, big head, nylon-coated (1) (1.85 kgf-cm) 1180 Speaker assembly For access, remove these FRUs: • “1010 External battery pack” on page 58 •... -
Page 87: 1190 Microprocessor
1190 Microprocessor For access, remove these FRUs: • “1010 External battery pack” on page 58 • “1020 Big door” on page 59 Removal steps of the microprocessor 1200 System board Important notices for handling the system board When handling the system board, observe the following: •... - Page 88 • “1020 Big door” on page 59 • “1030 Hard disk drive or solid-state drive” on page 61 • “1040 Optical drive” on page 62 • “1050 M.2 wireless LAN card” on page 63 • “1060 M.2 wireless WAN card or M.2 solid-state drive” on page 64 •...
- Page 89 Step Screw (quantity) Color Torque Black 0.181 Nm M2 × 3 mm, big head, nylon-coated (4) (1.85 kgf-cm) When installing: Ensure that the connectors are firmly attached to the system board. Chapter 9 Removing or replacing a FRU...
-
Page 90: 1210 Fingerprint Reader
1210 Fingerprint reader For access, remove these FRUs: • “1010 External battery pack” on page 58 • “1020 Big door” on page 59 • “1030 Hard disk drive or solid-state drive” on page 61 • “1050 M.2 wireless LAN card” on page 63 •... -
Page 91: 1220 Lcd Unit
1220 LCD unit For access, remove these FRUs: • “1010 External battery pack” on page 58 • “1020 Big door” on page 59 • “1100 Keyboard” on page 67 • “1120 Keyboard bezel assembly” on page 72 Removal steps of the LCD unit Torque Step Screw (quantity) - Page 92 When installing: Ensure that the connectors are firmly attached and you route the cables firmly and tape up in the proper positions. Attention: When you route the cables, ensure that they are not subject to any tension. Tension could cause the cables to be damaged by the cable guides, or a wire to be broken.
-
Page 93: 1230 Dc-In Cable Assembly
1230 dc-in cable assembly For access, remove these FRUs: • “1010 External battery pack” on page 58 • “1020 Big door” on page 59 • “1160 Base cover assembly” on page 77 • “1220 LCD unit” on page 85 Removal steps of the dc-in cable assembly Chapter 9 Removing or replacing a FRU... -
Page 94: 2010 Lcd Bezel Assembly
Step Screw (quantity) Color Torque Black 0.181 Nm M2 × 3 mm, flat-head, nylon-coated (2) (1.85 kgf-cm) When installing: Ensure that the connector is firmly attached. 2010 LCD bezel assembly For access, remove these FRUs in order: • “1010 External battery pack” on page 58 Removal step of the LCD bezel assembly When installing: Ensure that a new LCD front bezel is used. - Page 95 Removal steps of the LCD panel Step Screw (quantity) Color Torque Black 0.181 Nm M2 × 3mm, big-head, nylon-coated (4) (1.85 kgf-cm) Chapter 9 Removing or replacing a FRU...
-
Page 96: 2030 Lcd Hinge
When installing: Ensure that the LCD connector is attached firmly. Removal steps of the LCD cable assembly 2030 LCD hinge For access, remove these FRUs in order: • “1010 External battery pack” on page 58 • “1020 Big door” on page 59 •... -
Page 97: 2040 Camera/Microphone Combo Card
Removal steps of the LCD hinge Torque Step Screw (quantity) Color M2.5 × 2.5 mm, big-head, nylon-coated (4) Black 0.392 Nm (4.0 kgf-cm) 2040 Camera/microphone combo card For access, remove these FRUs: • “1010 External battery pack” on page 58 •... -
Page 98: 2050 Antenna Kit And Lcd Rear Cover Assembly
Removal steps of the camera/microphone combo card When installing: Ensure that the connector is firmly attached. 2050 Antenna kit and LCD rear cover assembly For access, remove these FRUs in order: • “1010 External battery pack” on page 58 • “1020 Big door”... - Page 99 Removal steps of the antenna kit and LCD rear cover assembly Attention: As you route the cables, ensure that they are not subject to any tension. Tension could cause the cables to be damaged by the cable guides, or a wire to be broken. Chapter 9 Removing or replacing a FRU...
- Page 100 Antenna locations Wireless-LAN auxiliary antenna (black) Wireless-WAN auxiliary antenna (blue) Wireless-WAN main antenna (orange) Wireless-LAN main antenna (white) Hardware Maintenance Manual...
-
Page 101: Appendix A. Notices
Appendix A. Notices Lenovo may not offer the products, services, or features discussed in this document in all countries. Consult your local Lenovo representative for information on the products and services currently available in your area. Any reference to a Lenovo product, program, or service is not intended to state or imply that only that Lenovo product, program, or service may be used. -
Page 102: Electronic Emissions Notices
EU contact: Lenovo, Einsteinova 21, 851 01 Bratislava, Slovakia Trademarks The following terms are trademarks of Lenovo in the United States, other countries or both: Lenovo ThinkPad TrackPoint Ultrabay Microsoft, Windows, and Windows Server are trademarks of the Microsoft group of companies. -
Page 103: Appendix B. Abbreviation Table
Appendix B. Abbreviation table The following table lists all abbreviations used in this manual. Abbreviation Term Ball Grid Array CMOS Complementary Metal Oxide Semiconductor Custom Model Variant Certificate of Authenticity Cyclic redundancy check Cathode ray tube Customer Replaceable Unit Configure To Order EAIA Enhanced Asset Information Area EEPROM... - Page 104 Hardware Maintenance Manual...
- Page 106 Part Number: SP40A25467_02 Printed in China (1P) P/N: SP40A25467_02 *1PSP40A25467_02*...
Need help?
Do you have a question about the T440p and is the answer not in the manual?
Questions and answers