
Related Manuals for ThinkPad T420


Summary of Contents for ThinkPad T420
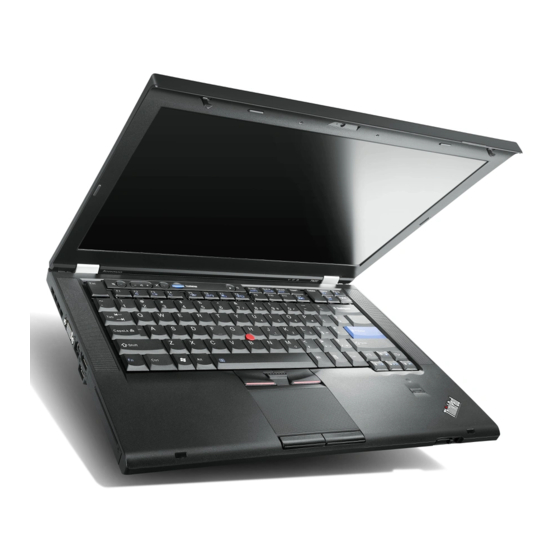
- Page 1 ThinkPad T420 and T420i Hardware Maintenance Manual Downloaded from LpManual.com Manuals...
- Page 2 Note: Before using this information and the product it supports, be sure to read the general information under Appendix A “Notices” on page 175. Sixth Edition (September 2012) © Copyright Lenovo 2012. LIMITED AND RESTRICTED RIGHTS NOTICE: If data or software is delivered pursuant a General Services Administration “GSA”...
-
Page 3: Table Of Contents
FRU ....65 System supporting the Lenovo ThinkVantage Before servicing ThinkPad T420 and T420i . . . Toolbox program and the PC-Doctor for DOS diagnostics program . - Page 4 Trademarks ....2070 Hinges and LCD rear cover assembly . . . Chapter 9. Locations ..ThinkPad T420 and T420i Hardware Maintenance Manual Downloaded from LpManual.com Manuals...
-
Page 5: About This Manual
Before servicing a ThinkPad product, be sure to read all the information under Chapter 1 “Safety information” on page 1 and Chapter 2 “Important service information” on page 23. - Page 6 ThinkPad T420 and T420i Hardware Maintenance Manual Downloaded from LpManual.com Manuals...
-
Page 7: Chapter 1. Safety Information
Chapter 1. Safety information This chapter presents following safety information that you need to be familiar with before you service a ThinkPad Notebook. • “General safety” on page 1 • “Electrical safety” on page 2 • “Safety inspection guide” on page 3 •... -
Page 8: Electrical Safety
– Pumps – Blowers and fans – Motor generators – Similar units to listed above This practice ensures correct grounding of the units. • If an electrical accident occurs: ThinkPad T420 and T420i Hardware Maintenance Manual Downloaded from LpManual.com Manuals... -
Page 9: Safety Inspection Guide
This guide addresses only those items. You should use good judgment to identify potential safety hazards due to attachment of non-ThinkPad features or options not covered by this inspection guide. If any unsafe conditions are present, you must determine how serious the apparent hazard could be and whether you can continue without first correcting the problem. -
Page 10: Grounding Requirements
Grounding requirements Electrical grounding of the computer is required for operator safety and correct system function. Proper grounding of the electrical outlet can be verified by a certified electrician. ThinkPad T420 and T420i Hardware Maintenance Manual Downloaded from LpManual.com Manuals... -
Page 11: Safety Notices (Multilingual Translations)
Safety notices (multilingual translations) The safety notices in this section are provided in the following languages: • English • Arabic • Brazilian Portuguese • French • German • Hebrew • Japanese • Korean • Spanish • Traditional Chinese DANGER Before the computer is powered on after FRU replacement, make sure all screws, springs, and other small parts are in place and are not left loose inside the computer. - Page 12 Unless hot swap is allowed for the FRU being replaced, do as follows before removing it: power off the computer, unplug all power cords from electrical outlets, remove the battery pack, and disconnect any interconnecting cables. ThinkPad T420 and T420i Hardware Maintenance Manual Downloaded from LpManual.com Manuals...
- Page 13 PERIGO Chapter 1 Safety information Downloaded from LpManual.com Manuals...
- Page 14 áreas afetadas imediatamente com água durante pelo menos 15 minutos. Procure cuidados médicos se algum sintoma causado pelo fluido surgir após a lavagem. PERIGO Para evitar choque elétrico, não remova a capa plástica que protege a parte inferior da placa inversora. PERIGO ThinkPad T420 and T420i Hardware Maintenance Manual Downloaded from LpManual.com Manuals...
- Page 15 Embora as principais baterias possuam baixa voltagem, uma bateria em curto-circuito ou aterrada pode produzir corrente o bastante para queimar materiais de pessoal ou inflamáveis. PERIGO A menos que uma hot swap seja permitida para a FRU que está sendo substituída, faça o seguinte antes de removê-la: desligue o computador, desconecte todos os cabos de energia das tomadas, remova o pacote de baterias e desconecte quaisquer cabos de interconexão.
- Page 16 örtlichen Bestimmungen für Sondermüll beachten. Beim Ersetzen der Bereitschafts-oder Systembatterie nur Batterien des Typs verwenden, der in der Ersatzteilliste aufgeführt ist. Der Einsatz falscher Batterien kann zu Entzündung oder Explosion führen. ThinkPad T420 and T420i Hardware Maintenance Manual Downloaded from LpManual.com Manuals...
- Page 17 VORSICHT Akkus enthalten geringe Mengen von Nickel. Sie dürfen nicht zerlegt, wiederaufgeladen, kurzgeschlossen, oder Feuer oder Wasser ausgesetzt werden. Bei der Entsorgung die örtlichen Bestimmungen für Sondermüll beachten. Beim Ersetzen der Batterie nur Batterien des Typs verwenden, der in der Ersatzteilliste aufgeführt ist.
- Page 18 Wenn ein Austausch der FRU bei laufendem Betrieb nicht erlaubt ist, gehen Sie beim Austausch der FRU wie folgt vor: Schalten Sie den Computer aus, ziehen Sie alle Netzkabel von den Netzsteckdosen ab, entfernen Sie den Akku und ziehen Sie alle miteinander verbundenen Kabel ab. ThinkPad T420 and T420i Hardware Maintenance Manual Downloaded from LpManual.com Manuals...
- Page 19 Chapter 1 Safety information Downloaded from LpManual.com Manuals...
- Page 20 ThinkPad T420 and T420i Hardware Maintenance Manual Downloaded from LpManual.com Manuals...
- Page 21 Antes de encender el sistema despues de sustituir una FRU, compruebe que todos los tornillos, muelles y demás piezas pequeñas se encuentran en su sitio y no se encuentran sueltas dentro del sistema. Compruébelo agitando el sistema y escuchando los posibles ruidos que provocarían. Las piezas metálicas pueden causar cortocircuitos eléctricos.
- Page 22 Salvo que se permita el intercambio en caliente para la unidad sustituible localmente, realice lo siguiente antes de extraerla: apague el sistema, desconecte todos los cables de alimentación de las tomas de alimentación eléctrica, extraiga la batería y desconecte los cables de interconexión. ThinkPad T420 and T420i Hardware Maintenance Manual Downloaded from LpManual.com Manuals...
-
Page 23: Laser Compliance Statement (Multilingual Translations)
Laser compliance statement (multilingual translations) The laser compliance statements in this section are provided in the following languages: • English • Arabic • Brazilian Portuguese • French • German • Hebrew • Japanese • Korean • Spanish • Traditional Chinese Chapter 1 Safety information Downloaded from LpManual.com Manuals... - Page 24 ThinkPad T420 and T420i Hardware Maintenance Manual Downloaded from LpManual.com Manuals...
- Page 25 Chapter 1 Safety information Downloaded from LpManual.com Manuals...
- Page 26 ThinkPad T420 and T420i Hardware Maintenance Manual Downloaded from LpManual.com Manuals...
- Page 27 Chapter 1 Safety information Downloaded from LpManual.com Manuals...
- Page 28 ThinkPad T420 and T420i Hardware Maintenance Manual Downloaded from LpManual.com Manuals...
-
Page 29: Chapter 2. Important Service Information
Chapter 2. Important service information This chapter presents following important service information that applies to all machine types supported by this manual: • “Strategy for replacing FRUs” on page 23 – “Strategy for replacing a hard disk drive” on page 23 –... -
Page 30: Important Notice For Replacing A System Board
Whatever causes the first error code may also cause false error codes. If no error code is displayed, see whether the error symptom is listed in the Symptom-to-FRU Index for the computer you are servicing. ThinkPad T420 and T420i Hardware Maintenance Manual Downloaded from LpManual.com Manuals... -
Page 31: Strategy For Replacing Frus For Cto, Cmv, And Gav
Strategy for replacing FRUs for CTO, CMV, and GAV Product definition Dynamic Configure To Order (CTO) This provides the ability for a customer to configure a Lenovo solution from an eSite, and have this configuration sent to fulfillment, where it is built and shipped directly to the customer. The machine label, Product Entitlement Warehouse (PEW), eSupport, and the HMM will load these products as the 4-digit MT and 3-digit model, where model = “CTO”... - Page 32 For Key Commodities (Examples - hard disk drive, system board, microprocessor, LCD, and memory) Use the HMM as a back-up to PEW and eSupport to view the complete list of FRUs at the MT Model level. ThinkPad T420 and T420i Hardware Maintenance Manual Downloaded from LpManual.com Manuals...
-
Page 33: Chapter 3. General Checkout
Chapter 3. General checkout This chapter presents the following information: • “What to do first” on page 28 • “Checkout guide” on page 29 – “System supporting the Lenovo ThinkVantage Toolbox program and the PC-Doctor for DOS diagnostics program” on page 29 –... -
Page 34: What To Do First
• Missing parts might be a symptom of unauthorized service or modification. • If the spindle of a hard disk drive becomes noisy, it may have been subjected to excessive force, or dropped. ThinkPad T420 and T420i Hardware Maintenance Manual Downloaded from LpManual.com Manuals... -
Page 35: Checkout Guide
For some possible configurations of the computer, PC-Doctor might not run correctly. To avoid this problem, you need to initialize the computer setup by use of the ThinkPad Setup program before you run PC-Doctor. To enter the ThinkPad Setup program, do as follows: 1. - Page 36 37, and check the power sources. If an error code appears, go to “Symptom-to-FRU index” on page 47. 4. When the ThinkPad logo comes up, immediately press F12 to enter the Boot Menu. 5. Insert the PC-Doctor CD into the optical drive.
-
Page 37: Lenovo Thinkvantage Toolbox
• In the Keyboard test in Interactive Tests, the Fn key should be held down for at least 2 seconds; otherwise, it cannot be sensed. • Video Adapter test supports only the LCD display on the ThinkPad Notebook. If you have an external monitor attached to your computer, detach it before running PC-Doctor for DOS. - Page 38 Follow the instructions on the screen. Lenovo ThinkVantageToolbox also has problem determination aids that determine software and usage problems. For additional information about this program, see the Help for the program. ThinkPad T420 and T420i Hardware Maintenance Manual Downloaded from LpManual.com Manuals...
-
Page 39: System Supporting The Lenovo Diagnostics Programs
Systemboard 1. Diagnostics ➙ CPU/Coprocessor 2. Diagnostics ➙ Systemboard 3. If the docking station or the port replicator is attached to the ThinkPad Notebook, detach it. 4. Place the computer on a horizontal surface, and run Diagnostics ➙ ThinkPad Devices ➙ HDD Active Protection Test. - Page 40 A UEFI diagnostic program is preinstalled on the computer. It enables you to test memory and internal storage problems, view system information, and check and recover bad sectors on internal storage devices. To run the UEFI diagnostic program, do the following: ThinkPad T420 and T420i Hardware Maintenance Manual Downloaded from LpManual.com Manuals...
-
Page 41: Bootable Diagnostic Programs
If an error code is displayed, go to “Symptom-to-FRU index” on page 47 for error code descriptions and troubleshooting hints. 2. When the ThinkPad logo is displayed, repeatedly press and release the F12 key. When the Boot Menu window opens, release the F12 key. - Page 42 5. Use the arrow keys to select ATAPI CDx (x: 0, 1, ...) and then press Enter. The diagnostic program will be launched automatically. 6. Follow the instructions on the screen to use the diagnostic program. ThinkPad T420 and T420i Hardware Maintenance Manual Downloaded from LpManual.com Manuals...
-
Page 43: Power System Checkout
Power system checkout To verify a symptom, do the following: 1. Turn off the computer. 2. Remove the battery pack. 3. Connect the ac power adapter. 4. Check that power is supplied when you turn on the computer. 5. Turn off the computer. 6. -
Page 44: Checking The Battery Pack
3. Remove the battery pack (see “1010 Battery pack” on page 67). 4. Remove the backup battery (see “1100 Backup battery” on page 83). 5. Measure the voltage of the backup battery. See the following figure. ThinkPad T420 and T420i Hardware Maintenance Manual Downloaded from LpManual.com Manuals... - Page 45 Wire Voltage (V dc) +2.5 to +3.2 Black Ground • If the voltage is correct, replace the system board. • If the voltage is not correct, replace the backup battery. • If the backup battery discharges quickly after replacement, replace the system board. Chapter 3 General checkout Downloaded from LpManual.com Manuals...
- Page 46 ThinkPad T420 and T420i Hardware Maintenance Manual Downloaded from LpManual.com Manuals...
-
Page 47: Chapter 4. Related Service Information
Press and hold down the F1 key, and then turn on the computer. When the logo screen is displayed or if you hear repeating beeps, release the F1 key. The ThinkPad Setup program opens. b. Use the arrow keys to select Startup ➙ Boot. -
Page 48: Passwords
11. After you have completed the Windows setup, you might want to restore the original startup sequence. Start the ThinkPad Setup program and then press F9 to restore the default settings. Press F10 to save and exit the ThinkPad Setup program. -
Page 49: Supervisor Password
Supervisor password A supervisor password (SVP) protects the system information stored in the ThinkPad Setup program. The user must enter the SVP in order to get access to the ThinkPad Setup program and change the system configuration. Attention: If the SVP has been forgotten and cannot be made available to the service technician, there is no service procedure to reset the password. - Page 50 2. When the ThinkPad logo comes up, immediately press F1 to enter the ThinkPad Setup program. When the POP icon is appearing on the screen, enter the POP. 3. Select Security, using the cursor directional keys to move the menu.
-
Page 51: Power Management
Power management To reduce power consumption, the computer has three power management modes: screen blank, sleep (standby in Windows XP), and hibernation. Screen blank mode If the time set on the “Turn off monitor” timer in the operating system expires, the LCD backlight turns off. To put the computer into screen blank mode, do as follows: 1. - Page 52 When the power is turned on, the computer returns from hibernation mode and resumes operation. The hibernation file in the boot record on the hard disk drive is read, and system status is restored from the hard disk drive. ThinkPad T420 and T420i Hardware Maintenance Manual Downloaded from LpManual.com Manuals...
-
Page 53: Symptom-To-Fru Index
If no numeric code is displayed, check the narrative descriptions of symptoms. If the symptom is not described there, go to “Intermittent problems” on page 52. Note: For a device not supported by diagnostic codes in the ThinkPad Notebooks, see the manual for that device. Numeric error codes Table 2. -
Page 54: Numeric Error Codes
Table 2. Numeric error codes (continued) FRU or action, in sequence Symptom or error 0191 1. Run the ThinkPad Setup program, and then save System Security—Invalid Remote Change requested. current setting by pressing F10. 2. System board. 0199 1. Run the ThinkPad Setup program, and then save System Security—... -
Page 55: Error Messages
Error messages Table 3. Error messages Symptom or error FRU or action, in sequence Fan error. 1. Fan. 2. Thermal grease. 3. System board. Thermal sensing error. System board. This system does not support batteries that are not Replace the battery. genuine Lenovo-made or authorized. -
Page 56: Beep Symptoms
LCD has three or more visible defective pixels, it will be deemed as defective by Lenovo and it should be replaced. Notes: • This policy applies to all ThinkPad Notebooks purchased on 1 January, 2008 or later. ThinkPad T420 and T420i Hardware Maintenance Manual... - Page 57 • Lenovo will not provide replacement if the LCD is within specification as we cannot guarantee that any replacement LCD will have zero pixel defects. • One pixel consists of R, G, B sub-pixels. Table 6. LCD-related symptoms Symptom or error FRU or action, in sequence No beep, power-on indicator on, and a blank LCD during System board.
-
Page 58: Intermittent Problems
6. If the problem does not recur, reconnect the removed devices one at a time until you find the failing FRU. 7. If the problem remains, replace the following FRUs one at a time (do not replace a nondefective FRU): a. System board b. LCD assembly ThinkPad T420 and T420i Hardware Maintenance Manual Downloaded from LpManual.com Manuals... -
Page 59: Chapter 5. Status Indicators
Chapter 5. Status indicators This chapter presents the system status indicators that show the status of the computer. © Copyright Lenovo 2012 Downloaded from LpManual.com Manuals... - Page 60 (standby) mode or turn off the computer. Note: Do not move the system while the green device access light is on. Sudden physical shock could cause drive errors. ThinkPad T420 and T420i Hardware Maintenance Manual Downloaded from LpManual.com Manuals...
- Page 61 Table 7. Status indicators (continued) Indicator Meaning Power on Green: The computer is on and ready to use. This indicator stays lit around the power-on button whenever the computer is on and is not in sleep (standby) mode. Note: This indicator blinks when the computer is in sleep mode. Numeric lock (On-screen By default, when the numeric lock is on, the numeric lock indicator is indicator)
- Page 62 Sleep (standby for Windows Green: XP) status The computer is in sleep (standby) mode. Blinking green: The computer is entering sleep (standby) mode or hibernation mode, or is resuming normal operation. ThinkPad T420 and T420i Hardware Maintenance Manual Downloaded from LpManual.com Manuals...
-
Page 63: Chapter 6. Fn Key Combinations
(power scheme) appears. Notes: To use this combination of the keys, ThinkPad PM device driver must have been installed on the computer. If you have logged on with an administrator user ID in Windows XP, and you press Fn+F3, the panel for selecting a power scheme appears. - Page 64 Put the computer into hibernation mode. To return to normal operation, press the power button for less than four seconds. Notes: To use this combination of the keys, ThinkPad PM device driver must have been installed on the computer. Though the screen fades out immediately after Fn+F12 are pressed, the computer does not enter the hibernation mode immediately.
- Page 65 Table 8. Fn key combinations (continued) Key combination Description Fn+Spacebar Enable the Full Screen Magnifier function. Fn+PrtSc Have the same function as the SysRq key. Fn+ScrLk Enable or disable the numeric keypad. The indicator of numeric lock will be displayed on the screen.
- Page 66 ThinkPad T420 and T420i Hardware Maintenance Manual Downloaded from LpManual.com Manuals...
-
Page 67: Chapter 7. Fru Replacement Notices
CRU. See your Lenovo Limited Warranty documentation for full details. Screw notices Loose screws can cause a reliability problem. In the ThinkPad notebook computer, this problem is addressed with special nylon-coated screws that have the following characteristics: •... -
Page 68: Retaining Serial Numbers
If you replace the system board, you must restore the serial number of the system unit to its original value. Before replacing the system board, save the original serial number by doing the following: 1. Install the LENOVO ThinkPad Hardware Maintenance Diskette Version 1.76 or later, and restart the computer. -
Page 69: Retaining The Uuid
When you replace the system board, you must set the UUID on the new system board as follows: 1. Install the LENOVO ThinkPad Hardware Maintenance Diskette Version 1.76 or later, and restart the computer. 2. From the main menu, select 4. Assign UUID. A new UUID is created and written. If a valid UUID already exists, it is not overwritten. - Page 70 ThinkPad T420 and T420i Hardware Maintenance Manual Downloaded from LpManual.com Manuals...
-
Page 71: Chapter 8. Removing And Replacing A Fru
Chapter 8. Removing and replacing a FRU This chapter presents directions and drawings for use in removing and replacing a FRU. External CRU statement to customers: Some problems with your product can be resolved with a replacement part you can install yourself, called a “Customer Replaceable Unit”... -
Page 72: Before Servicing Thinkpad T420 And T420I
Before servicing ThinkPad T420 and T420i Some models of the ThinkPad T420 and T420i you are servicing might have the SIM card that the customer has installed. If the computer you are servicing has the SIM card, remove it before you start the servicing. -
Page 73: 1010 Battery Pack
1010 Battery pack Important notice for replacing a battery pack: The Lenovo ThinkVantage Toolbox and Lenovo Solution Center (in Windows 7) have an automatic battery diagnostic component that determines if the battery pack is defective. A battery pack FRU should not be replaced unless this diagnostic test shows that the battery is defective. -
Page 74: 1020 Expresscard Blank Bezel
Removal steps of ExpressCard blank bezel When you press the ExpressCard blank bezel , it pops out When installing: Make sure that the bezel is correctly oriented as shown in the following figure. ThinkPad T420 and T420i Hardware Maintenance Manual Downloaded from LpManual.com Manuals... -
Page 75: 1030 Serial Ultrabay Enhanced Device Or Travel Bezel
1030 Serial Ultrabay Enhanced device or travel bezel For access, remove this FRU: • “1010 Battery pack” on page 67 Removal steps of Serial Ultrabay Enhanced device or travel bezel Holding the bay lock latch in the unlocked position , slide the bay eject latch in the direction shown by arrow , and then pull out the Serial Ultrabay Enhanced device or the travel bezel in the direction shown by arrow... -
Page 76: 1040 Hard Disk Drive (Hdd) And Solid State Drive (Ssd)
Removal steps of hard disk drive and solid state drive Note: Loosen the screw , but do not remove it. Torque Step Screw (quantity) Color Capture screw (1) Black 0.181 Nm (1.85 kgf-cm) ThinkPad T420 and T420i Hardware Maintenance Manual Downloaded from LpManual.com Manuals... - Page 77 For HDD and HDD rubber rails (9.5 mm): For HDD and HDD rubber rails (7.0mm) : For SSD and spacers: Chapter 8 Removing and replacing a FRU Downloaded from LpManual.com Manuals...
- Page 78 When installing: Make sure that SSD spacers or HDD rubber rails are attached firmly. ThinkPad T420 and T420i Hardware Maintenance Manual Downloaded from LpManual.com Manuals...
-
Page 79: 1050 Dimm Slot Cover
1050 DIMM slot cover For access, remove this FRU: • “1010 Battery pack” on page 67 Removal steps of DIMM slot cover Note: Loosen the screw , but do not remove it. Chapter 8 Removing and replacing a FRU Downloaded from LpManual.com Manuals... -
Page 80: 1060 Dimm (In The Slot On The Underside Of The Computer)
When installing: Insert the notched end of the DIMM into the socket. Press the DIMM firmly, and pivot it until it snaps into place. Make sure that it is firmly fixed in the slot and does not move easily. ThinkPad T420 and T420i Hardware Maintenance Manual Downloaded from LpManual.com Manuals... -
Page 81: 1070 Pci Express Mini Card For Wireless Wan
1070 PCI Express Mini Card for wireless WAN For access, remove these FRUs in order: • “1010 Battery pack” on page 67 • “1050 DIMM slot cover” on page 73 Removal steps of PCI Express Mini Card for wireless WAN In step , unplug the jacks by using the removal tool antenna RF connector (P/N: 08K7159), or pick the connectors with your fingers and gently unplug them in the direction of the arrow. - Page 82 If the computer you are servicing is a wireless WAN-ready model and does not have a wireless WAN card, route the antenna cables and secure them with a tape as shown in the following figure. ThinkPad T420 and T420i Hardware Maintenance Manual Downloaded from LpManual.com Manuals...
-
Page 83: 1080 Keyboard
1080 Keyboard For access, remove these FRUs in order: • “1010 Battery pack” on page 67 • “1050 DIMM slot cover” on page 73 Removal steps of keyboard Torque Step Screw (quantity) Color M2 × 10 mm, wafer-head, nylon-coated (1) Silver 0.181 Nm (1.85 kgf-cm) - Page 84 Lift the keyboard a little in the direction shown by arrow , and then detach the connector Installation steps of keyboard When installing the keyboard, do the following: 1. Attach the keyboard connector. ThinkPad T420 and T420i Hardware Maintenance Manual Downloaded from LpManual.com Manuals...
- Page 85 2. Attach the keyboard so that the keyboard edges are under the frame. 3. To make sure that the front edge of the keyboard is housed firmly, gently press the keys with your palms and slightly slide the keyboard toward you until it snaps into position. Chapter 8 Removing and replacing a FRU Downloaded from LpManual.com Manuals...
- Page 86 4. Make sure that the front edge of the keyboard is attached firmly. 5. Secure the keyboard by tightening the screws from the bottom side of the computer. ThinkPad T420 and T420i Hardware Maintenance Manual Downloaded from LpManual.com Manuals...
-
Page 87: 1090 Dimm (In The Slot Under The Keyboard)
1090 DIMM (in the slot under the keyboard) For access, remove these FRUs in order: • “1010 Battery pack” on page 67 • “1050 DIMM slot cover” on page 73 • “1080 Keyboard” on page 77 Note: Your computer has two DIMM slots: one under the keyboard and another on the underside of the computer. - Page 88 When installing: Insert the notched end of the DIMM into the socket. Press the DIMM firmly, and pivot it until it snaps into place. Make sure that it is firmly fixed in the slot and does not move easily. ThinkPad T420 and T420i Hardware Maintenance Manual Downloaded from LpManual.com Manuals...
-
Page 89: 1100 Backup Battery
1100 Backup battery For access, remove these FRUs in order: • “1010 Battery pack” on page 67 • “1050 DIMM slot cover” on page 73 • “1080 Keyboard” on page 77 Removal steps of backup battery DANGER Use only the battery specified in the parts list for your computer. Any other battery could ignite or explode. - Page 90 ThinkPad T420 and T420i Hardware Maintenance Manual Downloaded from LpManual.com Manuals...
-
Page 91: 1110 Pci Express Mini Card For Wireless Lan
1110 PCI Express Mini Card for wireless LAN For access, remove these FRUs in order: • “1010 Battery pack” on page 67 • “1050 DIMM slot cover” on page 73 • “1080 Keyboard” on page 77 Removal steps of PCI Express Mini Card for wireless LAN In step , unplug the jacks by using the removal tool antenna RF connector (P/N: 08K7159), or pick the connectors with your fingers and gently unplug them in the direction of the arrow. - Page 92 • In models with a wireless LAN card that has three antenna connectors, plug the gray cable (MAIN) into the jack marked TR1, the white cable (third) into the jack marked RO or TR3, and the black cable (AUX) into the jack marked TR2 on the card. ThinkPad T420 and T420i Hardware Maintenance Manual Downloaded from LpManual.com Manuals...
-
Page 93: 1120 Keyboard Bezel Assembly, Fpc Cable, And Bluethooth Daughter Card
1120 Keyboard bezel assembly, FPC cable, and Bluethooth daughter card For access, remove these FRUs in order: • “1010 Battery pack” on page 67 • “1020 ExpressCard blank bezel” on page 68 • “1050 DIMM slot cover” on page 73 •... -
Page 94: Step Screw (Quantity)
Step Screw (quantity) Color Torque M2 × 3 mm, wafer-head, nylon-coated (1) Black 0.181 Nm (1.85 kgf-cm) Shoulder screw (2) Silver 0.181 Nm (1.85 kgf-cm) ThinkPad T420 and T420i Hardware Maintenance Manual Downloaded from LpManual.com Manuals... - Page 95 When installing: Make sure that the connector is attached firmly. Chapter 8 Removing and replacing a FRU Downloaded from LpManual.com Manuals...
- Page 96 When installing: Make sure that the connectors are attached firmly. Step Screw (quantity) Color Torque M2 × 3 mm, wafer-head, nylon-coated (1) Black 0.181 Nm (1.85 kgf-cm) ThinkPad T420 and T420i Hardware Maintenance Manual Downloaded from LpManual.com Manuals...
- Page 97 When installing: Make sure that the connector is attached firmly. Chapter 8 Removing and replacing a FRU Downloaded from LpManual.com Manuals...
-
Page 98: 1130 Smartcard
• “1120 Keyboard bezel assembly, FPC cable, and Bluethooth daughter card” on page 87 Removal steps of SmartCard Step Screw (quantity) Color Torque Black 0.181 Nm M2 × 3 mm, wafer-head, nylon-coated (2) (1.85 kgf-cm) ThinkPad T420 and T420i Hardware Maintenance Manual Downloaded from LpManual.com Manuals... - Page 99 When installing: Make sure that the connector is attached firmly. Removal steps of SmartCard dummy spacer Some models have a SmartCard dummy spacer as a miscellaneous part. For those models, remove the spacer as shown: Step Screw (quantity) Color Torque Black 0.181 Nm M2 ×...
-
Page 100: 1140 Modem Daughter Card (Mdc)
Removal steps of modem daughter card (MDC) Step Screw (quantity) Color Torque M2 × 3 mm, wafer-head, nylon-coated (2) Black 0.181 Nm (1.85 kgf-cm) When installing: Make sure that the connector is attached firmly. ThinkPad T420 and T420i Hardware Maintenance Manual Downloaded from LpManual.com Manuals... -
Page 101: 1150 Speaker Assembly
1150 Speaker assembly For access, remove these FRUs in order: • “1010 Battery pack” on page 67 • “1050 DIMM slot cover” on page 73 • “1080 Keyboard” on page 77 • “1120 Keyboard bezel assembly, FPC cable, and Bluethooth daughter card” on page 87 Removal steps of speaker assembly Step Screw (quantity) - Page 102 When installing: Attach the speaker assembly and route the cable as shown in the following figure, and make sure that the speaker connector is attached firmly. ThinkPad T420 and T420i Hardware Maintenance Manual Downloaded from LpManual.com Manuals...
-
Page 103: 1160 Lcd Unit
1160 LCD unit For access, remove these FRUs in order: • “1010 Battery pack” on page 67 • “1020 ExpressCard blank bezel” on page 68 • “1050 DIMM slot cover” on page 73 • “1070 PCI Express Mini Card for wireless WAN” on page 75 •... - Page 104 Step Screw (quantity) Color Torque Black 0.181 Nm M2 × 3 mm, wafer-head, nylon-coated (1) (1.85 kgf-cm) ThinkPad T420 and T420i Hardware Maintenance Manual Downloaded from LpManual.com Manuals...
- Page 105 Torque Step Screw (quantity) Color M2.5 × 6 mm, wafer-head, nylon-coated (2) Black 0.392 Nm (4.0 kgf-cm) When installing: • Make sure that you attach the connectors firmly. • Make sure that you route the cables correctly and you tape up in the proper positions as shown in the above figure.
- Page 106 ThinkPad T420 and T420i Hardware Maintenance Manual Downloaded from LpManual.com Manuals...
-
Page 107: 1170 Fan Assembly
1170 Fan assembly For access, remove these FRUs in order: • “1010 Battery pack” on page 67 • “1020 ExpressCard blank bezel” on page 68 • “1050 DIMM slot cover” on page 73 • “1070 PCI Express Mini Card for wireless WAN” on page 75 •... -
Page 108: Color Torque Silver 0.181 Nm (1.85 Kgf-Cm)
Screw (quantity) Color Torque Capture shoulder screw (4) Silver 0.181 Nm (1.85 kgf-cm) M2 × 3 mm, wafer-head, nylon-coated (1) black 0.181 Nm (1.85 kgf-cm) For Discrete Graphics models: ThinkPad T420 and T420i Hardware Maintenance Manual Downloaded from LpManual.com Manuals... - Page 109 For Integreted Graphics models: When installing: • Before you attach the fan assembly to the computer, apply thermal grease, at an amount of 0.2 grams, on the parts marked as in the following figures. Either too much or too less application of grease can cause a thermal problem due to imperfect contact with a component.
- Page 110 • When attaching the fan assembly to the frame, take care not to damage the heat sink of the fan assembly. • Make sure that the fan connector is attached firmly. ThinkPad T420 and T420i Hardware Maintenance Manual Downloaded from LpManual.com Manuals...
-
Page 111: 1180 Cpu
1180 CPU For access, remove these FRUs in order: • “1010 Battery pack” on page 67 • “1020 ExpressCard blank bezel” on page 68 • “1050 DIMM slot cover” on page 73 • “1070 PCI Express Mini Card for wireless WAN” on page 75 •... -
Page 112: 1190 Base Cover Assembly And Dc-In Connector Cable
“1170 Fan assembly” on page 101 Removal steps of base cover assembly and DC-in connector cable Step Screw (quantity) Color Torque Black 0.181 Nm M2 × 8 mm, wafer-head, nylon-coated (5) (1.85 kgf-cm) ThinkPad T420 and T420i Hardware Maintenance Manual Downloaded from LpManual.com Manuals... - Page 113 Step Screw (quantity) Color Torque M2 × 5 mm, wafer-head, nylon-coated (8) Black 0.181 Nm (1.85 kgf-cm) When installing: Make sure that the connector is attached firmly. When installing: Make sure that the wireless switch is adjusted as shown in callout Chapter 8 Removing and replacing a FRU Downloaded from LpManual.com Manuals...
- Page 114 Windows Certificate of Authentication label (COA) Wireless LAN MAC address label Information label Ethernet MAC address label ThinkPad T420 and T420i Hardware Maintenance Manual Downloaded from LpManual.com Manuals...
- Page 115 Wireless WAN MAC address label China mobile IMEI label China telecom IMEI label SIRM labels (only for Malaysia) Wireless card label (only for Brazil) Anatel label (only for Brazil) Modem AMOM label (only for Brazil) Bluetooth label (only for Brazil) Israel label (50 mm x 19 mm) No MIC label (only for TAA module assembled in Mexico) Vodafone label...
-
Page 116: 1200 Magnesium Structure Frame
• “1190 Base cover assembly and DC-in connector cable” on page 106 Removal steps of magnesium structure frame Torque Step Screw (quantity) Color M2 × 5 mm, wafer-head, nylon-coated (2) Black 0.181 Nm (1.85 kgf-cm) ThinkPad T420 and T420i Hardware Maintenance Manual Downloaded from LpManual.com Manuals... - Page 117 Black 0.181 Nm M2 × 8 mm, wafer-head, nylon-coated (2) (1.85 kgf-cm) Hex stud, nylon-coated (2) Silver 0.392 Nm (4.0 kgf-cm) Chapter 8 Removing and replacing a FRU Downloaded from LpManual.com Manuals...
-
Page 118: 1210 System Board And Expresscard Slot Assembly
HDD Active Protection System still functions. The procedure is as follows: 1. Place the computer on a horizontal surface. 2. Run Diagnostics ➙ ThinkPad Devices ➙ HDD Active Protection Test. Attention: Do not apply physical shock to the computer while the test is running. - Page 119 Platform Controller Hub (PCH) Graphic Processing Unit (GPU) (Discrete graphics chip) Note: The GPU is only for models with switchable graphics. Models with integrated graphics do not have a GPU on the system board. For Switchable Graphics models: For Integrated Graphics models: Chapter 8 Removing and replacing a FRU Downloaded from LpManual.com Manuals...
-
Page 120: 1220 Msata Solid State Drive
• Before removing the drive, have the user make a backup copy of all the information on it if possible. • Never remove the drive while the system is operating or is in suspend mode. ThinkPad T420 and T420i Hardware Maintenance Manual Downloaded from LpManual.com Manuals... -
Page 121: Step Screw (Quantity)
Removal steps of mSATA solid state drive Step Screw (quantity) Color Torque M2 × 3 mm, wafer-head, nylon-coated (1) Black 0.181 Nm (1.85 kgf-cm) Chapter 8 Removing and replacing a FRU Downloaded from LpManual.com Manuals... -
Page 122: 2010 Lcd Bezel Assembly
2010 LCD bezel assembly For access, remove the following FRU: • “1010 Battery pack” on page 67 Removal steps of LCD bezel assembly ThinkPad T420 and T420i Hardware Maintenance Manual Downloaded from LpManual.com Manuals... -
Page 123: 2020 Led Board
2020 LED board For access, remove these FRUs in order: • “1010 Battery pack” on page 67 • “2010 LCD bezel assembly” on page 116 Removal steps of LED board Torque Step Screw (quantity) Color M2 × 3 mm, flat-head, nylon-coated (1) Black 0.181 Nm (1.85 kgf-cm) - Page 124 When installing: Make sure that the connector is attached firmly. ThinkPad T420 and T420i Hardware Maintenance Manual Downloaded from LpManual.com Manuals...
-
Page 125: 2030 Integrated Camera
2030 Integrated camera For access, remove these FRUs in order: • “1010 Battery pack” on page 67 • “2010 LCD bezel assembly” on page 116 Removal steps of integrated camera Step Screw (quantity) Color Torque M2 × 3 mm, flat-head, nylon-coated (1) Black 0.181 Nm (1.85 kgf-cm) - Page 126 ThinkPad T420 and T420i Hardware Maintenance Manual Downloaded from LpManual.com Manuals...
-
Page 127: 2040 Lcd Panel And Lcd Cable
2040 LCD panel and LCD cable For access, remove these FRUs in order: • “1010 Battery pack” on page 67 • “1020 ExpressCard blank bezel” on page 68 • “1050 DIMM slot cover” on page 73 • “1070 PCI Express Mini Card for wireless WAN” on page 75 •... - Page 128 When installing: Make sure that the connector is attached firmly. ThinkPad T420 and T420i Hardware Maintenance Manual Downloaded from LpManual.com Manuals...
-
Page 129: 2050 Camera Cable
2050 Camera cable For access, remove these FRUs in order: • “1010 Battery pack” on page 67 • “1020 ExpressCard blank bezel” on page 68 • “1050 DIMM slot cover” on page 73 • “1070 PCI Express Mini Card for wireless WAN” on page 75 •... -
Page 130: 2060 Wireless Lan Antenna Assembly Or Wireless Lan/Wan Antenna Assembly
Tension could cause the cables to be damaged by the cable guides, or a wire to be broken. ThinkPad T420 and T420i Hardware Maintenance Manual Downloaded from LpManual.com Manuals... - Page 131 Step Screw (quantity) Color Torque M2 × 3 mm, flat-head, nylon-coated (2) Black 0.181 Nm (1.85 kgf-cm) Chapter 8 Removing and replacing a FRU Downloaded from LpManual.com Manuals...
-
Page 132: 2070 Hinges And Lcd Rear Cover Assembly
Removal steps of hinges and LCD rear cover assembly Step Screw (quantity) Color Torque Black 0.392 Nm M2.5 × 4 mm, wafer-head, nylon-coated (4) (4.0 kgf-cm) When installing: Attach the hinges as shown in the following figure. ThinkPad T420 and T420i Hardware Maintenance Manual Downloaded from LpManual.com Manuals... - Page 133 Chapter 8 Removing and replacing a FRU Downloaded from LpManual.com Manuals...
- Page 134 ThinkPad T420 and T420i Hardware Maintenance Manual Downloaded from LpManual.com Manuals...
-
Page 135: Chapter 9. Locations
Chapter 9. Locations This chapter presents the locations of ThinkPad T420 and T420i hardware components. Front view Integrated camera (for some models) ThinkLight Built-in microphone Built-in speakers Security keyhole Universal serial bus (USB)/eSATA combo connector USB connector Media Card Reader slot... - Page 136 ThinkPad T420 and T420i Hardware Maintenance Manual Downloaded from LpManual.com Manuals...
-
Page 137: Rear View
Rear view Status indicators Note: For the description of each indicator, see Chapter 5 “Status indicators” on page 53. SmartCard slot DisplayPort connector USB connector RJ-45 (Ethernet) connector External monitor connector Power jack USB connector Modem connector or IEEE 1394 Chapter 9 Locations Downloaded from LpManual.com Manuals... -
Page 138: Bottom View
Bottom view Battery pack Battery pack latch DIMM slot Docking connector LCD cover latch Serial Ultrabay Enhanced lock latch Serial Ultrabay Enhanced eject latch ThinkPad T420 and T420i Hardware Maintenance Manual Downloaded from LpManual.com Manuals... -
Page 139: Chapter 10. Parts List
Lenovo does not receive the defective part within thirty (30) days of your receipt of the replacement CRU. See your Lenovo Limited Warranty documentation for full details. ThinkPad Notebooks contain the following types of CRUs: Self-service CRUs: These CRUs unplug or are held by no more than two screws. Examples of these types of CRUs include the ac power adapter, power cord, battery, and hard disk drive. -
Page 140: Overall
Overall ThinkPad T420 and T420i Hardware Maintenance Manual Downloaded from LpManual.com Manuals... - Page 141 See “Miscellaneous parts” on page 162. LCD unit (see “LCD FRUs” on page 155.) 60Y3247 ThinkPad b/g/n Wireless (1x1 BGN) • 4177-CTO, 25x, 26x, 27x, 28x, 29x, 2Ax, 2Bx, 2Cx, 2Dx, 2Ex, 2Fx, 2Gx, 2Kx, 60Y3249 2Lx, 2Mx, 2Xx, 2Yx, 36x, GFx, GKx, GLx, GMx, Q7x, QDx, QQx, QRx, QSx, R4x, RDx, RFx, RNx, RPx •...
- Page 142 MYx, N3x, N6x, N7x, NAx, PDx, PHx, PJx, PKx, PLx, PPx, Q6x, Q7x, Q9x • 4236-CTO, 62x, 63x, 64x, 65x, N6x, N7x, N8x, N9x, NAx, NBx, NCx, NKx, NLx, NXx, P3x, P4x, P5x, P6x, P7x, PBx, PJx • 4237-CTO • 4238-CTO ThinkPad T420 and T420i Hardware Maintenance Manual Downloaded from LpManual.com Manuals...
- Page 143 Table 9. Parts list—Overall (continued) FRU no. FRU (Overall) CRU ID 4-GB DDR3-1333 SDRAM SO-DIMM (PC3-10600) card 55Y3717 • 4177-CTO, 27x, 29x, 2Ax, 2Bx, 2Cx, 2Hx, 2Jx, 2Kx, 2Lx, 2Mx, 2Nx, 2Px, 2Sx, 2Tx, 2Ux, 2Vx, 2Wx, 2Yx, 32x, 33x, 34x, 35x, 37x, 38x, Q3x, Q5x, Q8x, QBx, QDx, QFx, QGx, QHx, QJx, QKx, QLx, QMx, QNx, QPx, QUx, QVx, QWx, QXx, QYx, QZx, R2x, R3x, R4x, R7x, R8x, RAx, RBx, RCx, RDx, RFx, RGx, RHx, RJx, RKx, RLx, RMx, RPx, RQx, RRx, RSx, RTx, RVx, RWx, RXx, RYx, RZx...
- Page 144 NDx, NEx, NFx, NGx, NHx, NKx, NLx, NMx, NNx, NPx, NQx, NRx, NSx, NTx, NWx, NXx, NYx, P2x, P3x, P4x, P5x, P6x, P8x, P9x, PBx, PCx, PDx, PEx, PHx, PJx • 4237-CTO • 4238-CTO ThinkPad T420 and T420i Hardware Maintenance Manual Downloaded from LpManual.com Manuals...
- Page 145 Table 9. Parts list—Overall (continued) FRU no. FRU (Overall) CRU ID Speaker assembly 04W1633 04W1634 Magnesium structure frame assembly 04W1629 75Y5115 DVD-RAM/RW drive • 4177-CTO, 22x, 23x, 24x, 25x, 26x, 27x, 28x, 29x, 2Ax, 2Bx, 2Cx, 2Dx, 2Ex, 75Y5113 2Fx, 2Gx, 2Hx, 2Jx, 2Kx, 2Lx, 2Mx, 2Nx, 2Px, 2Qx, 2Rx, 2Sx, 2Tx, 2Ux, 2Vx, 75Y5111 2Wx, 2Xx, 2Yx, 32x, 33x, 34x, 35x, 36x, 37x, 38x, GFx, GKx, GLx, GMx, Q2x, Q3x, Q4x, Q5x, Q8x, QAx, QBx, QCx, QEx, QGx, QHx, QJx, QKx, QLx, QMx,...
- Page 146 Q9x, QAx, QCx, QFx • 4236-CTO, MBx, N2x, N3x, N4x, N5x, N6x, N7x, N8x, N9x, NAx, NBx, NCx, NDx, NEx, NFx, NGx, NHx, NKx, NLx, NMx, NNx, NPx, NQx, NRx, NSx, NTx, ThinkPad T420 and T420i Hardware Maintenance Manual Downloaded from LpManual.com Manuals...
- Page 147 Table 9. Parts list—Overall (continued) FRU no. FRU (Overall) CRU ID NWx, NXx, NYx, P2x, P3x, P4x, P5x, P6x, P8x, P9x, PAx, PBx, PCx, PDx, PEx, PFx, PGx, PHx, PJx, PLx, PPx, PQx, QFx • 4237-CTO • 4238-CTO 04W1631 I/O sub card (1394 and USB) •...
- Page 148 • 4236-CTO, 65x, NVx, P2x, PFx, PKx, PNx, PRx • 4237-CTO • 4238-CTO Base cover assembly 04W1626 • 4177-CTO • 4178-CTO • 4179-CTO • 4180-CTO • 4236-CTO • 4237-CTO • 4238-CTO ThinkPad T420 and T420i Hardware Maintenance Manual Downloaded from LpManual.com Manuals...
- Page 149 Table 9. Parts list—Overall (continued) FRU no. FRU (Overall) CRU ID Base cover assembly (Taiwan 90 W) 04W1627 • 4177-CTO, RRx, RSx, RTx, RUx • 4178-CTO, 5Fx, 5Hx, 9Hx, 9Jx, 9Kx, 9Lx, 9Mx, 9Nx, A5x, A6x, A7x, BUx, BVx, BXx, CKx, CLx, CMx, CNx, CPx, CQx •...
- Page 150 • 4177-CTO, 26x, GKx, QAx, QCx 45N7229 • 4178-CTO, 6Tx, AJx 45N7305 • 4179-CTO 45N7285 • 4180-CTO, K3x, K4x, KQx, MFx, MVx, MWx, PDx 42T1153 42T1167 • 4236-CTO,N5x, P4x • 4237-CTO • 4238-CTO ThinkPad T420 and T420i Hardware Maintenance Manual Downloaded from LpManual.com Manuals...
- Page 151 Table 9. Parts list—Overall (continued) FRU no. FRU (Overall) CRU ID SATA hard disk drive, 320 GB, 5,400 rpm 45N7219 45N7297 • 4177-CTO, 22x, 25x, 28x, 2Dx, 2Ex, GLx, GMx, QDx, QNx, QQx, QRx, QSx, QUx, R7x, RNx 45N7315 • 4178-CTO, 5Ax, 5Bx, 5Cx, 5Dx, 9Vx, AAx, ABx, AGx, AQx, ARx, CDx, DRx 45N7307 45N7287 •...
- Page 152 • 4236-CTO, NSx, NTx, QCx, QEx, QFx • 4237-CTO • 4238-CTO 45N8085 Solid state flash drive, 4 GB • 4177-CTO • 4178-CTO • 4179-CTO • 4180-CTO • 4236-CTO • 4237-CTO • 4238-CTO HDD cover 04W1637 ThinkPad T420 and T420i Hardware Maintenance Manual Downloaded from LpManual.com Manuals...
- Page 153 Table 9. Parts list—Overall (continued) FRU no. FRU (Overall) CRU ID System board assembly, integrated graphics, AMT, TPM 04W2045 • 4177-CTO, Q2x, Q5x, Q8x, QAx, QNx, RMx • 4178-CTO, 52x, 56x, 57x, 59x, 5Ax, 5Bx, 5Vx, 5Wx, 5Xx, 67x, 68x, 6Fx, 6Gx, 6Qx, 6Ux, 6Zx, 9Bx, 9Cx, 9Px, 9Qx, ABx, ALx, ANx, APx, ASx, ATx, AWx, AYx, C8x, CZx, DKx, DMx •...
- Page 154 • 4238-CTO System board assembly, discrete graphics, non-AMT, non-TPM 04W2052 • 4177-CTO • 4178-CTO • 4179-CTO • 4180-CTO, 9Sx, 9Tx, 9Ux, 9Xx, AEx • 4236-CTO • 4237-CTO • 4238-CTO ThinkPad T420 and T420i Hardware Maintenance Manual Downloaded from LpManual.com Manuals...
- Page 155 Table 9. Parts list—Overall (continued) FRU no. FRU (Overall) CRU ID CPU assembly, i5-2520M (2.50 GHz) 04W0492 • 4177-CTO, 2Fx, 2Nx, Q5x, Q8x, QNx • 4178-CTO, 52x, 56x, 58x, 5Ax, 5Bx, 5Ex, 5Fx, 5Vx, 5Zx, 68x, 6Fx, 6Qx, 6Ux, 6Vx, 6Xx, 6Yx, 6Zx, 9Ax, 9Bx, 9Cx, 9Kx, 9Px, 9Qx, 9Tx, 9Wx, A3x, A9x, AAx, ABx, ACx, ALx, ANx, APx, ASx, C6x, CZx, DMx •...
- Page 156 BUx, BVx, BYx, BZx, C2x, C3x, C4x, CBx, CCx • 4179-CTO • 4180-CTO, PKx, PLx, PMx, PNx, PPx, PQx • 4236-CTO, PHx, PJx, PPx, PQx, PUx, PVx, PWx • 4237-CTO • 4238-CTO ThinkPad T420 and T420i Hardware Maintenance Manual Downloaded from LpManual.com Manuals...
- Page 157 Table 9. Parts list—Overall (continued) FRU no. FRU (Overall) CRU ID CPU assembly, Intel Dual Core i5-2450M (2.50 GHz) 04W4095 • 4177-CTO, 33x, 34x, 35x, 37x, 38x, RQx, RVx, RWx • 4178-CTO, CHx, CJx, CQx, CRx, CSx, CUx, CVx, CWx, CXx, CYx, D2x, D3x, D4x, D7x, D8x, D9x, DAx, DBx, DCx, DDx, DEx, DFx, DGx, DLx, DNx, DWx, DXx, DYx, DZx, E2x •...
- Page 158 PAx, PBx, PCx, PDx, PEx, PGx, PHx, PJx, PLx, PMx, PPx, PQx, PSx, PTx, PUx, PVx, PXx, PZx, Q2x, Q4x, Q6x, Q9x, QAx, QBx, QCx, QDx, QEx, QFx, QGx, QHx, QJx, QKx, QLx • 4237-CTO • 4238-CTO ThinkPad T420 and T420i Hardware Maintenance Manual Downloaded from LpManual.com Manuals...
- Page 159 Table 9. Parts list—Overall (continued) FRU no. FRU (Overall) CRU ID Fan assembly, discrete 04W0408 • 4177-CTO, 22x, 23x, 24x, 2Ax, 2Bx, 2Cx, 2Jx, 2Kx, 2Lx, 2Mx, 2Nx, 2Px, 2Tx, 04W0410 2Ux, 2Vx, 2Wx, 2Xx, 2Yx, 32x, 33x, 34x, 37x, GFx, GLx, Q3x, Q4x, QBx •...
- Page 160 • 4237-CTO • 4238-CTO Keyboard (see “Keyboard” on page 160.) TrackPoint caps 91P9642 — Thermal grease 91P8835 — ac power adapter (see “Information about ac power adapters” on page 164.) ThinkPad T420 and T420i Hardware Maintenance Manual Downloaded from LpManual.com Manuals...
-
Page 161: Lcd Frus
LCD FRUs Table 10. Parts list—LCD FRUs No. FRU FRU no. See “Miscellaneous parts” on page 162. 04W1609 LCD bezel assembly Chapter 10 Parts list Downloaded from LpManual.com Manuals... - Page 162 • 4180-CTO, K2x, K3x, K4x, K5x, K6x, KPx, LEx, LJx, LKx, LUx, MFx, MLx, NDx, NEx, PDx, PEx, PHx, PJx • 4236-CTO, N3x, N6x, NMx, NNx • 4237-CTO • 4238-CTO ThinkPad T420 and T420i Hardware Maintenance Manual Downloaded from LpManual.com Manuals...
- Page 163 Table 10. Parts list—LCD FRUs (continued) No. FRU FRU no. 04W1614 Camera module (No camera and no integrated microphone) • 4177-CTO • 4178-CTO • 4179-CTO • 4180-CTO • 4236-CTO • 4237-CTO • 4238-CTO LCD module, 14.0-inch HD (1366 x 768) LED backlight Anti-Glare Display 93P5691 •...
- Page 164 • 4236-CTO, 63x, 65x, MBx, N4x, N6x, N7x, N8x, N9x, NAx, NBx, NEx, NFx, NGx, NHx, NNx, NSx, NTx, NVx, P2x, PFx, PGx, PKx, PMx, PNx, PRx • 4237-CTO • 4238-CTO ThinkPad T420 and T420i Hardware Maintenance Manual Downloaded from LpManual.com Manuals...
- Page 165 Table 10. Parts list—LCD FRUs (continued) No. FRU FRU no. LED sub card 04W1370 Clear plate kit 04W1620 Chapter 10 Parts list Downloaded from LpManual.com Manuals...
-
Page 166: Keyboard
Traditional Chinese 45N2104 45N2174 45N2244 Turkish 45N2099 45N2169 45N2239 U.K. English 45N2100 45N2170 45N2240 U.S. English 45N2071 45N2141 45N2211 U.S. English (International, with a Euro symbol) 45N2101 45N2171 45N2241 ThinkPad T420 and T420i Hardware Maintenance Manual Downloaded from LpManual.com Manuals... - Page 167 Table 11. Parts list—Keyboard (continued) Language FRU no. Netherlands 45N2090 45N2160 45N2230 Turkish (F Type) 60Y9552 60Y9554 60Y9550 Chapter 10 Parts list Downloaded from LpManual.com Manuals...
-
Page 168: Miscellaneous Parts
• Bracket - FPR EMI • Speaker mesh • Face sheet - touchpad • ThinkPad logo • Bracket - touchpad button • Bracket - FPR • Insulation sheet - touchpad ThinkPad T420 and T420i Hardware Maintenance Manual Downloaded from LpManual.com Manuals... - Page 169 • LED lens - LCD front bezel • Shield - EMC • Clear plate - LCD rear cover • LED lens - LCD rear cover • ThinkPad logo • Lenovo logo • LCD latch - right • LCD latch - left •...
-
Page 170: Information About Ac Power Adapters
3-pin (90 W, 20 V) adapter (models CTO, xxA, xxB, xxG, xxH, xxK, xxM, xxQ, xxT, xxV) 42T4433 45N0068 3-pin (90 W, 20 V) adapter (models CTO, xxA, xxB, xxG, xxH, xxK, xxM, xxQ, xxT, xxV) ThinkPad T420 and T420i Hardware Maintenance Manual Downloaded from LpManual.com Manuals... -
Page 171: Power Cords
Power cords A ThinkPad power cord for a specific country or region is usually available only in that country or region: Table 15. Parts list—2-pin power cords Country or region FRU no. Argentina 42T5020 42T5105 • models -CTO, xxY Brazil... -
Page 172: Recovery Discs
• 4179-CTO • 4180-CTO • 4236-CTO • 4237-CTO • 4238-CTO Table 18. Parts list—Windows Vista Business (32 bit) SP2 recovery DVDs Language 04T3729 English (for India) US English 04T3730 ThinkPad T420 and T420i Hardware Maintenance Manual Downloaded from LpManual.com Manuals... - Page 173 Windows Vista Home Basic (32 bit) SP2 DVDs Note: The Windows Vista recovery DVDs are available only for models with a valid Microsoft Windows Vista certificate of authenticity (COA) affixed to the system. Due to a Microsoft licensing limitation, if a model came with Windows Vista Business or Windows Vista Ultimate preinstalled from the factory, but has a Windows 7 COA affixed to the system, that model is eligible only for recovery DVDs that match the operating system specified on the COA.
- Page 174 Greek with English German 04T3750 Hebrew with English 04T3751 Hungarian with English 04T3753 Japanese 04T3754 Korea with English 04T3755 Polish 04T3756 Portuguese with English 04T3757 Romanian with English 04T3758 Russian 04T3759 ThinkPad T420 and T420i Hardware Maintenance Manual Downloaded from LpManual.com Manuals...
- Page 175 Table 21. Parts list—Windows 7 Professional (64 bit) recovery DVDs (continued) Language 04T1340 or Slovak with English 04T3768 Spanish 04T3761 Serbian-Latin with English 04T3762 04T3744 Simplified Chinese Traditional Chinese with English (Hong Kong S.A.R.) 04T3752 Turkish with English 04T3763 04T4694 Traditional Chinese with English US English (Disabled) 04T3764...
- Page 176 C&L Nordics (Danish, Finnish, Swedish, Norwegian, and English) C&L EMEA (Dutch, French, German, Italian, and English) 04T3809 C&L Croatian (Slovenian, Croatian, and English) 04T3810 French 04T3790 Greek with English 04T3791 ThinkPad T420 and T420i Hardware Maintenance Manual Downloaded from LpManual.com Manuals...
- Page 177 Table 25. Parts list—Windows 7 Home Premium (64 bit) recovery DVDs (continued) Language 04T3792 German Hebrew with English 04T3793 Hungarian with Engish 04T3795 Japanese 04T3796 Korea with English 04T3797 Polish 04T3798 Portuguese with English 04T3799 Romanian with English 04T3800 Russian 04T3801 04T1381 and Slovak with English...
- Page 178 • 4238-CTO Table 27. Parts list—Windows 7 Ultimate (64 bit) recovery DVDs Language US English 04T3769 ThinkPad T420 and T420i Hardware Maintenance Manual Downloaded from LpManual.com Manuals...
-
Page 179: Common Service Tools
27L3452 USB floppy diskette drive tool kit Test card for integrated Smart Card 42W7820 — LENOVO ThinkPad Hardware Maintenance Diskette Version 1.76 or later Note: Download the file from the following Web site: http://www.lenovo.com/support Chapter 10 Parts list Downloaded from LpManual.com Manuals... - Page 180 ThinkPad T420 and T420i Hardware Maintenance Manual Downloaded from LpManual.com Manuals...
-
Page 181: Appendix A. Notices
Appendix A. Notices Lenovo may not offer the products, services, or features discussed in this document in all countries. Consult your local Lenovo representative for information on the products and services currently available in your area. Any reference to a Lenovo product, program, or service is not intended to state or imply that only that Lenovo product, program, or service may be used. -
Page 182: Electronic Emissions Notices
Electronic emissions notices For electronic emission information on Class B digital devices, refer to the corresponding information in the User Guide. ThinkPad T420 and T420i Hardware Maintenance Manual Downloaded from LpManual.com Manuals... -
Page 183: Trademarks
Trademarks The following terms are trademarks of Lenovo in the United States, other countries or both: Active Protection System Lenovo ThinkLight ThinkPad ThinkVantage TrackPoint Ultrabay Microsoft and Windows are trademarks of Microsoft group of companies: Intel, Intel Centrino and Intel Core are trademarks of Intel Corporation in the U.S. and/or other countries: Other company, product, or service names may be the trademarks or service marks of others. - Page 184 ThinkPad T420 and T420i Hardware Maintenance Manual Downloaded from LpManual.com Manuals...
- Page 185 Downloaded from LpManual.com Manuals...
- Page 186 Part Number: 0A60007_05 (1P) P/N: 0A60007_05 *1P0A60007_05* Downloaded from LpManual.com Manuals...
Need help?
Do you have a question about the T420 and is the answer not in the manual?
Questions and answers