ASCOM d81 User Manual
Dect handset
Hide thumbs
Also See for d81:
- Quick start manual ,
- Safety instructions (148 pages) ,
- User manual (126 pages)
Table of Contents
Advertisement
Quick Links
Advertisement
Table of Contents

Subscribe to Our Youtube Channel
Related Manuals for ASCOM d81


Summary of Contents for ASCOM d81
- Page 1 TD 92644EN User Manual Ascom d81 DECT Handset 12 December 2012/ Ver. E...
-
Page 2: Table Of Contents
1.3.2 End User..........................2 1.4 Abbreviations and Glossary....................2 1.5 Functions and Accessories ..................... 3 2 Descriptions ........................5 2.1 d81 DECT Handset ........................5 2.1.1 Hot Keys..........................8 2.1.2 Alphanumeric Keys ......................8 2.1.3 Icons and Text in the Display ..................9 2.2 Accessories.......................... - Page 3 User Manual TD 92644EN Ascom d81 DECT Handset 4.7 Connections ........................... 25 4.8 Settings ........................... 25 4.9 In Call Menu..........................26 4.9.1 Additional In Call Functions ..................27 4.10 Customizing the Menu Tree ..................... 28 5 Calling..........................29 5.1 Incoming Call .......................... 29 5.1.1 Answer a Call ........................
- Page 4 User Manual TD 92644EN Ascom d81 DECT Handset 6.1 Push-Button Alarm ....................... 37 6.1.1 Test Alarm........................37 6.1.2 Personal Alarm......................37 6.2 Man-Down and No-Movement Alarm ................38 6.3 Pull-Cord Alarm........................38 6.4 Alarm with Location Information..................39 6.4.1 Alarm with Data ......................39 6.5 Acoustic Location Signal......................
- Page 5 User Manual TD 92644EN Ascom d81 DECT Handset 7.6.3 Define Navigation Key ....................58 7.7 Settings............................ 59 7.7.1 Sound and Alert Settings ..................59 7.7.2 Lock Settings ........................ 61 7.7.3 Display Settings......................62 7.7.4 Time & Date Settings....................63 7.7.5 Answering ........................64 7.7.6 Change Text size for Messages................
- Page 6 User Manual TD 92644EN Ascom d81 DECT Handset 12.1 Accessibility and Voice Quality..................79 13 System Handling ......................80 13.1 Software Upgrade and Additional Features ..............80 14 Maintenance ....................... 81 14.1 Maintenance of Batteries ....................81 14.1.1 Battery Warnings ..................... 81 14.1.2 Charge the Battery ....................
-
Page 7: Introduction
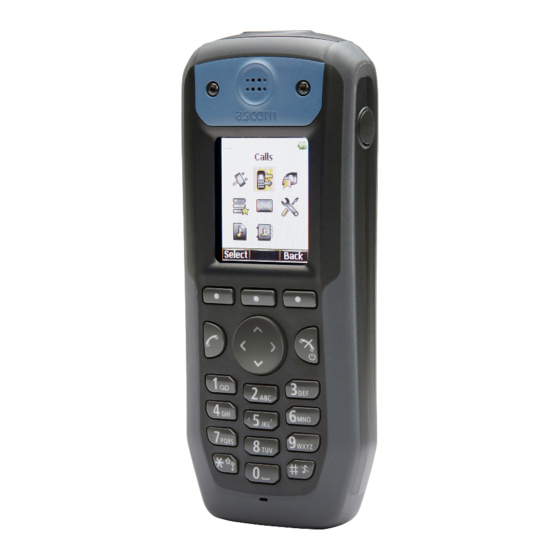
Ascom d81 DECT Handset Introduction This document describes features and settings available for d81 handsets. The handset is a feature-rich handset with color display, telephony, messaging, and Bluetooth. It is a highly robust handset to be used in rough demanding environment, for example the industry. -
Page 8: End User
5 • 3 Basic Operation on page 15 See also Quick Reference Guide, Ascom d81 DECT Handset, TD 92667EN. Because of its handy format you can place a print-out next to your handset as a quick reference. Abbreviations and Glossary... -
Page 9: Functions And Accessories
User Manual TD 92644EN Ascom d81 DECT Handset Functions and Accessories NOTE: Some functions can only be used when they are configured in the handset via PDM/ Device Manager. Additionally, some functions are also system dependent. Functions Enhanced DECT Security... - Page 10 Easy replacement of handset Clear lists in charger Site Survey tool Bluetooth barcode reader support Bluetooth Upgradeable to Protector 1.Requires a product license. The d81 Messenger cannot be upgraded to d81 Protector with the No-movement/Man-down hardware. Accessories Basic Charger Advanced Charger Charging rack Battery Pack Charger Leather Casing, incl.
-
Page 11: Descriptions
User Manual TD 92644EN Ascom d81 DECT Handset Descriptions d81 DECT Handset IMPORTANT: The handset may retain small metal objects around the mouthcap or earcap region. Case The plastic cover parts are made of durable PC/ABS material. Antenna The antenna is integrated inside the handset. - Page 12 Tactile indicators There are two tactile indicators to indicate the centre of the key pad 1.Applicable for the d81 Protector only. 2.Applicable for the d81 Protector with the hardware variant Man-down and No-movement only. 12 December 2012/ Ver. E...
- Page 13 User Manual TD 92644EN Ascom d81 DECT Handset Sound off key A long press on the key in idle mode, changes between ring signal on/ off, At incoming call, a long press on the key silencing the ring signal. Space...
-
Page 14: Hot Keys
User Manual TD 92644EN Ascom d81 DECT Handset 2.1.1 Hot Keys Any key "0", "2" - "9" can be set to a Hot Key. A long press on any of these numbers in idle mode are by default a short cut to the Call contact list. The list is in alphabetic order, and depending on which key that is pressed is dependent on where in the list the contact appears. -
Page 15: Icons And Text In The Display
User Manual TD 92644EN Ascom d81 DECT Handset 2.1.3 Icons and Text in the Display All functions and settings available to the user are shown as icons and text in the display. The icons and text in the display indicate functions and settings the user has access to. The display normally displays date and time, the Owner ID and handset number. - Page 16 User Manual TD 92644EN Ascom d81 DECT Handset "Microphone off" icon indicates a silenced microphone. It is displayed after a long press on the Sound off key, Mute button during a call. During a PTT call, the microphone is silenced when the PTT button is released.
- Page 17 "Man-down" icon indicates that the Man-down alarm is enabled. "No-movement" icon indicates that the No-movement alarm is enabled. "Profile active" icon "Messenger" icon indicates that the handset has a d81 Messenger product license. "Protector" icon indicates that the handset has a d81 Protector product license.
-
Page 18: Accessories
User Manual TD 92644EN Ascom d81 DECT Handset Menu Icons The ”Contacts” menu contains all names/numbers in the local phonebook. In addition, a company phonebook with up to 1000 entries can be downloaded to the phone via the PDM/Device Manager. It is also possible to access a central phonebook from the "Contact"... -
Page 19: Charging Rack
User Manual TD 92644EN Ascom d81 DECT Handset There are two desktop chargers available; one basic (DC3) that only charges the handset, and one with advanced functionality (DC4) to download new software and to synchronize parameters. The handset is fully operational while placed in the charger. -
Page 20: Pull Cord
User Manual TD 92644EN Ascom d81 DECT Handset 2.2.6 Pull Cord The pull cord is 800 mm long. The pull cord is attached directly to the handset’s pull cord connector on the upper right side. 2.2.7 Leather Casing The leather casing is especially designed for the handset. The casing comes with a swivel type belt clip and the handset is fully operational while placed in the casing. -
Page 21: Basic Operation
Log in to or out of a Shared Phone Note: This feature is license dependent and is applicable in IP-DECT systems only. See Configuration Manual, Ascom d81 DECT Handset, TD 92674EN. The feature shared phone allows more than one user to use a handset. When a handset is configured to be a shared phone, it can be used by any shared phone user in the system. -
Page 22: Turn The Audible Signal On/Off
Unlock keypad Press Press "Yes". TIP: It is possible to use the volume buttons and the mute button during the call. If the d81 Protector is used, it is also possible to use the alarm button. Lock/Unlock the Handset The handset can be protected for unauthorized use. If this function is activated, a PIN code has to be entered for example to switch on the handset, to answer an incoming call etc. -
Page 23: Mute Handset On Incoming Call Or Message
NOTE: If configured in the handset, it is possible to call a pre-defined emergency number while the handset is locked. See the handset’s Configuration Manual. If the d81 Protector is used, it is also possible to use the Alarm button. -
Page 24: Menu Tree
User Manual TD 92644EN Ascom d81 DECT Handset Menu Tree Calls Call list > 1234 12:00 > Call 1235 14:00 More > Time of Call etc. Edit number Save number > Work number Mobile number Other number Send message >... -
Page 25: Contacts
User Manual TD 92644EN Ascom d81 DECT Handset Contacts Call contact > Search From contact list > Add contact > New > Name Work number Mobile number Other number Ring signal > From Call list > Edit contact > Search From contact list >... -
Page 26: Profiles
User Manual TD 92644EN Ascom d81 DECT Handset Profiles Normal (default) Meeting (example) > Volume > Ring signal > Internal call > Play Back External call > (same as above) Call back > (same as above) > (same as above) Message alert >... -
Page 27: Messaging
User Manual TD 92644EN Ascom d81 DECT Handset Messaging Inbox > Message > View > Reply > Enter text list More > Delete Forward Call sender Call no. in text > Call Save number More > Delete > Yes Delete all >... -
Page 28: Services
User Manual TD 92644EN Ascom d81 DECT Handset Services Add new > Enter name > Phone call > Phone > Enter number > Save number "Contacts access" > Save Back Send data > Enter > Save > Enter > Save... -
Page 29: Short Cuts
User Manual TD 92644EN Ascom d81 DECT Handset Short cuts Soft Keys > Middle > Name Function > Not used Phone call > Enter number Phone call > Enter number Phone call PTT > Enter number Call list Contact list... - Page 30 1.This is a system dependent feature. 2. Visible if defined in handset via PDM/Device Manager. 3.Applicable for d81 Protector only. TIP: When configuring the Phone call function, it is possible to add a variable/character U in the Enter number field that allows the user to enter additional numerical character(s) before calling the number.
-
Page 31: Connections
User Manual TD 92644EN Ascom d81 DECT Handset Connections Bluetooth > Enable/Disable Headset > Add new > Barcode reader > Add new > Headset > Mic on boom Hearing protection System > Change system > Automatically System A (example) Subscribe >... -
Page 32: In Call Menu
Pull-cord Man-down No-movement Edit alarm data 1.Only visible for d81 Protector with Man-down/No-movement (factory option). In Call Menu The In Call menu can be accessed during an ongoing call by pressing the soft key "More". 12 December 2012/ Ver. E... -
Page 33: Additional In Call Functions
User Manual TD 92644EN Ascom d81 DECT Handset If the handset is configured via the PDM/Device Manager, it is possible to access a certain function in the In call menu directly by pressing the right Soft key or left Soft key. -
Page 34: Customizing The Menu Tree
User Manual TD 92644EN Ascom d81 DECT Handset 4.10 Customizing the Menu Tree The menu tree can be customized by hiding some of the functions that are available but for example not in use. Which functions that can be hidden are defined in the PDM/Device Manager. -
Page 35: Calling
User Manual TD 92644EN Ascom d81 DECT Handset Calling Incoming Call The flashing LED, accompanied by a ring signal and/or a vibrating handset, gives a notice of a call. Ring signal and vibrator can be disabled, see 7.7.1 Sound and Alert Settings on page The calling party’s handset number or name is shown. -
Page 36: Dial Using A Pre-Programmed Navigation Key, Hot Key, Soft Key, Or Headset Button
User Manual TD 92644EN Ascom d81 DECT Handset 5.2.3 Dial Using a Pre-programmed Navigation Key, Hot Key, Soft key, or Headset Button A Navigation key, Hot key, Soft key, or a headset button can be programmed with a number. Press the pre-programmed key/button to dial the number. The call will automatically be connected. -
Page 37: Dial A Name From The Central Phonebook
User Manual TD 92644EN Ascom d81 DECT Handset Select "Call contact". The local and company phonebook appears in the same list, but the company names are indicated by a icon in front of the name. Select contact from list, or search name/number by entering characters and select search. -
Page 38: Turn The Microphone On/Off During A Call
User Manual TD 92644EN Ascom d81 DECT Handset 7.4 Messaging on page 53 for more information about messaging. 5.3.4 Turn the Microphone on/off during a Call Press "More" during the call. Select "Microphone off". Press "Select". The icon indicates a silenced microphone. This means that the other part in an ongoing call cannot hear you. -
Page 39: Audio Transfer
User Manual TD 92644EN Ascom d81 DECT Handset 5.3.5 Audio Transfer To transfer audio between the Bluetooth headset and the handset’s earpiece, do as follows: Press "More" during the call. Select "Audio transfer" Press "Select". 5.3.6 Start a New Call during Conversation Press "More"... -
Page 40: Conference Call
User Manual TD 92644EN Ascom d81 DECT Handset Select "Transfer to new call" Press "Select". Enter the number to the person the ongoing call will be transfered to. Press to transfer the call. 5.3.11 Conference Call Prerequisite, a new call has been started during conversation, see 5.3.6 Start a New Call... -
Page 41: Dtmf
User Manual TD 92644EN Ascom d81 DECT Handset Method 1 During an ongoing conversation and a short tone for another incoming call appears, do as follows: Press the soft key "More" during the call. Select "Answer Call waiting". Press "Select". The new call is now connected, and the first call is on hold. -
Page 42: Call Diversion
User Manual TD 92644EN Ascom d81 DECT Handset • During a call, put the handset in a charger. Requires that the parameter Call behaviour is set to "Put on Loudspeaker" in PDM/Device Manager. See the handset’s Configuration Manual. • This function can also be activated by selecting another answering method, that is, "Automatically"... -
Page 43: Alarm Operation
The parameters described in this chapter are set in the PDM/Device Manager. See the handset’s Configuration Manual. NOTE: The alarm functionality is applicable for the d81 Protector only. In addition, some functions are not available when upgrading the product license from d81 Messenger to d81 Protector, or require a functionality license. -
Page 44: Man-Down And No-Movement Alarm
Man-Down and No-Movement Alarm NOTE: Man-down and No-movement are not available when upgrading the product license from d81 Messenger to d81 Protector. That is, only applicable for d81 Protector with the No-movement/Man-down hardware variant. Man-down alarm: If the handset is tilted 45 degrees (default) or more for a preset time (default 7 seconds), the Man-down alarm will be triggered. -
Page 45: Alarm With Location Information
ALS off. The password is the same as the phone lock password. ALS is configurable for Man-down & No-movement alarm, Push-button alarm and Pull-cord alarm. See Configuration Manual, Ascom d81 DECT Handset, TD 92674EN for more information. - Page 46 User Manual TD 92644EN Ascom d81 DECT Handset • Monitor mode, or • Normal mode See the handset’s Configuration Manual for more information. 9.When Bluetooth is enabled, the loudspeaker audio is lowered due to current limitations in the intrinsically safe handset.
-
Page 47: Menu Operation
User Manual TD 92644EN Ascom d81 DECT Handset Menu Operation Figure 4. Figure 4. The Main Menu (1) Messaging (5) Profiles (2) Short cuts (6) Services (3) Settings (7) Connections (4) Contacts (8) Calls Calls 7.1.1 Call List The 25 last received, dialed or missed calls are stored in a call list. If a number occurs more than once the last time stamp, together with the total number of occurrences, is shown. - Page 48 User Manual TD 92644EN Ascom d81 DECT Handset View the Time of a Call Enter the menu by pressing the “Menu” soft key. Select in the menu. Select "Call list". Step with the to select number in the list. Press "More".
-
Page 49: Missed Calls
User Manual TD 92644EN Ascom d81 DECT Handset Select "Yes" to delete the entry from the list. Delete all Entries from the Call list Enter the menu by pressing the “Menu” soft key. Select in the menu. Select "Call list". -
Page 50: Accept An Invitation
User Manual TD 92644EN Ascom d81 DECT Handset In order to participate in the conference, the group members must first accept an invitation received as an incoming call or as a text message. See 7.1.5 Accept an Invitation on page 44. - Page 51 User Manual TD 92644EN Ascom d81 DECT Handset • The invitation has higher priority than the ongoing call If the user declines the invitation, the he/she can re-join the PTT later on, see 7.1.8 Re-join a Group on page 46.
-
Page 52: Decline A Ptt Invitation
User Manual TD 92644EN Ascom d81 DECT Handset • The handset is configured to answer invitations automatically • The invitation is of higher priority than the call priority • The user does not reject the invitation within 10 seconds When the invitation is received, a warning signal notifies the user before disconnecting the current call in order to connect the PTT call. -
Page 53: Call Services
User Manual TD 92644EN Ascom d81 DECT Handset 7.1.9 Call Services Note: These functions are system dependent. Besides the default Call services functions, it is possible to define 10 extra system specific call services - with or without automatic disconnection. The parameters are set up in the PDM/Device Manager, see the handset’s Configuration Manual. -
Page 54: Contacts
User Manual TD 92644EN Ascom d81 DECT Handset Divert Calls if No Reply Enter the menu by pressing the “Menu” soft key. Select in the menu. Select "Call services". Select "Divert calls" Select "No reply". Select "Activate". Enter number (maximum 24 digits) to divert to, or press the soft key to enter the call contact list. -
Page 55: Call Contact
User Manual TD 92644EN Ascom d81 DECT Handset 7.2.1 Call Contact Enter the menu by pressing "Menu". Select in the menu. Select "Call contact". Select contact from the list, or enter name or number in the Search field. Press "Call", or It is also possible to edit the contact and to send a message by selecting "View"... -
Page 56: Edit Contact
User Manual TD 92644EN Ascom d81 DECT Handset A specific ring signal can be set for each contact, see 7.2.4 Set Ring Signal for a Contact page 50. 7.2.3 Edit Contact Note: It is not possible to edit a company phonebook contact. The contacts are indicated by a icon in front of the name. -
Page 57: Profiles
User Manual TD 92644EN Ascom d81 DECT Handset When the search result is displayed, it is possible to view contact information, add the number to new contact, and to send a message by pressing "More". It is also possible to call the number by pressing "Call". - Page 58 User Manual TD 92644EN Ascom d81 DECT Handset Select in the menu. Select "Add new". Enter name of the profile. Press "Save". Press "More" and then select "Add setting". Select the setting you want to add to the profile. Repeat steps 6-7 if you want to add additional settings.
-
Page 59: Messaging
User Manual TD 92644EN Ascom d81 DECT Handset Following options can be performed: • Edit the wanted setting by marking it and then press "Edit". • Add additional settings by pressing "More" and then select "Add setting" or "Import from". - Page 60 User Manual TD 92644EN Ascom d81 DECT Handset Select in the menu. Select "Inbox" to view the message list. Select a message by using the on the navigation key. Press "View". Press "Reply". Enter text. See 2.1.2 Alphanumeric Keys on page 8.
-
Page 61: Write New Messages
User Manual TD 92644EN Ascom d81 DECT Handset Select in the menu. Select "Inbox" to view the message list. Select a message by using the on the navigation key. Press "View". Do one of the following: • Press "More" and select "Call no. in text"... -
Page 62: Sent Messages
User Manual TD 92644EN Ascom d81 DECT Handset Select in the menu. Select "Unsent" to view the list. Select message to edit/send. Select "Edit", edit text and/or just select "Send". Delete/Delete All Enter the menu by pressing "Menu". Select in the menu. -
Page 63: Services
User Manual TD 92644EN Ascom d81 DECT Handset Delete/Delete All Enter the menu by pressing "Menu". Select in the menu. Select "Sent" to view the list. Select "More". Select "Delete" or "Delete all". Select "Yes" if the message(s) shall be deleted. -
Page 64: Short Cuts
User Manual TD 92644EN Ascom d81 DECT Handset Press "Back". Short Cuts Predefined functions can be set as short cuts for the Soft Keys, Hot keys, and Navigation keys. It is for example possible to define the Soft Key to make a call or as a short cut to send a message. -
Page 65: Settings
User Manual TD 92644EN Ascom d81 DECT Handset Select "Navigation keys". Select "Up", "Down", "Left", or "Right". Select "Function". Press "Select" to select function for the key. Select function from list, and press "Back". Select "Value" (only for some of the functions). Enter a value for example a number. - Page 66 User Manual TD 92644EN Ascom d81 DECT Handset Select in the menu. Select “Sound & Alerts”. Select “Message alert”. Select the wanted message alert from the list. By pressing "Play" it is possible to listen to the different alerts. TIP: The option Custom sound should be selected you want to create an own message alert.
-
Page 67: Lock Settings
NOTE: If configured in the handset, it is possible to call a pre-defined emergency number while the handset is locked. See the handset’s Configuration Manual. If the d81 Protector is used, it is also possible to use the Alarm button. -
Page 68: Display Settings
User Manual TD 92644EN Ascom d81 DECT Handset Select “Auto phone lock”. Select “On”, or "On in charger". Enter PIN code Press "OK". If the PIN code is forgotten it can be removed by your distributor. Deactivate the Phone Lock Enter the menu by pressing "Menu". -
Page 69: Time & Date Settings
User Manual TD 92644EN Ascom d81 DECT Handset Brightness NOTE: An intrinsically safe handset’s display brightness is lower than a non-intrinsically safe handset’s display brightness due to current limitations. Enter the menu by pressing "Menu". Select in the menu. Select “Display”. -
Page 70: Answering
User Manual TD 92644EN Ascom d81 DECT Handset Select “Date format”, press "Select". Selectable date format: • DD MMM YY, for example 30 Jan 11 • MMM DD YYYY, for example Jan 30 2011 • YYYY-MM-DD, for example 2011-01-30 (ISO 8601) •... -
Page 71: Change The Menu Language
Tip: It is recommended to configure a short cut to this menu if it is frequently used, see Short Cuts on page 58. NOTE: This menu is applicable for d81 Protector only. Activate alarm Enter the menu by pressing "Menu". -
Page 72: Connections
If the Man-down alarm and No-movement alarm are disabled during calls, the corresponding icons are not displayed. NOTE: See also Configuration Manual, Ascom d81 DECT Handset, TD 92674EN for additional settings and 6 Alarm Operation on page 37. - Page 73 User Manual TD 92644EN Ascom d81 DECT Handset Select "Bluetooth". Select "Disable". NOTE: When disabling Bluetooth on an intrinsically safe handset, it will be restarted. Pair/Connect Bluetooth Headset In order to use a Bluetooth headset, it must first be paired with the handset. It is only needed to pair the Bluetooth headset once.
-
Page 74: Headset
User Manual TD 92644EN Ascom d81 DECT Handset If needed, enter PIN code, see user manual for the Bluetooth barcode reader. Press "OK". The dialog Successful pairing appears if the pairing process was successful. The Bluetooth barcode reader will also be connected indicated by the icon in front of the barcode reader. - Page 75 User Manual TD 92644EN Ascom d81 DECT Handset If needed, switch off the handset by pressing Switch on the handset by pressing Select language to be used or press "Cancel". If Cancel is pressed, the default language (English) will be used.
-
Page 76: In Charger Action When In Call
User Manual TD 92644EN Ascom d81 DECT Handset Press "Yes to unsubscribe the system. Rename System It is possible to change the name of the system in the handset. Enter the menu by pressing the “Menu” soft key. Select in the menu. - Page 77 User Manual TD 92644EN Ascom d81 DECT Handset Note: Additional In charger actions can also be configured, see the handset’s Configuration Manual. Enter the menu by pressing "Menu". Select in the menu. Select “In charger”. Select "Other actions". Select one of the following: •...
-
Page 78: Procedure Call
User Manual TD 92644EN Ascom d81 DECT Handset Procedure Call When configuring the functions Call services, In Call menu, Contacts, or a shortcut/service to the Phone call function; the data added in these functions is static. When entering the data... -
Page 79: System Profiles
The system profile contains settings such as alarm settings, soft key settings, and presence settings, and can only be configured in PDM or Device Manager, see Configuration Manual, Ascom d81 DECT Handset, TD 92674EN. When the system profile is activated , its settings is not displayed in the handset’s menu. -
Page 80: Advanced Functions
User Manual TD 92644EN Ascom d81 DECT Handset Advanced Functions 10.1 Admin Menu The handset has a hidden menu for system administrators. See the handset’s Configuration Manual. The Admin menu contains: • Software, hardware and license information, IPEI/IPDI, and user ID •... -
Page 81: Enhanced Messaging
User Manual TD 92644EN Ascom d81 DECT Handset Enhanced Messaging 11.1 Voice Mail Note: This feature is only available if configured in the system. 11.1.1 Receive a Voice Mail When receiving a voice mail, the content of the voice mail notification is displayed automatically on the screen, and is also indicated by the icon in the status bar. -
Page 82: Message Queuing And Message Priority
They are shown as unread in the message list and will not be shown as read until you have closed them. See Configuration Manual, Ascom d81 DECT Handset, TD 92674EN for more information how to set the parameters. -
Page 83: Interactive Messaging
User Manual TD 92644EN Ascom d81 DECT Handset Figure 10. 12:34 12:34 Inbox 2009-01-01 12:00 Patient ready... 2009-01-01 Patient ready for transport. From: X-ray Patient ready... To: B/12/3 2009-01-01 View More Back Call Help Reject Figure 11. Shows an example of color messages. -
Page 84: Mobile Data
When the handset receives data, it is automatically transmitted to the destination and is not stored in the handset. A dialog window "Message sent" is displayed. For more information about configuration, see Configuration Manual, Ascom d81 DECT Handset, TD 92674EN. See also Pair/Connect Bluetooth Barcode Reader on page 67, and user manual for the Bluetooth barcode reader. -
Page 85: Operation Notice
User Manual TD 92644EN Ascom d81 DECT Handset Operation Notice 12.1 Accessibility and Voice Quality The base network is not always available. If you do not get in contact with your system, contact your system administrator. For best voice quality, avoid positioning near computer, radio or similar equipment. -
Page 86: System Handling
User Manual TD 92644EN Ascom d81 DECT Handset System Handling 13.1 Software Upgrade and Additional Features Software and parameters in the handset can be upgraded by using the PDM/Device Manager. Examples of additional features that can be downloaded/configured via PDM/ Device Manager: •... -
Page 87: Maintenance
User Manual TD 92644EN Ascom d81 DECT Handset Maintenance 14.1 Maintenance of Batteries 14.1.1 Battery Warnings The "Low battery" icon is displayed when the battery has 10% or less remaining capacity left. In addition; a warning signal sounds every minute, the LED flashing orange, and the dialog window "Battery low. -
Page 88: Easy Replacement Of Handset
Switch off the new handset by long pressing 30. A handset’s product license, for example d81 Protector, and/or license dependent functions can be moved to an unlicensed handset (d81 Messenger) using PDM/Device Manager. 12 December 2012/ Ver. E... -
Page 89: Easy Replacement Procedure
User Manual TD 92644EN Ascom d81 DECT Handset 14.2.2 Easy Replacement Procedure During the Easy Replacement procedure, the LEDs of the handset and the charger follow the same LED indications. This means that if the old handset has a broken display, the LED indications on the charger and on the handset can be used to follow the replacement procedure. - Page 90 User Manual TD 92644EN Ascom d81 DECT Handset 4, 5 When the text "Please insert old phone in charger" is displayed, replace the new handset with the old handset. The handset can either be switched on or off. Note: If the CR3 Charging Rack is used, the left charging slot must be used for both handsets.
-
Page 91: Attach The Hinge-Type Clip
User Manual TD 92644EN Ascom d81 DECT Handset 14.3 Attach the Hinge-type Clip Attach the hinge-type belt clip as described in Figure Figure 13. Figure 14. Screw the hinge-type clip into position. 14.4 Attach the Swivel-type Clip Attach the swivel-type belt clip as described in Figure Figure 14. -
Page 92: Attach Cover For No Clip
User Manual TD 92644EN Ascom d81 DECT Handset 14.5 Attach Cover for No Clip Attach the enclosed cover as described in Figure 15 when no clip is to be used. Figure 15. Figure 16. Screw the cover into position. 12 December 2012/ Ver. E... -
Page 93: Troubleshooting
User Manual TD 92644EN Ascom d81 DECT Handset Troubleshooting This section contains information on how to solve common operational problems, and warnings you may receive. Go through the following lists if you encounter any problems. If this checklist does not solve the problem, contact your system administrator. - Page 94 User Manual TD 92644EN Ascom d81 DECT Handset Operational Problems Fault Probable cause Action or comment No display The battery level is low or the Charge the battery or contact handset is defective. system administrator. No ringing The sound off icon is on, or ringer...
- Page 95 User Manual TD 92644EN Ascom d81 DECT Handset Fault Probable cause Action or comment Not possible to subscribe 1) The handset does not support 1) Make sure that the handset using Easy the Easy Registration feature. handset’s software is of Registration feature.
- Page 96 User Manual TD 92644EN Ascom d81 DECT Handset Error or Warning Messages Display shows Probable cause Action or comment No access The network is in range, but no Switch handset off and then access rights. switch it on again or contact system administrator.
- Page 97 User Manual TD 92644EN Ascom d81 DECT Handset Could not encrypt The parameter "Encryption 1) Disable the "Encryption connection Required" is enabled in the required" parameter in handset handset in combination with; via PDM/Device Manager; and/ 1) Unencrypted base station(s);...
-
Page 98: Appendix A: Bluetooth Headset
User Manual TD 92644EN Ascom d81 DECT Handset Appendix A: Bluetooth Headset Introduction Bluetooth technology replaces the cord between the handset and the headset. This allows the user to move more freely and eliminates the risk of a headset cord getting stuck. - Page 99 Headsets A number of Bluetooth headsets for different work situations have been tested together with the handset. Refer to the Ascom Wireless Extranet Website for a list of verified Bluetooth headsets. Since the Bluetooth supports the Bluetooth 2.0 standard, other headsets may also work although not verified by Ascom.
- Page 100 User Manual TD 92644EN Ascom d81 DECT Handset A.5.3 Add another Bluetooth Headset Up to eight Bluetooth devices can be paired to the handset, but only one at a time can be selected. To pair another headset repeat section “Pair and Connect a headset” steps 1-6.
- Page 101 User Manual TD 92644EN Ascom d81 DECT Handset Volume/Mute Control A.7.1 Adjust the Volume During a Call Depending on the Bluetooth headset it might be possible to adjust the volume on the headset . On the handset, press to increase the volume and to decrease the volume in the headset.
- Page 102 User Manual TD 92644EN Ascom d81 DECT Handset A.12.2 Operation Area Maximum distance between the headset and the handset is 10 metres. The communication distance between the handset and headset may vary considerably due to the environment and disturbances from other 2.45 GHz equipment. Different headsets can also give different communication distances.
- Page 103 User Manual TD 92644EN Ascom d81 DECT Handset A.14 Trouble Shooting Problem Reason Solution No headset found Headset is turned off Turn on headset Headset is out of battery Charge headset Move headset closer to handset Headset is out of range <...
-
Page 104: Appendix B: Bluetooth Barcode Reader
Bluetooth Barcode Readers A number of Bluetooth barcode readers for different work situations have been tested together with the handset. Refer to the Ascom Wireless Extranet Website for a list of verified Bluetooth barcode readers. Since the Bluetooth supports the Bluetooth 2.0 standard, other Bluetooth barcode reader may also work although not verified by Ascom. - Page 105 User Manual TD 92644EN Ascom d81 DECT Handset When the Bluetooth barcode reader is found it is displayed in the Barcode reader found list. Press the softkey "Select" on the handset to select the Bluetooth barcode reader. The pairing starts.
- Page 106 User Manual TD 92644EN Ascom d81 DECT Handset When the information is received, the handset sends it immediately to a predefined destination. A Message sent dialog window appears in the handset, and the barcode reader gives a beep to confirm that the message has been sent.
- Page 107 User Manual TD 92644EN Ascom d81 DECT Handset Troubleshooting Problem Reason Solution No barcode reader found Barcode reader is turned Turn on barcode reader Barcode reader is out of Charge barcode reader battery Barcode reader is out of Move barcode reader closer to handset ...
-
Page 108: Appendix C: Display Call Information From Cisco Systems
Ascom d81 DECT Handset Appendix C: Display Call Information from Cisco Systems NOTE: This feature requires Ascom IP-DECT 5.1.2 or later. The handset can display call information received from a Cisco system. The call information to be displayed is system dependent and is indicated by a dialog window and a short beep in the handset. -
Page 109: Related Documents
TD 92644EN Ascom d81 DECT Handset Related Documents Data Sheet, Ascom d81 DECT Handset, Messenger, TD 92643EN Data Sheet, Ascom d81 DECT Handset, Protector, TD 92711EN Configuration Manual, Ascom d81 DECT Handset, TD 92674EN Quick Reference Guide, Ascom d81 DECT Handset, TD 92667EN Function Description, Product Licensing Overview, TD 92677GB Installation and Operation Manual, ... -
Page 110: Document History
User Manual TD 92644EN Ascom d81 DECT Handset Document History For details in the latest version, see change bars in the document. Version Date Description 19 march 2010 First released version 20 December 2010 See change bars in the document.
Need help?
Do you have a question about the d81 and is the answer not in the manual?
Questions and answers