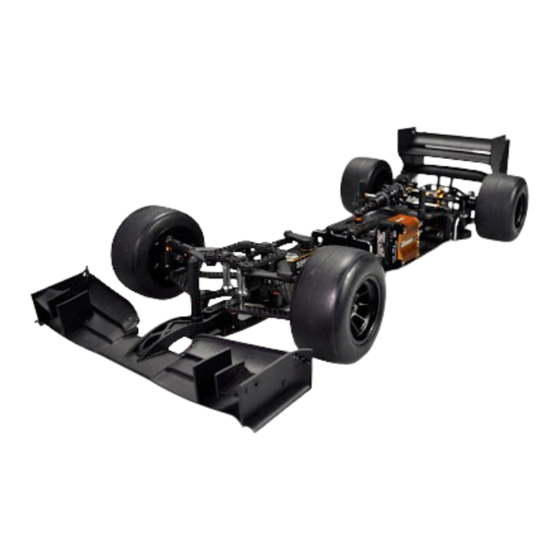
Serpent F110 Instruction Manual & Reference Manual
Hide thumbs
Also See for F110:
- Instruction manual & reference manual (22 pages) ,
- Update manual (7 pages) ,
- Build manual (26 pages)
Table of Contents
Advertisement
Quick Links
Advertisement
Table of Contents

Subscribe to Our Youtube Channel
Summary of Contents for Serpent F110
- Page 1 INSTRUCTION MANUAL & REFERENCE GUIDE...
-
Page 2: Read This First
Following the instructions will result in a well-built, Serpent has made a strong effort to make this scale F1 car with the F110, which like all our previous - Follow the manufacturer’s instruction in case you experience irritation high-performance race-car that will soon be able to manual as complete and clear as possible. -
Page 3: Using The Manual
USING THE MANUAL Each step contains a variety of numbers, lines, and symbols. The numbers represent the order in which the parts should be assembled. The lines and symbols are described below. Step number; the order in which you should SECTION A: assemble the indicated parts Length after assembly... - Page 4 CA Glue To prevent the risk of the carbon fibre splitting in the event of a crash you should apply CA Glue around the chassis’ edge and the power pod plate external and internal edge Nylock Nut M3 Low Alu as shown in red below.
- Page 5 Nylock nut M3 NOT INCLUDeD NOTE: It is needed to remove the servo 3x6x0.5 holes of the bottom part of the servo before going onto the step 4.4. Nylock nut M3 Use the following servo saver insert with this brand of servos: 3x6x0.5 23 - Sanwa / KO / JR 24 - Hitec...
- Page 6 Assemble the pivot-ball in the inner hole 20 mm of the steeringblock as default setup. M3x3 Steeringblock assembly detail view M3x6 10.5 mm Page Page M3x6...
- Page 7 13 mm 15 mm Nylock nut M3 Trackrod M3x23 Trackrod M3x26 M3x8 Detail view Approx. 30 mm M2.2x6 M3x6 M3x10 M3x10 Do not fully tighten these screws Page Page yet; fully tighten in step A12...
- Page 8 M3x6 M3x6 3x6x0.5 M3x6 Nylock nut M3 M3x5 M3x6 M3x6 M3x6 M3x6 3x6x6 M3x16 M3x16 Page Page M3x6...
- Page 9 M2x6 Adjust movement and play with these screws M2x6 3x5x2 3x5x2 M3x6 Tighten these screws after assembling M3x5 M3x6 links (see step 8) Page Page...
- Page 10 Configuration for 2S Standard Lipo Configuration for 2S Shorty Lipo M3x6 M3x6 M2.5X5 M2.5X5 M3x8 M3x6 M3x6 M3x6 M3x6 M2.5X5 M2.5X5 M2.5X5 M3x8 Note: see also pages 25-27 Note: see also pages 25-27 Page Page M2.5X5 M3x6 M3x6 M3x6...
- Page 11 15.1 Fill the tube with heavy silicon oil (15000 cst) M3x6 M3x10 M3x10 15.2 M3x6 Detail view side spring Page Page...
- Page 12 Note insert orientation. Assemble Note Spring washer as basic setup for rubber tyres 0/20 orientation. insert. 1/4x3/8 Flanged 1/4x3/8 M3X3 HOW TO ADJUST THE BALL-DIFF: In order to tighten or loosen the ball-diff, you should follow the next two steps: Push a pin or a 6.5x8x0.25 1/4x3/8...
- Page 13 Electronics position with standard 2S Lipo M3X6 Tip: Use double sided tape to mount the ESC and RX to the sideplates. M3X5 M3X6 Note position of the shock INCLUDeD M2.5X8 ball joint (basic setup) INCLUDeD Note: When using a 2S Standard Lipo M3X6 Receiver-RX installed...
- Page 14 Electronics position with Shorty 2S Lipo Electronics configuration for using 2S STANDARD Lipo Batteries Tip: Use double sided tape to mount the ESC and RX to the chassisplate. Note: When using a Shorty 2S Lipo install ESC and RX as shown. (Page 25 shows Standard 2S Lipo set- INCLUDeD...
- Page 15 RCM SHOCK ASSEMBLY 20.1 20.2 20.3 2.5x6x0.5 Check the default set-up Nut M2.5 sheet for the correct piston to use Use some Locktite to Use some silicone oil Use some silicone oil during assembly fix the nut during assembly 20.4 20.5 20.6 Assemble the...
- Page 16 M2X4 M3X3 M2X4 M2X4 M3X6 M2X4 M3X6 Pinion is NOT M4X14 INCLUDeD in the kit. Assemble the Page Page proper pinion for M3X8 your set-up...
-
Page 17: Section B: Reference Guide
SECTION B: Body, wheels and tyres are NOT included REFERENCE GUIDE M3x4 Nylock Nut M4 5x8x0.3 5x10x4 5x8x0.1 Page Nylock nut M4... -
Page 18: Front Assembly
FRONT ASSEMBLY REAR ASSEMBLY 411253 110428 1650 110415 110122 411074 110154 411072 110124 110415 411288 411295 401057 110122 411253 110108 110108 411286 110108 411063 411295 411285 401582 110402 411048 110108 110108 411253 110116 411304 411299 110402 411286 110402 110415 110132 411202 110108 411231... -
Page 19: Ball Diff Assembly
BALL DIFF ASSEMBLY FINAL ASSEMBLY 110182 411309 411007 411186 See parts list 411075 411069 160105 411186 411294 411290 1650 110108 411251 411249 110116 411075 411306 110136 411197 411166 110128 411287 411298 411070 110122 411293 110116 SHOCK ABSORBER ASSEMBLY 411070 411301 110124 160111 110122... -
Page 20: Parts List
411220 Front spring 26lbs S120L (2) 411304 Pod bulkhead right F110 411311 Decal b/w F110 (2) Optional 411307 Rear pod support plate carbon F110 CeNTRAL ASSemBLy 160109 Shock RCM bushing machined (8) 411312 Rear wing F110 white fRONT SUSPeNSION 160115... - Page 21 120111 Motor-pinion alu hard 64P / 24T 110115 Setscrew allen m3x4 (10) 110151 Screw allen cilinderhead M4x10 (10) 110202 Pin 5x5 (10) 120112 Motor-pinion alu hard 64P / 25T 110116 Setscrew allen m3x3 (10) 110152 Screw allen cilinderhead M3x8 (10) 110203 Pin 3x14 (10) 120113...
- Page 22 110413 Shim 3.5X12X0.2 (10) 190204 Hoody sweater Serpent black-zip (XL) 190532 Nut driver 5.5 x 100mm 1891 Serpent medium promo decal 20x12.5 (2) 110414 Shim 3X6X0.1 (10) 190205 Hoody sweater Serpent black-zip (2XL) 190533 Nut driver 7.0 x 100mm 1892 Serpent windowshop decal 20x12.5 (2 sided)
- Page 23 - info@serpent.com...


Need help?
Do you have a question about the F110 and is the answer not in the manual?
Questions and answers