Table of Contents
Advertisement
Quick Links
Download this manual
See also:
Reference Manual
Advertisement
Chapters
Table of Contents

Related Manuals for Serpent 9*50r


Summary of Contents for Serpent 9*50r
-
Page 2: Table Of Contents
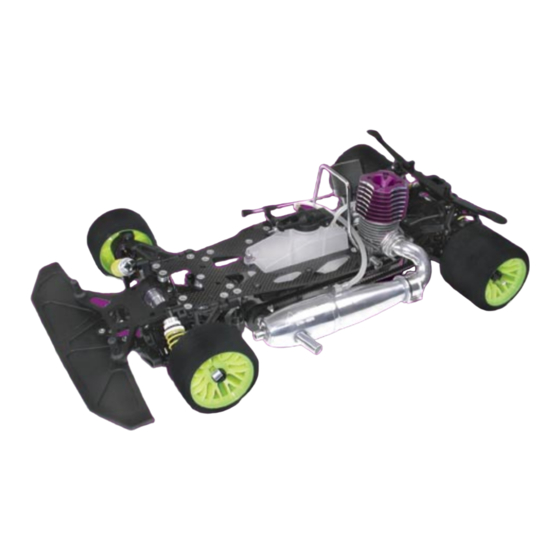
As part of the worldwide The Set-up Guidelines in Section 9 of this instruc- team of Serpent drivers, you will also get superior tion manual will help you to adjust your Serpent technical support. Serpent has a tradition of excel- 950R. - Page 3 Glue one item to another. Press/Insert one item into another. Connect one item to another. Gap between two items. Apply graphite grease (GR), threadlock (TL) or Serpent’s One-way Lube (OW). (items not included). myTSN.com The printed instruction manual included with your...
-
Page 4: Shock Assembly
1.0 Shock Assembly Step 1.1 Bag 01 3x6x0.3mm 1.9mm 2.3mm 12.1x1.6mm... - Page 5 3x1.5mm...
-
Page 7: Front Assembly
2.0 Front Assembly Step 2.1 10.3x1.8mm 12x18mm Step 2.2 M4x10mm... - Page 8 Step 2.3 M4x10mm M3x8mm 1.2mm Step 2.4 3.5x13mm 6x13mm...
-
Page 9: 3X6Mm
Step 2.5 4x4mm Step 2.6 M4x10mm Step 2.7 3x6mm 4x4mm... -
Page 10: 3X20Mm
Step 2.8 3x20mm 4x6mm Step 2.9 Step 2.10 3x6mm 2.5x22mm 12x21... - Page 11 Step 2.11 Step 2.12...
-
Page 12: Rear Assembly
3.0 Rear Assembly M4x10mm 2.5x22mm 3x16mm 6x15mm Roughen the metal plates with sandpaper before gluing 12x21mm 3.5x13mm M4x10mm 4x4mm 3x12mm 6x15mm... - Page 13 3.5x13mm 3x8mm M4x10mm 3x12mm 4x10mm 4x20mm 4x4mm 1.3mm 3x8mm 3.2x9x0.1mm 47.5mm...
- Page 15 Step 3.7 Bag 20 3x6mm 3x20mm 3x8mm 11 3 Step 3.8 Bag 21 3x12mm 3x16mm 2.3mm...
-
Page 16: Radio Plate Assembly
4.0 Radio Plate Assembly Step 4.1 22,23,24 2.5x8mm Step 4.2 Bag 25 The number on the servo arm corresponds to the number of teeth. 23 - Sanwa / KO / JR 24 - Hitec 25 - Futaba 3x8mm... - Page 17 Step 4.3 3x14mm M4x10mm Step 4.4 3x12mm Securely attach receiver to mounting plate. Step 4.5 Bag 26 Note. For clockwise circuits with mostly right hand corners the fuel tank lid nip- ple should be placed on the right side of 3x8mm the lid and the grubscrew on the opposite side.
-
Page 18: Radio Plate Mounting
Step 5.1 Bag 27 M4x10mm Securely attach a AAA 5-cell receiver battery pack to the battery tray. Note: Serpent offers the pre-built 5-Cell battery set (#902126) for the Serpent 950R. For more information, see the appropriate product page on myTSN.com Step 5.2... - Page 19 Step 5.3 4x6mm Step 5.4 Bag 28 Alternative: Serpent offers the #902160 Push-Rod Front Suspension Set as an alternative suspension system for the 950R. For more information, see the appropriate product page on myTSN.com.
- Page 20 Step 5.5 M4x10mm Step 5.6 3x13.8mm M4x10mm 3.5x13mm...
-
Page 21: Gearbox Assembly
6.0 Gearbox Assembly 3x12mm M3x6mm... - Page 22 M3x6mm 6x13mm 6x10mm 3x13.8mm...
-
Page 23: Centax Assembly
7.0 Centax Assembly 7x13x0.5mm... - Page 24 3x16mm...
- Page 25 5x10x0.1mm 5x10x0.3mm 5x10mm 5x13mm...
-
Page 26: Final Assembly
8.0 Final Assembly Step 8.1 Bag 33 3x12mm M5x12mm Step 8.2 Bag 34 3x16mm M4x10mm Orientation of belt tensioner bearings... - Page 27 Step 8.3 Bag 35 3x4mm Step 8.4 Bag 36 3x8mm 3x4mm Proper position of brake linkage arm...
- Page 28 Step 8.5 Step 8.6...
-
Page 29: Set-Up Guidelines
9.0 Set-up Guidelines Setting up a racecar with fully independent suspension, like your Serpent 950R, is front track-width, turn IN both pivotballs equally. necessary to make the car perform well. We have developed these straight-forward Make sure you make equal adjustments for each side or the track-width will not be procedures to help you set up your car properly and easily. - Page 30 Positive The Serpent 950R has an adjustable wheelbase so that you can change the dis- camber means that the top of the wheel is leaning outwards from the centerline of tance between the front and rear wheel axles.
- Page 31 lower traction conditions, while short wheelbases are typically used in higher trac- tion conditions to get more initial steering going into the corner. Measuring wheelbase Wheelbase is measured from its longest position (=0) to its shortest position (=-4mm). The wheel- base can be changed in 1mm increments.
- Page 32 www.myTSN.com/Serpent950R #902193 - Version 1...
Need help?
Do you have a question about the 9*50r and is the answer not in the manual?
Questions and answers