
Related Manuals for COMAC INNOVA 2011


Summary of Contents for COMAC INNOVA 2011
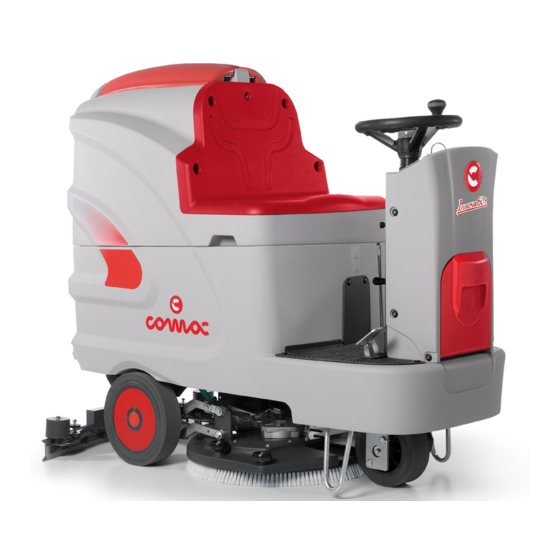
- Page 1 USE AND MAINTENANCE MANUAL INNOVA 2011 60-65-75-85 B 70 S ED. 06-2012 ORIGINAL INSTRUCTIONS Doc. 10029401 Ver.
- Page 2 The descriptions contained in this document are not binding. The company therefore reserves the right to make any modifications at any time to elements, details, or accessory supply, as considered necessary for reasons of improvement or manufacturing/commercial requirements. The reproduction, even partial, of the text and drawings contained in this document is prohibited by law.
-
Page 3: Table Of Contents
4. INSTRUMENT PANEL COMPONENTS (INNOVA 2011 60 B VERSIONS) ........................10 5. INSTRUMENT PANEL COMPONENTS (INNOVA 2011 65 -75-85 B INNOVA 2011 70 S) ....................11 6. INSTRUMENT PANEL COMPONENTS (INNOVA 2011 60 B VERSIONS) ........................11 ... - Page 4 69. THE BRUSHES MOTOR DOES NOT FUNCTION (INNOVA 2011 60 B VERSIONS) ....................39 70. THE BRUSHES MOTOR DOES NOT FUNCTION (INNOVA 2011 65 -75-85 B VERSIONS) ..................39 71. IT IS IMPOSSIBLE TO RAISE OR LOWER THE BRUSH HEAD OR SQUEEGEE ......................39 ...
-
Page 5: On Consignment Of The Machine
Introductory comment INNOVA 2011 is a scrubbing machine that is able to clean a wide variety of types of flooring and types of dirt by using the mechanical action of two disc or cylindrical brushes, depending on the model, and the chemical action of a water-detergent solution. -
Page 6: Technical Description
TECHNICAL DESCRIPTION 60 B 65 B 75 B 85 B 70 S Working width Squeegee width 1085 Work capacity, up to 3660 3900 4500 5100 4100 Disc brush Nr / mm 1 / 610 2 / 340 2 / 390 2 / 430 Nr / ... -
Page 7: Symbols Used On The Machine
SYMBOLS USED ON THE MACHINE Main switch symbol (key switch) Used on the instrument panel, to indicate the key switch for machine operation on (I) or off (O) Indicator showing battery charge level on the upper line and hour-counter on the lower line Indicator showing the type of hour-counter (total) on the upper line and the type of service (none) on the lower line Indicator showing the type of technology of the batteries used (lead) Brush head / squeegee motion symbol (idle position) - Page 8 SYMBOLS USED ON THE MACHINE Symbol denoting acoustic alarm Used to indicate the acoustic alarm button Water quantity adjustment symbol Used on the steering column to indicate the knobs for adjusting the quantity of water distributed on the brushes Symbol denoting pressure applied to the brushes Used to indicate the pedal to increase the pressure on the brushes Indicates the maximum gradient Parking brake symbol...
-
Page 9: General Safety Regulations
When your COMAC machine has reached the end of its long working life, dispose of the materials it contains (especially oils, batteries and electronic components) in an appropriate manner, and bearing in mind that the machine itself was constructed using 100% recyclable materials. -
Page 10: Machine Preparation
Check that the key switch is on OFF and remove the key Engage the parking brake Secure the machine to the pallet using wooden wedges 4. INSTRUMENT PANEL COMPONENTS (INNOVA 2011 60 B VERSIONS) The instrument panel components are identified as follows: Battery level / hour-counter display Battery level hour-counter display command button Main key switch. -
Page 11: Instrument Panel Components (Innova 2011 65 -75-85 B Innova 2011 70 S)
MACHINE PREPARATION 5. INSTRUMENT PANEL COMPONENTS (INNOVA 2011 65 -75-85 B INNOVA 2011 70 S) The instrument panel components are identified as follows: Water outlet regulation switch (CDS versions) Detergent outlet regulation switch (CDS versions) Working program adjustment switch, I-Drive device... -
Page 12: Footboard Front-Left Components
10. FOOTBOARD REAR COMPONENTS The components at the rear of the footboard are identified as follows: 22. The brush head extra-pressure pedal is present on the Innova 2011 65-75-85 B versions only (see paragraph BRUSH HEAD EXTRA-PRESSURE) 23. Water level pipe (versions with CDS) or solution level pipe (versions without CDS) 11. -
Page 13: Machine's Rear Components
MACHINE PREPARATION 12. MACHINE'S REAR COMPONENTS The rear components of the machine are identified as follows: 27. Recovery tank discharge cap 13. TYPE OF BATTERY To power the machine it is necessary to use: liquidelectrolyte lead traction batteries; sealed traction batteries with gasrecombination or gel technology. OTHER TYPES MUST NOT BE USED. -
Page 14: Battery Connection And Battery Connectors
3. Connect the battery connector (1) to the machine connector (2). ATTENTION: you are advised to have the electric connections made by a qualified, COMAC-trained technician ATTENTION: you are advised to always wear protective gloves, to avoid the risk of serious injury to your hands 17. -
Page 15: Battery Charger Connection (Versions With Cb)
MACHINE PREPARATION To connect the batteries you must: 1. Make sure the recovery tank is empty, otherwise empty it completely 2. Make sure that the key switch is in the “OFF” position 3. Move the machine near to the battery charger 4. - Page 16 MACHINE PREPARATION To connect the batteries you must: 1. Make sure the recovery tank is empty, otherwise empty it completely 2. Make sure that the key switch in the “0” position 3. Move the machine near to the battery charger 4.
-
Page 17: Battery Charge Level Indicator
Make sure the recovery tank is empty, otherwise empty it completely. Check the cap of the drainage tube (10) (on the rear of the machine) is correctly closed. 23. SOLUTION TANK (INNOVA 2011 60-65-75-85 B) The recovery tank must be completely empty each time the solution tank is filled. -
Page 18: Solution Tank (70S Versions)
MACHINE PREPARATION 24. SOLUTION TANK (70S VERSIONS) The recovery tank must be completely empty each time the solution tank is filled. Remove the front inlet cap and check the solution filter is correctly fitted. Check that the solution tank discharge cap (1), under the solution tank in the front left of the machine, is properly closed. -
Page 19: Detergent Solution (Versions With Cds)
MACHINE PREPARATION 27. DETERGENT SOLUTION (VERSIONS WITH CDS) Remove the filler cap and check the solution filter (1) is correctly assembled. Check that the filter cap, under the solution tank in the front right of the machine, is properly closed Fill it with clean water at a temperature not exceeding 50C. -
Page 20: Detergent Adjustment (Versions Without Cds)
To avoid any tampering with the set regulation, you can remove the two switches and cover the two holes with the plastic caps supplied with the machine. To resolve any malfunctioning of the CDS system, contact the COMAC assistance centre. WARNING: By positioning the tap lever in this way the CDS dosing system is excluded and the detergent solution is deposited on the brushes. -
Page 21: Detergent Pump Priming (Versions With Cds)
MACHINE PREPARATION 30. DETERGENT PUMP PRIMING (VERSIONS WITH CDS) Before starting work the detergent pump must be primed, to do so proceed as follows: 1. Check that the main switch is in the “Off – 0” position 2. Check that the battery connector is disconnected from the machine connector 3. -
Page 22: Squeegee Assembly (Innova 2011 60 B Versions)
Then re-tighten the handwheel to block the squeegee in place. Insert the squeegee tube in the appropriate sleeve (4). 32. SQUEEGEE ASSEMBLY (INNOVA 2011 65 -75-85 B INNOVA 2011 70 S) For packaging reasons, the squeegee is supplied disassembled from the machine, and must be assembled as shown in the figure. -
Page 23: Brush Head Casing Assembly (Innova 2011 65-75-85 B Versions)
ATTENTION: you are advised to always wear protective gloves, to avoid the risk of serious injury to your hands 36. BRUSH HEAD CASING ASSEMBLY (INNOVA 2011 65-75-85 B VERSIONS) The casing of the brushing base that for reasons of packaging are supplied disassembled from the machine, must be mounted as shown. -
Page 24: Cylindrical Brush Assembly (Innova 2011 70 S)
39. BRUSH HEAD EXTRA-PRESSURE (INNOVA 2011 65-75-85 B VERSIONS) The pressure on the brushes can be increased by pressing pedal (8) located under the seat. Simply release the pedal to return to the initial condition. -
Page 25: Service Brake And Parking Brake
To check the quantity of water in the solution tank there is a suitable level indicator pipe (5) placed in front of the driver seat. 43. KIT WATER MANAGEMENT (INNOVA 2011 60 B VERSIONS) If you want to increase the working capacity of the machine, you can replace the detergent solution choke bushing on the solenoid valve (optional) with the more suitable one included in the water management kit. -
Page 26: Work
The flashing “:” symbol indicates that the hour-counter is counting the machine functioning time. 10. For Innova 2011 65-75-85 B versions, select the desired working program with the I-Drive device: Transfer: movement of the machine without working... -
Page 27: Overflow Device (Innova2011 60 B)
(4) and detergent (5). See paragraph “DETERGENT ADJUSTMENT WITH CDS SYSTEM”. 13. For Innova 2011 60 B versions, lower the brush head by turning the righthand lever (4) clockwise, then lower the squeegee by turning the lefthand lever (5) counter-clockwise. -
Page 28: At The End Of The Work
For Innova 2011 60 B versions, Raise the brush head by turning the right-hand lever (2) anticlockwise. Then raise the squeegee by turning the left-hand lever (3) clockwise. After about 15-25 seconds, switch off the suction motor by making a 1/4 turn of the key, anticlockwise. -
Page 29: Daily Maintenance
DAILY MAINTENANCE PERFORM ALL MAINTENANCE OPERATIONS IN SEQUENCE 47. CLEANING THE RECOVERY TANK Disconnect the tube (1) from its seat, unscrew the drainage cap and empty the recovery tank. ATTENTION: Before performing any maintenance, remove the keys from the panel and disconnect the battery connector of the machine. WARNING: this operation must be carried out wearing gloves to protect against contact with dangerous solutions. -
Page 30: Cleaning The Squeegee
DAILY MAINTENANCE 49. CLEANING THE SQUEEGEE The careful cleaning of the whole suction group ensures better drying and cleaning of the floor as well as greater duration of the suction motor. Proceed as follows for cleaning: Slide the suction tube (1) from the squeegee sleeve. Remove the squeegee (2) from the support arm by unscrewing the handwheel (3). -
Page 31: Cleaning The Filter And Solution Tank (S Version)
ATTENTION: These operations must be carried out using gloves to protect against contact with dangerous solutions 52. DISC BRUSH ASSEMBLY (INNOVA 2011 60 B VERSIONS) 1. Raise the brush head by turning the righthand lever (1) for the counter-clockwise movement of the brush head. -
Page 32: Disassembly Of Cylindrical Brushes (S Versions)
DAILY MAINTENANCE WARNING: Before performing any maintenance, remove the keys from the panel and disconnect the battery connector of the machine. WARNING: This operation must be carried out using gloves to protect against contact with dangerous solutions. You are advised to invert the right and left-hand brushes every day. If the brushes are not new however, and have deformed bristles, it is better to reassemble them in the same position (the right-hand one on the right, and the left-hand one on the left), to prevent the different inclination of the bristles producing an overload on the brush motor as well as excessive vibrations. - Page 33 DAILY MAINTENANCE WARNING: Before performing any maintenance, remove the keys from the panel and disconnect the battery connector of the machine. WARNING: This operation must be carried out using gloves to protect against contact with dangerous solutions. 4. Disconnect the hopper suction hose (1) 5.
-
Page 34: Weekly Maintenance
WEEKLY MAINTENANCE 56. CLEANING OF THE SUCTION HOSE (INNOVA 2011 60 B VERSIONS) Whenever suction seems to be unsatisfactory, check that the suction tube (1) is not obstructed. If necessary clean with a jet of water as follows: 1. Make sure the recovery tank is empty, otherwise empty it 2. -
Page 35: Cleaning Of The Suction Hose (S Versions)
WEEKLY MAINTENANCE WARNING: Before performing any maintenance, remove the keys from the panel and disconnect the battery connector of the machine. WARNING: This operation must be carried out using gloves to protect against contact with dangerous solutions. 58. CLEANING OF THE SUCTION HOSE (S VERSIONS) Whenever suction seems to be unsatisfactory, check that the suction tube (1) is not obstructed. -
Page 36: Extraordinary Maintenance
EXTRAORDINARY MAINTENANCE 60. REPLACING THE FRONT SQUEEGEE RUBBER Suction will be poor and the machine will not dry perfectly if the front squeegee rubber is worn. Proceed as follows to replace: Turn the key to the “OFF/0” position and remove it from the electrical board. Remove the squeegee from the support arm by unscrewing the handwheel. - Page 37 EXTRAORDINARY MAINTENANCE 6. Unscrew the detergent tank cap and fill the tank with clean water 7. Close the lid of the detergent tank, taking care that the suction filter is positioned at the bottom of the tank. Reposition it in the tank compartment 8.
-
Page 38: Troubleshooting
Check that the tap (3) is turned on for versions without CDS. Clean the solution filter located at the front of the machine. Check if the choke bushing is not blocked for the Innova 2011 60 B versions with “KIT WATER MANAGEMENT”... -
Page 39: The Suction Does Not Function
4. Check the correct connection of the motor to the terminal under the footboards. 70. THE BRUSHES MOTOR DOES NOT FUNCTION (INNOVA 2011 65 -75-85 B VERSIONS) ATTENTION To avoid damaging the floor, the motor only starts up when the machine is moved forwards 1. -
Page 40: The Automatic Water/Detergent Dosing System Does Not Work
TROUBLESHOOTING 74. THE AUTOMATIC WATER/DETERGENT DOSING SYSTEM DOES NOT WORK The automatic water/detergent dosing system has been designed with criteria of extreme sturdiness and reliability, but there is a special by-pass system that allows you to use the machine even if the system is out-of-use. -
Page 41: Disposal
DISPOSAL To dispose of the machine, take it to a demolition centre or an authorised collection centre. Before scrapping the machine it is necessary to remove and separate the following materials and send them to the appropriate collection centres in accordance with the environmental hygiene regulations currently in force: ... -
Page 42: Choosing And Using The Brushes
CHOOSING AND USING THE BRUSHES POLYPROPYLENE BRUSH (PPL) Used on all types of floors. Good resistance to wear and tear, and hot water (no greater than 60°C). The Polypropylene brush is non-hygroscopic and therefore retains its characteristics even when working in wet conditions. NYLON BRUSH Used on all types of floors. -
Page 43: Ec Declaration Of Conformity
37059 Santa Maria di Zevio (VR) declares under its sole responsibility that the product SCRUBBING MACHINES mod. INNOVA 2011 60 B - INNOVA 2011 65 B - INNOVA 2011 75 B - INNOVA 2011 85 B complies with the requirements of the following Directives: ... -
Page 44: Ec Declaration Of Conformity
COMAC S.p.A. Via Maestri del Lavoro, 13 37059 Santa Maria di Zevio (VR) declares under its sole responsibility that the product SCRUBBING MACHINES mod. INNOVA 2011 70 S comply with the requirements of the following Directives: 2006/42/EC: Machinery Directive ...
Need help?
Do you have a question about the INNOVA 2011 and is the answer not in the manual?
Questions and answers