
Related Manuals for COMAC ABILA 42


Summary of Contents for COMAC ABILA 42
- Page 1 ..pag. 3 ..” 23 ..” 43 ..” 63 ..” 83 ABILA 42-52 07/2002 Codice 75124001...
-
Page 3: Table Of Contents
SUMMARY ON CONSIGNMENT OF THE MACHINE ....................... 24 FOREWORD ............................. 24 TECHNICAL DESCRIPTION ........................24 SYMBOLOGY USED ON THE MACHINE ...................... 25 SYMBOLOGY USED IN THE MANUAL ......................26 MACHINE PREPARATION ........................27 MOVING THE PACKED MACHINE ...................................27 HOW TO UNPACK THE MACHINE...................................27 INSTALLING THE BATTERY....................................28 CONNECTING THE BATTERY CHARGER.................................28 BATTERY RECHARGING....................................29... -
Page 4: On Consignment Of The Machine
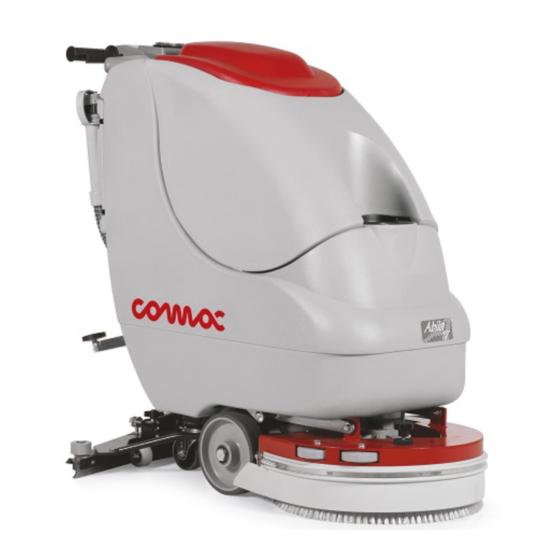
We therefore suggest you to read this instruction booklet carefully and re-read it whenever difficulties arise in the course of machine use. Our Service Department is at your disposal for all such advice and servicing as may prove necessary. ABILA 42 ABILA 52 TECHNICAL DESCRIPTION Cleaning width... -
Page 5: Symbology Used On The Machine
SYMBOLOGY USED ON THE MACHINE Cock symbol Indicates the cock lever Indicates the cock open signal lamp Squeegee base lift/lower symbol Indicates the base lift lever Brush symbol Indicates the brush motor switch Suction motor symbol Indicates the suction motor switch Squeegee lift/lower symbol Indicates the squeegee lift lever Battery charge level symbol... -
Page 6: Symbology Used In The Manual
SYMBOLOGY USED ON THE MACHINE Open book symbol Indicates to the operator to read the manual before using the machine. SYMBOLOGY USED IN THE MANUAL Warning symbol Carefully read the sections marked with this symbol, for the security of both the operator and the machine. -
Page 7: Machine Preparation
The machine is contained in specific packing with a platform so that a forklift can move it. No more than two packing crates can be stacked on each other The total weight is : -Abila 42: 136 Kg -Abila 52: 138 Kg Packing dimensions are the following:... -
Page 8: Installing The Battery
MACHINE PREPARATION INSTALLING THE BATTERY Battery must be housed in the battery compartment below the recovery tank, and must be handled using special hoisting equipment with suitable grasping systems and designed to support the battery weight. The battery must also conform to the requirements given in CEI 21-5 standards. WARNING! Strictly comply with all the instructions given by the battery manufacturer or retailer regarding battery maintenance and daily recharging. -
Page 9: Battery Recharging
MACHINE PREPARATION BATTERY RECHARGING Make sure that the battery charger is suitable to the installed battery, both in capacity and in type (lead/acid or GEL and equivalent). WARNING! Never charge a GEL battery with an unsuitable battery charger. Strictly follow the instructions provided by the battery and battery charger manufacturer. -
Page 10: Battery Charge Level Gauge
MACHINE PREPARATION BATTERY CHARGE LEVEL GAUGE The batteries’ indicator is digital with 4 fixed positions and a blinking one. The numbers, which appear on the display, show the approximate charge level. 4 = maximum charge, 3 = charge 3/4, 2 = charge 2/4, 1 = charge 1/4, 0 = (blinking) discharged batteries) WARNING! Some seconds after that “0”... -
Page 11: Installing The Splash-Guard
MACHINE PREPARATION INSTALLING THE SPLASH-GUARD The splashguard is supplied separately from the machine, for packing reasons, and is to be installed as shown in the picture. INSTALLING THE BRUSH Lift the brush base by acting on the pedal. Keeping the base lifted, thread the brushes on their seat on the hole under the base, turning them until the three buttons enter the holes in the plate. -
Page 12: Recovery Tank
MACHINE PREPARATION RECOVERY TANK Open the lid and check that plug (2) is properly anchored (it must not pull out when it is lifted, otherwise turn it clockwise), and that suction tube (1) is inserted in its seat, in the back of the machine, and closed. -
Page 13: General Security Rules
Carry off consumption materials according to the laws in force r When, after years of precious work your COMAC machine will be ready to be “pensioned”, organise the carrying off of its composing materials, in particular oils, batteries and electronics components. Please remember that the machine has been... -
Page 14: Work
WORK WORK PREPARATION Connect the connector (1) to the battery. Press the brush switch (2) Press the suction switch (3) Act on the cock lever (4) to adjust the detergent solution quantity: it should be enough to regularly wet the floor but not as much as to flow out the splashguard. Please not the right solution quantity depends on floor type, on dirt importance and on speed. -
Page 15: Overflow Device
WORK OVERFLOW DEVICE The machine is supplied with float that trips whenever the recovery tank is full, closing the suction tube. In this case you should empty the recovery tank by removing the outlet pipe cap. WARNING! Always wear gloves during this procedure, to avoid any contact with dangerous substances. -
Page 16: Upon Completion Of Work
UPON COMPLETION OF WORK At the end of the work, and before performing any type of maintenance: Close the cock by lever (1). Raise base by pedal. Raise squeegee by lever (2) Turn off the brush switch (3). Turn off suction motor switch (4). WARNING! If after having switched off the brush switch (3) the display of the battery indicator remains on, this means that, the solution cock is open. -
Page 17: Daily Maintenance
DAILY MAINTENANCE RECOVERY TANK CLEANING Hold the recovery tank outlet pipe. Remove the outlet cap and empty the tank. WARNING! Always wear gloves during this procedure, to avoid any contact with dangerous substances. Lift the recovery tank lid. Remove the suction cap (1) turning it anticlockwise. Remove the filter and its protection. -
Page 18: Rear Squeegee Rubbers Replacement
DAILY MAINTENANCE REAR SQUEEGEE RUBBERS REPLACEMENT Check the squeegee rubbers wear and replace them if necessary. Proceed as follows Unthread the squeegee pipe from sleeve. Remove the pin from column. Remove the squeegee from its support. Loosen the wing nuts (1) blocking the rubber blades and take them off. Replace the rubbers To reassemble the squeegee repeat the above-mentioned operations. -
Page 19: Weekly Maintenance
WEEKLY MAINTENANCE SQUEEGEE PIPE CLEANING Weekly, or whenever the suction in insufficient, it is necessary to check that the squeegee pipe is not obstructed. Should it be the case, proceed as follows to clean it: Unthread the pipe from the squeegee sleeve. Unthread the other end from the recovery tank. -
Page 20: Working Control
WORKING CONTROL INSUFFICIENT WATER TO THE BRUSHES Check that the cock (1) is open. Check that there is water in the solution tank. THE MACHINE DOES NOT CLEAN PROPERLY Check the brushes wear and replace them if necessary (the brushes must be replaced when bristles are 15 mm high). -
Page 21: Choice And Use Of Brushes
LIST FOR THE CHOICE OF THE BRUSHES Machine Brushes N Code Bristles type Bristles ∅ ∅ ∅ ∅ Brush ∅ ∅ ∅ ∅ Remarks 66805020 66805050 ABILA 42 66805060 66805120 TYNEX 66705020 Pad holder 66808010 66808040 ABILA 52 66808020 66808030...
Need help?
Do you have a question about the ABILA 42 and is the answer not in the manual?
Questions and answers