DeDietrich GT 430 A Operating Instructions Manual
Hide thumbs
Also See for GT 430 A:
- Service manual (36 pages) ,
- Installation and service manual (40 pages)
Table of Contents
Advertisement
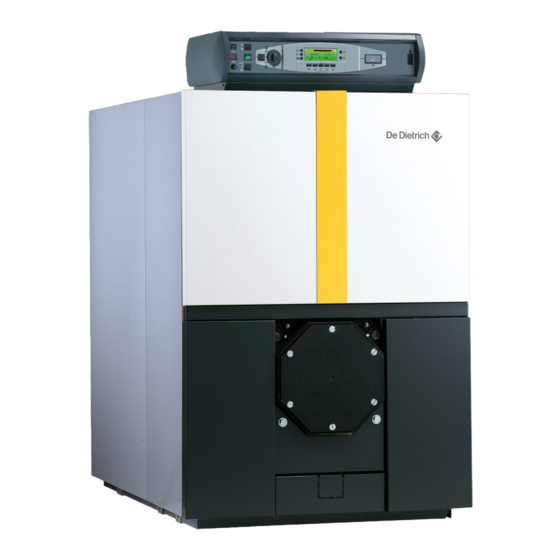
GT 430 A
Oil-Gas Fired Hot Water boiler
Installation and operating instructions
Warning:
Before putting the boiler into operation read this manual
carefully.
Warning:
The operating manual is part of the documentation that is
delivered to the installation's operator. Go through the
information in this manual with the owner/operator and
make sure that he or she is familiar with all the necessary
operating instructions.
82294154
Notice:
This manual must be retained for future reference. Improper
installation, adjustment, alteration, service or maintenance can
cause injury, loss of life or property damage. For assistance or
additional information consult a qualified installer, service agency
or the gas supplier.
English
11/20/09
11-20-09
Advertisement
Table of Contents

Related Manuals for DeDietrich GT 430 A


Summary of Contents for DeDietrich GT 430 A
-
Page 1: Installation And Operating Instructions
GT 430 A English Oil-Gas Fired Hot Water boiler 11/20/09 Installation and operating instructions Warning: Notice: This manual must be retained for future reference. Improper Before putting the boiler into operation read this manual installation, adjustment, alteration, service or maintenance can carefully. - Page 2 Guideline of Notices Safety Considerations Please observe the following safety instructions. Warning: indicates presence of hazards that can cause, if not Read this manual carefully. avoided, severe personal injury, death or substantial Correct in stallation and adjustment of the burner and the control property damage.
-
Page 3: Table Of Contents
Contents Contents ..................3 Regulations and guidelines . -
Page 4: Regulations And Guidelines
1 Boilers covered by this document The GT 430 A boilers are pressurized hot water heating boilers, The boiler is equipped with standard control panel. connected to a flue, fitted with an independent burner using domestic fuel oil or gas. - Page 5 GT 430A Series - Cast Iron Sectional Boiler Technical Specification Data Table Model Item Unit GT 430-8A GT 430-9A GT 430-10A GT 430-11A GT 430-12A GT 430-13A GT 430-14A Firing Sequence Consult Burner Technical Data 1,730 1,947 2,278 2,567 2,826 3,100 3,389 [CSA] - Gas Input...
-
Page 6: Main Dimensions
Main Dimensions GT 430 A ¿3 15/16 (1) 3” 150# weld neck flange (4) 3/4” NPT tapping for low water cutoff probe type (2) 1/2” NPT tapping for temp sensing well, etc… (5) 1/2” NPT tapping for combination pres/temp gauge (3) 2”... -
Page 7: Boiler Installation
Boiler Installation 1 Installation The GT 400 A boiler has a sturdy underframe, it does not need any special base although a housekeeping pad is recommended to keep steel parts out of casual water. It s furnace is closed, so it is not necessary to place it on a fireproof floor, but the floor must be able to bear the weight. -
Page 8: Assembly
2 Combustion Air Supply Boilers operating in atmospheres t hat contain fluorides or chlorides Note: Ensure boiler room is adequately ventilated and clear such as beauty shops and automotive repair garage s whe re air and free from combustible materials, gasoline and other conditioning services are performed or industrial applications that flammable vapours and liquids. - Page 9 Step one Front - Rear GT 430-8A - GT 430-10A - GT 430-12A - GT 430-14A GT 430-9A - GT 430-11A - GT 430-13A - Fit the 2 rear attachment brackets (in the body accessories pack) and attach them onto the framework using 2 bolts HM 12X25/25 + 4 washers L12 and 2 nuts HM 12.
- Page 10 Step three Clean the bores and nipples with a solvent. Handle the nipples with gloves, there might be sharp edges. Coat them with the lubricant supplied with the sections. Step four - Drive in the 2 nipples gently. 82294154 11-20-09...
- Page 11 Step five Assembling the sections A : thermocord Special intermediate section before rear section. Place the special intermed iate section, note fro nt back relationship with the sealing groove against the thermocord. For safety, insert an up per assembly rod ( body accessories pack) into the holes in the 2 sections.
- Page 12 Step six - Put the special assembly tool in place. - Tighten progressively so the upper and lower connectio ns come together equally at the same time. Step seven - Fit the remaining sections one by one in the order given, proceeding as per steps 3-4-5-6.
- Page 13 Step eight Installing the assembly rods and upper casing supports (1) Front - (2) Rear - (3) Top view - Install the upper assembly rods (body accessories pack) in the order given in the figure above. Place the expansion spring and its washer on each rod towards the rear.
- Page 14 Step nine Hydraulic test Any drop in pressure indicates a leakage in the boiler body. After assembling the boiler body, the installer must carry out a water tightness test at a pressure equal to 1.5 times the operating pressure (that is 137 PSI minimum - 113 PSI in Alberta) for 30 minutes at least.
- Page 15 Step ten Install the flue nozzle ( body accessories pack) using the 4 bolts HM 12 x 40 + 4 nuts H 12 and 4 washers on the flue outlet (pack CS20). Step eleven • Using a pipe wrench, install the 2 threaded rods (body accessory pack) M12 x 175 for the flue outlet.
- Page 16 Step twelve Install the lower (solid) and upper plugs with the thermo-wells (body accessory pack). Do not forget the hemp. Using a pipe wrench, put the 8 M 12 x 50 stu ds in place for the cleaning doors and the burner door and the 2 M 12 x 85 studs for the hinges of the sweeping doors.
- Page 17 Step fourteen Attach the hinge ( body accessories pack) on the burner door using the 3 bolts HM 12 x 30 + 3 washers L 12 (previously removed). Leave the 3 bolts HM12x30 and the 3 washers L12 on the burner door in place on the opposite side to the hinge.
- Page 18 Step sixteen Install the body insulation panels. Bear up the insulation by tying Install the lower casing supports (pack CS 428 to CS 434) on the each strap to the lower casing support at each side of the boiler. framework using 1 bolt HM 8 x 25 + lock washer for each support. Body insulation width "...
- Page 19 Step seventeen - Install the rear insulation (pack CS10). Step eighteen Pack CS 41 to CS 47 : Put the left and right cable ways in place, respecting the assembly sequence. Secure the cable ways (3 screws HM5x25 + serrated washers). Secure the front top panel (package CS10) with 4 screws...
- Page 20 Step nineteen : Control panel (1) Front - (2) Rear Position the control panel on the front bushes. Open the control panel (3 screws at the back). Step twenty : Standard control panel Attach the control panel at the rear, on the top panel using 2 self tapping screws dia.
-
Page 21: Piping
Piping 1 Dimensional information required Tapping dia. 1/2" Tapping dia. 1/2" Tapping dia. 2" ¯ 3" Tapping dia. 3/4" A pressure relief device must be installed, the the relief must be of the same capacity as the appliance it is installed. The relief valve must be installed to discharge hot water to the 45 1/4"... -
Page 22: Filling
3 Filling The boiler may be filled using the drain tap or water make-up system. Filling should be done at a slow flow rate in order to purge all the air contained in the system through air v ents installed at the system high points. -
Page 23: Contents
5 Boiler Venting 5. Boiler Venting & Chimney General Caution & Warning: It is advised and recommended that the heating contractor-professional apply vent materials that are approved and agency listed. Installation of any venting must follow all local codes in conjunction with vent manufacturer instructions and appliance manufacturer instructions. - Page 24 5 Boiler Venting 5.1 Boiler Venting – Category I & II Typical Layouts and Requirements. Caution & Warning: Improperly sealed venting system could result in carbon monoxide [CO] poisoning; ensure adequate support and fastening of the system. Ensure venting can safely exhaust all flue gases outside in an effective manner. These systems must operate under a negative vent pressure condition that is stable.
- Page 25 5 Boiler Venting 5.2 Boiler Venting – Category III & IV Vent Systems Typical Layouts and Requirements. Caution & Warning: Improperly sealed venting system could result in carbon monoxide [CO] poisoning; ensure adequate support and fastening of the system. Ensure venting can safely exhaust all flue gases outside in an effective manner. These systems must operate under a positive vent pressure condition that is stable.
- Page 26 5 Boiler Venting 5.3 Boiler Venting – Side-Wall or Direct Vent Systems Typical Layouts and Requirements. Caution & Warning: Improperly sealed venting system could result in carbon monoxide [CO] poisoning; ensure adequate support and fastening of the system. Ensure venting can safely exhaust all flue gases outside in an effective manner. These systems must operate under a positive vent pressure condition that is stable.
- Page 27 [x3] = 3 ft. Elbow 90° [x1] = 10 ft. Termination TEE [x1] = 0 ft. Length [equivalent] = 23 ft. GT 330 A Series GT 430 A Series Boiler [∆p] Pressure Boiler Oil-Gas [∆p] Pressure switch Oil-Gas Model Model...
- Page 28 5 Boiler Venting 5.5 All Side-wall and direct Vent termination locations installation precautions: Warning/Caution: In all cases avoid potential vent termination locations where excess debris or snow could accumulate and bock the vent termination to any degree. Minimum clearance of 4 ft. [1.22m] horizontally from, and in no case above or below, unless a 4 foot [1.22m] horizontal distance is maintained, from electric meters, gas meters, regulators &...
-
Page 29: Dimensional Information Required For Connection Of The Boiler
2 Replacement procedures • When an existing boiler is removed from a common venting (d)Place in operation the appliance being inspe cted. Follow the system, the common venting system is likely to be too large for lighting instructions. Adjust ther mostat so appliance will operate proper venting of the appliances remaining connected to it. -
Page 30: Oil Or Gas Connection
Oil or gas connection 1 Specific technical information supplied with the burner • The boiler and its individual shutoff valve must be disconnected Follow the information and documentation as supplied with from the gas supply piping system during any pressure testing of the burner, regarding: that system at test pressures in excess of 1/2 psi (3.5kPa), •... -
Page 31: Electrical
Electrical 1 Wiring Wiring in accordance with the requ irements of the authority having Warning-Caution jurisdiction or, in the absence of such requ irements, with the Label all wires prior to disconnecting when servicing controls. Wiring errors can cause improper and dangerous operation. Canadian Electrical Code Part 1, CSA C22.1, Electrical Codes. -
Page 32: Start Up Procedures
Start up procedures FOR YOUR SAFETY READ BEFORE OPERATING WARNING: If you do not follow these instructions exactly, a fire or explosion may result causing properly damage, personal injury or loss of life. A. This appliance does not have a pi l ot. It is equipped with an ignition device wich automatically lights the burner. -
Page 33: Shut-Down Procedures
1 Shut-down procedures Disengage all electrical power switches to heating system burners, For off-season shutdown, open boiler comb ustion flue aways and pumps. Isolate all boiler valves and fuel valves. clean. Ensure venting, chimney , combustion and ventilation air openings free from blockage. Do not drain waterside of system. °C 8553N185 1.BOILER OPERATING TEM PERATURE CONTROL graduated... -
Page 34: Maintenance
Maintenance 1 Boiler It is no t ad visable to drain an in stallation, ex cept in ca se of The good performance of the boiler depends on cleanliness. absolute necessity. Check the water level of the installation and Cleaning of the boiler must be carried out as often as required and at top it off if necessary, avoiding a sudden inlet of cold water in the least, as for the chimney once a year or more, according to the hot boiler. -
Page 35: Shut Down Procedure
• Maintenance of the combustion chamber - open the burner door (lower door) by unscrewing 4 lock nuts (19 mm spanner) - brush the inside of the combustion chamber - using a vacuum cleaner, vacuum up the soot deposits accumulated in the combustion chamber - close the door and replace the front cover •... -
Page 36: Service And Maintenance Schedule
Service and maintenance schedule • Require annual system inspection of the heating boiler, burner and controls by qualified service personnel, • Heating system check for safety control functions, system pressure, leaks, combustion and ventilation air should be done on a monthly schedule. Extended Shutdown Periods If the system is to be shutdown for any extended period of time, please follow these steps: 1. - Page 37 Bp 30 – 57, RUE DE LA Gare F – 67580 MERTZWILLER Tel: +33/3/88/80/27/00 – Fax: +33/3 88 80 27 99 Ni IRC : 347 555 559 RCS STRASBOURG www.dedietrich-thermique.com DDR AMERICAS INC In Canada: In USA or South America: 1090 Fountain St., Unit #10...
Need help?
Do you have a question about the GT 430 A and is the answer not in the manual?
Questions and answers