Table of Contents
Advertisement
Available languages
Available languages
Bauanleitung
D
Building instructions
GB
Notice de construction
F
Instruzioni di montaggio
I
Instrucciones de montaje
ES
Abbildungen
Illustrations
Illustrations
Illnstrazioni
Iiustraciónes
© Copyright by MULTIPLEX Modellsport GmbH & Co. KG 2014
... 21-28
Ersatzteile
Replacement parts
Pièces de rechanges
Parti di ricambio
Repuestos
RR
# 26 4293
2 ... 8
9 ... 15
16 ... 30
31 ... 37
38 ... 44
45-47
Version 1.0
Advertisement
Table of Contents

Subscribe to Our Youtube Channel
Related Manuals for Multiplex StuntMaster


Summary of Contents for Multiplex StuntMaster
- Page 1 Instruzioni di montaggio 31 ... 37 Instrucciones de montaje 38 ... 44 Abbildungen Ersatzteile Illustrations Replacement parts ... 21-28 45-47 Illustrations Pièces de rechanges Illnstrazioni Parti di ricambio Iiustraciónes Repuestos © Copyright by MULTIPLEX Modellsport GmbH & Co. KG 2014 Version 1.0...
- Page 2 UNDER THREE YEARS. CHOKING HAZARD! All the warnings in the OPERATING INSTRUCTIONS must be observed whenever the model is operated. Multiplex Modellsport GmbH & Co. KG accepts no liability for loss or damage or any kind which occurs as a result of incorrect operation or misuse of this product, including the accessories required for its operation.
- Page 3 Ensure that the speed controller and battery are adequately cooled. The instructions which accompany our products must not be reproduced and / or published, in full or in part, in print or any electronic medium, without the express written approval of Multiplex Modellsport GmbH & Co. KG. Seite 10...
- Page 4 Examine your kit carefully! MULTIPLEX model kits are subject to constant quality checks throughout the production process, and we sincerely hope that you are completely satisfi ed with the contents of your kit. However, we would ask you to check all the parts before you start construction, as we cannot exchange components which you have already worked on.
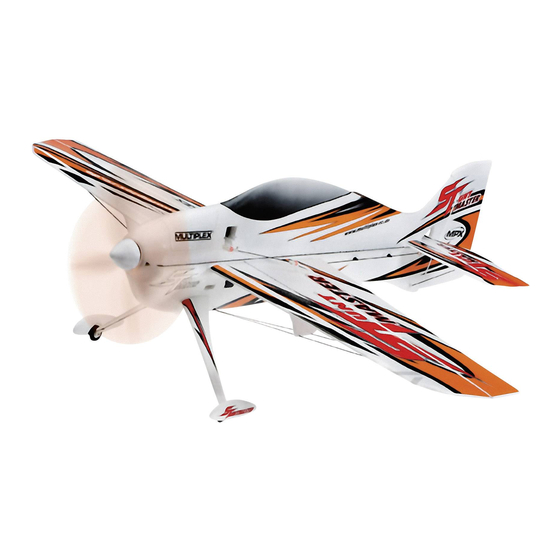
- Page 5 Paint must always be applied thinly and evenly, otherwise the component will warp. Then you really will have bent parts, and they will also be heavy and perhaps even unusable. We have found that matt-fi nish paints produce the best visual effect. Technical information STUNTMASTER: Wingspan: 870 mm...
- Page 6 Congratulations on your new STUNTMASTER! 5. Installing the servos (Figs. 07 - 09): Completing the model: First remove the battery hatch 7 from the fuselage 1. Apply a little Zacki to the base of the horn 24 and glue it You will need the following tools to complete the model: in the moulded-in recess in the left-hand aileron.
- Page 7 RUDDER: 9. Installing the receiver and fl ight battery Here there are two options: either a pushrod or pull-cables. (Figs. 27 & 28): Advantages of the pushrod linkage: Connect all the servos to the receiver in the sequence stated • Easier to install in your RC system instructions, then push the receiver into •...
- Page 8 Parts List - STUNTMASTER# 264293: Part No. Qty Description Material Dimensions Fuselage Elapor Ready made Wing Elapor Ready made Tailplane Elapor Ready made Rudder Elapor Ready made Brace support Elapor Ready made Battery hatch Elapor Ready made Spinner Elapor 40 mm Ø...
- Page 9 pic. 01 pic. 02 pic. 03 Seite 21...
- Page 10 pic. 04 pic. 05 pic. 06 pic. 07 Seite 22...
- Page 11 pic. 04 pic. 08 pic. 09 pic. 10 Seite 23...
- Page 12 pic. 11 pic. 12 pic. 13 Seite 24...
- Page 13 pic. 14 pic. 15 pic. 16 pic. 17 Seite 25...
- Page 14 pic. 18 pic. 19 pic. 20 pic. 21 Seite 26...
- Page 15 pic. 22 pic. 23 pic. 24 pic. 25 pic. 26 Seite 27...
- Page 16 pic. 27 pic. 28 pic. 29 pic. 30 Seite 28...
- Page 17 Bajo ningún concepto debe aplicar gruesas capas o de manera irregular, podría estropear su modelo. ¡Se torcerá, se volverá pesado y a menudo hasta frágil! Con una pintura mate conseguirá los mejores resultados. Características técnicas STUNTMASTER: Envergadura:...
- Page 18 Le damos la enhorabuena por su nuevo Multiplex 5. Instalación de los servos (Img. 07-09): STUNTMASTER. Comience retirando la tapa de la batería 7 del fuselaje 1. Montaje del conjunto: Usando algo de Zacki, pegue el horn de timón 24 en la Para montar el modelo necesitará...
- Page 19 Dirección: 10. Equilibrado (Img. 29 & 30): Aquí hay dos posibilidades, o transmisión por varilla o por cable. Coloque la tapa de la batería y equilibre el modelo de modo que el centro de gravedad quede en la zona de 95 - 105 Ventajas de la transmisión por varilla: mm.
- Page 20 Lista de partes STUNTMASTER STUNTMASTER# 264290 / # 264291: Ordinal Pieza Descripción Material Dimensiones Fuselaje Elapor Pieza prefabricada Alas Elapor Pieza prefabricada Estabilizador horizontal Elapor Pieza prefabricada Estabilizador vertical Elapor Pieza prefabricada Apoyos de las riostras Elapor Pieza prefabricada Tapa de la batería...
- Page 21 Ersatzteile / Spareparts # 22 4376 Rumpf (Ohne RC, Akkudeckel) Fuselage (without electrics, battery cap) # 22 4377 # 22 4380 # 22 4377 Akkudeckel / Battery cap # 22 4380 Höhenleitwerk Elevator # 22 4381 # 22 4378 # 22 4381 Hauptfahrwerk / Main landing gear # 22 4378...
- Page 22 # 73 2505 # 22 4382 # 73 2505 Propeller GWS EP-9x5“ # 22 4382 Spinner # 22 4386 # 22 4385 # 22 4386 O-Ringe für Propellermontage (5 Stk.) / O-rings # 22 4385 Kleinteilesatz / Small part set # 22 4383 Anlenkungssatz / Linkage set # 22 4384...
- Page 23 # 33 3119 Motor PERMAX BL-O 2206-1050 # 7 2266 Regler / ESC MULTIcont BL-18 SD # 6 5113 Servo MS-12016 Seite 47...
- Page 24 MULTIPLEX Modellsport GmBH & Co. KG. Westliche Gewerbestrasse 1 D-75015 Bretten-Gölshausen www.multiplex-rc.de Seite 48...
Need help?
Do you have a question about the StuntMaster and is the answer not in the manual?
Questions and answers