Table of Contents
Advertisement
Quick Links
- 1 Recommended Equipment
- 2 Technical Information
- 3 Installing the Motor/Main Undercarriage/Tailwheel Unit
- 4 Installing the Power-Multilight System in the Fuselage
- 5 Installing the Receiving System Components
- 6 Balancing
- 7 Assembling the Model
- 8 Recommended Control Surface Travels
- Download this manual
Advertisement
Table of Contents

Subscribe to Our Youtube Channel
Related Manuals for Multiplex FUNCUB XL


Summary of Contents for Multiplex FUNCUB XL
- Page 1 # 21 4331 # 26 4331 © Copyright by MULTIPLEX Modellsport GmbH & Co. KG 2015 Version 1.0...
- Page 2 UNDER THREE YEARS. CHOKING HAZARD! All the warnings in the OPERATING INSTRUCTIONS must be observed whenever the model is operated. Multiplex Modellsport GmbH & Co. KG accepts no liability for loss or damage or any kind which occurs as a result of incorrect operation or misuse of this product, including the accessories required for its operation.
- Page 3 Ensure that the speed controller and battery are adequately cooled. The instructions which accompany our products must not be reproduced and / or published, in full or in part, in print or any electronic medium, without the express written approval of Multiplex Modellsport GmbH & Co. KG.
- Page 4 Examine your kit carefully! MULTIPLEX model kits are subject to constant quality checks throughout the production process, and we sincerely hope that you are completely satisfi ed with the contents of your kit. However, we would ask you to check all the parts before you start construction, as we cannot exchange components which you have already worked on.
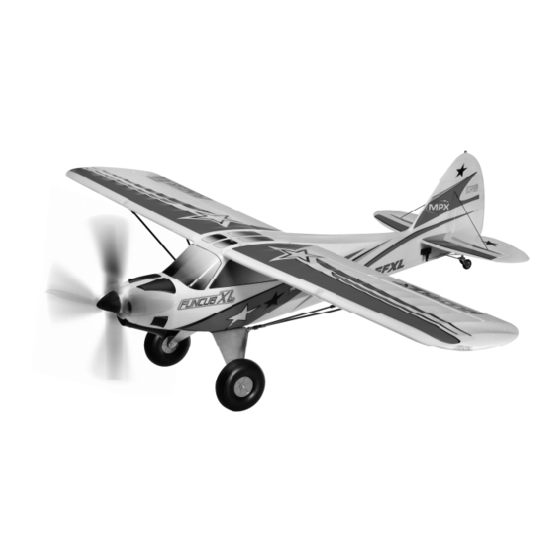
- Page 5 Paint must always be applied thinly and evenly, otherwise the component will warp. Then you really will have bent parts, and they will also be heavy and perhaps even unusable. We have found that matt-fi nish paints produce the best visual effect. Technical information FunCub XL: Wingspan: 1700 mm...
- Page 6 Congratulations on your new FunCub XL! 3. Completing the cowl and canopy (KIT) Take the moulded cowl 7 and glue the “front” exhaust fairing 28 You will need the following tools to build the model: to the underside using Zacki.
- Page 7 (KIT+RR) M2 self-locking nut 110 should be fi tted between the carbon fi bre The FunCub XL is designed to accept the POWER-MULTIlight struts as shown, to provide additional clamping pressure to the system # 7 3030. Cables are already present in the wings of the strut fi...
- Page 8 13. Closing the cargo bay (KIT) appropriate recess in the fuselage, with the output shaft on the left The FunCub XL is prepared as standard for fi tting a radio-controlled as seen from the nose of the model. Fix the servo in place with cargo drop bay.
- Page 9 Push the second wing fully into place, then secure both wings We - the MULTIPLEX team - hope you have many hours of ple- with the two M5 x 15 mm retaining screws 80, fi tting them through asure building and fl...
- Page 10 Parts List - FunCub XL # 214331 Part No. Qty Description Material Dimensions Building instructions, KIT / RR Complaints form, models Decal sheet L.H. fuselage shell Foam Ready made R.H. fuselage shell Foam Ready made Canopy Foam Ready made Cowl...
- Page 11 Tailwheel yoke Aluminium Ready made Tailwheel Plastic / rubber 35 Ø Tailwheel axle (machine screw) Metal M2x22 mm Self-locking nut for tailwheel Metal Washer Metal 3mm I.D. Tailwheel retaining screw Metal M3x10 mm Tailwheel support Plastic Ready made Tailwheel unit retaining screw Metal M3x20 mm Tailwheel steering spring...
- Page 12 Folding spring bolt Metal Ready made Lower strut fi tting 1 Plastic Ready made Lower strut fi tting 2 Plastic Ready made Strut fi tting clamp screw Metal M2x8mm Strut fi tting clamp screw Metal M2x6mm Strut fi tting clamp nut Metal Main wing strut Carbon fi...
- Page 13 Spareparts # 22 4431 Fuselage with decals (without electrics, battery cap, cowling) # 22 4430 fuselage parts set # 22 4433 RR Wings with decals (without servos) # 224432 wing set...
- Page 14 # 22 4434 # 22 4439 # 22 4434 cowling # 22 4439 canopy # 22 4435 # 22 4449 # 22 4435 tail set # 22 4449 RR tail set with decals # 22 4447 # 22 4447 # 22 4448 Spinner 54mm Ø...
- Page 15 # 22 4443 wing struts # 22 4440 # 22 4441 # 22 4440 navigation light covers # 22 4441 offset hinge set # 22 4445 spar joiner # 33 3126 # 33 3126 # 11 2225 Permax BL-O 4235-0480 motor # 11 2225 HS 225 BB servo # 72236...
- Page 16 # 22 4446 decal sheet MULTIPLEX Modellsport GmBH & Co. KG. Westliche Gewerbestrasse 1 D-75015 Bretten-Gölshausen www.multiplex-rc.de...
Need help?
Do you have a question about the FUNCUB XL and is the answer not in the manual?
Questions and answers