Table of Contents
Advertisement
Advertisement
Table of Contents

Subscribe to Our Youtube Channel
Related Manuals for Garmin eTrex Vista C


Summary of Contents for Garmin eTrex Vista C
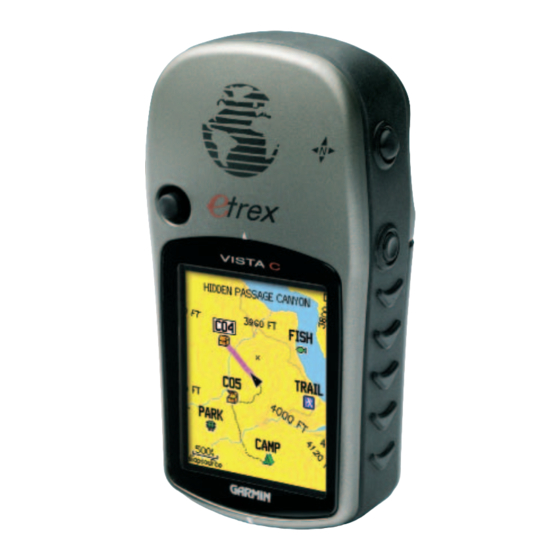
- Page 1 ® eTrex Vista C color map navigator owner’s manual...
- Page 2 Information in this document is subject to change without notice. Garmin reserves the right to change or improve its products and to make changes in the content without obligation to notify any person or organization of such changes or improvements.
-
Page 3: Preface
Monday – Friday, 8 am – 5 pm Central Time; or by GPS Navigation—takes you through the process of navigating with e-mail at sales@garmin.com. your eTrex Vista C and how to use GPS Navigation to customize the In Europe, contact Garmin (Europe) Ltd. at operation of your eTrex Vista C. -
Page 4: Software License Agreement
Vista C Introduction Software License Agreement Software License Agreement BY USING THE eTrex Vista C, YOU AGREE TO BE BOUND BY THE TERMS AND CONDITIONS OF THE FOLLOWING SOFT- WARE LICENSE AGREEMENT. PLEASE READ THIS AGREEMENT CAREFULLY. Garmin grants you a limited license to use the software embedded in this device (the “Software”) in binary executable form in the normal... -
Page 5: Fcc Compliance Information
Vista C Introduction FCC Compliance The eTrex Vista C complies with Part 15 of the FCC interference limits for Class B digital devices FOR HOME OR OFFICE USE. These Information limits are designed to provide more reasonable protection against harm- ful interference in a residential installation, and are more stringent than “outdoor”... -
Page 6: Warnings And Precautions
Vista C Introduction Warnings and Precautions CAUTION: Use the eTrex Vista C at your own risk. To reduce the risk of unsafe operation, carefully review and understand all aspects of this Owner’ s Manual—and thoroughly practice operation using the Demo Mode prior to actual use. - Page 7 The system is subject to changes which could affect the accuracy and performance of all GPS equipment. Although the Garmin eTrex Vista C is a precision electronic NAVigation AID (NAVAID), any NAVAID can be misused or misinterpreted and, therefore, become unsafe.
- Page 8 Airbag Field of Deployment Panels by the driver of a vehicle equipped with a eTrex Vista C installed to pay full attention to operation of the vehicle and road conditions while the vehicle is in motion could result in an accident with property damage and...
-
Page 9: Table Of Contents
Map Setup..............58 Unit Features................3 Routing Setup............61 Initialization................4 Geocache Setup............62 The Satellite Page...............4 Marine Setup..............62 Navigating with the eTrex Vista C..........5 Time Setup..............63 The Main Page Sequence............6 Units Setup..............63 The Main Page Features............7 Heading Setup.............64 Calibration Setup............64 Section 3: GPS Navigation........8-67 Altimeter Setup............65... -
Page 10: Table Of Contents
Hunt and Fish Tables..............72 GPS Enhanced Games............73 Non-Enhanced Game............76 Section 5: Appendices..........77-92 Accessories................77 Specifications................79 Data Field Options...............81 Connecting the eTrex Vista C to a Computer......85 Downloading MapSource Map Data........86 UTC Offset Chart..............87 Map Datums and Position Formats..........88 WAAS and DGPS..............89 Index..................90 Limited Warranty.................92... -
Page 11: Section 2: Getting Started
Installing the Batteries Start Up The eTrex Vista C operates on two “AA” batteries (not included), which are located in the back of the unit. Alkaline or NiMH batteries may be used (see page 56 for setting the battery type). Stored data will not be lost when batteries are removed. -
Page 12: Key Functions
Vista C Getting Started “Thumb Stick” ENTER/ROCKER Key (Press down to Enter - move to the side or up/ Key Functions down to scroll, highlight fields or pan the map) • Rock Up/Down or Right/Left to GPS Antenna move through lists, highlight fields, •... -
Page 13: Unit Features
Vista C Getting Started Unit Features USB Connector Port (under weather cover) • Provides interface to a PC for fast data transfer. Battery Compartment Locking Ring • Turn 1/4 turn counter-clockwise and lift to remove cover. Belt Clip/Auxiliary Connector Mount •... -
Page 14: Initialization
Starting Up the GPS Receiver Initialization & the Satellite Page When you turn on the eTrex Vista C, the GPS receiver begins to search for satellites in order to determine (fi x) its location. This process is called “initialization” and can take up to 15 minutes the fi rst time you use your unit. -
Page 15: Navigating With The Etrex Vista C
Track - A previous path of travel that has been stored (logged) in the eTrex Vista C. A Track allows you to repeat a path or retrace the path. Route - A path to a destination consisting of intermediate stops along the way (waypoints, cities, exits, points of interest, intersections, etc.). -
Page 16: The Main Page Sequence
The Main Page Sequence When you turn on the eTrex Vista C, a “Power On” Page is followed by the Satellite Page (which displays only at start up) and then the Map Page. The Map Page is the fi rst of the four Main Pages in sequence. -
Page 17: The Main
Vista C Getting Started Status Bar, Backlighting and On-Screen Messages The Main Page Features When you press and release the POWER key, the Backlight Bright- ness Adjustment Slider and a Status Bar with time and date displays Status Bar current status information for several unit features. -
Page 18: Section 3: Gps Navigation
Vista C GPS Navigation Using the Map Page The Map Page The Map Page is the primary navigation feature of the eTrex Vista “North Up” C. The Map Page displays a detailed map of the area surrounding your Mode current location. -
Page 19: Gps Navigation
“mapsource” appears below the scale. In many instances the map displays an “Accuracy Circle” surround- ing the “Position Icon.” The eTrex Vista C uses both map resolution and Map Features GPS accuracy in defi ning your location to a point within the circle. The smaller the circle, the more accurate your location. -
Page 20: The Map Page Options Menu
Vista C GPS Navigation The Map Page Options Menu The Map Page The Map Page can be changed to display a variety of information for navigation. You can stop navigation to a destination, arrange up to four data fields to display the type of navigation information you desire, include a navigation guidance text message on the map page and select the type of data fields to display. - Page 21 List of Some Data Field Options are related to the display of data received Data Field from other devices interfaced to the eTrex Vista C. For an explanation Options of what each option represents, see page 81 of the Appendices.
- Page 22 Vista C GPS Navigation To display Guidance Text: The Map Page 1. With Map Page displayed, press the FIND key to display the Map Page Options Menu. 2. Highlight the Guidance Text Option and press ENTER to display the Guidance Text Options Menu.
- Page 23 Vista C GPS Navigation Measuring Distance The Map Page This Map Page option allows you to determine the distance to a point on the map from your current location. Access the Map Page Options Menu, select “Measure Distance” and press ENTER to activate. To measure between two selected points on the Map, move the Map Pointer to the fi...
-
Page 24: The Compass Page
The compass ring is especially helpful when using a paper map or chart in conjunction with your eTrex Vista C for navigation. The Bearing When the electronic compass is On, a compass icon appears in the status... - Page 25 The Compass Page ually turn it On again. Sometimes, however, when you turn the Compass On, the eTrex Vista C overrides the Compass and uses the GPS receiver to track your heading. The criteria for switching between the Compass and the GPS can be customized (see below).
- Page 26 The Compass Page The Electronic Compass must be calibrated outdoors when you fi rst use the eTrex Vista C and after new batteries have been installed. The Calibration accuracy of the Electronic Compass is adversely affected if the unit is not Compass held level or if you are near objects that generate magnetic fi...
- Page 27 Vista C GPS Navigation To use Compass Page Options: The Compass Page Press the MENU key to display the Options Menu. To use Sight ‘N Go to navigate: 1. Use the QUIT button to access the Compass Page and then use the MENU key to access the Options Menu.
- Page 28 Vista C GPS Navigation To stop navigation: The Compass Page Highlight “Stop Navigation” and press ENTER to stop navigating. To select the Course Pointer or the Bearing Pointer: The “Bearing Pointer” is the factory set default option. When the “Bearing Pointer”...
- Page 29 Vista C GPS Navigation To display data fi elds: The Compass Page 1. Press MENU, then highlight the data fi elds option and press Data Field ENTER to display the “Show: 3 Data Fields or 4 Data Fields” Display Options options.
-
Page 30: The Altimeter Page
Vista C GPS Navigation The Altimeter Page displays the current elevation, rate of ascent/ The Altimeter Page descent, a profi le of elevation changes over distance or time, or a profi le Selectable Data of pressure changes over time. The Altimeter Page Options Menu allows... - Page 31 Vista C GPS Navigation You can customize the “View” option displays using the “Zoom Ranges” option to determine time, distance, pressure, and elevation The Altimeter Page parameters. If you know the correct elevation for your location, you can increase the accuracy of the altimeter using the ‘ Calibrate Altimeter’...
- Page 32 Vista C GPS Navigation Zoom Ranges The Altimeter Page You can set the Zoom Ranges for elevation, distance, or time when you display “View Elevation Plot.” Ranges for vertical distance are displayed as you press the Up and Down ROCKER keys. Ranges for linear distance are displayed as you press the Left and Right ROCKER keys.
- Page 33 Vista C GPS Navigation View Points You can scroll through a recorded elevation or pressure profi le to view The Altimeter Page data for any point along the profi le. When the red vertical and horizontal crosshairs are stopped at a location along the profi le, the display shows the elevation or pressure, time of day and date the point was created.
- Page 34 Vista C GPS Navigation Reset The Altimeter Page You can reset the elevation data and the maximum elevation data by selecting these “Reset” options from the Altimeter Page Options Menu. To reset the elevation data and max elevation fi elds: 1.
- Page 35 Vista C GPS Navigation Calibrate Altimeter Because the eTrex Vista C relies on barometric pressure to determine The Altimeter Page elevation, and the pressure at any given elevation can fl uctuate, you can calibrate the altimeter to increase its accuracy. You must know the eleva- tion or pressure at your current location.
-
Page 36: The Trip Computer Page
Vista C GPS Navigation Using the Trip Computer Page The Trip Computer Page The Trip Computer Page provides you with a wide variety of travel Select data that is useful when navigating long distances. It indicates your cur- “Change rent speed, average speed, trip odometer and many other statistics useful Data Fields”... -
Page 37: Using Waypoints
(or any other) location as a waypoint and displays a name for that waypoint and a waypoint symbol. You can mark your current location from any page on the eTrex Vista C. Press and To mark your current location as a waypoint: hold the 1. - Page 38 Vista C GPS Navigation To create a waypoint with the map panning arrow: Using Waypoints 1. With the Map Page displayed, move the panning arrow (map pointer) to the map item you want use as a waypoint. If there is information in the mapping database for that location it will highlight momentarily and display a name or address.
- Page 39 Vista C GPS Navigation Editing a Waypoint Using Waypoints A waypoint can be selected from the Find Feature Waypoints list and edited to change the map symbol, name, location coordinates, elevation or to delete it. Refer to page 31 for details on using the Find Feature.
- Page 40 Vista C GPS Navigation To move a Waypoint on the Map Page: Using Waypoints 1. Use the Find Feature to display the Information Page for the desired waypoint (refer to page 36). 2. Highlight the “Map” button at the bottom of the page and Original press ENTER to display the waypoint on the map.
-
Page 41: Using Find
Using Find The Find Feature provides you with a method for searching for Cities and Exits, which are included in the eTrex Vista C basemaps. If you have downloaded Garmin MapSource mapping data that contains additional map detail, you can search for Points of Interest, Addresses and Intersec- ®... - Page 42 Vista C GPS Navigation Searching for a location using Find By Name Using Find If you know the name of the location you want to find, the Find By Nearest Name search option may be the easiest method of searching.
- Page 43 Vista C GPS Navigation Using the Find Item Information Page Using Find When you select a Find item and press the ENTER key, an Informa- tion Page displays with detailed information about the item. This page contains the following information: •...
- Page 44 Vista C GPS Navigation The Find Information Page Options Menu offers eight options for Using Find using a Find Item as a tool for navigation. To use the Find Item Information Page Options Menu: 1. With an Information page displayed for a Find item, press the MENU key to display the Options Menu.
- Page 45 Vista C GPS Navigation • Change Reference - Point to a new Using Find location on the map Page using the Panning Arrow and press ENTER. • View Sun and Moon - View the Sun and Moon tables for this item location.
- Page 46 Vista C GPS Navigation Searching for a Waypoint Using Find The Waypoints List is your storage file for all created and saved waypoints. Waypoints are stored in alpha/numerical order and are also identified by a symbol assigned from a list of symbol types. Waypoints can be selected as destinations and added as points on a route.
- Page 47 Using Find The Find Geocache feature allows you to view the list of geocache locations that you have created using the eTrex Vista C or downloaded from your computer. A geocache location is actually a waypoint with a special geocache symbol assigned to separate it from others on the waypoints list.
- Page 48 Vista C GPS Navigation Searching for a City Using Find The Find Cities feature allows you to search for any city listed in the Find Cities mapping database (either in the basemap or from downloaded detailed List mapping data).
- Page 49 Vista C GPS Navigation Searching for an Interstate Exit Using Find The Find Exits feature allows you to search for the nearest Interstate Exits. To search for Exits: 1. Press and hold the FIND button to display the Find Menu.
- Page 50 Vista C GPS Navigation Searching for an Address Using Find The Find Addresses feature allows you to search for an address if you have downloaded detailed mapping data. Enter the street number, street name and city and the Find Feature will match that data with addresses in the map database.
- Page 51 Vista C GPS Navigation Searching for an Intersection Using Find The Find Intersections feature allows you to search for an intersec- tion if you have downloaded detailed mapping data. Enter the two street names and city and the Find Feature will match that data with intersec- tions in the map database.
- Page 52 Vista C GPS Navigation Searching for a Point of Interest Using Find You can use the Find Point of Interest feature to locate a nearby restaurant, lodging, landmark, public building, park, etc. However, you must have downloaded MapSource detailed mapping that supports this feature, otherwise these options, plus Address and Intersection options, are not functional.
-
Page 53: The Main Menu
• Calendar - An outdoor calendar with data access and waypoint association. • Alarm Clock - Allows you to use the eTrex Vista C as an Alarm Clock. • Calculator - A standard or scientifi c calculator for measurement conversions, etc. -
Page 54: Using Tracks
Vista C GPS Navigation Using a Track Log Using Tracks The Tracks feature creates an electronic trail on the map page as you travel about and is referred to as a Track Log. A track log contains informa- tion about points along its path, including time, position and elevation. - Page 55 Vista C GPS Navigation 5. Highlight the “Record Method” fi eld and press ENTER to display Using Tracks the Distance, Time and Auto options. Because a track is made of a series of points that defi ne your path of travel, they can be placed a specifi...
- Page 56 Vista C GPS Navigation 4. The Saved Track Page allows you to rename the track, view the track distance, view the calculated area encompassed by the Using Tracks track (an area is defi ned even if the track is open ended), and specify a color for the track when displayed on the map page (Show On Map).
- Page 57 To creat a track profile, you must be located within the geographic area supported by the DEM map data loaded on your eTrex Vista C. A Track Profile page displays when you select View Profi le “Profile.”...
- Page 58 Vista C GPS Navigation To use the TracBack feature: Using Tracks 1. With the Saved Tracks Page for the track or the Track Log displayed, highlight the TracBack button and press ENTER to display the TracBack Page. 2. A map showing the entire track appears and you are prompted TracBack to select the point you want to TracBack to.
-
Page 59: Using Routes
With routes, you can create a sequence of intermediate waypoints that lead you to your fi nal destination. The eTrex Vista C stores 50 routes, with up to 250 waypoints each. A route can be created and modifi ed from the Routes Page, and waypoints can be added to a route from the Find Menu. - Page 60 Using Routes • When you activate the “Go To” button on the Information Page for a User Waypoint or other Find Menu items, the eTrex Vista C creates a straight path (point to point) from your current location to that location.
- Page 61 Vista C GPS Navigation Navigating a Route Using Routes After you have created a route, you can begin navigation immediately or save it to the Saved Routes list as explained on page 49. When you are navigating a route, a guidance message and graphic view of turns in the route will display as you approach each one.
- Page 62 Vista C GPS Navigation Route Options Using Routes To delete the route: Saved Routes Options 1. Access the Saved Routes Page from the Main Menu and press the MENU key to display the Options Menu. 2. To clear the saved routes list, select “Delete All Routes” and press ENTER.
- Page 63 Route” option and press ENTER. To create a vertical profi le of the route: (Available only if Garmin MapSource DEM map data is used. See page 86 for details.) Select “Profi le” and press ENTER to display the route profi le.
-
Page 64: The Highway Page
Vista C GPS Navigation The Highway Page The Highway Page When you are navigating a route, the Highway Page can guide you to the destination using data fields and a graphic highway. Up to four user- selectable data fields display information such as speed, distance, time to next point on the route, etc. -
Page 65: The Setup Menu
GPS Navigation The Setup Menu The Setup Menu The Setup Menu allows you to customize the eTrex Vista C to your personal preferences. Each setup page is identified by an icon.Highlight an icon and press ENTER to view that setup page. -
Page 66: System Setup
Vista C GPS Navigation System Setup System Setup The System Setup Page allows you to choose from four modes of GPS operation, enable/disable WAAS (see page 89), designate a battery type, choose a display text language, and choose what happens when the eTrex Vista C is disconnected from an external power source. -
Page 67: Tones Setup
Vista C GPS Navigation Tones Setup Tones Setup The Tones Setup Page allows you to customize the signal tones for a variety of unit features. Tones Sound To use the Tones Setup feature: when high- 1. Access the Tones Setup Page. -
Page 68: Map Setup
Using the Map Setup Feature Map Setup The map display for your eTrex Vista C can be customized. A factory set of default settings currently control the Map Page display and may be satisfactory for your current requirements. The Map Setup pages allow... - Page 69 Vista C GPS Navigation Map Setup - General Settings Map Setup The fi rst page of the Map Setup feature is the General Settings Page. Use this page to select the map orientation. “Below” sets the map scale at which the Track Up feature displays; all scales above that revert to the North Up map orientation.
- Page 70 Vista C GPS Navigation Map Setup - Text Settings Map Setup The fourth page of the Map Setup feature is the Text Settings Page. Use this page to select the text size for descriptions of items on the Map Page.
-
Page 71: Routing Setup
Vista C GPS Navigation Routing Setup Routing Setup The Routing Setup Page allows you to customize how routing func- tions behave. There are setup and option menus for route creation and methods of navigation. To Use Routing Setup Options: 1. -
Page 72: Geocache Setup
Geocache Setup The Geocache Setup Page allows you to find and record items hidden at geographic locations. Refer to the Garmin website (www.garmin.com), for details and directions for downloading geocache locations from the internet. To use the Geocache Setup feature: 1. -
Page 73: Time Setup
4. Daylight Savings Time offers choices of “Yes,” “No” and “Auto.” Options Units Setup Units Setup The Units Setup Page allows you to select the units of measurement for your eTrex Vista C. To use the Units Setup feature: There are Options 1. Access the Units Setup Page. -
Page 74: Heading Setup
Vista C GPS Navigation Heading Setup The Heading Setup Page allows you to specify the type of heading Heading Setup display and the type of North Reference used to calculate your heading. Unless you have a working knowledge of Headings and North Referenc- ing, it is recommended that you use the default values. -
Page 75: Altimeter Setup
Vista C GPS Navigation Altimeter Setup The Altimeter Setup Page allows you to setup the Altimeter to self- Altimeter Setup calibrate each time you turn on the unit, to function as a barometer or to manually calibrate when you have accurate elevation or pressure data. -
Page 76: Welcome Page Setup
Vista C GPS Navigation Altimeter Setup Allow the GPS Receiver to deter mine the elevation: the GPS receiver estimates the current elevation when determining its location. The accur- racy will vary depending on the posi- tion (telemetry) of satellites overhead. -
Page 77: Proximity Waypoints
Vista C GPS Navigation Proximity Waypoints Proximity Waypoints The Proximity Waypoints Page allows you to establish waypoints that have alarm circles around them at specified distances. The alarm helps you to avoid locations that are restricted or hazardous. To use the Proximity Waypoint feature: 1. -
Page 78: Section 4: Gps Features
Vista C GPS Features Calendar Calendar The Calendar allows you to view the following for any given day and location: Sunrise/Sunset times, moon phase, Hunt and Fish probabilities, archived waypoints for activities you want to navigate to and a day, week New Location or month format display. -
Page 79: Alarm Clock
On and the alarm will beep. Press any key to silence the alarm. Calculator The Calculator Feature allows you to use your eTrex Vista C as a calcu- Options lator. You can select either a Standard or Scientific calculator and you can Menus choose from degrees or radians from the Options Menu. -
Page 80: Stopwatch
Vista C GPS Features Stopwatch This feature allows you to use the eTrex Vista C as a stopwatch, which Stopwatch includes a lap timer. You can choose to have the unit record the lap time based on distance. To start the stopwatch: Use the ROCKER key to highlight the “Start”... -
Page 81: Sun And Moon Tables
Vista C GPS Features Sun and Moon Tables Sun and Moon The Sun and Moon Tables provide you with a graphic depiction of the sun and moon relative to the Earth. Sun and moon positions can be displayed for any time, date and location on Earth. -
Page 82: Hunt And Fish Tables
Vista C GPS Features Hunt and Fish Hunt and Fish Tables The Hunt and Fish Tables provide you with a listing of predicted best times for hunting and fishing for a chosen date and location. To display hunting and fi shing predictions: 1. -
Page 83: Gps Enhanced Games
GPS Features Games GPS Enhanced Games The eTrex Vista C provides games as an entertainment feature. Several of these games employ GPS. To select and play a game: 1. Access the Main Menu and use the ROCKER key to select the Games icon. -
Page 84: Virtua Maze
Vista C GPS Features Virtua Maze GPS Enhanced Games This GPS game creates a virtual maze on the screen. You are placed at a central position in the maze and must explore the maze collecting flags. The lower right corner of the screen tells you how many flags remain. -
Page 85: Gps Features
Vista C GPS Features Nibbons GPS Enhanced Games In this GPS game, you must walk around the board collecting the flags as they appear. As you walk, your “tail” will grow. You may travel anywhere on the screen but you cannot walk on your tail, or you will lose a life. -
Page 86: Non-Enhanced Game
Vista C GPS Features Beast Hunt Non-Enhanced Game Although not a true GPS game, Beast Hunt requires some naviga- tion skills. You must find and defeat the dragon with an arrow before it breathes fire at you or you fall into one of the pits while navigating a maze of platforms. -
Page 87: Section 5: Appendices
The battery approved by Garmin for use with Garmin Products. Use of such cover for the color display series is slightly larger and accepts the mounting... - Page 88 Vista C Appendices Installing the Belt Clip, Auxiliary Mount Adapter and Carry Lanyard Accessories Back of eTrex Vista C (Press tab to USB Connector (under release the Clip weather cover) Knob) Suction Mount Kit Belt Clip Knob (attaches to back of unit)
-
Page 89: Specifications
Vista C Appendices PHYSICAL Specifi cations Case: Rugged, fully gasketed, water resistant, IEC- 60529 IPX7 (Submersible 1 meter @ 30 minutes) Size: 4.14”H x 2.15”W x 1.21”D Weight: 5.46 ounces (155 g) with batteries installed Display: 1.4”W x 1.7”H, 256-color, high resolution, transrefl... - Page 90 Up to 30 hours (typical use) Specifi cations subject to change without notice. 1. The temperature rating of the eTrex Vista C may exceed the usable range of some bat- teries. Some batteries can rupture at high temperatures. 2. Subject to accuracy degradation to 100m 2DRMS under the U.S. DoD imposed Selective Availability (SA) Program.
-
Page 91: Data Field Options
The following list provides a brief description of each data field Data Field Options option. Some of these options are supported only by devices interfaced to your eTrex Vista C. Accuracy GPS - The current accuracy of you GPS determined location. Ambient Pressure - The uncalibrated current pressure. - Page 92 Vista C Appendices Distance - Next - The distance to the next point on a route. Data Field Options Distance - Destination - The entire distance, from beginning to end, of a route. ETA - Next - The estimated time that you will arrive at the next point on your route, if you maintain your current speed and course.
- Page 93 Vista C Appendices Odometer - The total distance you have traveled for all trips. Data Field Options Off Course - The distance off your direct course line, right or left. Pointer - The arrow that indicates the direction to travel to the next point on a route.
- Page 94 Vertical Speed - The rate of altitude gain/loss over time. Vertical Speed Dest - The measurement of your rate of acsent/decsent to a predetermined altitude. Water Speed - The data acquired from measurement devices interfaced to the eTrex Vista C is used to calculate your current speed over water.
-
Page 95: Connecting The Etrex Vista C To A Computer
Appendices Interfacing the eTrex Vista C Connecting the eTrex Vista C The eTrex Vista C is provided with interface connection to a PC using to a Computer either a serial port or USB connector cable. Connection to your computer is necessary for downloading of detailed map from Garmin MapSource Lift Cover Map Data CDs. -
Page 96: Downloading Mapsource Map Data
Vista C will not be enabled unless you are using mapping data they are designed to support, such as many of the Find Features and DEM Eleva- tion Profi les. Visit the Garmin website for details on all of the maps you See your Garmin Dealer or visit the Garmin web site at www.garmin.com... -
Page 97: Utc Offset Chart
Vista C Appendices This chart is provided to help you determine the time offset settings UTC Offset Chart for your current location if it is not in one of the time zones listed on the Time Setup Page. To change the UTC Offset, access the Main Menu, then Setup and then open the Time Setup Page. -
Page 98: Map Datums And Position Formats
Lines of latitude and longitude on a map or chart are referenced to a specific map datum. Every chart has a map datum reference and the eTrex Vista C can be set to match most of those commonly used. If you are navigating and comparing the GPS coordinates to a map,... -
Page 99: Waas And Dgps
Vista C Appendices Appendix E What is WAAS? WAAS and DGPS The Wide Area Augmentation System (WAAS) is an F.A.A. funded project to improve the overall integrity of the GPS signal. It is a space- based system that broadcasts integrity information and correction data as determined by ground reference stations (see DGPS below). -
Page 100: Index
Vista C Appendices Index Data Fields 11, 19, 53, 54 Map Page Options 10 Accessories 77 Games 73-76 Data Field Defi nitions 81 Map Page Panning 9 Accuracy Circle 9 Geocache Setup 62 Date and Time Setup 63, 87... - Page 101 Vista C Appendices Index Page Sequence Setup 57 View Waypoints on Route 49, 53 Sun and Moon Tables 71 Panning (Map) 28 Symbol, Waypoint 27 Position Format 64, 88 Symbols, Status Bar 7 WAAS, Enable/Disable 55 Projecting a Waypoint 30...
-
Page 102: Limited Warranty
This Garmin product is warranted to be free from defects in materials or workmanship for one year from the date of purchase. Within this period, Garmin will at its sole option, repair or replace any components that fail in normal use. Such repairs or replacement will be made at no charge to the customer for parts or labor, provided that the customer shall be responsible for any transportation cost. - Page 104 For the latest free software updates (excluding map data) throughout the life of your Garmin products, visit the Garmin web site at www.garmin.com © Copyright 2004 Garmin Ltd. or its subsidiaries Garmin International, Inc. 1200 East 151 Street, Olathe, Kansas 66062, U.S.A.
Need help?
Do you have a question about the eTrex Vista C and is the answer not in the manual?
Questions and answers