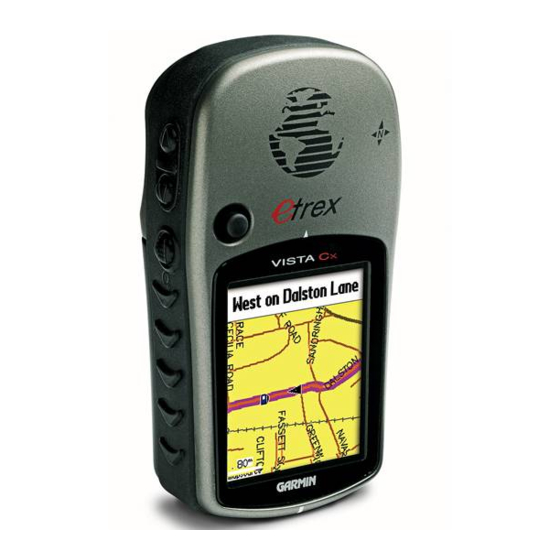
Garmin eTrex Vista Cx Owner's Manual
Hiking companion
Hide thumbs
Also See for eTrex Vista Cx:
- Owner's manual (112 pages) ,
- Quick reference manual (2 pages)
Table of Contents
Advertisement
Advertisement
Table of Contents

Related Manuals for Garmin eTrex Vista Cx


Summary of Contents for Garmin eTrex Vista Cx
- Page 1 eTrex Vista Cx ® hiking companion owner’s manual...
- Page 2 Garmin. Garmin hereby grants permission to download a single copy of this manual onto a hard drive or other electronic storage medium...
-
Page 3: Bout His
NTRODUCTION Thank you for choosing the Garmin The eTrex Vista Cx uses the proven performance of Garmin GPS and full-featured mapping to create an unsurpassed portable GPS receiver. Take a moment now to compare the contents of this package with the packing list on the box. -
Page 4: Table Of Contents
Using the Find Item Information Page ...18 Find Information Page Options Menu ...18 Finding a Waypoint ...20 Finding a Geocache ...20 Finding a City ...22 Finding an Interstate Exit ...22 Finding an Address ...23 Finding an Intersection ...24 eTrex Vista Cx Owner’s Manual Card ...9 ™... - Page 5 Turning Declutter On or Off ...47 Restoring Defaults ...47 Compass Page ... 48 Using the Electronic Compass ...49 eTrex Vista Cx Owner’s Manual NTRODUCTION Compass Page Options ...51 Sight ‘N Go Navigation ...52 Using the Course Pointer or Bearing Pointer ...53 Data Fields ...54...
- Page 6 What Is WAAS/EGNOS? ... 93 Map Datums and Location Formats ... 94 What Are Map Datums? ...94 What Is a Location Format? ...94 Loran TD Setup ... 95 FCC Compliance ... 96 Limited Warranty ... 97 Index ... 99 eTrex Vista Cx Owner’s Manual...
-
Page 7: Software License Agreement
Serial Number: ___ ___ ___ ___ ___ ___ ___ ___ Contact Garmin If you should encounter any difficulty while using your eTrex Vista Cx, or if you have any questions, in the U.S.A. contact Garmin Product Support by phone: 913/397.8200 or 800/800.1020, Monday–Friday, 8 AM–5 PM Central Time;... -
Page 8: Caring For The Vista Cx
IPX7. It can withstand immersion in 1 meter of water for 30 minutes. Prolonged submersion can cause damage to the unit. After submersion, be certain to wipe and air dry the unit before reuse or charging. eTrex Vista Cx Owner’s Manual... -
Page 9: Warning
WARNING: This product, its packaging, and its components contain chemicals known to the State of California to cause cancer, birth defects, or reproductive harm. This Notice is being provided in accordance with California’s Proposition 65. If you have any questions or would like additional information, please refer to our Web site at http://www.garmin.com/prop65. eTrex Vista Cx Owner’s Manual... -
Page 10: Caution
Other Garmin dashboard or friction mounting options should be used. Garmin does not take any responsibility for any fines, penalties, or damages that may be incurred as a result of disregarding this notice. -
Page 11: Getting Started
Unit Overview GPS antenna • Provides quick satellite acquisition Color LCD display Battery compartment locking D-Ring ETTING TARTED Carry Lanyard attachment slots USB connector port (under weather cap) Battery compartment cover Belt Clip/Auxiliary Mount Adapter attachment location • Accepts a Belt Clip accessory for convenient access when hiking or walking. -
Page 12: Installing The Batteries
Installing the Batteries The Vista Cx operates on two AA batteries (not included), which are installed in the back of the unit. You can use Alkaline or NiMH batteries. See page 67 for information on setting the battery type. To install the batteries: 1. -
Page 13: Key Functions
Vista Cx... -
Page 14: Turning On The Vista Cx
3. Press Enter or the Quit key to close the backlight adjustment window. See page 68 for information about changing the display colors and backlight timeout and brightness levels. Backlight Adjustment Slider eTrex Vista Cx Owner’s Manual... -
Page 15: Initializing The Gps Receiver
When the receiver has signals from at least three satellites, the display at the top of the page changes to indicate position accuracy and location coordinates. eTrex Vista Cx Owner’s Manual ETTING TARTED NITIALIZING THE 3. Press and release the Quit key until the Map Page appears. -
Page 16: Using The Vista Cx
Rocker. Default—the factory setting saved in the unit’s memory. You can change the settings, but you can also revert to the factory (default) settings when you select Restore Defaults. Field Highlighted field On-screen buttons eTrex Vista Cx Owner’s Manual... -
Page 17: Selecting Options And Entering Data
Press the Quit key. The Quit key moves backward through your steps. Press the Quit key repeatedly to return to the starting page. eTrex Vista Cx Owner’s Manual ETTING TARTED The Status Bar and Date and Time The status bar and Date/Time Window appear below the backlight adjustment slider when you press and release the Power key. -
Page 18: On-Screen Messages
MapSource data from a PC to the microSD card when installed in the Vista Cx. You can purchase additional microSD cards at your local electronics supplier. See the Garmin Web site (http://www.garmin.com/cartography/) for compatible MapSource products and pre-loaded microSD cards. -
Page 19: Transferring Data To A Microsd ™ Card
Transferring Data to a microSD The eTrex Vista Cx is equipped with a pre-installed microSD card. To install or remove the microSD card: 1. Remove the battery compartment cover from the back of the unit. 2. Locate the card slot at the upper-left edge of the battery tray, and check to be certain the card is installed in the slot. -
Page 20: Basic Operation
To change any information on the Mark Waypoint Page, highlight the appropriate field, and press Enter to open the on-screen keypad. After entering and confirming your changes, highlight OK, and press Enter. Waypoint name Mark Waypoint Page eTrex Vista Cx Owner’s Manual... -
Page 21: Creating Waypoints Using The Map
4. To change any information on the Waypoint Page, highlight the appropriate field, and press Enter to open the on-screen keypad. After entering and confirming your changes, highlight OK, and press Enter. eTrex Vista Cx Owner’s Manual ASIC PERATION REATING AND Creating a Waypoint Using Coordinates You can manually enter location coordinates to create a waypoint. -
Page 22: Editing Waypoints
3. Select the waypoint you want to delete, and press Enter. The Waypoint Page opens. 4. Highlight the Delete button, and press Enter. A confirmation message appears. 5. Highlight Yes, and press Enter to delete the waypoint. eTrex Vista Cx Owner’s Manual... -
Page 23: Moving A Waypoint
5. Use the Rocker to move the waypoint to a new location on the map, and press Enter. Original location Moving a waypoint eTrex Vista Cx Owner’s Manual ASIC PERATION Averaging the Waypoint’s Location You can average a new waypoint location over time to produce a more accurate location. -
Page 24: Projecting A Waypoint
6. Enter the distance and bearing to the projected waypoint in the appropriate fields at the bottom of the page, and press the Quit key when finished. Page Project Waypoint Page Projected Waypoint on the Map eTrex Vista Cx Owner’s Manual... -
Page 25: Proximity Waypoints
4. Select a waypoint from the Waypoints List or from any other group of map points, and press Enter to open the information page for the item. eTrex Vista Cx Owner’s Manual ASIC PERATION 5. With the Use button highlighted, press Enter to add the point to the list on the Proximity Waypoints Page. -
Page 26: Using The Find Menu
Find key to open the Find Menu. Find Menu with optional MapSource data When you access a Find group list, it contains only those items near your current location or the pointer (if active). Waypoint Options Menu Cities Options Menu eTrex Vista Cx Owner’s Manual... -
Page 27: Find By Name
To search the entire database, select the All Points of Interest icon, and press Enter. 3. Press the Menu key, highlight Find By Name, and press Enter. eTrex Vista Cx Owner’s Manual ASIC PERATION SING THE 4. Use the Rocker and Enter key to operate the on-screen keypad and enter the name of the location you want to find. -
Page 28: Recent Finds
2. Use the Rocker to select an option, and press Enter: • Average Location—sample a waypoint location over time and average the result for a more accurate location reference. See page 13 for more information. eTrex Vista Cx Owner’s Manual... - Page 29 See page 82 for more information. • View Hunt and Fish—view Hunt and Fish tables for this item location. See page 83 for more information. eTrex Vista Cx Owner’s Manual ASIC PERATION SING THE • Map Information—show the map from which the map item originated.
-
Page 30: Finding A Waypoint
A geocache location is a waypoint with a special geocache symbol assigned to give special significance and to allow it to be separated from others on the waypoints list. For more information about creating a geocache point, see eTrex Vista Cx Owner’s Manual... - Page 31 field. When a geocache is found, the unit marks the cache as found, log an entry into the calendar, and provide an option that, when activated, shows the nearest cache. eTrex Vista Cx Owner’s Manual ASIC PERATION Geocache icon...
-
Page 32: Finding A City
3. Use the Rocker to select an exit, and press Enter to open the information page. This page contains the exit description, a list of available services near the exit, and the distance and bearing from the exit to the highlighted service. page eTrex Vista Cx Owner’s Manual... -
Page 33: Finding An Address
When you enter the street number, street name, and city, the find feature matches that data with addresses in the map database. eTrex Vista Cx Owner’s Manual To find an address: 1. Press and hold the Find key to open the Find Menu. -
Page 34: Finding An Intersection
4. Highlight the <Enter Street 1> field, and press Enter. 5. Type the street name using the on-screen keypad. When finished, highlight OK, and press Enter again. eTrex Vista Cx Owner’s Manual... -
Page 35: Intersection Information Page
If you downloaded MapSource detailed mapping, you can use the All Points of Interest icon on the Find Menu to locate a nearby restaurant, lodging, landmark, public building, and so on. eTrex Vista Cx Owner’s Manual ASIC PERATION SING THE To find a point of interest:... -
Page 36: Custom Points Of Interest
first. Custom Points of Interest You can create your own category for points of interest by using the Garmin POI Loader utility available from the Garmin web site: www.garmin.com/products/ poiloader/. Follow the instructions for use on the web. - Page 37 • Wrap When Full—the track log records over the oldest data with new data. • Record Method—Distance records track points after a specified distance is traveled. eTrex Vista Cx Owner’s Manual ASIC PERATION Time creates track points after a specified time has elapsed.
- Page 38 7. With OK highlighted, press Enter. To log tracks to the microSD card: 1. With the Track Log setup page displayed, highlight the Data Card Setup button, and press ENTER to display the Data Card setup page. eTrex Vista Cx Owner’s Manual...
- Page 39 3. Use the USB cable to connect the unit to your computer then access the USB Mass Storage feature explained on page 68. You can open the track logs using Garmin MapSource or another .gpx file-compatible application. 4. To delete these track logs from the microSD card, highlight individual logs, and then press ENTER.
-
Page 40: Track Profiles
Begin point and the End point are shown at the bottom. 3. At any point along the profile, you can press Enter to show that point on the map. 4. Press Menu to use Zoom Ranges and Hide Symbols options. eTrex Vista Cx Owner’s Manual marker... -
Page 41: Navigating A Saved Track
When these types of maps are available, a Use Map Data - Use Track Data option menu appears when you select Profile. Refer to the Garmin web site for more information about MapSource U.S. Topo 24K maps. -
Page 42: Creating And Using Routes
3. Use the Rocker to highlight the New button, and press Enter to open the Route Page. 4. With the <Select Next Point> field highlighted, press Enter to open the Find Menu. Routes icon Setting up a route eTrex Vista Cx Owner’s Manual... -
Page 43: Navigating A Route
It navigates directly from point to point. Before each turn in the route, a turn page shows a guidance message and a graphic of the turn. You can eTrex Vista Cx Owner’s Manual ASIC PERATION REATING AND view the turns at any time by pressing up or down on the Rocker while the route is active. - Page 44 4. To scroll through all turn previews, press up or down on the Rocker. Press the Quit key to close the Turn Preview Page and return to the Active Route Page. Route on the Map Page eTrex Vista Cx Owner’s Manual...
-
Page 45: Editing A Route
Routes Page. 3. Select a saved route, and press Enter. 4. Highlight the route name field at the top of the Route Page, and press Enter. eTrex Vista Cx Owner’s Manual ASIC PERATION REATING AND 5. Use the... -
Page 46: Using The Route Page Options
• Profile—creates a vertical profile of the route. NOTE: This option is available only if you are using Garmin MapSource U.S. Topo 24K map data. • Copy Route—makes a copy of the saved route with the same name, but followed by a number. -
Page 47: Options Menu
Each page has an Options Menu, which contains the setup options and functions that apply to the page. To view the Options Menu for a page, press the Menu key. Map Page Altimeter Page Main Menu Compass Page No Options Altimeter Page Compass Page Map Page Options Menu Options Menu Options Menu eTrex Vista Cx Owner’s Manual... -
Page 48: Satellite Page
• New Location—use if you have moved the unit more than 600 miles and you are having trouble locking onto satellite signals. • GPS Elevation—shows your current elevation. eTrex Vista Cx Owner’s Manual... -
Page 49: Map Page
You can add and configure up to four optional data fields to the top of the page to provide a variety of travel and navigational information. eTrex Vista Cx Owner’s Manual To show data fields on the Map Page: 1. Press the Menu key to open the Map Page Options Menu. -
Page 50: Using Additional Map Data
2. Highlight Setup Map, and press Enter. 3. Use the Rocker to select the Map Setup- information page. The list of maps stored in the unit appears. A check mark indicates the map is shown on the Map Page. eTrex Vista Cx Owner’s Manual... -
Page 51: Changing The Zoom Range
When using MapSource maps, “mapsource” appears below the scale. Map ranges eTrex Vista Cx Owner’s Manual Map Orientation There are two map orientation options: North Up orients the map like a paper map. Track Up orients the map in the direction of travel. -
Page 52: Guidance Text
If you select Always Show, a guidance message always appears whether or not you are navigating. If you select Show When Navigating, a guidance message appears until you select Stop Navigation from the Options Menu. eTrex Vista Cx Owner’s Manual... -
Page 53: Setting Up The Map Page
Each page has a sub-menu of general options. To access this menu, press the Menu key with the preferred setup page displayed. eTrex Vista Cx Owner’s Manual Map Setup – General Page The Map Setup – General Page contains the settings for Orientation, Below, Auto Zoom, Detail, and Lock On Road. - Page 54 Us the Map Setup – Points Page to set the map scale at which Map Points, User Waypoints, Street Label, and Land Cover appear on the Map Page. Select Auto, Off, or from 20 ft to 800 mi. Map Setup – Points Page eTrex Vista Cx Owner’s Manual...
- Page 55 Enter to show it on the map display or turn it off. Map Setup – Information Page eTrex Vista Cx Owner’s Manual Press the Menu key to view the list of options for displaying maps. Map Setup – Marine Page Use the Map Setup –...
-
Page 56: Measuring Distance
The distance between the two points is shown in the upper-right corner of the Map Page. 5. Press Quit to cancel. Push pin indicating the beginning point of the measurement eTrex Vista Cx Owner’s Manual Measured distance End point of measurement labeled REF... -
Page 57: Turning Declutter On Or Off
2. Highlight Turn Declutter On, and press Enter. To turn Declutter off, press Menu, select Turn Declutter Off, and press Enter. eTrex Vista Cx Owner’s Manual Restoring Defaults Use the Restore Defaults option to return the map settings to factory settings. -
Page 58: Compass Page
North orientation. Course Pointer The bearing pointer always indicates the direction of your destination. Scale The course pointer indicates your course of travel and the distance you drift off course. Bearing Pointer eTrex Vista Cx Owner’s Manual... -
Page 59: Using The Electronic Compass
You can customize the criteria for switching between the electronic compass and the GPS. eTrex Vista Cx Owner’s Manual To turn the electronic compass on or off: 1. Press and hold the Quit key to turn the electronic compass on or off. -
Page 60: Calibrating The Electronic Compass
Hold the unit level while turning. A “Calibration Successful” message appears when finished. If a “Calibration Failed” message appears, repeat the process. Calibration Compass Page Calibration Progress Page eTrex Vista Cx Owner’s Manual... -
Page 61: Compass Page Options
Page. With the Compass Page open, press the Menu key. To select an option, highlight it, and press Enter. Compass Page Options Menu eTrex Vista Cx Owner’s Manual The following options are available: • Sight ‘N Go—allows you to navigate to an object within your sight. -
Page 62: Sight 'N Go Navigation
The Compass Page shows a bearing pointer for guidance. To stop navigation: 1. Press Menu to open the Map Page Options Menu. 2. Highlight Stop Navigation, and press Enter to stop navigating Project Waypoint Page eTrex Vista Cx Owner’s Manual... -
Page 63: Using The Course Pointer Or Bearing Pointer
Using the Course Pointer or Bearing Pointer The bearing pointer and course pointer work independently of each other. The bearing pointer indicates the direction to your destination, and the course pointer indicates your relationship to a course line leading to the destination. If the bearing pointer arrow is pointing straight up, for example, you are going directly to your destination. -
Page 64: Data Fields
To select the course pointer or the bearing pointer: 1. Press the Menu key to open the Compass Page Options Menu. The bearing pointer is the factory set default option. When the bearing pointer option is shown, the course pointer is active and vice versa. -
Page 65: Altimeter Page
1. Press the Menu key to open the Compass Page Options Menu. 2. Highlight Restore Defaults, and press Enter to return the page to factory settings. eTrex Vista Cx Owner’s Manual AGES Altimeter Page The Altimeter Page shows you the current elevation, rate of ascent and descent, a profile of elevation... -
Page 66: Altimeter Page Options
Altimeter” option. • Restore Defaults—clears recorded data from the page and begin recording new data. You can customize the View option displays using the Zoom Ranges option to determine time, distance, pressure, and elevation parameters. eTrex Vista Cx Owner’s Manual... -
Page 67: Plot Over Time Or Distance
Altimeter Page Options Menu. Elevation over Pressure over Distance plot eTrex Vista Cx Owner’s Manual View Pressure or Elevation Plots Select the View Elevation Plot option to plot a profile of elevation changes that occur as you navigate over a set distance or period of time. -
Page 68: Zoom Ranges
Pressing up or down on the Rocker while a plot is displayed also switches to the Zoom Range feature. 3. Press Enter to return to the Plot Page. Time plot eTrex Vista Cx Owner’s Manual... -
Page 69: View Points
Red crosshairs View point for an View point for a altitude plot pressure plot eTrex Vista Cx Owner’s Manual AGES To use the View Points option: 1. Press the Menu key to open the Altimeter Page Options Menu. 2. Select View Pressure Plot or View Elevation Plot, and press Enter to open the Plot Page. -
Page 70: Resetting Data
fields. A confirmation message appears. You can reset or delete data for any of the other features represented on the list by placing a check mark in the box next to the item. eTrex Vista Cx Owner’s Manual... -
Page 71: Calibrating The Altimeter
1. Press the Menu key to open the Altimeter Page Options Menu. 2. Highlight Calibrate Altimeter, and press Enter to open the Calibration Page. eTrex Vista Cx Owner’s Manual AGES 3. At the message “Do You Know The Correct Elevation?” highlight the Yes button, and press Enter. -
Page 72: Change Data Fields
Enter to view a list of available data field options. Data field options 4. Press up or down on the Rocker to highlight an option, and press Enter to place it in the data field. Data fields eTrex Vista Cx Owner’s Manual... -
Page 73: Trip Computer Page
Selecting the type of data to display is done in the same manner as for the similar data fields on the Map Page. (See page 40 for details.) eTrex Vista Cx Owner’s Manual AGES Trip Computer Page Options Menu The following options are available: Reset—because you want to record new data... -
Page 74: Main Menu
1. Press the Menu key twice to open the Main Menu. 2. Select the Tracks icon, and press Enter. 3. Highlight the Setup button, and press Enter to open the Track Log Setup Page. Tracks Page Track Log Setup eTrex Vista Cx Owner’s Manual... -
Page 75: Track Page Options
Record Method is set to Distance or Time. • Color—sets the color for the track when it appears on the map. eTrex Vista Cx Owner’s Manual Routes Page Use the Routes Page to create a route to a destination. For more information, see Routes on page 32... -
Page 76: Setup Menu
System, Display, Tones, Page Sequence, Map Display, Routing Methods, Geocaching, Marine Features, Time, Units of Measure, Heading, Calibration, Altimeter, Welcome Page, and Jumpmaster. Each feature is explained on the pages that follow. Setup Menu Page eTrex Vista Cx Owner’s Manual... -
Page 77: System Setup
• Battery Type— selects the battery type you are using (Alkaline or NiMH). • Text Language—sets the unit’s on-screen language. eTrex Vista Cx Owner’s Manual • External Power Lost—indicates whether the unit remains on (Stay On) or turns off (Turn Off) when external power is removed from the unit. -
Page 78: Display Setup
USB Mass Storage—allows the microSD card to be used as a USB Mass Storage device. It also allows transfer of Track Log Data to Garmin MapSource and detailed map data transfer. eTrex Vista Cx Owner’s Manual... -
Page 79: Tones Setup
3. For a PC, highlight the file and select Edit > Copy and open the drive identified with the Vista Cx. eTrex Vista Cx Owner’s Manual NOTE: If you have several network drives mapped to your computer, Windows experience difficulty assigning a drive letter for your unit microSD card. -
Page 80: Page Sequence Setup
Follow Road—creates a route that overlays the roads shown on the map. Off Road—creates a direct line from your current location to your destination. This is useful when traveling outside of the detailed map coverage area or where no roads exist. eTrex Vista Cx Owner’s Manual... -
Page 81: Follow Road Options
• Next Turn Pop-up—turns the Next Turn pop- up window on or off. eTrex Vista Cx Owner’s Manual Follow Road Options • Off Route Recalculation— sets whether the unit prompts you when it is recalculating your route (Prompted) or whether recalculates automatically. -
Page 82: Geocache Setup
ETUP Geocache Setup Use the Geocache Setup Page to find and record items hidden at geographic locations. See the Garmin Web site (www.garmin.com) for details and how to download geocache locations from the Internet. NOTE: Before setting up and placing physical... -
Page 83: Units Setup
94 in the Appendix. • Distance and Speed—sets the unit of measurement for speed and distance traveled. eTrex Vista Cx Owner’s Manual • Elevation (Vert. Speed)—sets the unit of measurement (Feet (ft/min), Meters (m/min), or Meters (m/sec)) for indicating your altitude. -
Page 84: Calibration Setup
1. On the Setup Menu Page, highlight the Altimeter icon, and press Enter. 2. Highlight the Auto Calibration field, and press Enter to select from On or Off. When on, elevation is corrected by the GPS. eTrex Vista Cx Owner’s Manual... -
Page 85: Welcome Page Setup
Vista Cx. To access the Welcome Setup Page: On the Setup Menu Page, highlight the Welcome Message icon, and press Enter. eTrex Vista Cx Owner’s Manual To add a welcome message: 1. Use the on-screen keypad and the Rocker... - Page 86 2,000 to 6,000 feet AGL. Static jumps require a drop altitude of at least 1,000 feet to be specified. A constant wind speed and direction for the duration of the jump is assumed. eTrex Vista Cx Owner’s Manual...
-
Page 87: Wind Setup
Oceanographic & Atmospheric Administration (NOAA) or by a drop zone support team leader (DZSTL) monitoring the course of a Pilot eTrex Vista Cx Owner’s Manual Balloon (PiBal) released from the ground at the DIP and wind streamers dropped from aircraft once the HARP is calculated. - Page 88 DIP. If you want your unit to determine when you have jumped, this box should be checked. A message appears describing how to manually navigate the route. Select Restore Defaults from the Option Menu of this page to reset the values. eTrex Vista Cx Owner’s Manual...
- Page 89 FFD—(Free Fall Drift) defines the distance traveled before the parachute is open. Forward Throw Horizontal—describes the distance traveled forward due to aircraft speed. eTrex Vista Cx Owner’s Manual K values—defines the wind drag values for parachutes. HAHO—(High Altitude High Opening) describes a type of jump.
-
Page 90: Proximity Waypoints
Remove Points Options List. 7. To view other calendar formats, Sun and Moon, or Hunt and Fish extended data for a specific date and location, press the Menu key, and use the Rocker to make your choice. eTrex Vista Cx Owner’s Manual... -
Page 91: Calculator
3. Use the Rocker and the Enter key to operate the calculator. Options Menus Calculator Page eTrex Vista Cx Owner’s Manual ALCULATOR AND Stopwatch Select the Stopwatch icon to use the Vista Cx as a stopwatch, which includes a lap timer. You can also have the unit record the lap time based on distance. -
Page 92: Sun And Moon
The button to the left animates the display of the sun and moon. The center button animates more rapidly, showing the phases of the moon. The right button stops animation. eTrex Vista Cx Owner’s Manual Press to stop animation. -
Page 93: Hunt And Fish
1. Press the Menu key twice to open the Main Menu. eTrex Vista Cx Owner’s Manual 2. Select the Hunt & Fish icon, and press Enter. The current date and location appear in the date and location fields at the top of the page. -
Page 94: Games Menu
Travel to each square, highlight Open at the bottom of the screen, and press Enter to view the symbol. eTrex Vista Cx Owner’s Manual... -
Page 95: Virtua Maze
Viewing less of the maze makes the game more difficult. eTrex Vista Cx Owner’s Manual TIP: Press Menu, and select Cheat to start cheat mode. Enabling this mode penalizes you by five minutes and counts seconds by 10 instead of... -
Page 96: Nibbons
The map is stationary and north is always up. The “Ship Up” setting rotates the virtual world around your ship. Your ship always points up. Press Enter to start, and blast away. eTrex Vista Cx Owner’s Manual... -
Page 97: Beast Hunt
Select a difficulty level (Trainee, Beginner, Expert, or Master), and press Enter to open the Visibility Menu. eTrex Vista Cx Owner’s Manual 3. Select a visibility option (Extended or Limited), and press Enter to begin play. 4. Use the Rocker to jump from platform to platform. -
Page 98: Appendix
Map Storage: , resolution; 1 degree Accuracy; +/- 10 feet*, resolution; 1 ft. Two 1.5 volt AA batteries, 12 V DC Adapter Cable, or PC/USB Adapter Dependant on the formatted capacity of the microSD Card. eTrex Vista Cx Owner’s Manual... -
Page 99: Optional Accessories
Battery Pack—rechargeable, NiMH, AA-battery kit, with US-type receptacle plug. Belt Clip with Button—Attaches to back of unit. For a complete list of available accessories for use with the Vista Cx, refer to the Garmin Web site: http://garmin.com/products/etrexVistacx/. PTIONAL CCESSORIES... -
Page 100: Data Field Definitions
(N, S, E, W). Location (lat/lon)—your current location as latitude and longitude coordinates. Location (selected)—your current location described in the selected units of measure (other than latitude and longitude). eTrex Vista Cx Owner’s Manual... - Page 101 Time of Day—the current time and date. It can be displayed in 12- or 24-hour format in local time or universal (UTC) time. eTrex Vista Cx Owner’s Manual PPENDIX To Course—your direction of travel to get back on course. Trip Odometer—the running total of distance traveled since the Trip Computer was reset.
-
Page 102: Connecting Your Vista Cx To A Computer
You only need to install the drivers once. After the drivers are installed, your computer always detects your Vista Cx when it is connected. USB drivers might be updated periodically. You can find updates at www.garmin.com. eTrex Vista Cx Owner’s Manual... -
Page 103: What Is Waas/Egnos
SBAS satellite. In fact, it can degrade the accuracy to less than that provided by GPS satellites alone. For this reason, when you enable WAAS on your Garmin GPS receiver, the receiver automatically uses the method that achieves the best accuracy. For more information, go to... -
Page 104: Map Datums And Location Formats
Your current location is viewed on the GPS in the form of coordinates. Because different maps and charts use different location formats, Garmin GPS units allow you to choose the correct coordinate system for the type of map you are using. The most common format is latitude and longitude, which is used by all Garmin units. -
Page 105: Loran Td Setup
TD coordinates accordingly. Remember that the Vista Cx is not relying on the LORAN signal for navigation and eTrex Vista Cx Owner’s Manual PPENDIX actually converts the TD coordinate to a useful latitude and longitude coordinate before storing the waypoint to memory or using it for navigation. -
Page 106: Fcc Compliance
PPENDIX OMPLIANCE FCC Compliance The eTrex Vista Cx complies with Part 15 of the FCC interference limits for Class B digital devices FOR HOME OR OFFICE USE. These limits are designed to provide more reasonable protection against harmful interference in a residential installation, and are more stringent than “outdoor”... -
Page 107: Limited Warranty
Limited Warranty This Garmin product is warranted to be free from defects in materials or workmanship for one year from the date of purchase. Within this period, Garmin will at its sole option repair or replace any components that fail in normal use. Such repairs or replacement... - Page 108 Garmin dealer for repairs. The eTrex Vista Cx is fastened shut with screws. Any attempt to open the case to change or modify the unit in any way will void your warranty and may result in permanent damage to the equipment.
-
Page 109: Index
22 bearing pointer 53 a geocache 20 calibrating 50 a point of interest 25 course pointer 53 eTrex Vista Cx Owner’s Manual by name 17 view elevation or pressure item information page 18 recent finds 18 hunt and fish 83... - Page 110 28 setting up a track 27 view a track 29 transferring data to a microSD card 9 Trip & Waypoint Manager 92 trip computer 63 options 63 turning on the unit 4 eTrex Vista Cx Owner’s Manual...
- Page 112 For the latest free software updates (excluding map data) throughout the life of your Garmin products, visit the Garmin Web site at www.garmin.com. © 2006 Garmin Ltd. or its subsidiaries Garmin International, Inc. 1200 East 151 Street, Olathe, Kansas 66062, U.S.A.
Need help?
Do you have a question about the eTrex Vista Cx and is the answer not in the manual?
Questions and answers
У компьютер не видит Гармин виста. Как его настроить