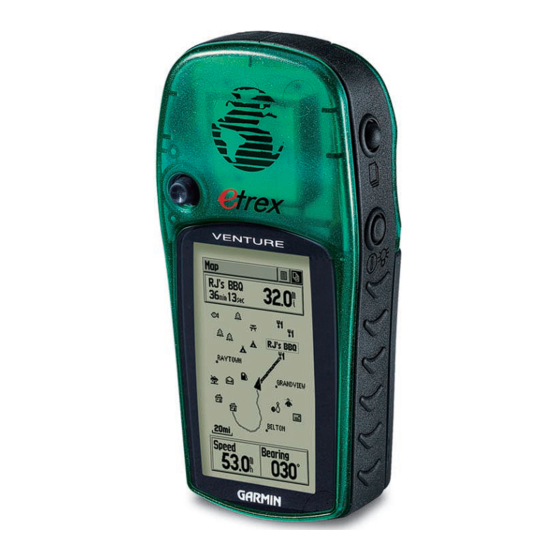
Garmin eTrex Venture Owner's Manual And Reference Manual
Personal navigator
Hide thumbs
Also See for eTrex Venture:
- Owner's manual and reference manual (76 pages) ,
- Specifications (2 pages) ,
- Quick start manual (2 pages)
Table of Contents
Advertisement
Quick Links
Advertisement
Table of Contents

Related Manuals for Garmin eTrex Venture


Summary of Contents for Garmin eTrex Venture
- Page 1 eTrex Venture ® personal navigator owner’s manual reference guide...
- Page 2 GARMIN Corporation. GARMIN Corporation hereby grants permission to download a single copy of this manual onto a hard drive or other electronic storage medium to be viewed for personal...
-
Page 3: About This Manual
Manual Thank you for choosing the GARMIN eTrex Venture. To get the most from your new eTrex Venture, take time to read through this owner’ s manual in order to understand all of the operating features. This manual is organized into four sections. -
Page 4: Fcc Compliance Statement
Consult an authorized GARMIN dealer or other qualifi ed service technician if the problem cannot be corrected. Operation is subject to the following conditions: (1) This... - Page 5 Refer to air bag safety precautions con- tained in the vehicle owner’ s manual. Do not mount the eTrex Venture in a place where the driver or pas- sengers are likely to impact it in an accident or collision.
-
Page 6: Table Of Contents
Introduction Table of Contents Projecting a Waypoint.........29 Section One - Introduction Editing Waypoints........29 About This Manual..........i Saving as a Waypoint........29 FCC Compliance Statement.......ii Warnings and Precautions......ii-iii The Find Menu........30-35 Table of Contents..........iv Finding a Waypoint......31 Finding a Favorite........32 Finding a City........33 Section Two - Getting Started Finding a Point of Interest..34-35 Setup, Features, &... -
Page 7: Setup, Features, & Basic Navigation
Getting Started SECTION 2 Setup, Before you begin to explore the eTrex Venture’ s operating features, you will want to follow these “Getting Features, Started” instructions to prepare it for operation by installing batteries, adjusting the screen contrast, loading Basic Navigation optional GARMIN “Points of Interest”... -
Page 8: Features And Button Function
• Press and hold when on the Satellite Page to adjust the screen contrast The FIND button: • Press and release to access the Find Menu Battery NOTE: The eTrex Venture is designed to be Compartment Carry Cover held and operated in the left hand, but it... -
Page 9: Battery Installation
D-ring last up to 20 hours. Starting Up Starting Up Your eTrex Venture To start up the eTrex Venture, take the unit outside GPS Receiver Status Message Satellites Signal Strength and fi nd an open area where the built-in antenna has a clear view of the sky. -
Page 10: Backlighting And Contrast
The eTrex Venture will currently accept only the “Points of Interest” map data guide. Data transfer requires the use of a PC, a GARMIN MapSource “Points of Interest” CD-ROM, and the PC Inter- face Cable with RS232 serial port connector supplied with this unit. -
Page 11: Page Basics: The Main
Getting Started Moving from main page to main page Page Basics: The Main Pages All of the information you need to operate the eTrex Venture can be found on fi ve main pages (or display screens). You can simply press and release the PAGE button to cycle through the Satellite Page, Map Page, Navigation Page, Trip Computer and Main Menu Page. -
Page 12: Getting Started
The map also displays geographic details such as major cities. The map can display more map item details when GARMIN MapSource “Points of Interest” data has been downloaded to the unit using a CD-ROM program To allow you to view the map from different perspec- tives, the scale can be changed from 120 feet to 500 miles. - Page 13 Getting Started Navigation Page Basics Page Basics: Straight Line Distance The Main Pages Destination (Waypoint) Name to the Destination Time to Destination Bearing Pointer Compass Ring Selectable Data Fields The Navigation Page displays directional information to guide you to a destination. The Status Window at the top of the page shows you the name of your destina- tion, the distance and the time to go.
- Page 14 Getting Started Page Basics: Trip Computer Page Basics The Main Pages Selectable Data Fields The Trip Computer page displays up to eight different types of navigation data. Each data fi eld is selectable and can contain one of many data information options. By selecting the information options that you prefer and arranging them in a desired order on the page, you can customize the Trip Computer Page to meet your...
-
Page 15: Setting The Correct Time
Power Supply, Time/Date, and Backlighting Status Bar. The Main Menu provides you with a directory of the eTrex Venture’ s advanced features. From the Main Menu page you can mark and create new waypoints, fi nd map items such as cities, points of interest, etc., create routes, save track logs, Setup system operating features, access and use unit accessories. -
Page 16: Basic Navigation
Getting Started Basic Navigation To begin learning how to use your eTrex Venture, begin by using some basic navigation techniques such as marking your current location as a waypoint, and travel a short distance and allow yourself to be guided back to where you started. - Page 17 Getting Started To change the waypoint symbol: Basic Navigation 1. Use the CLICK STICK to highlight the waypoint symbol fi eld on the Mark Waypoint Page and then press it in to display the list of symbols. 2. Use the CLICK STICK to move up and down the list to highlight the desired symbol and then press it in to place the symbol in the fi...
-
Page 18: Basic Navigation
Getting Started Navigating Back to Your Starting Point Basic Navigation Now we will navigate back to the waypoint you marked at the beginning of this exercise using the Goto function. Going To (Goto) the Marked Waypoint: 1. Press and release the FIND key to display the Find Menu. 2. -
Page 19: The Satellite
The Satellite Overview Page Because the eTrex Venture relies on satellite signals to provide you with navigational guidance, the unit’ s view of the sky will determine how fast you achieve navigational status. GPS signals do not travel through rocks, build- ings, people, metal, or heavy tree cover...so keep the unit... -
Page 20: The Satellite Page
2. Highlight ‘New Location’ and press in on the CLICK STICK to display choices of ‘Auto’ or ‘Use Map’. 3. If you choose ‘Auto’ the eTrex Venture will determine your new location automatically. 4. If you choose ‘Use Map’ a map page will appear with instructions stating, “Point to your approximate location... -
Page 21: Navigation Methods
Track - A previous path of travel that has been stored (logged) in the eTrex Venture. A Track allows you to repeat a path or to return to your starting point on the same path using the GARMIN TrackBack feature. -
Page 22: The Map Page
Press and hold to ZOOM the map scale rapidly. In many instances the map will display an ‘Accuracy Circle’ surrounding the ‘Position Icon’. The eTrex Venture The Map Page uses both map resolution and GPS accuracy in defi ning your location to a point within the circle. -
Page 23: Map Page
Map Page Options - Overview Map Page Options Menu Map Page options allow a variety of operating and customizing features for your eTrex Venture. On-screen Map Page Options Menu button Not all of the Map Page options are available at the same time. -
Page 24: Panning The Map
Reference Map Page Options Using the Panning Arrow - Overview The Map Page pan function allows you to display an arrow used to point at and identify items on the map, and to move the map in order to view areas beyond the current viewing area on the display. -
Page 25: Stop Navigation
Reference Stop Navigation Map Page Options The ‘Stop Navigation’ option allows you to quit naviga- tion of a Goto, Route or Track in progress. To stop navigation: 1. Select ‘Stop Navigation’ and then press in on the CLICK STICK. When there is no active navigation, the ‘Stop Naviga- ‘Stop Navigation’... -
Page 26: Data Fields
Reference Data Field - Overview Data Fields Two optional data fi elds support the Map Page and can be programmed to display the following options: Status Field, shows satellite tracking and accuracy. Bearing - The direction from your current location to (Non-programmable) a destination. -
Page 27: Map Page Setup
Reference Map Page Setup Map - Overview Setup Options The ‘Setup Map’ option displays the Map Setup Pages. These pages determine how map features are displayed allowing you to tailor the map to your needs. The Map Page Setup Options The Map Setup Page consists of four sub-pages, each accessed by an on-screen button. -
Page 28: Map Page Setup
Reference Step-by-Step Instructions Map Page Setup Options To use Setup Map options: 1. Select ‘Setup Map’ from the Options Menu and then press in on the CLICK STICK to display the Map Setup Page. 2. Highlight the desired sub-page button to display the features list for that sub-page. -
Page 29: The Navigation Page
Reference Overview The Navigation Page The Navigation Page provides active guidance with a rotating compass ring that shows your course over ground (track) while you’re moving and a bearing pointer to indicate the current direction to your destination (bear- ing) relative to the course over ground. The Compass Ring and ‘Bearing Pointer’... -
Page 30: Data Fields
Reference Step-by-Step Instructions The Navigation Page Using options to Setup the Navigation Page: 1. With the Navigation Page displayed, use the CLICK STICK to highlight the Options Menu button at the top of the page. Then press it in to display the menu. 2. -
Page 31: The Trip Computer Page
Reference Trip Computer Page - Overview Trip Computer Page The Trip Computer provides a variety of data fi elds with read-outs of current information as you travel. Eight fi elds display navigation information and are user programmable. The default settings for these fi elds are shown in the illustration to the right. -
Page 32: The Main Menu
The Main Menu provides access to additional eTrex Venture feature pages. The pages listed below provide enhancements to eTrex Venture operation. Press the PAGE button repeatedly to cycle to the Main Menu..Or select it from the page list at the top of each... -
Page 33: Marking Your Location
Reference The Mark Waypoint Page - Overview Marking Your Location The Mark Waypoint Page allows you to mark and record your current location as a waypoint and appears with a graphic name block (man with a fl ag) that displays the assigned number for that waypoint and waypoint symbol. -
Page 34: Creating A Waypoint
Reference Creating a To create a waypoint using the panning arrow when a map item is not highlighted: Waypoint 1. With the Pan Map feature active, move the panning arrow (map pointer) on the map to the location you want to mark and then, press the CLICK STICK in and release. -
Page 35: Projecting A Waypoint
Reference Projecting Projecting a Waypoint a Waypoint Projecting a waypoint from any map item (another waypoint, etc.) allows you to establish a new waypoint on a bearing and distance projected from that map item. To project a waypoint: 1. Select a map item from the Find Menu. (See page 30) 2. -
Page 36: The Find Menu
Reference The Find Menu The Find Menu - Overview The Find Menu allows you to fi nd stored locations: waypoints and cities. They can be found by name or by those nearest to your current location (Position Icon) or the panning arrow (Map Pointer). If you are using the MapSource “Points of Interest”... -
Page 37: Finding A Waypoint
The Find Menu Waypoints that you have created and stored in the eTrex Venture can be found by selecting the “Waypoint’ option from the Find Menu. You can fi nd a waypoint from the list of waypoints using the ‘By Name’ or ‘Nearest’... -
Page 38: Finding A Favorite
Reference Finding a Favorite - Overview The Find Menu Favorites are map items and waypoints that have designated as those you would like to give a special status, as they are frequently used or have other special signifi - cance. Placing a waypoint in the ‘Favorites’ makes it easy to access, as this list has a maximum of 50 entries. -
Page 39: Finding A City
Reference Finding a City - Overview The Find Menu Major cities can be found by selecting the ‘Cities’ option of the Find Menu, selecting the city from the list using fi nd ‘Nearest’ or fi nd ‘By Name’ options, and then displaying the City Information Page. -
Page 40: Finding A Point Of Interest
Reference The Find Menu Finding a Point of Interest - Overview You can use the Find Point of Interest option to locate a nearby restaurant, lodging, landmark, public building, park, etc. However, you must have fi rst trans- ferred MapSource “Points of Interest” data to the unit database, otherwise this option, will appear gray and will not be functional. -
Page 41: The Find Menu
Reference The Find Menu Step-by-Step Instructions To fi nd a point of interest: 1. Press the FIND button to display the Find Menu. 2. Use the CLICK STICK to highlight ‘Points of Interest’ and then press it in to display the Points of Interest Categories List. -
Page 42: Using A Goto
Reference Using a Goto Using a Goto to Navigate to a Destination The Goto function allows you to create a direct route to a destination, (waypoint, city, or point of interest). Once you have accessed the Information Page for an item, use the Goto button at the bottom of the page to initiate travel to a map item using the Map and Navigation Pages for guidance. -
Page 43: Routes
Route navigation allows you to create a sequence of intermediate waypoints which lead you to your fi nal destination. The eTrex Venture will store 20 routes, each with up to 50 waypoints. A route can be created and modifi ed from the Route Page, waypoints can be added to a route from Find Menu. -
Page 44: Editing A Route
Reference Editing a Route Routes To remove all waypoints: 1. Select the on-screen page options button from the Route Page and press the CLICK STICK in to access the options menu. 2. Highlight the ‘Remove All’ option and then press in on the CLICK STICK to remove all waypoints from the list. -
Page 45: Adding Or Editing From The Route Map Page
Reference Routes Editing a Route (Continued) To review a waypoint: 1. Select the waypoint from the Route Waypoints List and press the CLICK STICK in to access the options menu for the waypoint. 2. Highlight ‘Review’ and then press in on the CLICK STICK to display the Information Page for the waypoint. - Page 46 Reference To move a route waypoint: Routes 1. Select the waypoint from the Route Waypoints List and press the CLICK STICK in to access the options menu for the waypoint. 2. Highlight the ‘Move’ option and press in on the CLICK STICK to display the waypoint on the map.
-
Page 47: Navigating A Route
Reference Routes 3. Next drag the line to a map item or other location where you want to establish a new waypoint and then press in on the CLICK STICK to place the new waypoint. A waypoint information page will display. Press the on- screen ‘OK’... -
Page 48: Data Fields
Reference Routes Data Fields for the Route Page When navigating a Route, the data displayed in the data fi elds on Route Page may be customized to provide useful navigation information that is specifi cally related to route navigation. These data options appear only on the Route Page, Options for this type of navigation are: Distance to Point - The distance from your current loca-... - Page 49 ‘Track Log’. The Track Log contains informa- tion about points along its path, including time, and posi- tion. The eTrex Venture can use this information to allow you to navigate using the saved track. The ‘TracBack’ feature allows you to return along a traveled path without marking any waypoints.
-
Page 50: Tracks
Reference Tracks Page Step-by-Step Instructions To save and use a Track Log: 1. Access the ‘Tracks’ page from the Main Menu. The page has On/Off buttons, a list of tracks, and the number of unused tracks. 2. You can press in on the on-screen ‘Off’ button to pause track logging. -
Page 51: The Setup
Reference The Setup Pages - Overview Setup Pages The Setup Pages allow you to customize your eTrex Venture to your personal preferences. You can choose Time settings, Units of Measure, Display backlighting and contrast settings, Heading measurement, Interface options and System operating mode. By highlighting the icons on the Setup Menu and then pressing in on the CLICK STICK, you can display the Setup Page for each of the menu items. -
Page 52: Units Page
Reference Setup Pages Units Page - Overview The Units features are best used by individuals with a working knowledge of map grids and datums. To learn more about these subjects, visit the National Imagery and Mapping Agency at http://www.nima.mil or inquire at your library. -
Page 53: Display Page
Reference Display Page - Overview Setup Pages You can adjust the amount of time that the backlight- ing feature stays on before timing out and adjust the screen contrast for best viewing Backlighting Timeout - Allows you to choose from always On, to delays of 15 seconds, 30 seconds, one, or two minutes before timing out. -
Page 54: Interface Page
This feature is used when connecting your eTrex Venture to external NMEA devices, a DGPS beacon receiver, a personal computer, etc. For effective use of this feature it is necessary to have a working knowledge of these applications. -
Page 55: System Page
WAAS Enabled You can use the Wide Area Augmentation System (WAAS) capability of the eTrex Venture to produce a more accurate position fi x (3 meters nominal). When enabled, this feature searches for a WAAS satellite near your location and then receives data for correcting differentials in the GPS satellite signals. -
Page 56: The Accessory
Reference Accessory Pages Accessories Menu The are three accessory pages (features which enhance the unit operation, but are not essential), sun and moon position relative to a location, a calendar displayed by month, and a hunting and fi shing best times record. Highlight the appropriate icon and then press in on the CLICK STICK to display the desired page. -
Page 57: Calendar Page
Reference Calendar - Overview Accessory Pages This feature provides you with a monthly calendar with programmable reference notes dates. You can display one monthly calendar of days at a time and mark days on each with reference notes using the data entry keypad. You can create reference notes for multiple months and for months years in yet to come. -
Page 58: Hunt And Fish Page
Reference Accessory Pages Hunt and Fish - Overview This feature provides you with a listing of best times for hunting and fi shing for a chosen location and date. Step-by-Step Instructions To set the date: 1. Highlight the date fi eld and then press in on the CLICK STICK to begin data entry of individual characters. -
Page 59: Appendix A: Specifi Cations
Subject to accuracy degradation to 100m 2DRMS under the U.S. DoD-imposed Selective Availability program. Subject to proper user calibration The temperature rating for the eTrex Venture may exceed the usable range of some batteries. Alkaline batteries can rupture at high temperatures. External power can only be applied using the GARMIN Auto Power Adapter (P/N 010-10203-00) or PC Interface Cable with Auto Power Adapter (P/N 010-10268-00). -
Page 60: Appendix B Time Offset Chart
Appendices Appendix B Time Offset Chart The table below gives approximate UTC time offset for various longitudinal zones. If you are in daylight savings time, add one hour to the offset. Longitudinal Zone Offset Longitudinal Zone Offset E007.5° to E022.5° +01.00 W180.0°... -
Page 61: Appendix C Accessories
Provides convenient method for carrying the eTrex Venture. Attaches to a slot on the bottom of the unit. (Not shown) PC Interface Cable....Part No. 010-10206-00 Allows for transfer of data from a PC to an eTrex Venture. (RS232 serial port connector) (Not shown) Owner’s Manual......Part No. 190-00203-00 Quick Start Guide..... -
Page 62: Appendix D Wiring Diagram
PC’ s , differential beacon receivers, marine auto- pilots and /or a second GPS receiver. The NMEA 0183 version 2.3 interface format is supported by the eTrex Venture and enables the unit to drive up to three NMEA devices. NMEA 0183 Version 2.3 Approved Sentences:... -
Page 63: Appendix E Troubleshooting
CLICK STICK the left. right corner. to exit. The eTrex Venture is programmed to provide “pop-up” messages concerning operational characteristics and conditions. Press in on the CLICK STICK to acknowledge a message and return to the current feature. -
Page 64: Appendix F Index
Appendices Appendix F Index Features............1-2 Fields, Data ..........20 Find Cities..........30, 33 Accessories..........55 Find Favorites ........30, 32 Activate a Route .......... 37 Find Button........... 2 Altitude ..........13, 14 Find Menu ..........30 Altitude Entry..........14 Find Points of Interest ......30, 34-35 Antenna ............. - Page 65 Appendices Appendix F Navigation Page......5, 7, 23-24 Index Nearest (Waypoints, Cities, etc.)....31 NMEA ........... 48, 56 Normal Mode..........49 North Up ..........14, 21 Time Format ..........45 North Reference .......... 47 Time Offset Chart........54 Time Zone..........45, 54 TracBack............
-
Page 66: Appendix G: Warranty
GARMIN Corporation warrants this product to be free from defects in materials and workmanship for one year from the date of purchase. GARMIN will, at its sole option, repair or replace any components which fail in normal use. Such repairs or replacement will be made at no charge to the customer for parts or labor. - Page 67 Product Registration Help us to better support you by completing our on-line registration today! Connect to our website (www.garmin.com) and look for the Product Registration link on the Home Page. Why should you register your eTrex Venture unit? • Notifi cation of Product Updates •...
- Page 68 © 2001 GARMIN Corporation GARMIN International, Inc. 1200 E 151 Street, Olathe, KS 66062 U.S.A. GARMIN (Europe) Ltd. Unit 5, The Quadrangle, Abbey Park Industrial Estate, Romsey, SO51, 9AQ U.K. GARMIN Corp. No. 68, Jangshu 2 Road, Shijr, Taipei County, Taiwan www.garmin.com...
Need help?
Do you have a question about the eTrex Venture and is the answer not in the manual?
Questions and answers