Table of Contents
Advertisement
OWNER'S MANUAL & OPERATING INSTRUCTIONS
35 Ton
LOG SPLITTER
MODEL NUMBER
93520
10006 Santa Fe Springs Road
SAVE THESE INSTRUCTIONS
Santa Fe Springs CA 90670
Important Safety Instructions
USA / 1-877-338-0999
MADE IN CHINA
are included in this manual.
REV 93520-20130425
www.championpowerequipment.com
Advertisement
Table of Contents

Subscribe to Our Youtube Channel
Related Manuals for Champion Power Equipment 93520


Summary of Contents for Champion Power Equipment 93520
- Page 1 OWNER’S MANUAL & OPERATING INSTRUCTIONS 35 Ton LOG SPLITTER MODEL NUMBER 93520 10006 Santa Fe Springs Road SAVE THESE INSTRUCTIONS Santa Fe Springs CA 90670 Important Safety Instructions USA / 1-877-338-0999 MADE IN CHINA are included in this manual. REV 93520-20130425 www.championpowerequipment.com...
- Page 2 AN IMPORTANT MESSAGE ABOUT TEMPERATURE: Your Champion Power Equipment product is designed and rated for continuous operation at ambient temperatures up to 40°C (104°F). When your product is needed your product may be operated at temperatures ranging from -15°C (5°F) to 50°C (122°F) for short periods.
-
Page 3: Table Of Contents
93520 35 Ton LOG SPLITTER TABLE OF CONTENTS Spark Plugs ..... . . Introduction ...... -
Page 4: Introduction
Introduction Accessories Congratulations on your purchase of a Champion Champion Power Equipment manufactures and sells Power Equipment log splitter. CPE designs and builds accessories designed to help you get the most from your log splitters to strict specifications. With proper use purchase. -
Page 5: Manual Conventions
Please call our help line at 1-877-338-0999 situation which, if not avoided, could result in death or serious injury. CAUTION CAUTION indicates a potentially hazardous situation which, if not avoided, may result in minor or moderate injury. REV 93520-20130425... -
Page 6: Safety Rules
Keep work zone clear of debris while working to can start fires around dry vegetation. ensure safe footing. A spark arrestor may be required. The operator should contact local fire agencies for laws or regulations relating to fire prevention requirements. REV 93520-20130425... - Page 7 DO NOT expose log splitter to excessive moisture, dust, or dirt. DO NOT allow any material to block the cooling slots. DO NOT use the engine if: – Equipment sparks, smokes or emits flames – Equipment vibrates excessively REV 93520-20130425...
-
Page 8: Training
Make sure you comply with local, state, and federal codes. Take appropriate fire-fighting equipment with you. 10. Log splitters should be used only for splitting wood. Do not use for other purposes unless the manufacturer provides attachments and instructions. REV 93520-20130425... -
Page 9: Operation
12. Use only your hand to operate the log splitter controls. 13. Do not refuel the engine until it has cooled for several minutes. REV 93520-20130425... -
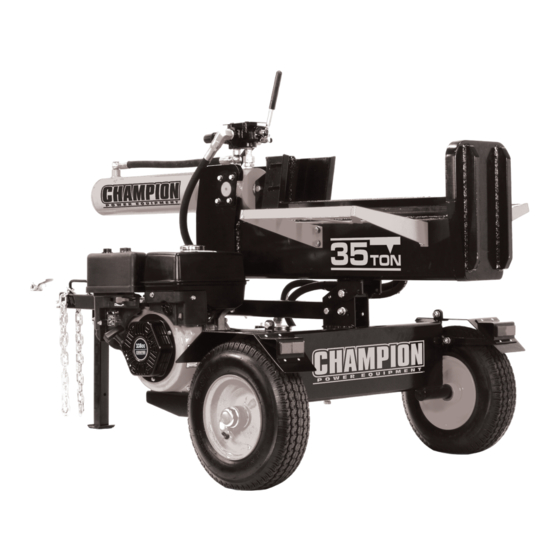
Page 10: Controls And Features
(16) 2” Ball Coupler – For towing the log splitter behind your vehicle. Log Catchers – Prevents split logs from falling to the ground. (17) Safety Chains – For use while towing. Splitting Beam (18) Support Leg – Supports log splitter while operating. Raise leg for towing. REV 93520-20130425... -
Page 11: Assembly
3. Slide the wheel over the axel on the hydraulic oil tank. To A 4. Install the castle nut and tighten by hand. Tighten another ¼ turn with a wrench to seat the bearing. REV 93520-20130425... -
Page 12: Install The Beam
(B) NOTE The cylinder rod may need to be rotated slightly in order to properly align the the wedge. Insert a screwdriver into the bolt hole in the cylinder rod To B and slowly rotate as needed. REV 93520-20130425... -
Page 13: Install The Engine And Hoses
NOTE The pump outlet connection does NOT require teflon tape. The o-ring seals against the face of the fittings on the pump and hose. Tighten to approximately 12 ft-lb. Over-tightening can damage the pump. REV 93520-20130425... -
Page 14: High Pressure Hose
7. Stop the engine and check the hydraulic oil tank sight glass. Add approximately 1 to 2 gallons (3.79 to 7.6 L) of hydraulic oil to bring the level back up to the sight glass. 8. Check oil level daily and add as needed. REV 93520-20130425... -
Page 15: Add Engine Oil
The engine is equipped with a low oil shut-off and will stop when the oil level in the crankcase falls below the threshold level. NOTE Check oil often during the break-in period. Refer to the Maintenance section for recommended service intervals. REV 93520-20130425... -
Page 16: Add Engine Fuel
It is advisable to always shut off the fuel supply, run the engine to fuel starvation and drain the tank when the equipment is not in use for more than 30 days. REV 93520-20130425... -
Page 17: Operation
– Use handle on cylinder to rotate beam to vertical DO NOT place the log splitter near vents or intakes position where engine exhaust fumes could be drawn into – Insert beam lock-pin in the pivot bracket occupied or confined spaces. ONLY operate the log splitter outdoors. REV 93520-20130425... -
Page 18: Starting The Engine
Too much choke leads to weeks or longer, please see the Storage section for spark plug fouling/engine flooding due to the lack of proper engine and fuel storage. incoming air. This will cause the engine not to start. REV 93520-20130425... -
Page 19: Log Splitter Operation
8. Clear the split wood from the work zone. CAUTION Do not hold auto control valve in return position. It will damage the stop block or beam. NOTE It is normal for the hydraulic fluid to become foamy or frothy during operation. REV 93520-20130425... -
Page 20: Operation At High Altitude
To alleviate high altitude issues other than the natural power loss, Champion Power Equipment can provide a high altitude carburetor main jet. The alternative main jet and installation instructions can be obtained by contacting Customer Support. -
Page 21: Maintenance And Storage
Check and tighten all bolts and nuts before operating the log splitter. Be sure to confirm all hose connections and hose clamps are tight before each use. It is possible for connections to vibrate loose over time. REV 93520-20130425... -
Page 22: Changing The Hydraulic Oil And Oil Filter
NOTE Replacement filters can be purchased from The drain plug is sealed with Teflon tape. Add 2-3 Champion Power Equipment by calling wraps of new Teflon tape as needed when replacing 1-877-338-0999. Wix #51391 or Fram PH3682 the drain plug to prevent oil leak can also be used if needed. -
Page 23: Cleaning
Change hydraulic oil filter Every 250 hours Clean combustion chamber* Every year Inspect wheel bearings and repack bearing grease as needed. Every 3 years Replace fuel line *To be performed by knowledgeable, experienced owners or Champion Power Equipment certified dealers. REV 93520-20130425... -
Page 24: Troubleshooting
Faulty control valve Contact Customer Service Excessive bouncing while towing Under-inflated tires Inflate tires to proper pressure. Refer to tire sidewall For further technical support: Technical Service Mon – Fri 8:30 AM – 5:00 PM (PST/PDT) Toll Free: 1-877-338-0999 tech@championpowerequipment.com REV 93520-20130425... -
Page 25: Specifications
Replacement spark plug: NGK BPR6ES or equivalent An Important Message About Temperature Make certain the spark plug gap is 0.7 - 0.8 mm or Your Champion Power Equipment product is designed (0.028 - 0.031 in.). and rated for continuous operation at ambient Maintenance Valve Clearance temperatures up to 40°C (104°F). -
Page 26: Parts Diagram
93520 ENGLISH SPECIFICATIONS Parts Diagram REV 93520-20130425... -
Page 27: Parts List
PMJ30-28 Engine Connector PMJ22J-05-02 Axle Cap PMJ30-29 Engine Bushing PMJ22G-38 Big Tension Spring PMJ30-32 GB/T 798-1988 Swing Bolt M8x28 GB/T 5782-2000 Bolt M12x70 GB/T 6170-2000 Nut M8 JB/T 8870-1999 Clamp d40 GB 1160.2-89 Oil Scale PMJ35-10 Gear Pump REV 93520-20130425... -
Page 28: Engine Parts Diagram
93520 ENGLISH SPECIFICATIONS Engine Parts Diagram REV 93520-20130425... -
Page 29: Engine Parts List
Oil Seal, Valve 1.859.05 Spring washer Ø5 45.040003.00 Spring, Valve 46.101000.05 Muffler Assembly 23.040010.00 Bolt, Rocker Arm 46.131017.01 Standard Main Jet 46.131017.01.01 Altitude Main Jet 45.040001.00 Retainer, Intake Valve Spring(Up) 45.040007.00 Retainer, Exhaust Valve Spring(Up) REV 93520-20130425 45.040008.00 Rotator, Exhaust Valve... -
Page 30: Warranty
Warranty Qualifications – Accessory parts such as starting batteries, and storage covers. Champion Power Equipment (CPE) will register this – Failures to due acts of God and other force majeure warranty upon receipt of your Warranty Registration Card events beyond the manufacturer’s control. - Page 31 The United States Environment Protection Agency (U.S. EPA.) and the California Air Resources Board (CARB) Emission Control System Warranty Your Champion Power Equipment (CPE) engine complies with both the U.S. EPA and state of California Air Resources Board (CARB) emission regulations.
- Page 32 EMISSION CONTROL SYSTEM WARRANTY The following are specific provisions relative to your Emission Control System (ECS) Warranty Coverage. 1. APPLICABILITY: This warranty shall apply to 1995 and later model year California small off-road engines (for other states, 1997 and later model year engines). The ECS Warranty Period shall begin on the date the new engine or equipment is delivered to its original, end-use purchaser, and shall continue for 24 consecutive months thereafter.
- Page 33 You must take your CPE engine or the product on which it is installed, along with your warranty registration card or other proof of original purchase date, at your expense, to any Champion Power Equipment dealer who is authorized by Champion Power Equipment, Inc. to sell and service that CPE product during his normal business hours.
Need help?
Do you have a question about the 93520 and is the answer not in the manual?
Questions and answers