Table of Contents

Related Manuals for Miele TepanYaki


Summary of Contents for Miele TepanYaki
- Page 1 Operating and installation instructions Stainless steel TepanYaki To avoid the risk of accidents or damage to the appliance, it is essential to read these instructions before it is installed and used for the first time. en - AU, NZ M.-Nr. 09 054 600...
-
Page 2: Table Of Contents
Contents Guide to the appliance ..........3 Warning and Safety instructions . -
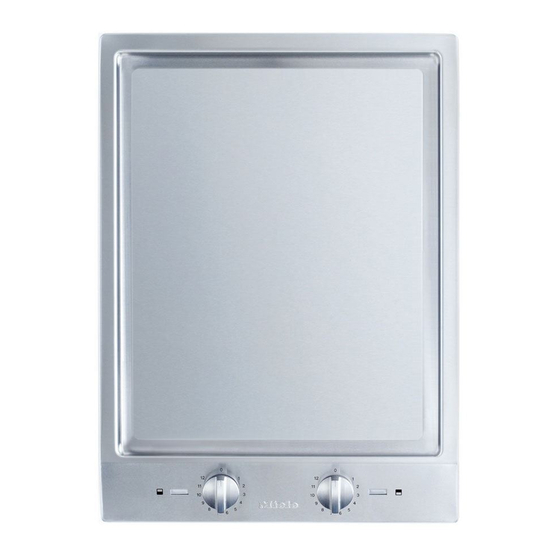
Page 3: Guide To The Appliance
Guide to the appliance a Rear Tepan plate b Front Tepan plate c Symbols to indicate which part of the Tepan plate the controls are for d Indicators e Control for rear Tepan plate f Control for front Tepan plate Indicators g In-operation indicator h Temperature indicator light... -
Page 4: Accessories Supplied
Guide to the appliance Accessories supplied The accessories supplied with your TepanYaki as well as a range of optional ones are available to order (see "Optional accessories"). Miele Tepan Cookbook A selection of the best recipes from the Miele test kitchen. -
Page 5: Warning And Safety Instructions
Keep these instructions in a safe This TepanYaki is not intended for place and ensure that new users are use by persons (including children) familiar with the content. Pass them with reduced physical, sensory or on to any future owner. - Page 6 The TepanYaki gets hot when in use The manufacturer cannot be held liable and remains hot for quite a while after for the consequences of an inadequate being switched off.
- Page 7 These do not guarantee the required person authorised by Miele in strict safety of the appliance (e.g. danger of accordance with current national and overheating).
- Page 8 Do not use the TepanYaki to heat up Do not cover the appliance, e.g. the room. Due to the high temperatures with a covering plate, a cloth, kitchen radiated, objects near the appliance foil etc.
- Page 9 Spray canisters, aerosols and other inflammable substances must not be stored in a drawer under the TepanYaki. Cutlery inserts must be heat-resistant. If the appliance is built-in behind a furniture door, it must only be operated when the door is open.
-
Page 10: Caring For The Environment
Caring for the environment Disposal of the packing Disposal of your old appliance material or machine The transport and protective packing Electrical and electronic appliances / has been selected from materials which machines often contain materials are environmentally friendly for disposal which, if handled or disposed of and can normally be recycled. -
Page 11: Before Using For The First Time
Before using for the first time Please adhere the extra data plate for Metal components have a protective the appliance supplied with this coating which may give off a slight documentation in the space provided in smell when heated up for the first the "After sales service"... -
Page 12: Operation
Operation Switching on and off The Tepan plate is divided into two separate cooking zones which can be switched on and regulated Do not leave the appliance independently of one another. The unattended whilst it is being used. entire area can be used when cooking large quantities of food. -
Page 13: Settings
Operation Settings Cooking process Settings Keeping cooked food warm 1 - 2 Steaming fruit, e.g. apple slices, peach halves, 2 - 4 sliced bananas, etc. Gentle stir frying of chopped/sliced vegetables, e.g. 5 - 7 leeks, mushrooms, green/red capsicum, onion, etc. Gentle frying of breaded or battered fish 7 - 9 Rapid frying in succession of meat, fish,... -
Page 14: Tips
Operation Tips – Marinating often improves the flavour of food to be cooked. Wipe the surface of the Tepan plate – Pat wet food dry with kitchen paper before each use with a damp cloth before cooking to prevent it spitting. to remove any dust particles or other –... -
Page 15: Cleaning And Care
Cleaning and care To avoid damaging the outer Do not use a steam cleaning surfaces of your appliance, do not appliance to clean this appliance. use: The steam could reach the electrical – cleaning agents containing soda, components and cause a short alkalines, ammonia, acids or circuit. - Page 16 Stainless steel frame / Control panel When using stainless steel cleaning Clean the stainless steel frame / control agents, please follow the instructions panel with a few drops of Original Miele on the packaging. ceramic and stainless steel cooktop cleaner (see "Optional accessories") Cooking surface applied with a soft, damp cloth.
-
Page 17: Problem Solving Guide
If it has, reset the fuse. If it trips national safety regulations. Repairs again after switching on the appliance, and other work by unqualified contact a qualified electrician or Miele persons could be dangerous. The manufacturer cannot be held liable for unauthorised work. -
Page 18: Optional Accessories
Optional accessories Miele offers a range of useful accessories, as well as cleaning and conditioning products for your appliance. Depending on country, these can be ordered online at: These products can also be obtained by contacting Miele (see back of instructions for contact details). -
Page 19: Safety Instructions For Installation
Safety instructions for installation After installing the TepanYaki, Fit the wall units and rangehood ensure that the connection cable before fitting the TepanYaki to avoid cannot come into contact with the damaging the surface. underside of the appliance. Make sure... -
Page 20: Safety Clearances
Safety clearances Safety distance above the appliance When two or more appliances are installed together below a rangehood, e.g. a gas wok and a ceramic cooktop, which have different safety distances given in the installation instructions, you should select the greater distance of the two. - Page 21 Safety clearances Side / rear clearances to the cooktop Ideally the cooktop should be installed with plenty of space on either side. There may be a wall at the rear and a tall unit or wall at one side. On the other side, however, no unit or divider should stand higher than the cooktop (see illustrations).
-
Page 22: Appliance And Building-In Dimensions
Appliance and building-in dimensions a Spring clamps b Front c Building-in depth d Building-in depth for mains connection box with mains connection cable, L = 2,000 mm... -
Page 23: Preparing The Worktop
Preparing the worktop ^ Make the worktop cut-out for one or more appliances as applicable. Remember to maintain a minimum safety clearance from the back wall, as well as from any tall unit or side wall to the right or left of the appliance(s). -
Page 24: Installation Of Several Appliances
Installation of several appliances When installing two or more appliances next to each other, a spacer bar b must be used between each one. See "Fitting the spacer bars and support brackets". Worktop cut-out Worktop cut-out - two appliances - three appliances When installing three appliances, the When installing two appliances, the width of the cut-out required (D) is... - Page 25 Installation of several appliances Worktop cut-out calculation example for three appliances Appliance width Appliance Appliance width Worktop less 8 width less 8 cut-out 1032 1424 1124 1516 1136 1320 1136 All dimensions are given in mm...
- Page 26 Installation of several appliances a Spring clamps b Spacer bars c Gap between spacer bar and worktop d Cover The illustration shows a worktop cut-out with spring clamps a and spacer bars b for 3 appliances. An additional spacer bar is required for each additional appliance. The position for securing each additional spacer bar will depend on the width of appliance B (288 mm / 380 mm / 576 mm).
-
Page 27: Fixing The Spring Clamps And Spacer Bars
Fixing the spring clamps and spacer bars Wooden worktops ^ Position the spring clamps supplied a and spacer bars b on the top edge of the cut-out in the positions marked. ^ Secure the spring clamps and spacer bars with the 3.5 x 25 mm screws supplied. - Page 28 Fixing the spring clamps and spacer bars Granite and marble worktops The screws are not required for granite or marble worktops. ^ Coat the side edges and the lower edges of the spring clamps a and the spacer bars b with silicone. ^ Then fill gap e between the spacer bars and the worktop with silicone.
-
Page 29: Installing/Removing The Appliance(S)
In stubborn cases, or if the appliance is When installing several appliances, a not accessible from below, use a cover must be inserted into the spacer cooktop lever (available from Miele) to bar. lift up the cooktop. To prevent damage ^ Slide the installed appliance to one... -
Page 30: General Installation Tips
General installation tips Seal between the appliance and the Tiled worktop worktop Grout lines a and the hatched area The sealing strip under the edge of the top part of the appliance provides a underneath the appliance frame must sufficient seal for the worktop. be smooth and even. -
Page 31: Electrical Connection
As the colours of the wires in the mains connection cable of type H 05 V V-F lead of this appliance may not (pvc insulated), available from Miele. correspond with the coloured markings identifying the terminals in your plug, For extra safety, it is advisable to install... -
Page 32: After Sales Service, Data Plate, Warranty
After sales service, data plate, warranty In the event of any faults which you cannot remedy yourself, please contact Miele. The contact details for Miele are given at the back of these instructions. When contacting Miele, please quote the model and serial number of your appliance. - Page 36 CS 1327 en - AU, NZ M.-Nr. 09 054 600 / 03...
Need help?
Do you have a question about the TepanYaki and is the answer not in the manual?
Questions and answers