
Subscribe to Our Youtube Channel
Related Manuals for Kodak ESP 7


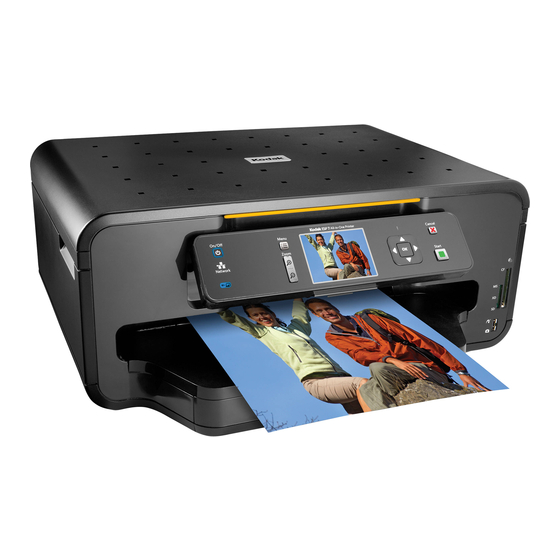
Summary of Contents for Kodak ESP 7
- Page 1 Kodak ESP 7 All-in-One Printer All-in-One Printer print copy scan User Guide User Guide...
- Page 2 Eastman Kodak Company Rochester, NY 14650 © Eastman Kodak Company, 2010 Kodak is a trademark of Eastman Kodak Company. The Bluetooth® word mark and logos are owned by the Bluetooth SIG, Inc., and any use of such marks is under license.
-
Page 3: Table Of Contents
Contacting Kodak Customer Service & Support...2 Support at Kodak.com...2 2 Printer Overview All-in-one printer features... 3 Major components of the ESP 7 all-in-one printer...4 Support for connecting digital memory devices to the printer ...5 Memory card slots ...5 Memory cards supported...5 USB host port...6... - Page 4 Transferring images to a computer ... 45 Transferring images to a Windows computer... 45 Transferring images to a Macintosh computer... 46 6 Copying Simple copying ... 47 Adjusting copy settings ... 47 Copy Document options... 48 Copy Photo options ... 49 www.kodak.com/go/aiosupport...
- Page 5 Windows Vista troubleshooting... 74 Home Center software on Windows works incorrectly following software upgrade ... 74 Print troubleshooting ... 74 Envelope printing incorrect ... 74 PictBridge camera not detected... 75 Picture cropped ... 76 Picture print smudged ... 76 www.kodak.com/go/aiosupport Table of contents...
- Page 6 Windows PC ...93 Macintosh... 94 Papers Supported ... 94 Paper Sizes for PC and Macintosh computers...95 Safety Specifications... 96 Parts ... 96 Power... 96 Location...97 Environment...97 Regulatory Compliance... 98 FCC Compliance and Advisory... 98 FCC and Industry Canada ... 98 www.kodak.com/go/aiosupport...
- Page 7 IC Radiation Exposure Statement... 99 Canadian DOC Statement... 99 European Compliance Statement... 99 German Compliance Statement ... 99 Waste Electrical and Electronic Equipment Labeling... 100 Declaration of Conformity... 101 Glossary Appendix A: If You Need to Call Customer Support www.kodak.com/go/aiosupport Table of contents...
-
Page 9: Getting Help
This user guide helps you learn to operate your all-in-one printer from the control panel. Kodak also provides online help in the Home Center Software installed when you set up your printer, and helpful information about common tasks from the LCD screen on the printer control panel. -
Page 10: Getting Answers To Frequently-Asked Questions
Getting answers to frequently-asked questions Chapter 9 , Troubleshooting copying, scanning, and configuring the wireless service on your printer. Contacting Kodak Customer Service & Support Kodak provides several resources to help you answer questions about your printer. Support at Kodak.com Support All-in-one printer... -
Page 11: Printer Overview
Printer Overview The KODAK ESP 7 All-in-One Printer allows you to print, copy, and scan images and documents. Although many functions can be operated directly from the control panel, you may also print, store, and manage digital images from a Windows or Macintosh computer connected to the printer via Kodak’s Home Center Software,... -
Page 12: Major Components Of The Esp 7 All-In-One Printer
Printer Overview Major components of the ESP 7 all-in-one printer The graphics below show the main components of the printer. Number Component Name Scanner lid LCD screen Top paper tray Bottom paper tray extender tab Bottom paper tray Paper-edge guide... -
Page 13: Support For Connecting Digital Memory Devices To The Printer
– CF Compact Flash type I and type II, including micro drives – SDHC Secure Digital High Capacity cards CAUTION: WARNING: Do NOT remove the memory card while the light blinks, or you may damage the card. www.kodak.com/go/aiosupport KODAK ESP 7 All-in-One Printer... -
Page 14: Usb Host Port
NOTE: This printer can read only one memory card OR one portable USB drive OR Control panel layout The legend describing the numbered parts of the control panel illustration is in the table below. one Kodak Bluetooth dongle at a time. www.kodak.com/go/aiosupport... -
Page 15: Lcd Screen
Starts the following operations: copy, scan, print, and transfer. Adjusting the control panel position, page 8 and lowering the control panel so that it is easier to use. www.kodak.com/go/aiosupport KODAK ESP 7 All-in-One Printer Description for instructions on raising Color ink level monitor Black ink level monitor... -
Page 16: Using The Control Panel
Let go when the panel is seated against the front panel of the printer. 8) on the control panel, the Main menu displays on the LCD Using the printer menus, page www.kodak.com/go/aiosupport Using... -
Page 17: Using The 4-Way Navigation Buttons
Zoom buttons, page www.kodak.com/go/aiosupport KODAK ESP 7 All-in-One Printer Using the OK button, page causes the visible page to be replaced Using the Zoom increases or decreases the and symbols. -
Page 18: Using The Ok Button
(Images already selected will not be affected.) Press and hold Zoom in Zoom out www.kodak.com/go/aiosupport again to deselect all images. -
Page 19: Using The Start Button
(Ethernet) or wireless (Wi-Fi) network, in the Network Settings menu To maneuver around the on-screen keyboard, use the 4–way navigation buttons, described in described in Using the 4-way navigation buttons, page Using the OK button, page www.kodak.com/go/aiosupport KODAK ESP 7 All-in-One Printer 9, and the OK button,... -
Page 20: Using The Printer Menus
Use the menus on the LCD screen to select stand-alone tasks (that is, tasks that can be performed without your computer), such as copying documents or photos; or printing photos stored on memory cards, USB drives, Kodak Bluetooth adapter (“dongle”), or digital cameras plugged into the printer; or sending a fax. -
Page 21: Menu Structure
Description or the button on the control panel. Using the 4-way navigation buttons, page When you press www.kodak.com/go/aiosupport KODAK ESP 7 All-in-One Printer symbols are pressed, the selected Using To review details about the option: Copy Document options, page 48... -
Page 22: Status Lights
Plug a working device into the wall outlet to test it, or have it checked by an electrician. Check the power supply status light, if available. As needed, visit Kodak.com for additional troubleshooting steps, or contact Kodak Service & Support. None. www.kodak.com/go/aiosupport... - Page 23 Unable to read memory card or USB host device. Ink cartridge(s) inserted incorrectly. Ink cartridge(s) not installed. Media sensor failure. Printhead failure. Scanner failure. Memory Card Slot Light Cause Remove and reinsert the memory card. None. None. www.kodak.com/go/aiosupport KODAK ESP 7 All-in-One Printer Error Action/Solution...
- Page 24 Press OK to turn off the error message on the LCD screen and then turn the Wi-Fi radio off. Run the Wi-Fi Setup Wizard to find and connect to an available wireless network within range. None. www.kodak.com/go/aiosupport Action/Solution , the light will go off. However, if the Wi-Fi...
-
Page 25: Home Center Software
• Enhance and print images • Configure settings for printing, copying, and scanning from the control panel • Access the Kodak Tips and Projects Center Web site • Order supplies from the Kodak Web site The functions of the three small icons located in the upper-right corner of the Home... -
Page 26: Home Center For Macintosh
• Run a printhead nozzle correction • Clean the printhead • Click About this Printer to view the printer model number, its Kodak Service Number, and the version of printer firmware used to operate the printer From both the Setup and Maintenance tabs you can: •... -
Page 27: Setting Up Your Printer
Printer Settings is selected, and then press OK . until the parameter you want to configure is selected, and then press to configure the Date and Time, Tagged Image Printing, Control as needed to change the default value. The default value is www.kodak.com/go/aiosupport Printer Settings options, symbols. -
Page 28: Printer Settings Options
For Windows XP 1. Click Start , point to Settings , and then double-click Printers and Faxes . 2. Right-click the icon for the KODAK ESP 7 All-in-One Printer, and then select Set as the Default Printer on the shortcut menu. -
Page 29: Configuring Network Settings
1. Click Start , and then click Control Panel . 2. Click Hardware and Sound , and then click Printers . 3. Right-click the icon for the KODAK ESP 7 All-in-One Printer, and then select Set as the Default Printer on the shortcut menu. -
Page 30: Configuring A Wireless Network Connection
• existing signal is too weak to transmit The LED has a repetitive cycle of blinking, then resting for 15 seconds, followed by blinking again. The Wi-Fi radio will continue to attempt connection to the network until a connection is established. www.kodak.com/go/aiosupport Description... -
Page 31: What You Need To Know Before You Connect
• A laptop or desktop computer equipped with a network interface card or wireless networking support, and the Kodak software installed • A working 802.11 wireless network. Kodak recommends that you use a wireless access point/router that uses Dynamic Host Configuration Protocol (DHCP) •... -
Page 32: Network Settings Options
LCD screen. As appropriate, press panel until you locate the network you want to use. www.kodak.com/go/aiosupport Settings / Action (page down) symbol and/or the on the control panel until you locate the... - Page 33 OK . Key/Passphrase/ Security String WEP key 5 or 13 ASCI characters; case-insensitive 10 or 26 Hexidecimal digits; case-insensitive WPA/WPA2 phrase 8-63 printable ASCI characters; case-sensitive www.kodak.com/go/aiosupport KODAK ESP 7 All-in-One Printer to select a key. Press OK . Description...
-
Page 34: Scanning For Wireless Networks
The Wi-Fi radio will continue to attempt connection to the network until a connection is established. to select a key. Select < BKSP > to erase any incorrect characters. Then select DONE and press OK . www.kodak.com/go/aiosupport Description to select a key. Enter the alphanumeric... -
Page 35: Setting Up An Ip Address
149.2.40.149 until Network Settings is selected, and then press OK . until View Network Configuration is selected, and then press OK . When www.kodak.com/go/aiosupport KODAK ESP 7 All-in-One Printer Printer Entry Format 149. 089 .138.149 149. 002 . 040 .149... -
Page 36: Printing Network Configuration
Next . 4. After the driver installation completes, click Next to proceed. The printer will be named KODAK ESP 7-XXXX, where XXXX is a number unique to your printer. -
Page 37: Changing The Printer Connection Type
Next . 9. After the driver installation completes, click Done to proceed. 10. The printer will be named KODAK ESP 7-XXXX, where XXXX is a number unique to your printer. -
Page 38: For Macintosh
Network printers are labeled “Bonjour” under “Kind”. 7. The printer will be named KODAK ESP 7-XXXX, where XXXX is a number unique to your printer. 8. Select your printer and click Add . - Page 39 3. Press Menu . 4. Press 5. Select View Network Configuration and confirm you have an IP address. until Network Settings is selected, and then press OK . www.kodak.com/go/aiosupport KODAK ESP 7 All-in-One Printer Configuring a...
-
Page 40: Handling Paper
It automatically detects the size and whether or not photo paper is loaded into the paper tray. Kodak photo paper contains bar codes that allow your printer to detect the paper type that optimizes your photo prints. -
Page 41: Loading Plain Paper
To return the lower paper tray to its default size, press and hold the extension-release and push the tray until the extension stops moving, and then let go. www.kodak.com/go/aiosupport KODAK ESP 7 All-in-One Printer above. -
Page 42: Loading Photo Paper
4. Squeeze the paper edge guide and slide it to the right until it just touches the loaded paper. 5. Lower the paper output tray. 6. Gently push the tray forward until it is aligned with the edge of the paper output tray. Things to keep in mind, page www.kodak.com/go/aiosupport... -
Page 43: Loading Envelopes
6. Squeeze the paper edge guide and move it towards the printer until it just touches the loaded paper. 7. Push the paper tray in towards the printer. CAUTION: Things to keep in mind, page www.kodak.com/go/aiosupport KODAK ESP 7 All-in-One Printer... -
Page 44: Loading Originals
Loading originals Loading an original for copying or scanning To copy or scan a document or photo, place your original directly on the scanner glass, print side-down, against the silver arrow on the right-front corner. www.kodak.com/go/aiosupport... -
Page 45: Viewing And Printing Photos
NOTE: For assistance on printing from a connected computer to your printer, refer Although your printer is compatible with the Kodak 8-in-1 USB card reader (sold separately) as well as other Kodak USB card readers, it may not be compatible with other manufacturers’ card readers. -
Page 46: Configuring Photo Print Settings
Home Center Software, page until the option you want to configure is selected, and then press OK . to change the setting. until View Photos is selected in the Print Photos menu, www.kodak.com/go/aiosupport 40, as 17, for information on... -
Page 47: Print Photos Options
USB connected devices. The default is On . The default setting does not print the date on the photo print. View Settings / Select www.kodak.com/go/aiosupport KODAK ESP 7 All-in-One Printer Settings 1- 99 Top Tray Bottom Tray 3.5x5... -
Page 48: Printing Photos
Use your computer to explore the files stored on the flash drive while it is still plugged in. Navigate to and open the file in the computer, or transfer the file(s) to the computer hard drive. Then, print the file from your computer. www.kodak.com/go/aiosupport... - Page 49 10. Repeat this process as needed. NOTE: Each photo is automatically deselected after it has been printed. www.kodak.com/go/aiosupport KODAK ESP 7 All-in-One Printer until a photo you want to print is displayed until the number you want is shown on the LCD. To...
-
Page 50: Printing Tagged Images
• Personal Digital Assistants (PDAs) • Digital still cameras • Computers The Bluetooth adapter will not work when plugged directly into computers, Kodak printer-docks, other types of Kodak printers or devices made by other manufacturers. This adapter works exclusively with KODAK All-in-One Printers. -
Page 51: Printing Multiple Photos
Bluetooth device to the printer. Your printer supports connectivity to one Bluetooth device at a time. For the highest transfer speed, Kodak recommends keeping a maximum distance of 10 meters (32.8 feet) between Bluetooth devices, as they may not work reliably beyond this range. -
Page 52: Zooming And Cropping Photos
Tip : You can make more precise zoom and crop adjustments to your photos on your computer using photo editing software. To send a photo from the printer to your computer, see Transferring images to a computer www.kodak.com/go/aiosupport Printing photos from navigation buttons on the control panel below. -
Page 53: Transferring Images To A Computer
Transferring images to a computer You can transfer .jpg, .mov, or .wav files to your Windows or Macintosh computer from a digital camera, memory card, device connected to your printer via a Kodak Bluetooth dongle, and portable (USB) thumb drive connected to the printer. -
Page 54: Transferring Images To A Macintosh Computer
(for a PictBridge camera) or the printer LCD screen (all other devices). 3. Press 4. Press OK . 5. Press Start . 6. Use iPhoto or Image Capture to complete the transfer. until Transfer All to PC is highlighted. www.kodak.com/go/aiosupport... -
Page 55: Copying
Handling Paper. until the option you want to adjust is selected. If a value is until Save as Defaults is selected; press OK , and then www.kodak.com/go/aiosupport Chapter 4 , to select Copy on the control panel symbols displayed in to select Copy Photo . -
Page 56: Copy Document Options
Produces the highest quality for all paper and eliminates the banding (striping) effect that sometimes occurs in Draft and Normal modes. Best is the slowest print speed. If Kodak photo paper is loaded in the paper tray, this setting is used. -
Page 57: Copy Photo Options
Automatic setting. To review the settings for plain paper copying, see “Plain Paper Quality” under Copy Document options, page View Settings / Select www.kodak.com/go/aiosupport KODAK ESP 7 All-in-One Printer Settings 1- 99 4x7 (High Def) 4x12 (Panoramic) 8x10 8.5x11... -
Page 58: Scanning
Scanning converts text and images from documents and pictures placed on the scanner glass into electronic data, and then sends the data to your computer. To scan using the ESP 7 All-in-One printer, the printer must be connected to a computer. You can scan to the following destinations: •... -
Page 59: Simple Scanning
5. Note that the default Scan What setting is Document . 6. Press which application on the computer will open the file. Kodak Home Center software appears on the list by default. 7. Press Start . 8. When the Scanner dialog window displays on your computer, follow the prompts to finish the scanning process. -
Page 60: Scanning Multiple Originals Simultaneously
6. Press Start to initiate the scan. The available scan settings are in the following table: CAUTION: until Scan is selected. until the option you want to adjust is selected. If a value www.kodak.com/go/aiosupport symbols in the row, press until Save as Defaults is to select... -
Page 61: Scan Options
Scan Destination settings. Each application will appear as a separate setting in the display. (Kodak Home Center software is displayed by default; you do not need to configure your destinations to include it.) In addition, before using a Scan Destination setting of File , familiarize yourself with the location where the files will be saved and with the file naming setting. -
Page 62: Maintaining Your Printer
Service agreements are available in some countries. Contact dealers for Kodak products for more information. For recycling and or disposal information, contact your local authorities. In the U.S.,... -
Page 63: Cleaning The Scanner Glass
4. When finished cleaning, plug in the printer. Cleaning the scanner lid Minor debris can accumulate on the document backing located underneath the scanner lid of the Kodak printer. WARNING: Do not use abrasives, acetone, benzene, or carbon tetrachloride on the glass, as they can damage it. Do not place or spray liquid directly on the glass. -
Page 64: Monitoring And Adjusting The Printer's Performance
For example, you can check the status of the printer’s inkjet nozzle to ensure high-quality prints. Kodak recommends that you run a nozzle check if you are experiencing changes in image quality. You can also use the Printhead Alignment function if you see degradation in print quality. -
Page 65: Maintenance Options
Macintosh and then click Nozzle Correction or Printhead Alignment . CAUTION: WARNING: Use genuine Kodak ink cartridges to ensure best results and avoid printhead damage not covered under warranty. Third-party ink cartridges may not work with your printer. www.kodak.com/go/aiosupport KODAK ESP 7 All-in-One Printer... - Page 66 4. Open the box containing the new ink cartridge. 5. Remove the bagged ink cartridge from the box, tear open the bag at the notch, and remove the ink cartridge. stores for safe disposal. www.kodak.com/go/aiosupport 1 Printhead 2 Color ink cartridge 3 Black ink cartridge...
- Page 67 Discard the orange cap. 7. Insert the ink cartridge into the printhead. 8. Press down on the tab until you hear a click and feel the latch snap into position. www.kodak.com/go/aiosupport KODAK ESP 7 All-in-One Printer...
-
Page 68: Replacing The Printhead
The printhead moves to an accessible position for handling the ink cartridges. The ink cartridges are seated in the printhead. into place in the printhead. This seats the cartridges properly, and prevents ink from being dispensed incompletely during your print or copy jobs. www.kodak.com/go/aiosupport... - Page 69 4. Unlatch the printhead by lifting the rectangular latch on the top of the printhead. 5. Remove the old printhead from the carriage. www.kodak.com/go/aiosupport KODAK ESP 7 All-in-One Printer 1 Printhead 2 Color ink cartridge 3 Black ink cartridge...
- Page 70 Maintaining Your Printer 6. Remove the new printhead from its bag. CAUTION: Do not touch copper contacts on the printhead, as this may damage it. www.kodak.com/go/aiosupport...
- Page 71 KODAK ESP 7 All-in-One Printer 7. Remove and discard the black plastic casing and the orange protective cap. 8. Place the new printhead into the carriage. www.kodak.com/go/aiosupport...
- Page 72 10. Reinstall the ink cartridges. As needed, see 11. Close the printer access door. The printer should now complete a printhead calibration to ensure that it is ready to for normal operation. www.kodak.com/go/aiosupport Replacing ink cartridges, page Listen carefully during this step;...
-
Page 73: Upgrading The Printer Software - For Windows
A pop-up window appears at the bottom right corner of your computer monitor stating “Found New Hardware KODAK ESP 7 AIO,” then changes to “Found New Hardware. Your new hardware is installed and ready to use.”... -
Page 74: Upgrading The Printer Software - For Macintosh
17. Download the firmware. 18. Double-click on the *.dmg file. 19. Double-click on Kodak AiO Updater . 20. Upon completion of the install, click Quit . The printer firmware is updated. network or Wi-Fi. Your All-in-One printer must be connected to the computer with a USB cable in order to perform a firmware upgrade. -
Page 75: Troubleshooting
Use the Help window to view troubleshooting topics. (Windows users can also select Troubleshoot from the Help panel on the main Home Center window.) • You can also get troubleshooting help at the Kodak Web site. Visit www.kodak.com/go/support NOTE: Many issues with degradation in performance or print quality can be... -
Page 76: Device Not Recognized
If none of the above corrects the problem, contact Kodak support. Device not recognized Probable Cause Any of the following can prevent your Kodak All-in-One printer from reading a connected device (digital camera, USB drive, or memory card). • The camera is turned OFF. -
Page 77: Ink Cartridge Not Recognized
4. Press OK . Multiple pictures not scanned properly When scanning or copying, the Kodak printer can detect multiple images on the scanner glass, straighten them, and create individual files. If you are having trouble with this feature, check the following: Probable Cause Your photos are not placed optimally on the scanner glass. -
Page 78: No Communication With Computer
Scan the photos again in the appropriate format. No communication with computer Probable Cause Your Kodak printer is not connected to your computer. Corrective Action • Make sure your printer is plugged in and turned on. • Make sure you are using the proper USB cable (USB 2.0). -
Page 79: No Paper Feed
4. Reinsert the printhead and ink cartridges. NOTE: See CAUTION: Replacing the printhead, page performing this procedure. If this does not resolve your printing issue, contact Kodak Service and Support. www.kodak.com/go/aiosupport KODAK ESP 7 All-in-One Printer 60for illustrated instructions for... -
Page 80: Paper Jam
The paper did not advance, was not picked up properly from the paper tray, or is lodged inside the printer. Kodak Inkjet paper is recommended for your Kodak All-in-One printer. Corrective Action 1. Remove the paper from the tray you used when the jam occurred. -
Page 81: User Guide On The Cd Is Obsolete
Probable Cause The User Guide has been updated since the software CD was released. Corrective Action • Download the most recent version of the User Guide from Kodak.com. Wrong paper size Probable Cause The print size or paper size you selected may be larger or smaller than the paper found in the paper tray. -
Page 82: Windows Vista Troubleshooting
2. Straighten the stack of envelopes against a flat surface. Reload the stack into the paper tray print side down, with the envelope flap aligned to the left. 3. Squeeze the paper guide and slide it to the right until it touches the edge of the envelopes. www.kodak.com/go/aiosupport... -
Page 83: Pictbridge Camera Not Detected
1. On the Windows Desktop, click Start > Settings > Control Panel . 2. In the Control Panel window, open Printers or Printers and Faxes. 3. In the Windows Explorer window, right-click on the Kodak All-in-One printer in the Name column, and then select Printing Preferences . -
Page 84: Picture Cropped
The image file may not be in JPEG format. Corrective Action The Kodak printer can print only JPEG files in stand-alone mode. Connect the printer to a computer and use software to print other image formats. output paper. The dimensions of the photo on the camera are slightly different from each paper size so a portion will be cropped to fit perfectly on whatever paper size was selected. -
Page 85: Poor Print Quality
Print skewed or slanted Probable Cause 1 The paper is not properly loaded in the tray. Kodak Inkjet paper is recommended for your all-in-one printer. Corrective Action Realign the paper in the paper tray. Remove paper and check for wrinkles and tears. -
Page 86: Print Too Dark
Adjust the exposure compensation on your camera, and try taking the picture again. Refer to your camera user’s guide for details. • Edit the picture using Kodak Home Center (Windows only) or other image editing software. • Make sure the printer is not placed in direct sunlight or is not operating in a high-temperature environment. -
Page 87: White Edges On Borderless Prints
When the original is larger than the paper loaded, reduce copy size to fit the size of the paper loaded. Scan troubleshooting Scan fails Probable Cause 1 Your computer is not turned ON. Corrective Action Turn on your computer. www.kodak.com/go/aiosupport KODAK ESP 7 All-in-One Printer... -
Page 88: Scanned Image Blank
Troubleshooting Probable Cause 2 Your Kodak printer is not connected to your computer. Corrective Action Connect your Kodak printer to your computer with a standard USB cable. Probable Cause 3 The Kodak Home Center software is not installed. Corrective Action Insert the Kodak printer installation CD and install the software. -
Page 89: Network Troubleshooting
3. In the System Profiler, click Network . 4. Make sure your LAN card appears in the list. Probable Cause 3 You do not have an active network connection. Corrective Action Check to see if you have an active network connection. www.kodak.com/go/aiosupport KODAK ESP 7 All-in-One Printer... - Page 90 If the top light is off, there is no network connection. Bottom light This yellow light flashes when data is being sent or received by the device over the network. www.kodak.com/go/aiosupport...
- Page 91 Kodak AiO Home Center (C:\Program Files\Kodak\Printer\Center\AiOHomeCenter.exe) Go to www.kodak.com/go/inkjetnetworking these firewall permissions for the Kodak printer network services for 20 of the top rated firewall security programs on the market. If necessary, visit your firewall Manufacturer’s online help Web site. www.kodak.com/go/aiosupport...
- Page 92 To print the network configuration page • On the control panel of the printer, press Menu. • Press • Press until Network Settings is highlighted, and then press OK. until Print Network Configuration is highlighted, and then press OK. www.kodak.com/go/aiosupport...
-
Page 93: Wireless Troubleshooting
NOTE: Devices like wireless speakers or wireless gaming accessories can emit radio interference at 2.4 GHz. You can verify this on your wireless desktop or laptop computer by viewing sporadic signal bars in your Wi-Fi status utility. www.kodak.com/go/aiosupport KODAK ESP 7 All-in-One Printer... - Page 94 Unplug the Ethernet cable. Repositioning your computer away from these sources of signal interference can improve your computer network performance. For example: wireless computer. Wi-Fi All-in-One printer. to scroll to the bottom of the list. Infrastructure entries are listed first and www.kodak.com/go/aiosupport...
- Page 95 Corrective Action Enter the WEP key correctly. Remember that the WEP key is case-sensitive. Probable Cause 5 The wireless settings on the printer do not match the wireless settings of your access point. page www.kodak.com/go/aiosupport KODAK ESP 7 All-in-One Printer...
- Page 96 Unsupported authentication or encryption type Probable Cause Your network is configured with an authentication protocol not supported by the Kodak All-in-One printer. Corrective Action Open the Embedded Web Server of your access point and change the security settings. Use one of the supported protocol types.
- Page 97 Another device in the vicinity connected to your access point before the All-in-One printer was able to connect. Corrective Action Cancel the setup and start over. first WEP key (index 1) when setting up your wireless network. www.kodak.com/go/aiosupport KODAK ESP 7 All-in-One Printer...
-
Page 98: Product Safety Specifications
US Letter (8.5 x 11 inch) (22 x 28 cm) A4 (21 x 30 cm) Normal, Best, and Draft Auto-detect plain paper, photo paper, and transparency Optimize image quality for Kodak Photo Papers with barcode Kodak Perfect Touch Technology with Home Center software Yes, No Black &... -
Page 99: Copy Document Features
US Letter (8.5 x 11 inch) (22 x 28 cm) A4 (21 x 30 cm) Normal, Best, and Draft – 3 to + 3 Scanning Features Contact Image Sensor (CIS) type scanner 8.5 × 11.7 in. (21.6 × 29.7 cm) Segmentation scanning Auto-destination www.kodak.com/go/aiosupport KODAK ESP 7 All-in-One Printer... -
Page 100: Paper Tray Features
Devices supported Image formats supported Number of USB ports Software Support Application support Third-party image management applications or Kodak EasyShare Software for photos; optical character reader (OCR) support for documents Media support Plain paper, photo paper, envelopes, greeting cards, transparencies, labels,... -
Page 101: Physical Specifications
Celeron 1.2 GHz 512 MB RAM 500 MB available USB 2.0 CD-ROM Internet access capability www.kodak.com/go/aiosupport KODAK ESP 7 All-in-One Printer Recommended Microsoft Windows Vista 32- or 64-bit processor 2 GHz 1024 MB RAM 500 MB available USB 2.0 CD-ROM... -
Page 102: Macintosh
All commercially available inkjet varieties on 8.5 x 11 and A4 size sheets All commercially available inkjet varieties on 8.5 x 11 and A4 size sheets www.kodak.com/go/aiosupport Recommended 10.4.9 or greater Intel Mac 2 GHz 1024 MB RAM 200 MB available USB 2.0... -
Page 103: Paper Sizes For Pc And Macintosh Computers
8 x 10 in. (203 x 254 mm) US Letter (8.5 x 11 in.) (216 x 280 mm) A4 (210 x 297 mm) 4 x 5.5 in. (101 x 140 mm) 4 x 8 in. (101 x 203 mm) www.kodak.com/go/aiosupport KODAK ESP 7 All-in-One Printer... -
Page 104: Safety Specifications
Product Safety Specifications Safety Specifications • Read and follow these cautions and warnings before using Kodak products. • Always follow basic safety procedures. • Follow all warnings and instructions marked on the Kodak All-in-One printer. Parts Do not disassemble this product; there are no user-serviceable part(s) inside. -
Page 105: Location
WARNING: Do not expose this product to liquid, moisture, or extreme temperatures. Kodak alternating current (AC) adapters are intended for indoor use only. The use of controls, adjustments, or procedures other than those specified herein may result in exposure to shock and/or electrical or mechanical hazards. -
Page 106: Regulatory Compliance
When using the Bluetooth interface with a Kodak printer, the transmitter must not be collocated or operated in conjunction with any other antenna or transmitter. -
Page 107: Ic Radiation Exposure Statement
Observation des normes-Class B—Cet appareil numérique de la classe B est conforme à la norme NMB-003 du Canada. European Compliance Statement Hereby, Eastman Kodak Company declares that this KODAK all-in-one wireless printer is in compliance with the essential requirements and other relevant provisions of Directive 1999/5/EC. -
Page 108: Waste Electrical And Electronic Equipment Labeling
Sie Ihren lokalen Kodak Repräsentanten oder www.kodak.com/go/recycle Wiederverwerten von Batterien Waste Electrical and Electronic Equipment Labeling Contact your local Kodak representative or refer to additional information on the collection and recovery programs available for this product. www.kodak.com/go/recycle für mehr Informationen über das Sammeln und www.kodak.com/go/aiosupport... -
Page 109: Declaration Of Conformity
KODAK ESP 7 All-in-One Printer Declaration of Conformity See www.kodak.com/go/declarationofconformity. www.kodak.com/go/aiosupport... -
Page 110: Glossary
Glossary Ad hoc The Kodak All-in-One printer communicates directly with each device on the network. No wireless access point is used. This is also called a peer-to-peer network. On an Apple Macintosh, ad hoc is called computer-to-computer. All-in-One. Bluetooth An industrial specification for wireless personal area networks (PANs). Bluetooth... - Page 111 JPEG is a compressed image file format. JPEG is a “lossy” format, which means some quality is lost when the image is compressed. Kodak Perfect Touch Automatically corrects for common image flaws and “mistakes,” such as shadows, and backlighting. Kodak Perfect Touch technology also enhances the desirable qualities of pictures, for vibrant color and richer detail.
- Page 112 Service Set Identifier: A unique identifier (up to 32 characters) that differentiates one wireless local area network (WLAN) from another. The SSID is also known as the network name. The name of the network to which the Kodak All-in-One printer is connected is called its SSID.
- Page 113 Kodak All-in-One printer IP address bits identify the network and subnet, and which bits identify the device itself. Kodak recommends that the All-in-One printer and the computers that use it all reside on the same subnet.
-
Page 114: Appendix A: If You Need To Call Customer Support
If you can have ready access to it, it may save you time. Useful for the Kodak service technician: • Kodak Service Number (located inside or on the outside of the printer) • Printer model number (located on back of the printer) • Control panel error message, if any •... - Page 115 .rtf files, 50 Numerics 1111 See Personal identification number, 43 2.0 USB See USB 4-way navigation buttons, 7, 9 8-in-1 card reader See Kodak Ad hoc, definition, 102 Add Date to Prints, 39 Adjusting Control panel, 7 Copy settings, 47...
- Page 116 Keyboard See On-screen keyboard, 11 Kodak Bluetooth dongle, 6 Ink cartridges, 57 Web site, 2 Kodak 8-in-1 USB card reader, 37 Kodak Bluetooth dongle Kodak Perfect Touch, 90, 103 Kodak Service Number, 106 Locate in Home Center (Macintosh) software, 18 Kodak.com, 2...
- Page 117 Photo paper sizes, 95 Photocopy, 47 Photos Cropping, 44 Panoramic, 43 Printing, 40 Printing multiple, 43 Select and print all, 41 Setting image quality, 39 Transferring, 39 PictBridge camera Definition, 104 Displaying photos on, 38 Printing photos from, 40 Troubleshooting, 75 www.kodak.com/go/aiosupport Index...
- Page 118 Components, 4 Configuring network settings, 21 Ethernet, 21 Wireless, 22 Personal identification number, 43 Updates from Kodak.com, 2 Printer access door, 57, 60 Printer fails to power on, troubleshooting, 67 Printer location, selecting, 19 Printer model number, 106 Printer not responding, troubleshooting, 72...
- Page 119 Top paper tray, 4 Touching the scanner glass, 54 Transfer picture failure, troubleshooting, 72 Transferring photos, 39 Transparency sizes, 95 Troubleshooting at Kodak.com, 2 Camera, 68, 72, 75 Copy problems, 79 Cropped picture, 76 Device not recognized, 68 Document print order, 75...
- Page 120 Help, 67 Home Center software system requirements, 93 Windows Vista troubleshooting, 74 WIA error, 74 Wireless network status light, 7 Wireless network, configuring, 22 Wireless printing, Bluetooth WPA, definition, 105 WPS, definition, 105 Zoom buttons, 7, 10 Zooming photos, 44 www.kodak.com/go/aiosupport...
Need help?
Do you have a question about the ESP 7 and is the answer not in the manual?
Questions and answers