Table of Contents
Advertisement
Quick Links
Download this manual
See also:
User Manual
Advertisement
Table of Contents
Troubleshooting

Related Manuals for Kodak ESP 9


Summary of Contents for Kodak ESP 9
- Page 1 All-in-One Printer Print Copy Scan Fax Note: For a USB cable connection, a USB 2.0 cable is required to connect your KODAK All-in-One Printer to your WINDOWS or MACINTOSH OS computer. Available in the KODAK store or see your local retailer.
-
Page 2: Unpacking The Printer
Unpacking the Printer Included with your KODAK All-in-One Printer: Inkjet Printer Software FOR WINDOWS & MACINTOSH 10 10 Power Cord Printhead Black & Color Phone Cord Software CD and Adapter Ink Cartridges with User Guide a) Remove all orange shipping tape and any foam pieces... -
Page 3: Connecting The Power
2. Connect the adapter to the printer. 3. Connect to the power source. b) Remove the plastic fi lm from the LCD display and raise the control panel. c) Press ON d) Select your language and press OK. e) Select your country/region and press OK. www.kodak.com/go/aiosupport... - Page 4 Remove the 3 plastic protective shields. Do not touch the copper-colored contacts. Carriage c) Place the printhead into the carriage. Insert at the angle shown. d) Push fi rmly against the target label of the printhead until you hear a loud snap. www.kodak.com/go/aiosupport...
- Page 5 Insert the black ink cartridge into the printhead. c) Press down on the ink cartridge until you hear it click into position. d) Repeat steps 4a - 4c with the color ink cartridge. e) Close the printer access door and press OK. www.kodak.com/go/aiosupport...
- Page 6 Pull out the top paper tray and insert 4x6 in. (10x15 cm) photo paper face down. Slide the paper edge guides, close the top paper tray. Lower the paper output tray. e) Press START. Calibration will take 2-3 minutes. www.kodak.com/go/aiosupport...
-
Page 7: Connecting To A Computer Or Network
User Guide for detailed instructions. USB CABLE CONNECTION- WAIT TO CONNECT Do not connect the USB cable to the printer until instructed during software install. a) Select USB cable from the LCD display and press OK. b) Proceed to step www.kodak.com/go/aiosupport... - Page 8 Network Name (SSID): _______________________________ information, please go to: Security String: _____________________________________ www.kodak.com/go/inkjetnetworking The security string is unique to your network’s access point. Check with whomever set up your access point, your internet provider, or check the access point documentation for this information.
- Page 9 Ethernet router or hub. d) Proceed to step NONE (CAN CONNECT LATER) You can connect your printer at a later time. a) Select None from the LCD display and press OK. b) Proceed to step www.kodak.com/go/aiosupport...
- Page 10 3. Press or so that Fax Auto Answer is set to Off . You can manually receive a fax by pressing the Start button whenever a phone call comes in. NOTE: For additional fax settings, refer to the User Guide. www.kodak.com/go/aiosupport...
- Page 11 Start Programs Kodak User Guide WINDOWSWINDOWS Setting your KODAK All-in-One Printer as the default on your WINDOWS OS WINDOWS XP: Start Printers and Faxes. Right-click the icon for the printer you want to use as the default printer, and then click Set As Default Printer.
- Page 12 Documentation Kodak AiO Printers Setting your KODAK All-in-One Printer as the default on your MACINTOSH OS MAC OS X defaults to the printer most recently added. To change the default printer, follow these steps: 1. From the print dialog, choose Edit Printer List from the Printer pop-up menu.
-
Page 13: Warranty Information
The option of repair, replacement, or refund is Kodak’s only obligation. Kodak will not be responsible for any special, consequential or incidental damages resulting from the sale, purchase, or use of this product regardless of the cause. -
Page 14: Safety Information
- Do not place your All-in-One Printer on an unstable cart, stand, bracket, or table. Injury to persons and damage to the equipment may occur. - The use of an accessory attachment that is not recommended by Kodak, such as an AC adapter, may cause fi re, electric shock, or injury. - Page 15 Registration has its rewards— including a terrifi c off er. Register your KODAK All-in-One Printer and get great support, expert tips, free software downloads—plus a phenomenal deal on inkjet supplies to get you started. Simply register right away when prompted during software installation or on the web at www.kodak.com/go/register.
- Page 16 KODAK Printer. Kodak provides several methods to help you troubleshoot and solve problems with your KODAK Printer. First attempt to power cycle the printer by unplugging the printer. Wait 5 seconds, and then plug the power cord back into the printer.
- Page 17 All-in-One Printer print copy scan fax User Guide...
- Page 18 Eastman Kodak Company Rochester, New York 14650 © Eastman Kodak Company, 2008 Kodak is a trademark of Eastman Kodak Company. The Bluetooth® word mark and logos are owned by the Bluetooth SIG, Inc., and any use of such marks is under license.
-
Page 19: Table Of Contents
..........5 Major components of the ESP 9 All-in-One printer . - Page 20 Using voice–messaging services with the ESP 9 All–in–One fax ..31 Using an answering machine with the ESP 9 All–in–One fax ... 32 Connecting the phone and fax .
- Page 21 ..........67 Kodak ESP 9 Printer User Guide...
- Page 22 ..........91 Kodak ESP 9 Printer User Guide...
- Page 23 ..............110 Kodak ESP 9 Printer User Guide...
- Page 24 Waste Electrical and Electronic Equipment Labeling ....116 . Glossary . If you need to call Customer Support Index Kodak ESP 9 Printer User Guide...
-
Page 25: Getting Help
This user guide helps you learn to operate your All-in-One printer from the control panel. Kodak also provides online help in the Home Center software installed when you set up your printer, and helpful information about common tasks from the LCD display on the printer control panel. -
Page 26: Getting Answers To Frequently-Asked Questions
See “Troubleshooting” on page 83 for help resolving a number of issues about printing, copying, scanning, and configuring the wireless service on your printer. Contacting Kodak Customer Service & Support Kodak provides several resources to help you answer questions about your printer. Support at Kodak.com Support... -
Page 27: Telephone Customer Support
23 16 21 33 Peru 0 80053679 Poland 00800-4411625 Portugal 021-415-4125 Spain 91-7497653 Sweden 08 587 704 21 Switzerland 01 838 53 51 United Kingdom 0870-243 0270 United States 1 800 421 6699 Venezuela 0800-1008820 Kodak ESP 9 Printer User Guide... - Page 28 Getting Help Kodak ESP 9 Printer User Guide...
-
Page 29: Printer Overview
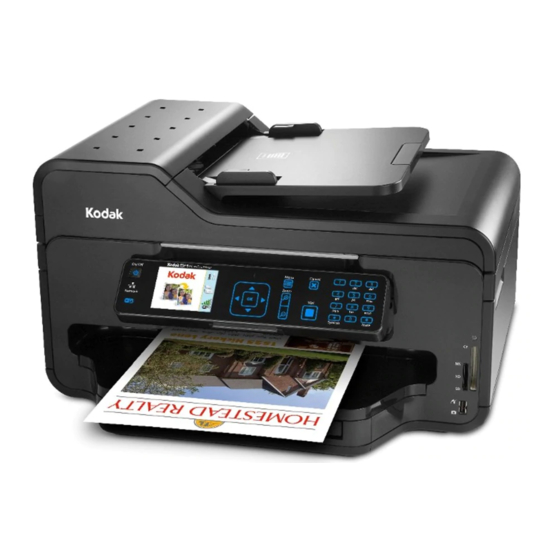
Printer Overview The Kodak ESP 9 All-in-One printer allows you to print, copy, scan, and fax images and documents. Although many functions can be operated directly from the control panel, you may also print, store, and manage digital images from a Windows or Macintosh computer connected to the printer via Kodak’s All-in-One printer Home Center software, which... -
Page 30: Major Components Of The Esp 9 All-In-One Printer
A low-fidelity speaker A Fax modem A telephone jack Major components of the ESP 9 All-in-One printer The graphics below show the main components of the printer.The legend describing the parts shown in the images is in the table below. -
Page 31: Support For Connecting Digital Memory Devices To The Printer
Although this All-in-One printer has two card slots, insert and use only one memory card at a time. Do NOT remove the memory card while the light blinks, or you may Warning: damage the card. Kodak ESP 9 Printer User Guide... -
Page 32: Memory Cards Supported
A blue light, located above the memory card slots, blinks while the card is being accessed and stays lit while the card remains in the slot and the printer is on. Memory cards supported The Kodak ESP 9 All-in-One printer supports the following memory cards, used in most digital cameras: XD xD-Picture Card... -
Page 33: Control Panel Layout
Also used to select menu items. Zoom buttons Lets you zoom in and out of the photo. Start button Allows you to start the following operations: copy, scan, print, fax, maintenance tasks, and file transfer. Kodak ESP 9 Printer User Guide... -
Page 34: Lcd Display
The Start Up screen also displays the current level of black and color ink. Color ink level monitor Black ink level monitor The first time you use your Kodak ESP 9 All-in-One printer and press the button Menu (described on page 13) on the control panel, the Main menu displays on the LCD. -
Page 35: Using The Control Panel
About the “touch-sense” buttons on the control panel The ESP 9 All–in–One printer features flat-panel buttons that do not depress when pushed, as in a traditional keyboard or calculator keypad. Each button on the control panel responds to the pressure of your finger and performs a specific action based on the task you are working on. -
Page 36: Using The 4-Way Navigation Buttons
When a photo is displayed on the LCD display, after you have pressed the Zoom+ button pressing moves the focus in the direction you have used. buttons on the control panel are discussed on Note: Zoom+ and Zoom- page 13. Kodak ESP 9 Printer User Guide... -
Page 37: Using The Ok Button
LCD and you want to adjust the area to be Zoom+ printed, copied, or scanned. When this feature is available, the printer displays a prompt to press on the image shown on the LCD. Zoom Kodak ESP 9 Printer User Guide... -
Page 38: Using The Start Button
Using the number keypad buttons The number keypad is used primarily as a resource for sending faxes from the ESP 9 All–in– One printer. It is also used to enter a quantity for making copies. -
Page 39: Using The On-Screen Keyboard
Enter a quantity for making copies of a document or photo As on a telephone dial pad, which the number keypad resembles, each key on the ESP 9 number keypad (except for the 1 key and the zero key) is associated with both a numerical value and with either three or four alphabetic characters, with typographic symbols, or with symbols and a space (used to separate two alphanumeric characters). -
Page 40: Using The All-In-One Printer Menus
Use the menus on the LCD display to select stand-alone tasks (that is, tasks that can be performed without your computer), such as copying documents or photos;, printing photos stored on memory cards, USB drives, Kodak Bluetooth adapter (“dongle”), or digital cameras plugged into the printer; or sending a fax. -
Page 41: Menu Structure
27 Displays Printer Settings Printer Settings See “Printer settings options” on menu page 24 Maintenance Displays Maintenance menu See “Maintenance Options” on page 76 Help Displays Help menu See “Help Menu” on page 1 Kodak ESP 9 Printer User Guide... -
Page 42: Status Lights
Most power supplies used with this ESP All-in-One printer are equipped with a status light which illuminates when electricity is appied. If you cannot determine if the power supply is working properly contact Kodak Service & Support for assistance. Printer Power Cord Light... - Page 43 Unit open, scanner lid open, rear access door open. Too many image sources. Printhead not installed. Unable to read memory card or USB host device. Blinks (fast) Ink cartridge(s) inserted incorrectly. Ink cartridge(s) not installed. Media sensor failure. Printhead failure. Scanner failure. Kodak ESP 9 Printer User Guide...
-
Page 44: All-In-One Printer Home Center Software
All-in-One printer Home Center software Kodak Home Center software is installed on your computer during the setup process. The software functionality for Windows or Macintosh users is described below. -
Page 45: Home Center For Macintosh
Enhance and print images Configure settings for printing, copying, and scanning from the control panel Access the Kodak Tips and Projects Center Web site. Order supplies from the Kodak Web site. The functions of the three small icons located in the upper-right corner of the Home Center... - Page 46 From both the and tabs you can: Setup Maintenance : This option allows you to order supplies online from the Kodak web Order Supplies site. : This option opens a drawer displaying the configuration status of View/Hide Status your All-in-One printer.
-
Page 47: Setting Up Your Printer
Setting Up Your Printer Use this chapter to set up and start using your Kodak All-in-One printer. Selecting a printer location Place your printer on a clean, flat surface in a dry, well-ventilated location, away from direct sunlight. Avoid areas with high levels of dust and debris. Do not expose the printer and paper to ventilation ducts, open doors, or high traffic, as airborne particles can affect picture quality. -
Page 48: Printer Settings Options
00 - 59 Tagged Image Printing Control Panel Settings Button Sounds Time to Low Power 1-4 hours, in .5 hour increments Language English (U.S.) English (International) Deutsch Français Français (Canada) Italiano Español Castellano Português Nederlands Kodak ESP 9 Printer User Guide... - Page 49 Setting the date and time via the control panel is a separate task from Note: stamping the date and time on photo prints. You can also synchronize the printer's date and time using the Home Center software. Kodak ESP 9 Printer User Guide...
-
Page 50: Configuring Network Settings
IP Address. See your network provider for Manual IP Address assistance. Configuring a wireless network connection You can connect your printer to a 802.11 wireless (WiFi) network from the All-in-One printer control panel. Kodak ESP 9 Printer User Guide... -
Page 51: Configuring Basic Wireless (Wifi) Settings
0 and 100, where 100 is the highest possible strength. If more WiFi networks are within range than can be shown on the LCD, the display includes the (page down) symbol and/or the (page up) symbol on the LCD. Kodak ESP 9 Printer User Guide... -
Page 52: Connecting To An Unlisted Network
Enter the alphanumeric string accurately, using the correct upper and lower case letters. After completing your entry, select the DONE key, and then press Select as required for your network's security setup, and then press WPA/WPA2 Kodak ESP 9 Printer User Guide... -
Page 53: Setting Up An Ip Address
Settings with no values will be displayed as zeros. Setting up the fax Your Kodak ESP 9 All-in-One printer allows you to send and receive faxes, set up quick dials, and other fax options from the control panel. For more information about sending and receiving faxes using this All-in-One printer, see Chapter 8, “Faxing”... -
Page 54: Telephone Service Delivery Systems And All-In-One Fax Features
By connecting the telephone cable that came with your printer to the computer or cable modem and also to the ESP 9, your printer can successfully send and receive faxes over this type of telephone system. -
Page 55: Digital Subscriber Line (Dsl) Telephone Systems
Your telephones will not work without the installation of the DSL filter. Caution: Using cordless telephones with the ESP 9 All–in–One fax Cordless telephones, which connects to a digital, standard, or DSL telephone system can be used with your All-in-One printer. To do so, you must connect the base station of your telephone;... -
Page 56: Using An Answering Machine With The Esp 9 All-In-One Fax
Fax Auto–Answer mode. You can accept them manually, though. See “Manually receiving fax” on page 36. Using an answering machine with the ESP 9 All–in–One fax If you use an answering machine to retrieve and record messages from telephone callers when you are not available to pick up the handset, you can set up your telephone to work with both the answering machine and the printer. -
Page 57: Connecting The Printer To A Standard Telephone Line
Set the number the of rings on your answering EXT-Out machine to a lower number of rings than the Rings to Answer settings on your All-in- One printer. If you are using a dedicated telephone line to send or receive faxes, LINE-In Kodak ESP 9 Printer User Guide... -
Page 58: Connecting The Printer To A Digital Subscriber (Dsl) Telephone Line
Obtain a DSL filter from your DSL provider. Connect the one end of the phone cord supplied with your Kodak ESP 9 All–in–One printer to the open port on the DSL filter, and the other to the printer port labeled .When the phone rings your printer is set to answer automatically after the... -
Page 59: Specifying Rings To Answer
Set the number of Rings to Answer for the printer to exceed the number rings set for the answering machine. This ESP 9 All–in–One printer allows you to specify the Note: Rings–to–Answer from 1–6 rings. -
Page 60: Setting Fax Auto-Answer
Is your All–in–One printer located in a separate room from a telephone with Tip: the same number used by the ESP 9 All-in-One printer? If so, remember to dial when you pick up the phone and hear incoming fax tones. -
Page 61: Fax Settings Options
On/Off Some phone system features may not be available with pulse dialing, which is slower than tone dialing. Contact your telephone company if you are unsure about which setting to use. Kodak ESP 9 Printer User Guide... - Page 62 As needed, press to set the desired sub-setting, as in configuring your sender name and telephone numbers. As needed, press to change the setting. Press to save the setting(s). Kodak ESP 9 Printer User Guide...
-
Page 63: Handling Paper
41); its capacity is 100 sheets of 20 lb. plain paper. The top tray capacity is 40 sheets of 4X6, 4X7, or 5X7 inch paper. The automatic document feeder (ADF) on the ESP 9 All-in-One printer accepts up to 35 sheets of plain paper. -
Page 64: Loading The Paper Trays
This process repeats until, eventually, the trapped sheets jam the paper inside the printer, which cannot free themselves from the print roller and onto the paper output tray. Kodak ESP 9 Printer User Guide... -
Page 65: Loading Plain Paper
Chapter 4 Loading plain paper Review “Things to keep in mind” above. Note: The automatic document feeder (ADF) on the ESP 9 only accepts plain Caution: paper. Pull the bottom paper tray toward you To load media that is more than A4 size, such as 4X12 inch panoramic... -
Page 66: Loading Photo Paper
Loading photo paper Review “Things to keep in mind” on page 40. Note: The automatic document feeder (ADF on the ESP 9 only accepts plain Caution: paper. If you try to run photo paper through it, the printer displays an error message on the LCD, and the printer will not complete the job. -
Page 67: Loading Originals
Do NOT use the automatic document feeder for scanning. If the original is more than 11 inches (279 mm) long, you can pull the tray extender all the way out to keep the original flat. Kodak ESP 9 Printer User Guide... - Page 68 See “Loading an original for copying or scanning” on page 43. Align the paper-width guides with the edges of the paper to center the original in the ADF tray. Kodak ESP 9 Printer User Guide...
-
Page 69: Viewing And Printing Photos
Never load photo paper into the automatic document feeder (ADF) on Caution: the ESP 9; the ADF only accepts plain paper. If you load photo paper in the ADF, the printer displays a warning on the LCD, and will not complete the job. -
Page 70: Viewing Photos
From the control panel, press Menu Press until the option you want to configure is selected, and then press As needed, press to change the setting. Press to save the setting for the current print job. Kodak ESP 9 Printer User Guide... -
Page 71: Print Photos Options
Your All-in-One printer automatically adjusts the print output to the best available quality for images printed on photo paper. You need to set to Draft, Plain Paper Quality Normal or Best only when printing images or documents on plain printer paper. Kodak ESP 9 Printer User Guide... -
Page 72: Printing Photos
(“beep”), and displays an error message on the LCD display. See the first Tip on the following page for a work–around if your flash drive cannot be read by your printer. Kodak ESP 9 Printer User Guide... - Page 73 Print Photos Options below.. Here you can press until the parameter you want to adjust is selected. If a value is displayed between the symbols in the row, press to select the value you want Kodak ESP 9 Printer User Guide...
-
Page 74: Printing Tagged Images
When you select photos with your camera, the camera creates a DPOF file that identifies which photos have been tagged for printing. Your Kodak All-in-One printer can read the DPOF file from the memory card so you do not have to re-select the photos to print. -
Page 75: Range
Chapter 5 To enable Bluetooth wireless connectivity, plug the Kodak Bluetooth adapter into the USB port located on the front panel of your printer. Before you can transmit photos to your printer from a Bluetooth–enabled Note: device, you must first “pair” the printer and the device so that they can communicate. -
Page 76: Zooming And Cropping Photos
Start crop box. If you want to specify additional print parameters for the photo, press Menu to display the menu. A sample of the menu is shown in the Print Photos Options illustration below. Kodak ESP 9 Printer User Guide... -
Page 77: Transferring Images To A Computer
You can transfer .jpg, .mov, or .wav files to your Windows or Macintosh computer from a digital camera, memory card, device connected to your printer via a Kodak Bluetooth dongle, and portable (USB) thumb drive connected to this All-in-One printer. -
Page 78: Transferring Images To A Macintosh Computer
PictBridge camera) or the printer LCD display (all other devices). Press until is highlighted. Transfer All to PC Press When a transfer or connection message appears on the monitor, click Press Start Use iPhoto or Image Capture to complete the transfer. Kodak ESP 9 Printer User Guide... -
Page 79: Copying
Copying You can copy both images and documents directly from the control panel of your Kodak ESP All-in-One printer. The printer produces high–quality color or black and–white copies on a variety of paper types, including transparencies. Before using your All-in-One printer to copy a document or photo for the... -
Page 80: Copy Document Options
The copy is the same size as the original. Cropping occurs if the original is Same Size larger than the paper size. The copy will contain white space if the original is smaller than the paper size. is the default copy setting. Same Size Kodak ESP 9 Printer User Guide... -
Page 81: Copy Photo Options
Produces the highest quality for all paper and eliminates the banding (striping) effect that sometimes occurs in modes. Draft Normal Best is the slowest print speed. If Kodak photo paper is loaded in the paper tray, this setting is used. Copy Photo Options View Settings / Menu Options Settings... - Page 82 Copying Kodak ESP 9 Printer User Guide...
-
Page 83: Scanning
As a file on your computer Before you start Before you start scanning with this All-in-One printer, Kodak recommends that you use the Home Center software to configure the default scan settings. This way, you can easily manage the scan in your computer. See “All-in-One printer Home Center software” on page 20 for additional information. -
Page 84: Simple Scanning
As needed, press to specify which Scan Destination application on the computer will open the file. Kodak Home Center software appears on the list by default. Press Start When the Scanner dialog window displays on your computer, follow the prompts to finish the scanning process. -
Page 85: Simple Image Scans
Scan Options illustration below. Here you can press until the option you want to adjust is selected. If a value is displayed between the symbols in the row, press to select the value you want. Kodak ESP 9 Printer User Guide... -
Page 86: Scan Options
Each application will appear as a Scan Destination separate setting in the display. (Kodak Home Center software is displayed by default; you do not need to configure your destinations to include it.) In addition, before using a... -
Page 87: Faxing
Faxing Introduction Your Kodak ESP 9 All-in-One printer allows you to send and receive faxes (including color faxes), assign and use quick dial settings for frequently used fax recipients, and select a number of fax options from the control panel. -
Page 88: Dialing A Fax Number On The Control Panel
Send Fax The list of Fax Phonebook entries displays in the Send Fax menu. The last Fax number selected is shown above the menu. See the example, below. Fax Options... Kodak ESP 9 Printer User Guide... -
Page 89: Using Quick Dial To Select A Fax Phonebook Entry
Using Quick Dial to select a Fax Phonebook entry By assigning up to ten contacts in your Fax Phonebook with a number between 0 (zero) and 9, the Quick Dial feature in your ESP 9 All-in-One printer allows you to create shortcuts for quickly sending Faxes to them. -
Page 90: Specifying A Quick Dial Recipient From The Send Fax Menu
Press the Quick Dial number on the keypad, and then press . For example, Start press to specify the entry assigned the Quick Dial value of “08.” See the illustration below. Press to accept the selected value, and then press Start Kodak ESP 9 Printer User Guide... -
Page 91: Canceling Faxes
Quick Dial value. This section describes managing the Fax Phonebook from the control panel. Windows users can manage the Fax Phonebook from Home Center software; see “All-in-One printer Home Center software” on page 20. Kodak ESP 9 Printer User Guide... -
Page 92: Adding A New Fax Phonebook Entry
Send Fax This option is also accessible by selecting from the Fax Note: Edit Phonebook Settings menu. Select and press Fax Options Select and press Edit Phonebook The Edit Phonebook menu displays on the LCD. Kodak ESP 9 Printer User Guide... -
Page 93: Deleting An Existing Fax Phonebook Entry
Never load photo paper into the automatic document feeder (ADF) on Caution: the ESP 9; the ADF only accepts plain paper. If you load photo paper in the ADF, the printer displays a warning on the LCD, and will not send the Fax. -
Page 94: Changing Send Fax Settings
“Dialing a fax number on the control panel” , below “Selecting a fax recipient from the Fax Phonebook” on page 64 “Using Quick Dial to select a Fax Phonebook entry” on page 65 Kodak ESP 9 Printer User Guide... -
Page 95: Send Fax Options
Fax Lost Job report when power returns to the printer (and it is turned on). This feature allows you to notify the sender(s) about any fax that could not be received due to loss of power, and you can request re–transmission, as appropriate. Kodak ESP 9 Printer User Guide... -
Page 96: Printing A Fax Report
Print Fax Confirmation Page This report cannot be run from the control panel; the ESP 9 will Note: output this report only after you send a fax, and only based on the setting. If you change this setting, press... -
Page 97: Maintaining Your Printer
Maintaining Your Printer Your Kodak ESP 9 All-in-One printer requires little maintenance. However, Kodak recommends cleaning the scanner glass and lid backing regularly to remove dust and fingerprints. Fingerprints and other debris on the glass or lid backing could slow down the printer’s performance, and affect the quality and accuracy of scanning. -
Page 98: Cleaning The Scanner Glass
Do not use paper-based wipes, as these might scratch the underside of Warning: the scanner lid. Do not use harsh or abrasive cleaners or organic solvents on the printer or any of its parts. Kodak ESP 9 Printer User Guide... -
Page 99: Monitoring And Adjusting The Printer's Performance
From the control panel, you can perform many tasks to keep this printer in good working order. For example, you can check the status of the printer’s inkjet nozzle to ensure high- quality prints. Kodak recommends that you run a nozzle check if you are experiencing changes in image quality. You can also use the... -
Page 100: Maintenance Options
Printhead Alignment Replacing ink cartridges Your Kodak printer uses separate black and color ink cartridges. The ink levels are shown on the control panel and in the printer software. For the best quality prints, store ink cartridges in locations where the Caution: temperature does not exceed 85°F (30°C). - Page 101 You can take your used ink cartridges to most office supply or electronics Note: stores for safe disposal. Open the box containing the new ink cartridge. Kodak ESP 9 Printer User Guide...
- Page 102 Insert the ink cartridge immediately to prevent any drying of the ink. Caution: Remove the orange cap from the cartridge by grasping the top edge and pulling/ rotating it off the ink cartridge. Discard the orange cap. Insert the ink cartridge into the printhead. Kodak ESP 9 Printer User Guide...
-
Page 103: Replacing The Printhead
If your printhead is damaged or broken, you may replace it yourself. Make sure your printer is turned on. Open the printer access door by lifting from the recessed hand-holds on the sides of the unit. Kodak ESP 9 Printer User Guide... - Page 104 Insert the ink cartridges into the newly installed printhead as soon as Caution: possible to prevent any drying of the ink. Unlatch the printhead by lifting the rectangular latch on the top of the printhead. Kodak ESP 9 Printer User Guide...
- Page 105 Remove the old printhead from the carriage. Remove the new printhead from its bag. Do not touch copper contacts on the printhead, as this may damage it. Caution: Remove and discard the black plastic casing and the orange protective cap. Kodak ESP 9 Printer User Guide...
- Page 106 Close the printer access door. The printer should now complete a printhead calibration to ensure that it is ready to for normal operation. Kodak ESP 9 Printer User Guide...
-
Page 107: Troubleshooting
Finally, turn the printer back on. Confirm that you are using a 2.0 USB cable to connect the printer to your computer. If you need to buy one, they are available online at www.kodak.com/go/aio, or from your local electronics and printer retailer. -
Page 108: Device Not Recognized
If none of the above corrects the problem, contact Kodak support. Device not recognized Probable Cause Any of the following can prevent your Kodak All-in-One printer from reading a connected device (digital camera, USB drive, or memory card). The camera is turned OFF. -
Page 109: Ink Cartridge Not Recognized
Ink cartridge not recognized Probable Cause 1 The color or black ink cartridge installed was not recognized. Generic or non-Kodak ink cartridges may not function with the Warning: All-in-One printer. Kodak recommends using genuine Kodak ink cartridges. Corrective Action Install a genuine Kodak ink cartridge. -
Page 110: Multiple Pictures Not Scanned Properly
Troubleshooting Multiple pictures not scanned properly When scanning or copying, the Kodak printer can detect multiple images on the scanner glass, straighten them, and create individual files. If you are having trouble with this feature, check the following: Probable Cause 1 Your photos are not placed optimally on the scanner glass. -
Page 111: No Paper Feed
No paper feed Probable Cause The paper tray may be empty, or there may be a problem with the paper in the tray. Kodak Inkjet paper is recommended for your Kodak All-in-One printer. Caution: Corrective Action If the tray is empty, load paper into the paper tray, then resume printing. Check for a message from the printer status monitor (Windows) or the printer queue window (Macintosh) on your computer. -
Page 112: Paper Jam
See “Replacing the printhead” on page 79 for illustrated instructions for Note: performing this procedure. If this does not resolve your printing issue, contact Kodak Service and Support Paper jam Probable Cause The paper did not advance, was not picked up properly from the paper tray, or is lodged inside the printer. -
Page 113: Transfer Pictures Failure
Probable Cause The User Guide has been updated since the software CD was released. Corrective Action Download the most recent version of the User Guide from Kodak.com. Wrong paper size Probable Cause The print size or paper size you selected may be larger or smaller than the paper found in the paper tray. -
Page 114: Macintosh Os X Troubleshooting
Security and/or User Account Control settings. Corrective Action Right-click on the Home Center icon (shortcut) on the Desktop. Select Properties Select the Compatibility tab. Check the box that says “Run the program as an administrator.” Kodak ESP 9 Printer User Guide... -
Page 115: Print Troubleshooting
On the Windows Desktop, click Start > Settings > Control Panel In the Control Panel window, open Printers or Printers and Faxes. In the Windows Explorer window, Right-click on the Kodak All-in-One printer in the column, and then select Name... -
Page 116: Pictbridge Camera Not Detected
Change the picture quality setting (or resolution) on your digital camera to 3:2. See your camera user’s guide for details. Adjust cropped photos using the Kodak Home Center software (Windows only) or other image editing software on your computer. If you are printing from an application on your computer, select the proper paper size from the printer options. -
Page 117: Poor Print Quality
Probable Cause 2 The image file may not be in JPEG format. Corrective Action The Kodak printer can print only JPEG files in stand-alone mode. Connect the printer to a computer and use software to print other image formats. Poor print quality Probable Cause Low resolution image file or the printer may need maintenance. -
Page 118: Print Spotted
Adjust the exposure compensation on your camera, and try taking the picture again. Refer to your camera user’s guide for details. Edit the picture using Kodak Home Center (Windows only) or other image editing software. Make sure the printer is not placed in direct sunlight or is not operating in a high- temperature environment. -
Page 119: Printing Slow
Make sure your computer meets the minimum system requirements. Upgrade your system if necessary. Printing stops Printing stops during mid-print. Paper stops feeding, and status light may blink. For best results, use Kodak paper and ink cartridges for your Kodak Caution: All-in-One printer. To check the paper: Remove any loose paper from the printer. -
Page 120: Copy Troubleshooting
Turn on your computer. Probable Cause 2 Your Kodak printer is not connected to your computer. Corrective Action Connect your Kodak printer to your computer with a standard USB cable. Probable Cause 3 The Kodak Home Center software is not installed. Corrective Action Insert the Kodak printer installation CD and install the software. -
Page 121: Scanned Image Blank
Corrective Action Verify the setup of your LAN card. To check your LAN card (Windows) Open the Control Panel. Double-click System In the dialog box, click the Hardware tab. System Properties Click Device Manager Kodak ESP 9 Printer User Guide... -
Page 122: No Tcp/Ip
Your Local Area Network (LAN) card is not installed properly. Corrective Action Make sure your LAN card is installed properly and set up for TCP/IP. See the instructions that came with your LAN card. Kodak ESP 9 Printer User Guide... -
Page 123: Printer Not Found
If you see firewall pop-up messages, you must accept or allow the pop-up messages. For more information, see the documentation provided with the firewall software. Kodak ESP 9 Printer User Guide... - Page 124 To print the network configuration page On the control panel of the printer, press Menu Press until is highlighted, and then press Network Settings Press until is highlighted, and then press Print Network Configuration Kodak ESP 9 Printer User Guide...
-
Page 125: No Ip Address With Cable Modem (Without A Router)
If a cordless telephone, microwave, or other device that emits radio signals transmitting at 2.4 GHz is nearby, move it farther away to reduce radio interference. Kodak ESP 9 Printer User Guide... - Page 126 The firmware for the wireless adapter on your computer needs updating (ad hoc). Corrective Action Check for firmware updates for your wireless adapter on the manufacturer's Web site, and then update the firmware. Probable Cause 7 An Ethernet cable is connected to the printer. Kodak ESP 9 Printer User Guide...
-
Page 127: Weak Signal
Enter the SSID correctly. Remember that the SSID is case-sensitive. Probable Cause 4 You have entered the WEP key incorrectly. Corrective Action Enter the WEP key correctly. Remember that the WEP key is case-sensitive. Kodak ESP 9 Printer User Guide... -
Page 128: Unsupported Authentication Or Encryption Type
Unsupported authentication or encryption type Probable Cause Your network is configured with an authentication protocol not supported by the Kodak All-in-One printer. Corrective Action Open the Embedded Web Server of your access point and change the security settings. -
Page 129: Invalid Wpa Passphrase
Another device connected to the access point Probable Cause Another device in the vicinity connected to your access point before the All-in-One printer was able to connect. Corrective Action Cancel the setup and start over. Kodak ESP 9 Printer User Guide... - Page 130 Troubleshooting Kodak ESP 9 Printer User Guide...
-
Page 131: Product And Safety Specifications
Product and Safety Specifications Specifications for this Kodak ESP All-in-One printer are described in the tables below. Print Performance Print Performance Black print speed Up to 30 pages per minute on plain paper Color print speed Up to 29 pages per minute on plain paper... -
Page 132: Copy Document Features
Product and Safety Specifications Photo Printing Features Image enhancement Kodak Perfect Touch Technology with Home Center software Add Dates to Prints Yes, No Color Color, Black-and-White Scene Balance On, Off Copy Document Features Copy Document Features Color Black & white or color... -
Page 133: Paper Tray Features
Image formats JPEG (EXIF V2.2) (progressive JPEG format not supported) supported AVI, MOV and WAV (transfer only) Number of USB One front host port (full speed), one rear device port (high speed) ports Kodak ESP 9 Printer User Guide... -
Page 134: Software Support
Product and Safety Specifications Software Support Software Support Application Third-party image management applications or Kodak EasyShare support Software for photos; optical character reader (OCR) support for documents Media support Plain paper, photo paper, envelopes, greeting cards, transparencies, labels, t-shirt transfers... -
Page 135: Windows Pc
20 to 24 lb (60 to 90 gsm) Photo paper 10 mils Card stock 110 lb index max (200 gsm) Envelopes 20 to 24 lb (75 to 90 gsm) Transparencies All commercially available inkjet varieties (with or without a white stripe.) Kodak ESP 9 Printer User Guide... -
Page 136: Paper Sizes For Pc And Macintosh Computers
4 x 8 in. (101 x 203 mm) Safety Specifications Read and follow these cautions and warnings before using Kodak products. Always follow basic safety procedures. Follow all warnings and instructions marked on the Kodak ESP 5 All-in-One printer. Kodak ESP 9 Printer User Guide... -
Page 137: Parts
Do not plug the alternating current (AC) adapter into a household Caution: extension cord. The use of an accessory not recommended by Kodak could cause fire, an Warning: electric shock, or injury. Location To prevent your printer from overheating, do not block or cover the... -
Page 138: Environment
Do not expose this product to liquid, moisture, or extreme temperatures. Warning: Kodak alternating current (AC) adapters are intended for indoor use only. The use of controls, adjustments, or procedures other than those specified herein may result in exposure to shock and/or electrical or mechanical hazards. -
Page 139: Fcc And Industry Canada
When using the Bluetooth interface with a Kodak printer, the Caution: transmitter must not be collocated or operated in conjunction with any other antenna or transmitter. -
Page 140: German Compliance Statement
Waste Electrical and Electronic Equipment Labeling In the European Union, this symbol indicates that when the last user wishes to discard this product, it must be sent to appropriate facilities for recovery and recycling. Contact your local Kodak representative or refer to www.kodak.com/ go/recycle for additional information on the collection and recovery programs available for this product. -
Page 141: Glossary
Glossary Ad hoc The Kodak All-in-One printer communicates directly with each device on the network. No wireless access point is used. This is also called a peer-to-peer network. On an Apple Macintosh, ad hoc is called computer-to-computer. All-in-One printer All-in-One printer Bluetooth An industrial specification for wireless personal area networks (PANs). - Page 142 This feature is available when scanning or copying pictures. Color restoration and Kodak Perfect Touch can be used together to enhance pictures. This feature is not available when scanning black and white pictures.
- Page 143 (DHCP) server on the network. On small networks, this could be a router. Manual: The configuration parameters are set manually, such as a static IP address. Not Specified: The mode used when the Kodak All-in-One printer is initializing. Optical character recognition.
- Page 144 Service Set Identifier: A unique identifier (up to 32 characters) that differentiates one wireless local area network (WLAN) from another. The SSID is also known as the network name. The name of the network to which the Kodak All-in-One printer is connected is called its SSID.
- Page 145 Chapter A Wireless Provisioning Services. A standards-based and integrated platform to provide secure WiFi hotspots. WPS enables enterprises to easily provide guest access with enhanced security to private wireless Internet and corporate networks. Kodak ESP 9 Printer User Guide...
- Page 146 Glossary Kodak ESP 9 Printer User Guide...
-
Page 147: If You Need To Call Customer Support
Exact Home Center error message received, if applicable Windows PC only: Exact printer error message received in the printer status monitor Version of Kodak Home Center software. (From the Home Center Help panel, click the Info button to view the About box) - Page 148 If you need to call Customer Support Kodak ESP 9 Printer User Guide...
-
Page 149: Index
Canceling a fax ......69 Card reader, Kodak 8-in-1 ....47 Castellano (Iberian/Spanish) . - Page 150 Off ....... . 69 Kodak ESP 9 Printer User Guide...
-
Page 151: Image Quality
Host port ......5 Kodak.com ......2 Hostname, definition . - Page 152 Modifying See Edit. See also Adjusting Paper stop ......42 Kodak ESP 9 Printer User Guide...
- Page 153 Printing photos from ....50 at Kodak.com ..... . 2 Troubleshooting .
-
Page 154: Quality Settings
Start button ......9 Rings to Answer ..... . 39 Kodak ESP 9 Printer User Guide... - Page 155 Scanning problems ....100 at Kodak.com ..... . 2 Status lights .
- Page 156 Zoom buttons ......9 Zooming photos ..... . 54 Kodak ESP 9 Printer User Guide...
- Page 157 *1K3289 *1K3289 1K3289 B...
Need help?
Do you have a question about the ESP 9 and is the answer not in the manual?
Questions and answers