Table of Contents
Advertisement
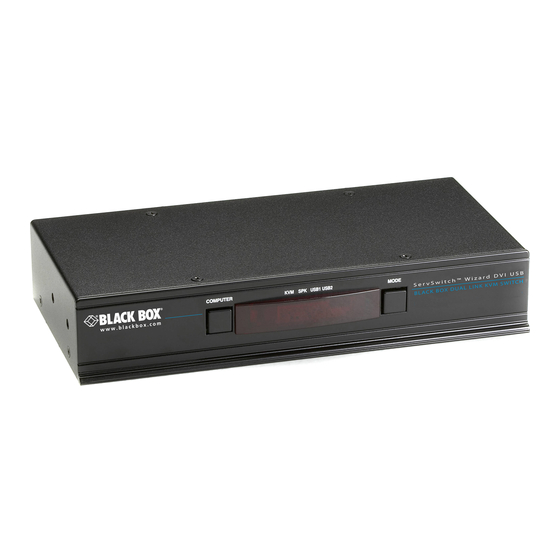
ServSwitch Wizard DVI DL
Control up to four computer systems and share
peripherals among them.
KV2004A supports one video head per channel, KV2204A supports two,
KV2304A supports three, and KV2404A supports four.
Order toll-free in the U.S.: Call 877-877-BBOX (outside U.S. call 724-746-5500) •
Customer
FREE technical support 24 hours a day, 7 days a week: Call 724-746-5500 or fax 724-746-0746 •
Support
Mailing address: Black Box Corporation, 1000 Park Drive, Lawrence, PA 15055-1018 •
Information
Web site: www.blackbox.com • E-mail: info@blackbox.com
BLACK BOX
March 2010
KV2004A
KV2304A
KV2204A
KV2404A
®
Advertisement
Table of Contents

Related Manuals for Black Box KV2004A


Summary of Contents for Black Box KV2004A
-
Page 1: Black Box
Order toll-free in the U.S.: Call 877-877-BBOX (outside U.S. call 724-746-5500) • Customer FREE technical support 24 hours a day, 7 days a week: Call 724-746-5500 or fax 724-746-0746 • Support Mailing address: Black Box Corporation, 1000 Park Drive, Lawrence, PA 15055-1018 • Information Web site: www.blackbox.com • E-mail: info@blackbox.com... - Page 2 ServSwitch Wizard DVI DL Trademarks Used in this Manual Black Box and the Double Diamond logo are registered trademarks, and ServSwitch Wizard is a trademark, of BB Technologies, Inc. Apple and Mac are registered trademarks of Apple Computer, Inc. IBM is a registered trademark of International Business Machines Corporation.
- Page 3 FCC and IC RFI Statements Federal Communications Commission and Industry Canada Radio Frequency Interference Statements This equipment generates, uses, and can radiate radio-frequency energy, and if not installed and used properly, that is, in strict accordance with the manufacturer’s instructions, may cause inter ference to radio communication. It has been tested and found to comply with the limits for a Class A computing device in accordance with the specifications in Subpart B of Part 15 of FCC rules, which are designed to provide reasonable protection against such interference when the equipment is operated in a commercial environment.
-
Page 4: Instrucciones De Seguridad
ServSwitch Wizard DVI DL Instrucciones de Seguridad (Normas Oficiales Mexicanas Electrical Safety Statement) 1. Todas las instrucciones de seguridad y operación deberán ser leídas antes de que el aparato eléctrico sea operado. 2. Las instrucciones de seguridad y operación deberán ser guardadas para referencia futura. 3. -
Page 5: Table Of Contents
Overview ..................................7 Introduction ..................................7 Features ..................................7 What’s Included ................................8 Additional Items You May Need ............................8 Hardware Description, Single-Head Version (KV2004A) ....................9 2.5.1 Front Panel ................................9 2.5.2 Back Panel ............................... 10 Hardware Description, Multi-Head Versions (KV2204A, KV2304A, and KV2404A) ............11 2.6.1... -
Page 6: Specifications
Output: 5-VDC, 2-A; Power consumption: KV2004A: 12.5 watts, KV2204A, KV2304A, KV2404A: 20 watts Size: KV2004A: 1.73"H (1U) x 9.21"W x 4.72"D (4.39 x 23.39 x 11.99 cm); KV2204A, KV2304A, KV2404A: 4.375"H (2.5U) x 9.21"W x 4.72"D (11.13 x 23.39 x 11.99 cm) Weight: KV2004A: 1.87 lb. -
Page 7: Overview
™ systems and share peripherals among them in a very flexible manner. The KV2004A can support one video head per channel, whereas the slightly larger KV2204A, KV2304A, and KV2404A units support two, three, and four video heads per channel, respectively. -
Page 8: What's Included
Your package should contain the following items. If anything is missing or damaged, contact Black Box Technical Support at 724-746-5500 or info@blackbox.com. • ServSwitch Wizard DVI DL unit (KV2004A) or ServSwitch Wizard DVI DL Multihead unit (KV2204, KV2304A, or KV2304A) •... -
Page 9: Hardware Description, Single-Head Version (Kv2004A)
Chapter 2: Overview 2.5 Hardware Description, Single-Head Version (KV2004A) 2.5.1 Front Panel Figure 2-2 shows the front panel of the ServSwitch Wizard DVI DL. Table 2-1 describes its components. Figure 2-2. Front panel. Table 2-1. Front-panel components. Number Component Description COMPUTER button Press to change to the next computer channel. -
Page 10: Back Panel
ServSwitch Wizard DVI DL 2.5.2 Back Panel Figure 2-3 shows the back panel of the ServSwitch Wizard DVI DL. Table 2-2 describes its components. Figure 2-3. Back panel. Table 2-2. Back panel components. Number Component Description Barrel connector Power input or power supply connects here. (2) USB Type A connectors Connect the console’s USB keyboard and mouse to these connectors. -
Page 11: Hardware Description, Multihead Versions (Kv2204A, Kv2304A, And Kv2404A)
Chapter 2: Overview 2.6 Hardware Description, Multihead Versions (KV2204A, KV2304A, and KV2404A) 2.6.1 Front Panel Figure 2-4 shows the front panel of the ServSwitch Wizard DVI DL, multihead versions. Table 2-2 describes its components. Figure 2-4. Front panel. Table 2-3. Front-panel components. Number Component Description... -
Page 12: Back Panel
ServSwitch Wizard DVI DL 2.6.2 Back Panel Figure 2-5 shows the back panel of the ServSwitch Wizard DVI DL. Table 2-4 describes its components. Figure 2-5. Back panel. Table 2-4. Back panel components. Number Component Description Barrel connector Power input or power supply connects here. (2) USB Type A connectors Connect the console’s USB keyboard and mouse to these connectors. -
Page 13: Installation
There are two main mounting methods: • Via the (4) supplied self-adhesive rubber feet • Via optional rackmount brackets (KV2004A models only) using RMK2004 Rack brackets (KV2004A models only): The optional brackets (plus four screws), enable the unit to be secured within a standard rack slot. See Figure 3-1. - Page 14 ServSwitch Wizard DVI DL From USB keyboard and mouse Figure 3-2. Connecting the keyboard/mouse to the user console. NOTE: The unit’s True Emulation feature will read the full characteristics of the keyboard and mouse and will present those to each connected computer concurrently. This ensures that specialized keyboards and mice are fully supported. 3.
- Page 15 Chapter 3: Installation Single-head units: Attach the lead from the video monitor to the DVI-I connector of the user console area. See Figure 3-4. From video monitor Figure 3-4. Connecting a video monitor to the user console. NOTE: During initial powerup, the ServSwitch Wizard DVI DL unit will attempt to read the EDID information from the connected display(s).
-
Page 16: Computer Systems
ServSwitch Wizard DVI DL 5. Audio: Where required, connect the lead from your speakers to the audio connector. See Figure 3-6. From speakers Figure 3-6. Connecting speakers to the user console. 3.2.2 Computer Systems Each computer system is connected to the Wizard DVI DL unit using up to three cables. To connect a computer system: 1. - Page 17 Chapter 3: Installation 4. Single-head units: Use a DVI cable or a VGA to DVI-I adapter cable (if using analog signals) to link the video output of the com- puter’s graphic port to the DVI-I port of the required channel on the rear of the unit. See Figure 3-8. From the video port on the computer Figure 3-8.
-
Page 18: Power In Connection
ServSwitch Wizard DVI DL Figure 3-10. Vertically stacked connectors linked to the same channels. 3.2.3 Power In Connection The Wizard DVI DL unit is supplied with either a 12.5 W (single-head version) or 20 W (multihead versions) power adapter. There is no on/off switch on the unit, so operation begins as soon as the power adapter is connected. -
Page 19: Switching Control By Computer
Chapter 3: Installation 2. Connect the IEC connector of the supplied country-specific power lead to the power adapter’s connector. See Figure 3-12. Figure 3-12. Connecting the power lead to the power adapter’s connector. 3. Connect the power lead to a nearby power outlet. NOTE: Both the unit and its power supply generate heat when in operation and will become warm to the touch. -
Page 20: Synchronizing Multiple Units
3.2.5 Synchronizing Multiple Units ServSwitch Wizard DVI DL units can be connected together so that they operate in a synchronized manner. Thus, two KV2004A units can be made to switch two video heads in a similar manner to an KV2204A. Additonally, two KV2204A (dual) units could be made to resemble an KV2404A (quad), while two KV2404A units could be combined in order to switch up to eight video heads simultaneously. -
Page 21: Managing Edid Video Display Information
Chapter 3: Installation 3.2.6 Managing EDID Video Display Information Whenever a ServSwitch Wizard DVI DL unit is powered on (or when the option is selected from the configuration menu), it will interrogate the connected monitor(s) to determine whether EDID (Extended Display Identification Data) information is available. If EDID information is available, it will be copied and used;... -
Page 22: Configuration
ServSwitch Wizard DVI DL 4. Configuration 4.1 Using the Configuration Menu The configuration mode allows you to determine numerous aspects of the Wizard DVI DL unit capabilities. To use the configuration menu: During normal use, the seven-segment display on the front panel shows the number of the currently selected computer channel. From this condition, enter configuration mode as follows: 1. -
Page 23: General Configuration
Chapter 4: Configuration Table 4-1 (Continued). Configuration menu. Letter Number Description Enter the Switch Mode menu KVM + speaker KVM only Speaker only USB 1 only USB 2 only Enter the Autoscan Time Delay menu Autoscan disabled 2 seconds 5 seconds 7 seconds 15 seconds 30 seconds... -
Page 24: Mouse Switching
ServSwitch Wizard DVI DL 4.2.2 Mouse Switching You can enable or disable mouse switching to suit your installation requirements. To enable/disable mouse switching: 1. Enter the Configuration menu. 2. Press U to enter the User Preferences menu and then press either: 1 to Enable mouse switching 2 to Disable mouse switching 3. - Page 25 1. Obtain and run the KVM Firmware Uploader. (Contact Black Box Technical Support at 724-746-5500 or info@blackbox.com.) Download the latest ServSwitch Wizard DVI DL unit KVM Firmware Uploader from Black Box Technical Support and install it on a Windows based upgrade computer that will be connected to the ServSwitch Wizard DVI DL unit. The files are supplied as a compressed ZIP file.
- Page 26 IMPORTANT: Check that the “Intended Target Units” field matches the “Unit connected” field. If these fields do not match, then you may have an incorrect upgrade file, and you should check with Black Box Technical Support before proceeding. Check also that the “New firmware version” is greater than the “Current firmware version.” See Figure 4-2.
-
Page 27: Operation
Chapter 5: Operation 5. Operation 5.1 Selecting a Computer There are three main ways to switch the common peripherals to specific computer channels: • Using the front-panel controls • Using hotkeys • Using mouse button presses 5.1.1 Select a Computer Using the Front Panel The front panel allows you to determine how the various peripherals are switched to one or more computer channels. -
Page 28: Select A Computer Using Hotkeys
ServSwitch Wizard DVI DL 5.1.2 Selecting a Computer Using Hotkeys Using hotkey combinations, you can quickly switch the keyboard, video monitor(s), mouse. speakers. and USB peripherals to any computer channel. The Ctrl and Alt keys when pressed in combination are called ”hotkeys,“ and they signal to the ServSwitch Wizard DVI DL unit that you want to control it, rather than the computer. -
Page 29: Select A Computer Using The Mouse Buttons
Chapter 5: Operation The appropriate peripherals will change to the chosen channel. NOTE: Regardless of which peripherals were switched, the front-panel indicators will continue to show the switching mode that was last determined using the front-panel controls. 5.1.3 Selecting a Computer Using the Mouse Buttons Using the mouse buttons, you can quickly switch the keyboard, mouse, video monitor(s), speakers and/or USB peripherals to any computer channel. - Page 30 ServSwitch Wizard DVI DL Seven autoscan periods are available (the time spent viewing each computer) ranging from 2 seconds to 5 minutes. To select the autoscan period, choose T and then 2 to 8 within the configuration menu as described below. To start autoscanning mode, press Ctrl + Alt + X on the keyboard.
-
Page 31: Appendix A. What Is True Emulation
Appendix A: What Is True Emulation? Appendix A. What Is True Emulation? True Emulation represents a significant breakthrough in sharing USB devices between two or more computer systems. Until this point, the problem has been how to create a USB switch that provides all the following: •... - Page 32 ServSwitch Wizard DVI DL True Emulation is not necessarily required by other USB devices, which is why you will also find two enumerated circuits included (shown in green within the block diagram) alongside the True Emulation feature (shown in blue). This allows those other USB devices to operate at their highest speeds without any intervention.
-
Page 33: Appendix B. Default Edid Video Modes
Appendix B: Default EDID Video Modes Appendix B. Default EDID Video Modes The following digital video modes are defined within the default EDID information held by the ServSwitch Wizard DVI DL units. This information is used only if no new EDID information is made available by the attached video monitor(s). The ServSwitch Wizard DVI DL units support video resolutions and refresh rates in excess of those listed here. -
Page 34: Appendix C. Cable Pinouts
ServSwitch Wizard DVI DL Appendix C. Cable Pinouts The OPTIONS port uses a 10p10c socket, which can accommodate both 10p10c connectors as well as the much more common 8p8c connectors, which are used on Ethernet leads and patch cables. The pin-outs are listed in this section for both types of con- nector. -
Page 35: Appendix D. Safety Information
Appendix D: Safety Information Appendix D. Safety Information • For use in dry, oil-free indoor environments only. • Both the ServSwitch Wizard DVI DL unit and its power supply generate heat when in operation and will become warm to the touch. Do not enclose them or place them locations where air cannot circulate to cool the equipment. Do not operate the equipment in ambient temperatures exceeding 104°... - Page 36 About Black Box Black Box Network Services is your source for more than 118,000 networking and infrastructure products. You’ll find everything from cabinets and racks and power and surge protection products to media converters and Ethernet switches all supported by free, live 24/7 Tech support available in 20 seconds or less.
Need help?
Do you have a question about the KV2004A and is the answer not in the manual?
Questions and answers