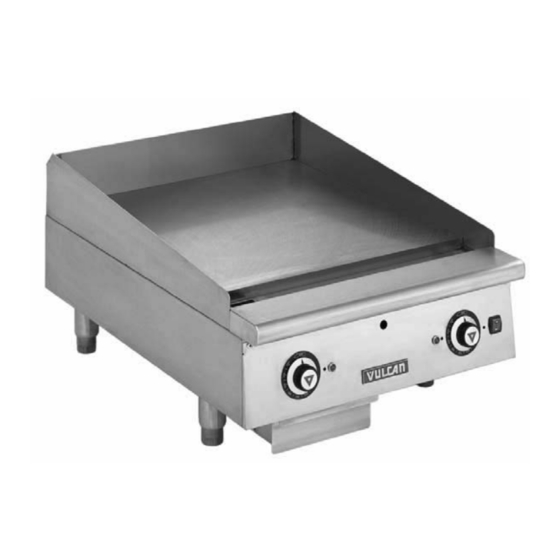
Vulcan-Hart Vulcan 924RE Installation & Operation Manual
Heavy duty gas griddles
Hide thumbs
Also See for Vulcan 924RE:
- Service manual (20 pages) ,
- Service manual (24 pages) ,
- Installation & operation manual (13 pages)
Table of Contents
Advertisement
Quick Links
INSTALLATION & OPERATION MANUAL FOR
MODEL
924RE
ML-135221-00G24
936RE
ML-135222-00G36
948RE
ML-135223-00G48
960RE
ML-135224-00G60
972RE
ML-135225-00G72
www.vulcanhart.com
ITW Food Equipment Group, LLC
3600 North Point Blvd.
Baltimore, MD 21222
Heavy Duty Gas Griddles
MLS
AGE24
924RE
MODELS
AGE24
AGE36
AGE48
AGE60
AGE72
RETAIN THIS MANUAL FOR FUTURE USE
MLS
ML-135226-00G24
ML-135227-00G36
ML-135228-00G48
ML-135229-00G60
ML-135230-00G72
www.wolfrange.com
FORM F-36958 (4-07)
Advertisement
Table of Contents

Summary of Contents for Vulcan-Hart Vulcan 924RE
- Page 1 INSTALLATION & OPERATION MANUAL FOR Heavy Duty Gas Griddles MODEL 924RE ML-135221-00G24 936RE ML-135222-00G36 948RE ML-135223-00G48 960RE ML-135224-00G60 972RE ML-135225-00G72 www.vulcanhart.com 924RE MODELS AGE24 ML-135226-00G24 AGE36 ML-135227-00G36 AGE48 ML-135228-00G48 AGE60 ML-135229-00G60 AGE72 ML-135230-00G72 AGE24 www.wolfrange.com RETAIN THIS MANUAL FOR FUTURE USE ITW Food Equipment Group, LLC 3600 North Point Blvd.
-
Page 2: Important For Your Safety
IMPORTANT FOR YOUR SAFETY THIS MANUAL HAS BEEN PREPARED FOR PERSONNEL QUALIFIED TO INSTALL GAS EQUIPMENT, WHO SHOULD PERFORM THE INITIAL FIELD START-UP AND ADJUSTMENTS OF THE EQUIPMENT COVERED BY THIS MANUAL. POST IN A PROMINENT LOCATION THE INSTRUCTIONS TO BE FOLLOWED IN THE EVENT THE SMELL OF GAS IS DETECTED. -
Page 3: Installation
Thoroughly read this entire manual and carefully follow all of the instructions provided Model Number of Burners BTU/hr Input Rating 924RE, AGE24 60,000 936RE, AGE36 90,000 948RE, AGE48 120,000... - Page 4 This griddle is Design Certified for installation on a non-combustible counter with 4” legs, or combustible floor with 25” high stand. INSTALLATION CLEARANCES NON-COMBUSTIBLE COMBUSTIBLE CONSTRUCTION CONSTRUCTION Back: 6” 0” Right Side: 6” 0” Left Side 6” 0” INSTALLATION CODES AND STANDARDS The griddle must be installed in accordance with: In the United States of America: 1.
-
Page 5: Gas Pressure Regulator Installation
GAS PRESSURE REGULATOR INSTALLATION Gas regulator pressure is preset at 5” Water Column (W.C.) for natural gas, and 10” W.C. for propane gas. Minor adjustments may be required based on site specific gas pressure. Install the regulator as close to the griddle on the gas supply line as possible. Make sure that the arrow on the underside of the regulator is oriented in the direction of gas flow to the griddle (Fig. -
Page 6: Flue Connections
GRIDDLES MOUNTED ON STANDS WITH CASTERS Griddles mounted on stands with casters must use a flexible connector (not supplied) that complies with the Standard for Connectors for Movable Gas Appliances ANSI Z21.69•CSA6.16, and a quick-disconnect device that complies with Gas Fuel, ANSI Z21.3•CSA6.9. In addition, adequate means must be provided to limit movement of the appliance without depending on the connector and the quick-disconnect device (or its... - Page 7 CALIBRATION 1. Each thermostat controls a 12” zone of the griddle. Using a Surface Probe temperature measurement device, observe the temperatures at the center points of the cooking zones. These points are located by starting 6” from the side splash (left or right) and every 12” across the width of the griddle, with all points located 12”...
-
Page 8: Operation
OPERATION WARNING: THE GRIDDLE AND ITS PARTS ARE HOT. USE CARE WHEN OPERATING, CLEANING OR SERVICING. BEFORE FIRST USE Before leaving the factory the griddle is coated with vegetable oil as a rust inhibitor. Remove this film when the griddle plate is being cleaned prior to its first cooking use. Heat the griddle to 200-300°F to loosen and melt the coating, then clean the surface with a non-corrosive, grease dissolving commercial cleaner, following the manufacturer’s directions. -
Page 9: Using The Griddle
USING THE GRIDDLE Each 12” section of the griddle is independently controlled by a thermostat. Turn the thermostat(s) to the desired setting. To preheat, turn the burners on about 20-25 minutes before cooking. A uniform and systematic approach to loading the griddle will produce the most consistent product results. -
Page 10: Cleaning The Griddle
CLEANING THE GRIDDLE WARNING: DISCONNECT THE ELECTRICAL POWER TO THE APPLIANCE AND FOLLOW LOCKOUT/TAGOUT PROCEDURES. Empty the grease drawer as needed throughout the day and regularly clean at least once daily. Clean the griddle regularly. A clean griddle always looks better, lasts longer and performs better. -
Page 11: Maintenance
MAINTENANCE WARNING: THE GRIDDLE AND ITS PARTS ARE HOT. USE CARE WHEN OPERATING, CLEANING OR SERVICING THE GRIDDLE. WARNING: DISCONNECT THE ELETRICAL POWER TO THE APPLIANCE AND FOLLOW LOCKOUT/TAGOUT PROCEDURES. LUBRICATION All valves and thermostats must be checked and lubricated periodically. Check with your Service Agency for details. -
Page 12: Troubleshooting
TROUBLESHOOTING PROBLEM POSSIBLE CAUSES 1. No power to unit – verify unit plugged. Check circuit breaker or GFI (Ground Fault Indicator). Heat does not come on 2. Problem with thermostat. (Call for service) when the thermostat is 3. Loose wiring connection. (Call for service) turned on 4.


Need help?
Do you have a question about the Vulcan 924RE and is the answer not in the manual?
Questions and answers