Table of Contents
Advertisement
Advertisement
Table of Contents

Related Manuals for Fujitsu PRIMERGY RX300 S5


Summary of Contents for Fujitsu PRIMERGY RX300 S5
- Page 1 PRIMERGY RX300 S5 Service Supplement Edition June 2009...
-
Page 2: Copyright And Trademarks
Gesellschaft für Technik-Dokumentation mbH www.cognitas.de Copyright and Trademarks Copyright © 2009 Fujitsu Siemens Computers GmbH. All rights reserved. Delivery subject to availability; right of technical modifications reserved. All hardware and software names used are trademarks of their respective manufacturers. -
Page 3: Table Of Contents
Contents Introduction ......5 Overview of the documentation ....5 Notational conventions . - Page 4 Contents Board layouts ......55 5.1.1 Operating panel ......55 5.1.2 USB panel board .
-
Page 5: Introduction
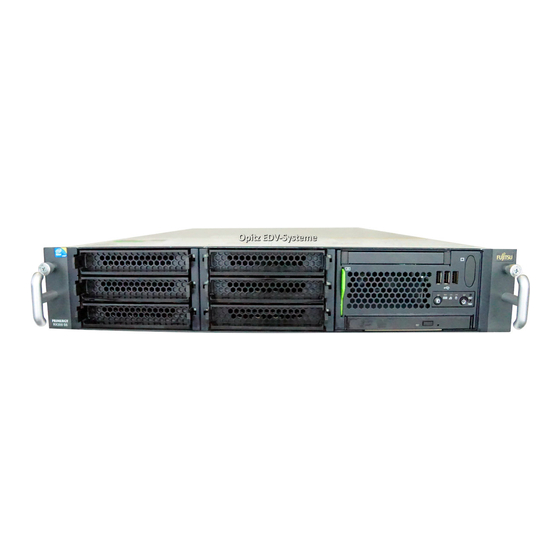
Introduction The PRIMERGY RX300 S5 Server is an Intel-based server for medium-sized networks and large companies. The server is suitable for use as a file server as well as an application, information, or Internet server. Overview of the documentation Concept and target groups This Service Supplement completes the information given in the Operating Manual, the Options Guide and the Technical Manual of the system board. - Page 6 – Controllers Information about the system board: Technical Manual – Features of the system board – Board layout – Jumper settings – LED displays – Replacing the battery Table 1: Overview of the documentation PRIMERGY RX300 S5 Service Supplement RX300 S5...
- Page 7 – Replacing the UFM Settings and Board layouts BIOS setup BIOS Setup Table 1: Overview of the documentation PRIMERGY RX300 S5 For some components only the installation routine is described in the Options Guide. Removing these components proceed in reverse order. Service Supplement...
-
Page 8: Notational Conventions
Notational conventions Introduction Notational conventions The following notational conventions are used in this manual: Text in italics indicates commands, menu items or software programs. „Quotation marks“ indicate names of chapters and terms that are being emphasized. Ê describes activities that must be performed in the order shown. -
Page 9: Procedure
Procedure CAUTION! The actions described in these instructions should only be performed by service personnel. Ê First of all please familiarize yourself with the safety instructions in the chapter “Safety notes” on page Ê Ensure that all required manuals (see Service DVD) are available, printing out the PDF files if necessary. -
Page 11: Safety Notes
Safety notes The following safety notes are also provided in the “Safety notes and other important information” manual. This device complies with the relevant safety regulations for data processing equipment. CAUTION! The actions described in these instructions should only be performed by service personnel. - Page 12 Safety notes CAUTION! ● Ensure that the power socket on the device or the grounded wall outlet is freely accessible. The ON/OFF button does not disconnect the device from the mains ● voltage. To disconnect the line voltage completely, remove all power plugs from the grounded insulated sockets.
- Page 13 Safety notes CAUTION! ● Only install system expansions that satisfy the requirements and rules governing safety and electromagnetic compatibility and relating to telecommunications terminal equipment. If you install other expan- sions, you may damage the system or violate the safety regulations and regulations governing RFI suppression.
- Page 14 Safety notes ● All batteries containing pollutants are marked with a symbol (a crossed-out garbage can). In addition, the marking is provided with the chemical symbol of the heavy metal decisive for the classification as a pollutant: Cd Cadmium Hg Mercury Pb Lead Notes on handling optical disk drives CAUTION!
- Page 15 Safety notes CAUTION! The device works with invisible laser class 1. Never look directly into a laser beam which is dangerous for the human eye. Never remove parts of the optical disk drive assembly! Modules with electrostatic-sensitive components: Systems and components that might be damaged by electrostatic discharge (ESD) are marked with the following label: Figure 1: ESD label When you handle components fitted with ESDs, you must observe the following...
-
Page 17: Replacement Routines
The removal procedure of the left one is the same. Ê Open the server as described in the section “Opening the server” on page Ê Remove the fan box (see Options Guide PRIMERGY RX300 S5 in chapter „preparation“). Service Supplement RX300 S5... - Page 18 Preparation Replacement routines Figure 2: Removing the fan box holder. Ê Take the cables out of the fan box holder. Ê Loosen the captive screw and remove the fan box holder. Service Supplement RX300 S5...
-
Page 19: Installling The Fan Box Holder
Ê Open the server as described in the section “Opening the server” on page Ê Remove the fan box (see Options Guide PRIMERGY RX300 S5 in chapter „preparation“. Ê Remove the fan box holder on the right side behind the front panel frame. - Page 20 Replacing the operating panel Replacement routines Figure 4: Unlocking the front panel frame Ê Press the locking handle upward. Ê Push the front panel frame inward. Service Supplement RX300 S5...
- Page 21 Replacement routines Replacing the operating panel Figure 5: Removing the operating panel module Ê Unlock the operating panel module (1). Ê Pull the operating panel module outward to the front side (2). Service Supplement RX300 S5...
- Page 22 Replacing the operating panel Replacement routines Figure 6: Removing cable from the operating panel module Ê Disconnect the cable from the operating panel module. Ê Connect the cable to the new operating panel module. Pay attention to the coding of the connector. Ê...
- Page 23 Figure 7: Inserting the front panel frame Ê Reinstall the front panel frame into the server. Ê Reinstall the other components. Information about the cabling you will find in the “appendix“ of the Options Guide PRIMERGY RX300 S5. Service Supplement RX300 S5...
-
Page 24: Replacing Usb Module
Ê Open the server as described in the section “Opening the server” on page Ê Remove the fan box (see Options Guide PRIMERGY RX300 S5 in chapter „preparation“). Ê Remove the Fan box holder on the right side behind the front panel frame. - Page 25 Replacement routines Replacing USB module Figure 9: Remove the USB module from the front panel frame Ê Remove both screws (1). Ê Push the USB module forward out. Ê Unplug the cable. Ê Connect the cable to the new USB module. Ê...
- Page 26 Figure 10: Installing front panel frame Ê Reinstall the front panel frame in the server. Ê Reinstall the other components. Information about the cabling you will find in the “appendix“ of the Options Guide PRIMERGY RX300 S5. Service Supplement RX300 S5...
-
Page 27: Replacing The Fan Box Backplane
Replacing the fan box backplane Ê Open the server as described in the section “Opening the server” on page Ê Remove the fan box (Description see Options Guide PRIMERGY RX300 S5 in chapter „Preparation“). Ê Remove all fans. Ê Turn the fan box. - Page 28 Replacing the fan box backplane Replacement routines Figure 12: Removing the fan box backplane Ê Press down the locking latch (1) of thefan box backplane Ê Push the fan box backplane in the direction fo the arrow (2) and push it so out of the lockings.
-
Page 29: Replacing Psu Riser Card
Replacement routines Replacing PSU riser card Replacing PSU riser card Ê Open the server as described in the section “Opening the server” on page Ê Disconnect the power connectors. Ê Remove the power supply cage as discribe the Options Guide PRIMERGY RX300 S5 in chapter „Preparation“). - Page 30 Replacing PSU riser card Replacement routines Figure 15: Removing PSU riser card Ê Remove the defective PSU riser card from the PSU cage. Figure 16: PSU riser card Service Supplement RX300 S5...
- Page 31 Replacement routines Replacing PSU riser card Figure 17: Mounting PSU riser card Ê Fit the PSU riser card into the PSU cage as shown. Ensure, the boards engage with the recesses in the PSU cage (see circles). Service Supplement RX300 S5...
- Page 32 Ê Insert the PSU box into the server . (Description see Options Guide PRIMERGY RX300 S5 in the capter „completion“). Ê Close the server and connect the power connectors (Description see Options Guide PRIMERGY RX300 S5 in the capter „completion“). Service Supplement RX300 S5...
-
Page 33: Replacing The Sas Backplane
Replacing the SAS backplane Replacing the SAS backplane In the following section the replacing of the SAS backplanes is described. Three different variants of the PRIMERGY RX300 S5 are delivered – 6 x 3.5“ hard disk drive (Replacing see chapter “Replacement routines”... -
Page 34: Replacing The Sas Backplane (8 X 2.5")
Replacing the SAS backplane Replacement routines Figure 20: Removing the SAS-Backplane Ê Hold the SAS backplane by the black handle. Ê Unlock the SAS backplane (1) and push the SAS backplane in the direction of the arrow (2) until it unlocks out of the locking noses and the locking mechanism on the bottom of the server. - Page 35 Replacement routines Replacing the SAS backplane Ê Unlock the USB module (see section “Replacing USB module” on page and press it slightly to the front side. Figure 21: Removing cables Ê Remove all cables from the SAS backplane. Ê Unlock the USB drive cage and push it somewhat to the front. Figure 22: Removing the SAS backplane Ê...
- Page 36 Replacing the SAS backplane Replacement routines Ê Remove the holder from the backplane. Ê Insert the holder to the new backplane. Figure 23: Installing the SAS backplane Ê Insert the backplane tilted behind the guiding rails. Figure 24: Inserting the SAS backplane Service Supplement RX300 S5...
- Page 37 Replacement routines Replacing the SAS backplane Ê Push backplane in the direction of the arrow. The backplane must be flush with the plate. Figure 25: Locking the SAS backlplane with the USB drive cage Ê Push back the USB drive cage. Ê...
-
Page 38: Replacing The Sas Backplane (12 X 2.5")
Replacing the SAS backplane Replacement routines 4.6.3 Replacing the SAS backplane (12 x 2.5“) Ê Unlock the hard disk drive modules. Note where each hard disk is installed. When you reinstall them make sure they go back where they came from. Figure 26: Kabel entfernen Ê... - Page 39 Replacement routines Replacing the SAS backplane Figure 27: Unlocking the backplane holder Ê Unlock the backplane holder. Ê Take the backplane with its black holders and remove the SAS backplane. Ê Remove the holder from the old backplane and insert it to the new backplane.
- Page 40 Replacing the SAS backplane Replacement routines Figure 29: Locking the SAS backplane Ê Lock the backplane holder. Ê Connect all cables to the SAS backplane. Ê Engage the hard disk drive cage and insert the other components again. Service Supplement RX300 S5...
-
Page 41: Replacing The Idtemp Combo
ServerStart. Ê Open the server as described in the section “Preparation” on page Ê Remove the fan box (see Option Guide PRIMERGY RX300 S5 in the chapter „preparations“). Figure 30: Removing IDTemp Combo with holder Service Supplement... - Page 42 Replacing the IDTemp Combo Replacement routines Ê Push out the holder with the IDTemp Combo. Figure 31: Removing the connector clamp Ê Remove the connector clamp (1). Ê Push the faulty IDTemp Combo out of the holder (2). Ê Push the new the IDTemp Combo into the holder. Ê...
- Page 43 After installing the new chassis ID board, it is necessary to program the Chassis ID prom with the help of the "Chassis ID Prom Tool" to enable ServerView and ServerStart to identify the system. The tool can be downloaded from the Fujitsu Technology Solutions Service and Support page (URL: http://partners.ts.fujitsu.com/com/service/intelservers/tools).
-
Page 44: Replacing The System Board
“Opening the server” on page Ê Remove the PSU cage, fan box, fan box holder, processor heat sinks, and PCI controllers. You will find Information about this item in the ’PRIMERGY RX300 S5 Options Guide’. Service Supplement RX300 S5... - Page 45 Replacement routines Replacing the system board Figure 33: Removing the cables from the system Board Ê Remove all cables from the system board. Figure 34: Removing the screws Ê Remove all screws. Service Supplement RX300 S5...
- Page 46 Replacing the system board Replacement routines Figure 35: Removing the system board CAUTION! Hold the system board by the memory sockets but do not lift or handle the system board by any of its heat sinks!. Ê Pull the system board somewhat to the front (1). Ê...
- Page 47 Replacement routines Replacing the system board Figure 36: Installing the system board Ê Carefully insert the new system board from the rear side into the housing. Ê Push the system board to the front Ê Carefully insert the connectors into the I/O field. Caution! Ensure not to damage the EMI springs to comply with applicable EMC regulations and satisfy cooling requirements and fire protection...
- Page 48 PRIMERGY RX300 S5). Insert the processor cover in processor sockets of the old system board (for more Informations see Options Guide PRIMERGY RX300 S5). Ê Insert the PSU cage, fan box, fan box holder, processor heat sinks, and PCI controllers (for more Information see Options Guide PRIMERGY RX300 S5).
- Page 49 Replacement routines Replacing the system board CAUTION! After installing the new system board, it is necessary to update system specific data (e. g. BIOS, iRMC S2 firmware) to ensure proper operation (BIOS flash floppy disk , BIOS flash memory stick or iRMC flash memory stick, refer to the BIOS Manual for a detailed description).
-
Page 50: Replacing The Tpm Board
Replacing the TPM board Replacement routines Replacing the TPM board CAUTION! Advise the customer that he must provide you with TPM backup copies. For security reasons, the TPM must be restored/re-saved by the customer. If the customer DOES NOT have a backup copy available, inform him that replacing the system board will cause him to lose all his data. - Page 51 Replacement routines Replacing the TPM board Figure 38: TPM bit insert Ê Attach the TPM bit insert provided with the spare kit S26361-F3552-E1 / L1 to a bit screwdriver. Figure 39: Mounting the TPM board Ê Connect the new TPM board to the system board (1). Ê...
-
Page 52: Replacing The Ufm Board
Replacing the UFM board Replacement routines 4.10 Replacing the UFM board Ê Open the server as described in section “Preparation” on page Ê Remove the PSU cage as described in section “Replacing PSU riser card” on page Figure 40: Removing the UFM board Ê... - Page 53 Replacement routines Replacing the UFM board Figure 41: Preparing the UFM board Ê Remove the nylon screw from the new UFM board (1). Ê Remove the UFM spacer (2) from the new UFM board. Figure 42: Mounting the UFM board Service Supplement RX300 S5...
- Page 54 Replacing the UFM board Replacement routines Ê Connect the new UFM board to the System Board and the remaining UFM spacer (1). Ê Secure the UFM board to the UFM spacer with the nylon screw (2). Ê Reinstall the PSU cage as described in the Option Guide PRIMERGY RX300 S5 in chapter „completion.
-
Page 55: Appendix
Appendix Board layouts 5.1.1 Operating panel Part number: A3C40096850 The operating panel is a part of the preassembled operating panel module (Part number A3C40096851) Figure 43: Operating panel Connector Description Connector operating panel to system board Service Supplement RX300 S5... -
Page 56: Usb Panel Board
Board layouts Appendix 5.1.2 USB panel board Part number: A3C40094697 Figure 44: USB panel board Connector Description Connector USB cable to system board External USB connectors Service Supplement RX300 S5... -
Page 57: Sas Backplane
Appendix Board layouts 5.1.3 SAS backplane 5.1.3.1 HDD backplane for 6 x 3.5“ HDDs Part number: A3C40093251 Figure 45: SAS backplane side facing the system board Connector Description SAS channel 1 SAS channel 2 Power input Power output Service Supplement RX300 S5... -
Page 58: Hdd Backplane For 8 X 2.5" Hdds
Board layouts Appendix 5.1.3.2 HDD backplane for 8 x 2.5“ HDDs Part number: A3C40093253 Figure 46: Power Backplane Connector Description SAS channel 1 SAS channel 2 Power input Power output Service Supplement RX300 S5... -
Page 59: Backplane For 12 X 2.5" Hdds
Appendix Board layouts 5.1.3.3 Backplane for 12 x 2.5“ HDDs Part number:A3C40094107 Figure 47: SAS backplane side facing the system board Connector Description SAS channel 1 SAS channel 2 Power input Power output Service Supplement RX300 S5... -
Page 60: Idtemp Combo
Board layouts Appendix 5.1.4 IDTemp Combo Part number: A3C40096564 Figure 48: IDTemp Combo Connector Description 5.1.5 PCI SAS controller 5.1.5.1 SAS IME controller Figure 49: PCI eXpress LSI 1068 (Modular RAID IME) Controller Service Supplement RX300 S5... -
Page 61: Sas Raid Controller
Appendix Board layouts 5.1.5.2 SAS RAID controller Figure 50: PCI eXpress LSI 1078 (Modular RAID 5,6) Controller Connector Description RAID-Key Service Supplement RX300 S5... -
Page 62: Fan Box Backplane
Board layouts Appendix 5.1.6 Fan box backplane Part number: A3C40094355 Figure 51: Fan box backplane Connector Description Power connector Service Supplement RX300 S5... -
Page 63: System Board
Appendix Board layouts 5.1.7 System board Part number: S26361-D2619 Figure 52: System board You will find the connector description and the extension in the „System board D2619 Technical Manual“. Service Supplement RX300 S5... -
Page 65: Index
Index chassis ID ESD (devices sensitive to electrostatic discharge) ESD-sensitive devices I/O Feld Isolierung 46, IDTemp Combo light-emitting diode (LED) lithium battery locking handle front panel frame meaning of the symbols notational conventions note about the laser operating panel Overview documentation PSU riser card PSU riser card bracket 29, target group...
Need help?
Do you have a question about the PRIMERGY RX300 S5 and is the answer not in the manual?
Questions and answers