Table of Contents
Advertisement
Quick Links
Advertisement
Table of Contents

Subscribe to Our Youtube Channel
Related Manuals for Motorola K701


Summary of Contents for Motorola K701
- Page 1 User’s Guide DECT 6.0 Digital Cordless Phone with Answering machine Models: K701, K702, K703, K704, K705 Warning Use only the adapter and telephone line cord provided in the box. The features described in this User’s Guide are subject to modifications without prior notice.
- Page 2 Motorola Phone! Please retain your original dated sales receipt for your records. For warranty service of your Motorola product, you will need to provide a copy of your dated sales receipt to confirm warranty status. Registration is not required for warranty coverage.
- Page 3 This User’s Guide provides you with all the information you need to get the most from your phone. Before you make your first call you will need to set up your phone. Follow the simple instructions in ‘Getting Started’, on the next few pages. IMPORTANT Only use the telephone line cord supplied.
-
Page 4: Table Of Contents
Table of contents 1. Getting started ..................7 Connecting the base .................. 8 Connecting the charger ................8 Installing and charging the handset battery pack ........9 Setting the display language ..............9 Setting the date and time................10 2. Getting to know your phone ..............11 Overview of your handset ................ - Page 5 3.10 Memory ..................... 23 3.10.1 Storing a memory number ............23 3.10.2 Reviewing a memory number ..........23 3.10.3 Dialing from the memory ............24 3.10.4 Editing a memory number ............24 3.10.5 Deleting a memory number .............24 3.11 Caller ID..................... 25 3.11.1 Calls List ..................25 3.11.2...
- Page 6 Recording a memo ................... 35 Answering machine settings ..............35 4.5.1 Setting the answer mode ............35 Recording your own outgoing message (OGM)........36 Playing back and deleting the outgoing message (OGM) ..... 36 4.7.1 Playing back the OGM ............. 36 Deleting the personalized OGM ..............
-
Page 7: Getting Started
1. Getting started WARNING Do not place your phone in the bathroom or other humid area. Location When choosing a location for your new phone, here are some important guidelines you should consider: • Avoid sources of noise and heat, such as motors, fluorescent lighting, microwave ovens, heating appliances and direct sunlight. -
Page 8: Connecting The Base
Connecting the base DC 5V 450 mA 1. Plug the power adapter and the telephone line cord into the base. The power adapter with the larger pin is for the charger (only in multi-handset packs). 2. Plug the other end of the power adapter into a power outlet and the telephone line cord into a telephone wall jack. -
Page 9: Installing And Charging The Handset Battery Pack
Installing and charging the handset battery pack Slide off the battery compartment cover to remove it. Place the supplied rechargeable battery pack in the battery compartment, with the battery connector plugged in, as shown. 2. Slide the battery compartment cover back on. 3. -
Page 10: Setting The Date And Time
Setting the date and time 1. Press MENU and then VOL+ or REDIAL/VOL- to select DATE&TIME. If you’re a subscriber to your network’s Caller ID service, the date and time is automatically set when a call is received. 2. Press SELECT and then use the keypad to edit the year and the date. 3. -
Page 11: Getting To Know Your Phone
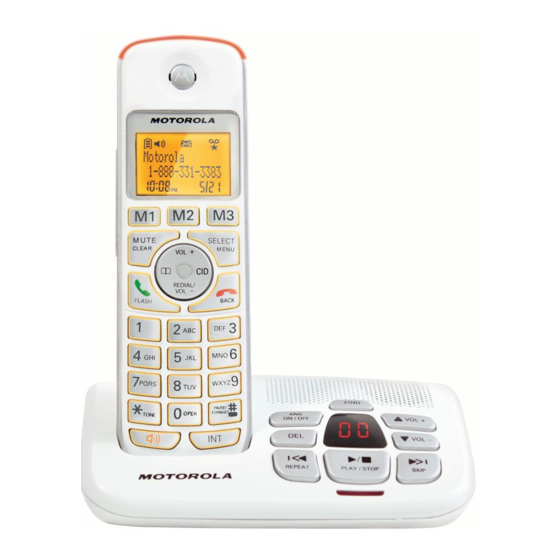
2. Getting to know your phone Overview of your handset Get acquainted with the following 14 buttons on your handset and their multi- function tasks. M1/M2/M3 a) In idle mode: Press and hold to edit or store a number into the memory key. - Page 12 Right / Calls list a) In idle mode / during a call: Press to access the calls list. b) In editing mode: Press to move the cursor to the right. Talk off / Back a) In menu / editing mode: Press to exit to the previous level. b) In pre-dial mode / phonebook / calls list / redial list entry: Press to exit to idle.
- Page 13 11 */Tone a) In idle / pre-dial / editing mode: Press to insert a *. b) During a call: Press to switch from pulse to tone dialing temporarily if pulse mode was selected before. After the call has ended, the dial mode will change back to pulse.
-
Page 14: Cordless Handset Lcd Display
Cordless handset LCD display Display Icons On when the speakerphone is turned on. Indicates when a new call is received. Off when a new call has been viewed. On when ringer volume is turned off. On when you have received new voicemail not yet listened to. Off when new voicemail has been listened to On when a call is muted. -
Page 15: Overview Of The Base
Overview of the base Find Press to find/page all registered handsets. Press the button again, or any key on the handset, to turn off page signal. VOL+ Increase speaker volume during message playback or increase the base ringer volume when there is an incoming external call. VOL- Decrease speaker volume during message playback or decrease the base ringer volume when there is an incoming external call. -
Page 16: Charging Cradle
7-Segment LED DISPLAY Steady: When the answering machine is OFF. Flash: When the answering machine is ON. Steady: No voice messages in the answering machine. Flashing: There are XX new voice messages received where XX is from 01 to 59 or when playing new messages. Steady: Playing the current XX incoming old message. -
Page 17: Overview Of The Charger
Overview of the charger 1. Charging cradle Getting to know your phone... -
Page 18: Using The Phone
3. Using the phone Making a call 3.1.1 Predial Enter the phone number and then press /FLASH or /SPEAKER to dial the phone number. 3.1.2 Direct dialing Press /FLASH or /SPEAKER to get a line and enter the phone number. 3.1.3 Dialing from the phonebook 1. -
Page 19: Answering A Call
Answering a call Press /FLASH or /SPEAKER to answer an the incoming call. Ending a call During a call, press /BACK or put the handset on the base. Adjusting the volume During a call, press VOL+ or REDIAL/VOL- to adjust the volume. Call waiting If you subscribe to call waiting service from your telephone service provider, you hear a tone if someone calls when you are already on a call. -
Page 20: Deleting A Redial Number
3.7.3 Deleting a redial number 1. Follow steps 1 to 2 in the section Redialing a number from the redial list. 2. Press SELECT then VOL+ or REDIAL/VOL- to select DELETE. 3. Press SELECT. The screen will display “DELETED” with a confirmation tone. -
Page 21: Storing A Phonebook Entry To A Speed Dial Location
NOTES • Numbers can be up to 24 digits long and names up to 16 characters long. Entries are stored in alphabetical order. • If there is no entry in the phonebook, the screen will display “LIST EMPTY” when pressing , then go back to phone book menu. -
Page 22: Speed Dial
Speed dial You can store up to 9 numbers in the speed dial locations. Each speed dial location can have a maximum of 24 digits for the number and 16 characters for the name. This feature makes it convenient when you want to dial a certain number more quickly. -
Page 23: Deleting An Entry In A Speed Dial Location
3.9.4 Deleting an entry in a speed dial location 1. Follow steps 1 to 4 in the section Reviewing the entry in a speed dial location. 2. Press SELECT and then VOL+ or REDIAL/VOL- to select DELETE. 3. Press SELECT. The screen will display “DELETED” with a confirmation tone. -
Page 24: Dialing From The Memory
3.10.3 Dialing from the memory In idle mode: 1. Press the desired memory location key to dial the number stored in that memory location automatically. 1. Press /FLASH or /SPEAKER. 2. Press the desired memory location key to dial the number stored there automatically. -
Page 25: Caller Id
3.11 Caller ID If you have subscribed to Caller ID service, and provided the identity of the caller is not withheld, the number of the caller will be displayed together with the date and time of the call (if provided by the network). NOTES •... -
Page 26: Viewing The Calls List
3.11.2 Viewing the calls list 1. Press CID to enter the calls list. 2. Scroll VOL+ or REDIAL/VOL- to browse the calls list. NOTES • When reviewing an entry from the calls list, press # repeatedly to display the number in different formats. For example, if a caller number is displayed as 888-331-3383, the various formats will be: 331-3383... -
Page 27: Deleting The Entire Calls List
3.11.5 Deleting the entire calls list 1. Press CID to enter the calls list. 2. Press SELECT then VOL+ or REDIAL/VOL- to scroll to DELETE ALL. 3. Press SELECT. The screen will display “DELETE ALL CALL LOG ENTRIES?”. 4. Press SELECT to confirm. The screen will display “DELETED” with a confirmation tone. -
Page 28: Calling Another Handset
3.13.1 Calling another handset 1. Press /FLASH then MENU. Except for the originating handset, all registered handsets will be displayed in the list. 2. Press VOL+ or REDIAL/VOL- to select the handset you want to call. 3. Press SELECT to call the handset. 4. -
Page 29: Handset Settings
3.14 Handset settings 3.14.1 Setting the ringer tone 1. Press MENU then VOL+ or REDIAL/VOL- to select SETUP 2. Press SELECT then VOL+ or REDIAL/VOL- to select RINGER TONE. 3. Press SELECT then VOL+ or REDIAL/VOL- to select your desired ringer tone (10 melodies are available for home line calls and 5 standard and 5 polyphonic melodies are available for cellular calls). -
Page 30: Renaming The Handset
3.14.4 Renaming the handset 1. Press MENU and then VOL+ or REDIAL/VOL- to select SETUP 2. Press SELECT and then VOL+ or REDIAL/VOL- to select HANDSET NAME. 3. Press SELECT to enter the name of your handset. 4. Press SELECT to confirm. The screen will display “SAVED” with a confirmation tone. -
Page 31: Base Settings
3.15 Base settings 3.15.1 Setting the dial mode The default dialing mode is suitable for your country and network operator. It is unlikely that you should need to change this setting unless advised to do so. 1. Press MENU and then VOL+ or REDIAL/VOL- to select SETUP 2. -
Page 32: Registration
3.16 Registration 3.16.1 Registering a handset Up to 5 handsets can be registered to one base. The original handset is pre- registered to use. Additional handsets must be registered to the base before you can use them. To register an additional handset, 1. -
Page 33: Answering Machine
4. Answering machine The K701, K702, K703, K704 and K705 are equipped with a telephone answering machine that records unanswered calls when it is switched on. The screen message counter (two digits) seven segment display on the base will show the number of the messages when the answering machine is on. -
Page 34: Through The Handset
4.1.2 Through the handset: 1. Press MENU and then VOL+ or REDIAL/VOL- to select ANSWER MACHINE. 2. Press SELECT then VOL+ or REDIAL/VOL- to select ANSWER 3. Press SELECT to confirm. • If the answering machine is set to ON, displays on the handset screen and the 7- segment LED on the base will display the number of incoming messages. -
Page 35: Deleting All Messages Through The Handset
4.3.2 Deleting all messages through the handset 1. Press MENU and then VOL+ or REDIAL/VOL- to select ANSWER MACHINE. 2. Press SELECT and then VOL+ or REDIAL/VOL- to select DEL ALL OLD MSG. 3. Press SELECT and the screen will display DELETE ALL OLD MESSAGES?. -
Page 36: Recording Your Own Outgoing Message (Ogm)
Recording your own outgoing message (OGM) You can record your own OGM for ANNC & RECORD mode or ANNOUNCE ONLY mode. When you record your own OGM, it will be used when the answering machine answers the call. If your personalised OGM is deleted, the pre-set OGM will be restored automatically. -
Page 37: Deleting The Personalized Ogm
5. Press SELECT to playback your personalized OGM (if you have recorded a personalized OGM before) and PLAYING will be displayed on the screen. 6. Press SELECT to stop the OGM playback and return to the previous menu. NOTE If a personalized OGM is not recorded, the preset OGM will be played. Deleting the personalized OGM 1. -
Page 38: Activating Remote Access
4.11 Activating remote access Your phone lets you check your messages, or operate your answering machine, remotely. You can do this by calling the answering machine when you are away from home and entering a 4-digit remote access PIN on a tone-dialling phone. Use the 4-digit remote access PIN code to prevent unauthorized access to your answering machine. -
Page 39: Remote Commands
NOTE If your answering machine is switched off, it will answer after 10 rings and play the ANSWER ONLY OGM. Press , then enter the 4-digit security code (the default security code is 0000 to activate the remote access feature.) When your answering machine memory is full and the answer mode is in ANS &... -
Page 40: Help
5. Help icon is not scrolling when the handset is placed on the base • The handset not properly seated on the base cradle - readjust the handset on the base. • Dirty contact - clean the charge contacts by wiping with an alcohol moistened cloth. - Page 41 No display • Try recharging or replacing the rechargeable battery pack. • Reset the base. Unplug the unit, then plug it back in. • If the LED is not lit up, then try to unplug the unit, then plug it back in. If the handset disconnects from the base during a phone call •...
-
Page 42: General Information
6. General information If your product is not working properly... 1. Read this User's Guide. 2. Visit our website: www.motorola.com 3. Contact Customer Service in the US and Canada at 1-888-331-3383. To order a replacement battery pack contact customer service or visit our website. -
Page 43: Installation Guidelines
Unplug this cordless phone immediately from an outlet if: • The power cord or plug is damaged or frayed. • Liquid has been spilled on the product. • The product has been exposed to rain or water. Do not retrieve the handset or base until after you have unplugged the power and phone from the wall. - Page 44 Contact your local recycling center for proper disposal methods. SAVE THESE INSTRUCTIONS Consumer Products and Accessories Limited Warranty ("Warranty") Thank you for purchasing this Motorola branded product manufactured under license by Binatone Electronics International LTD ("BINATONE"). What Does this Warranty Cover? Subject to the exclusions contained below, BINATONE warrants that this Motorola branded product ("Product") or certified accessory ("Accessory") sold...
- Page 45 PROVIDED UNDER THIS EXPRESS LIMITED WARRANTY IS THE EXCLUSIVE REMEDY OF THE CONSUMER, AND IS PROVIDED IN LIEU OF ALL OTHER WARRANTIES, EXPRESS OF IMPLIED. IN NO EVENT SHALL MOTOROLA OR BINATONE BE LIABLE, WHETHER IN CONTRACT OR TORT (INCLUDING...
- Page 46 (c) use of the Products or Accessories for commercial purposes or subjecting the Product or Accessory to abnormal usage or conditions; or (d) other acts which are not the fault of MOTOROLA or BINATONE., are excluded from coverage.
- Page 47 You will receive instructions on how to ship the Products or Accessories at your expense and risk, to a BINATONE Authorized Repair Center. To obtain service, you must include: (a) the Product or Accessory; (b) the original proof of purchase (receipt) which includes the date, place and seller of the Product;...
- Page 48 Changes or modifications to this equipment not expressly approved by the party responsible for compliance could void the user's authority to operate the equipment. This device complies with Part 15 of the FCC rules. Operation is subject to the following two conditions: (1) this device may not cause harmful interference, and (2) this device must accept any interference received, including interference that may cause undesired operation.
- Page 49 most, but not all areas, the sum of all RENs should be five (5.0) or less. For more information, please contact your local telephone company. This equipment may not be used with Party Lines. If you have specially wired alarm dialing equipment connected to your telephone line, ensure the connection of this equipment does not disable your alarm equipment.
-
Page 50: Technical Specifications
The term "IC:" before the certification/registration number only signifies that the Industry Canada technical specifications were met. The Ringer Equivalence Number (REN) for this terminal equipment is 0.0. The REN is an indication of the maximum number of devices allowed to be connected to a telephone interface. - Page 51 MOTOROLA and the Stylized M Logo, are trademarks or registered trademarks of Motorola Trademark Holdings, LLC. and are used under license. All other trademarks are the property of their respective owners. © 2014 Motorola Mobility LLC. All rights reserved. Version 4.0 Printed in China...
Need help?
Do you have a question about the K701 and is the answer not in the manual?
Questions and answers